Control Your AWS Costs
Introduction
Implementation
Explore the AWS Free Tier
1. Access the AWS Free Tier page
Open the Free Tier page, so you can keep this step-by-step guide open. On the AWS Free Tier page, under the AWS Free Tier Details header, choose the 12 months free link.

2. Explore 12 months free offers
These free tier offers are only available to new AWS customers, and are available for 12 months following your AWS sign-up date. When your 12 month free usage term expires or if your application use exceeds the tiers, you simply pay standard, pay-as-you-go service rates (see each service page for full pricing details).
Notable offers for the first 12 months following your AWS account sign-up include some level of free usage for Amazon Elastic Compute Cloud (Amazon EC2), Amazon Elastic Block Store (Amazon EBS), Amazon Simple Storage Service (Amazon S3), Amazon Relational Database Service (Amazon RDS), and many other useful services.

3. Access the Always free page
On the AWS Free Tier page, choose the Always free link to view the Always free offers.

4. Explore Always free offers
As the name suggests, these free tier offers do not automatically expire at the end of your 12-month AWS Free Tier term and are available to all AWS customers.
Notable Always free offers include some level of free usage for AWS Lambda, Amazon DynamoDB, Amazon CloudWatch, and many other useful services.

5. Access the Free trials page
On the AWS Free Tier page, choose the Free trials link to view the Free trials offers.

6. Explore trial offers
Trial offers allow you to use a service for a specified period of time or number of operations.
Notable trial offers include Amazon SageMaker, Amazon GuardDuty, Amazon Redshift, and many other useful services.

Sign up for AWS (or sign in)
There is no additional charge associated with using the AWS Billing Console for this tutorial.
The resources you create in this tutorial are Free Tier eligible.
Already have an account? Sign-in
Review your spend and Free Tier usage
In this step, you will use the AWS Billing Console to review your overall AWS spend and Free Tier usage.
1. Access the billing dashboard
After you have logged in to your account, from the account menu, choose Billing Dashboard.

2. Review your billing dashboard
Once you reach the AWS Billing Dashboard page, you can view a summary of your month-to-date costs in the AWS Summary section, as well as the cost trend for your top five services for the most recent three to six closed billing periods in the Cost trend by top five services section.

3. Access all your Free Tier usage
To dive deeper into your Free Tier eligible usage, choose Free Tier from the left navigation pane.

4. Analyze all your Free Tier usage
In the Summary section on the AWS Free Tier page, all of your usage of services in the Free Tier are listed. In addition to your Current usage, your forecasted service usage by the end of the month is detailed in the Forecasted usage column.
In the example screenshot, note that the forecasted usage of EC2 is 2 GB-mo. Exceeding the limit of the Free Tier generally results in a billable charge.

5. Modify your AWS Free Tier Usage Limit email alerts
By default, most accounts are automatically opted in to receive AWS Free Tier Usage Limit email alerts when their service usage exceeds 85% of a given Free Tier usage limit.
To change who gets these email alerts, choose Billing Preferences from the left navigation bar.
To opt other people in to receive Free Tier Usage Alerts, in the Email Address field, add their email address and choose Save preferences.

Set up a cost budget
In this step, you will set up a cost budget in the AWS Billing Console using AWS Budgets. As part of your cost budget, you will set up three notifications: one for if your costs reach 80% of your budget, one for if your costs are forecasted to exceed your budget, and one if your costs do exceed your budget.
1. Create budget
From the navigation menu on the left, select Budgets then choose Create a budget on the AWS Budgets console page.

2. Choose budget type
On the Choose budget type page, choose Cost budget under Budget types.

3. Set budget details
On the Set your budget page, edit the Budget name field to read MyMonthlyBudget.
In the Set budget amount section, keep the default selections for Period, Budget renewal type, Start month, and Budgeting method. Enter $100 in the Enter your budgeted amount ($) field.
In the Budget scope section, you can use these features to create budgets that track costs associated with a particular set of AWS services, linked accounts, tags, or other usage dimensions. For this tutorial, keep these values as the default and choose Next.

4. Configure budget alert threshold
On the Configure alerts page, you can have AWS Budgets contact you and others by email when budget conditions are met.
Choose Add an alert threshold.

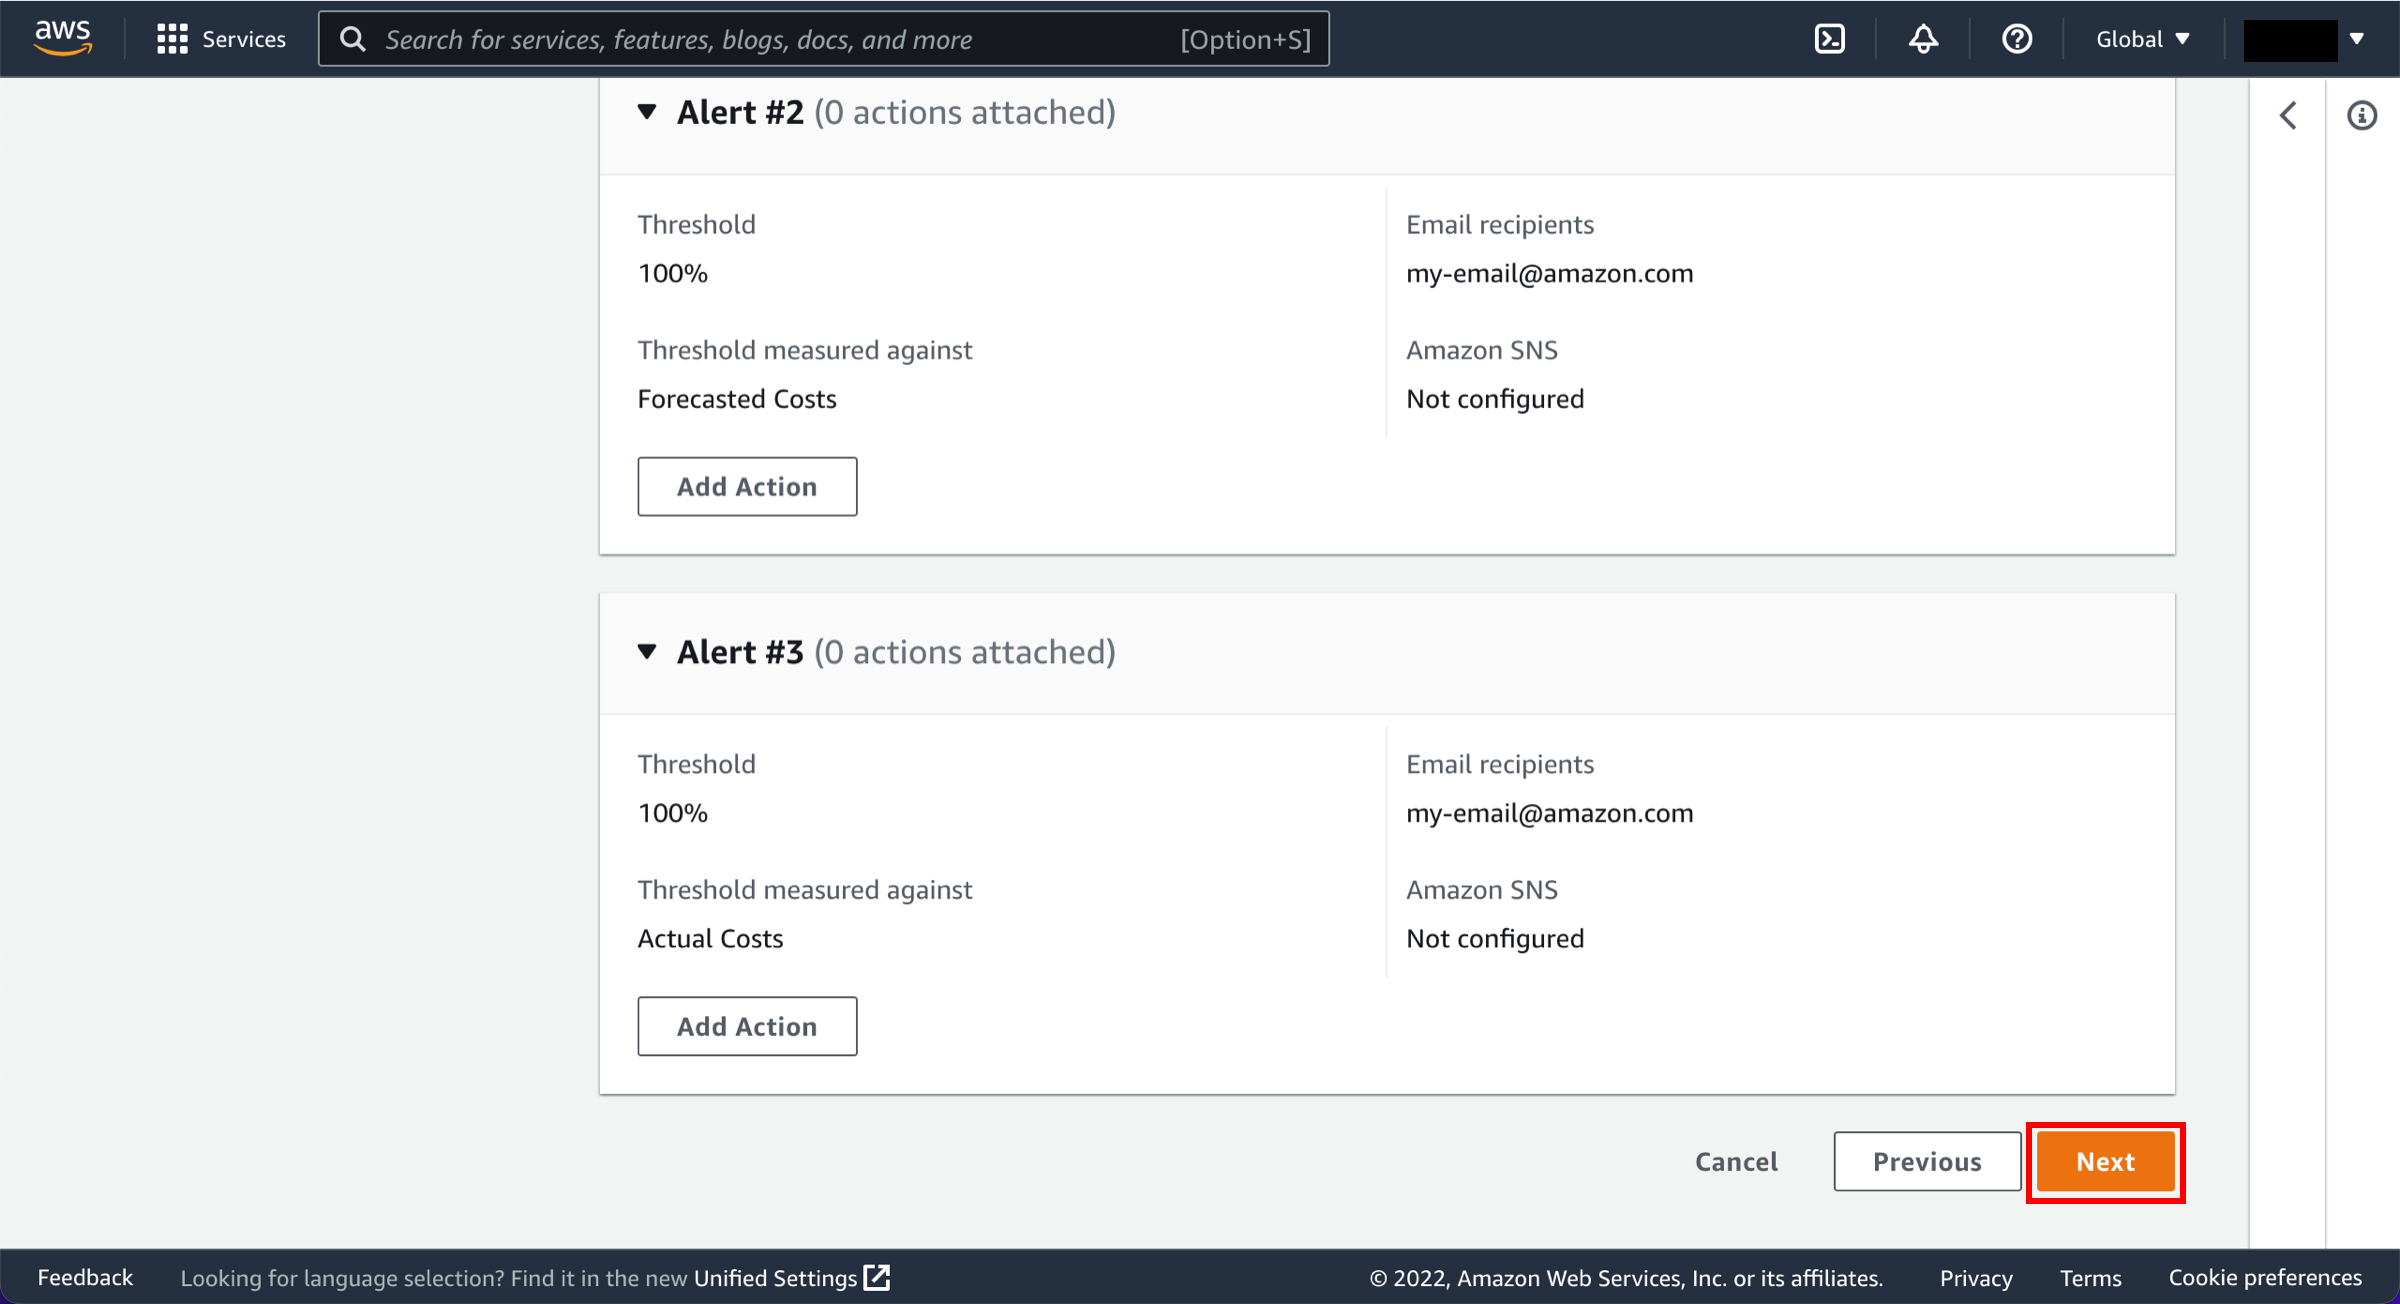
5. Configure alert for when actual cost exceeds 80% of budget threshold
Configure the alert to be triggered when actual costs are greater than 80% of budgeted amount, as shown in the screen shot. Add your email address and the email address of anyone who should receive this alert in the Email recipients field.

6. Configure budget alert threshold
From the Configure alerts page, choose Add alert threshold.

7. Configure alert for when actual cost exceeds your budget
Configure this alert to be triggered when forecasted costs are greater than 100% of the budgeted amount, as shown in the screen shot. Add your email address and the email address of anyone who should receive this alert in the Email recipients field.

8. (Optional) Attach actions
Choose Next to view the attach actions page.

9. (Optional) Configure budget actions
A budget action allows you to define and trigger cost-saving responses to reinforce a cost-conscious culture. You have the option to attach actions that run whenever your alert threshold has been exceeded, such as stopping an EC2 instance from incurring any further costs. You can select the alerts to which you would like to attach actions, then define these actions.

10. (Optional) Review budget details
Choose Next to review the budget details on the Review page.
10. (Optional) Create budget
Review your budget and then choose Create budget to create the budget and alerts.
After the budget has been created, you see a list AWS Budgets you have created. It is a best practice to create a total monthly cost budget for each AWS account that you use.
You can create up to 62 budget days per month using the AWS Budgets service within the Free Tier limit. After that, you simply pay as you go to create additional budgets.

11. Inspect your budget
To dive deeper into your budget details, select your new budget.

12. View budget details
From there, you can view your budget details, access a budget performance summary, and inspect your historical budget performance.

Conclusion
Congratulations! You have finished the Control Your AWS Costs tutorial.
You have successfully analyzed your Free Tier usage and have created a total monthly cost budget using AWS Budgets. Using the AWS Billing Console, you can access a number of tools to help you better understand your costs and usage, including AWS Free Tier Usage Limit email alerts and AWS Budgets. The AWS Free Tier enables you to gain free, hands-on experience with AWS products and services.
Continue your journey with AWS by following the next steps section below.
Next steps
Did you find what you were looking for today?
Let us know so we can improve the quality of the content on our pages