Implementing GenAI
Everybody is looking to explore and provide new value and experiences to users by leveraging generative AI, and more specifically, by using large language models (LLMs) to create intuitive natural language interfaces for their products and services. One of the most straightforward solutions for achieving this is Retrieval-Augmented Generation (RAG), which relies on vector embeddings (vectorized representations of your data) and similarity searches as part of the response-generation process.
Getting such a system in place requires various moving pieces, from a repository where your unstructured text data lives to document loaders, splitters, and model pipelines that take that data and store it as vectors. And then you must think about where to store those vectors without adding complexity to your existing tech stack.
In this guide, you will learn how Amazon Bedrock has abstracted away most of the complexity of creating a RAG-based system for foundation models and how Redis Cloud provides a vector storage solution that is secure, highly performant, and tightly integrated. This keeps your developers and tech stack close to their comfort zone since Redis is a tool that most builders have used in their careers and that is likely already in use in your organization.
To get started you must have an Amazon Web Services (AWS) account with enough permissions to deploy all required resources, including Amazon Bedrock services, Amazon Simple Storage Service (Amazon S3) buckets, and AWS Marketplace offerings.
You must have an active Redis Cloud account with the ability to create a Redis Cloud Pro database. You can sign up to use Redis Cloud in AWS Marketplace using your AWS account here and get a free 14-day trial.
Before getting started
The following guide will help you understand the fundamentals of how to use Amazon Bedrock and Redis Cloud to build a functional agent, but it is not expected to be a production-ready deployment. Please use this only as a starting point and be mindful of security, availability, and other production-grade deployment concerns that are not within scope of this implementation guide.
Configure Redis
You will use Redis as a vector store for Amazon Bedrock Knowledge Bases, so the first thing you need to do is create a database. Amazon Bedrock Knowledge Bases will require a mutual Transport Layer Security (TLS) connection with certificate-based authentication to be able to work with Redis. This feature is only available on Redis Cloud Pro plans.
Create your database by choosing “AWS” for vendor and choose the “Region” of your preference. For non-production environments you can disable multi-Availability Zone (AZ) and other high-availability features which may not be required and will have a direct impact on cost.
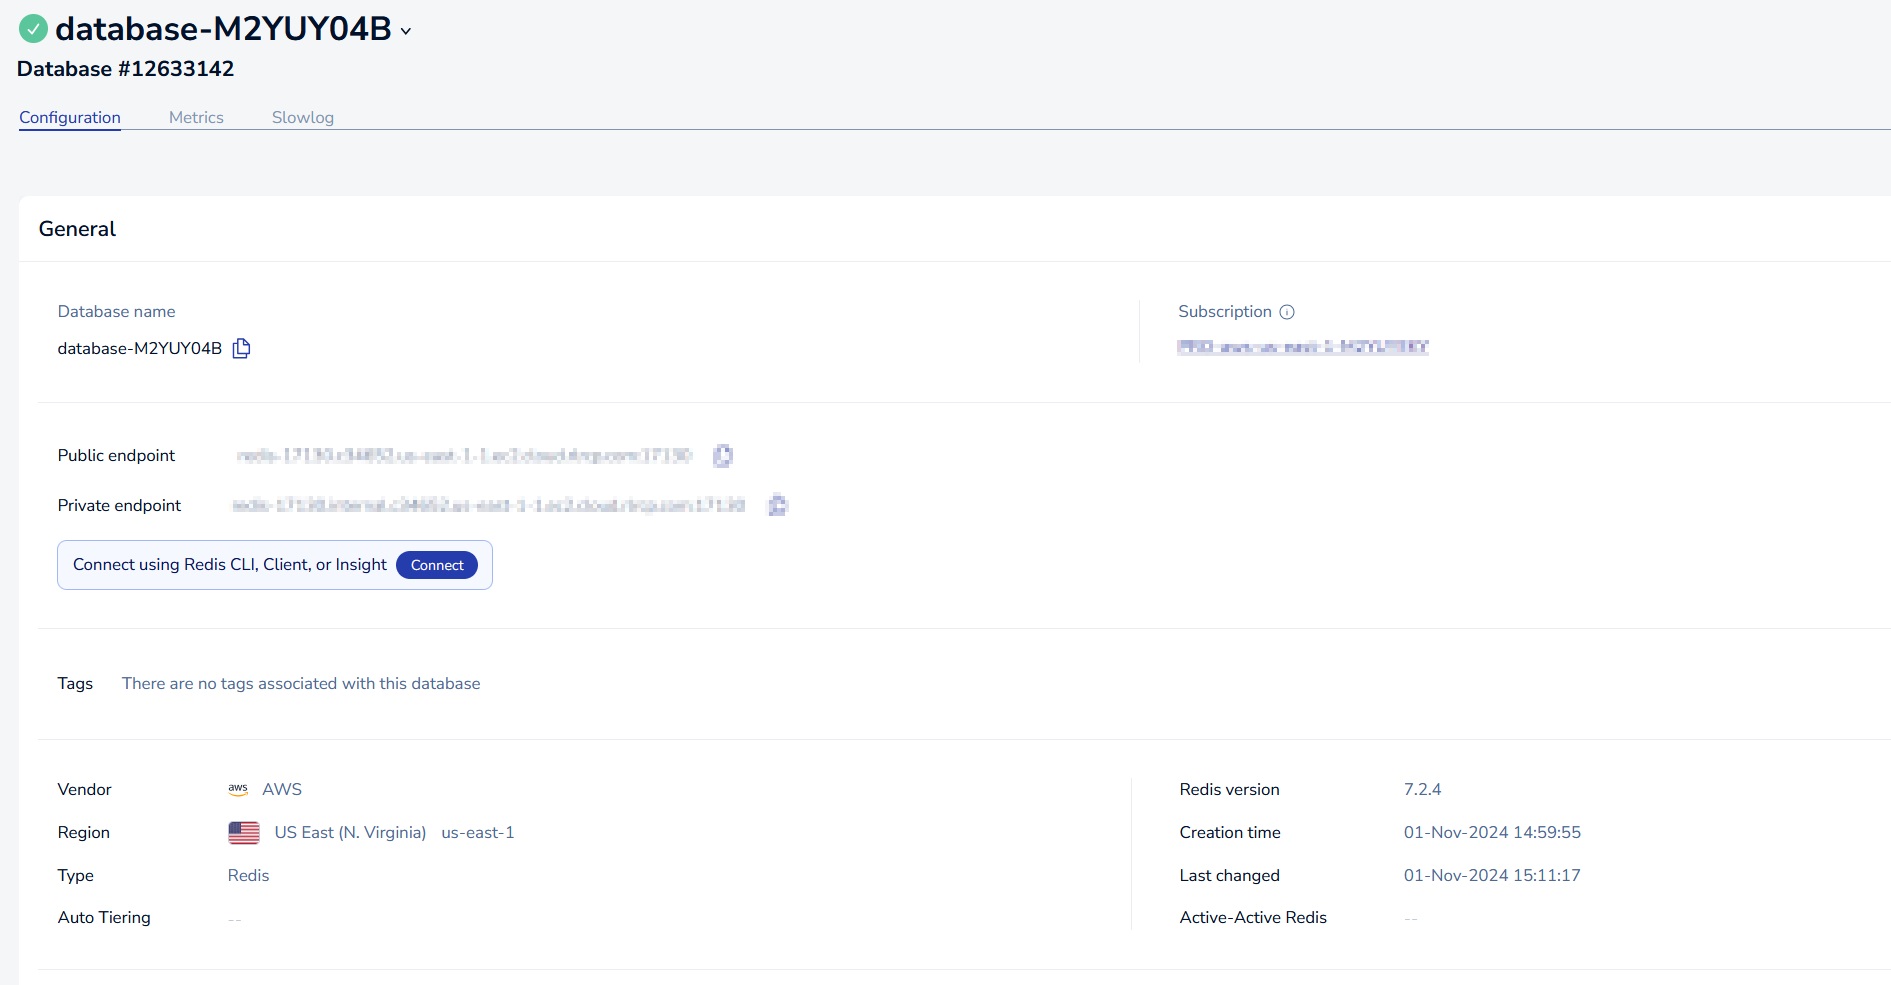
Once your database is created, you need to enable TLS and generate the required certificates. You do that by clicking “Edit:”

Scroll down to “Security” and toggle “Transport layer security (TLS)” to “On.” Once this is done, you’ll be able to download the server certificate, as well as add a new client certificate, which you can also generate automatically using the Redis Cloud interface. You can follow detailed instructions from this guide. Once you’ve done these steps your interface should look like this and you should have downloaded two ZIP files for server and client certificates:
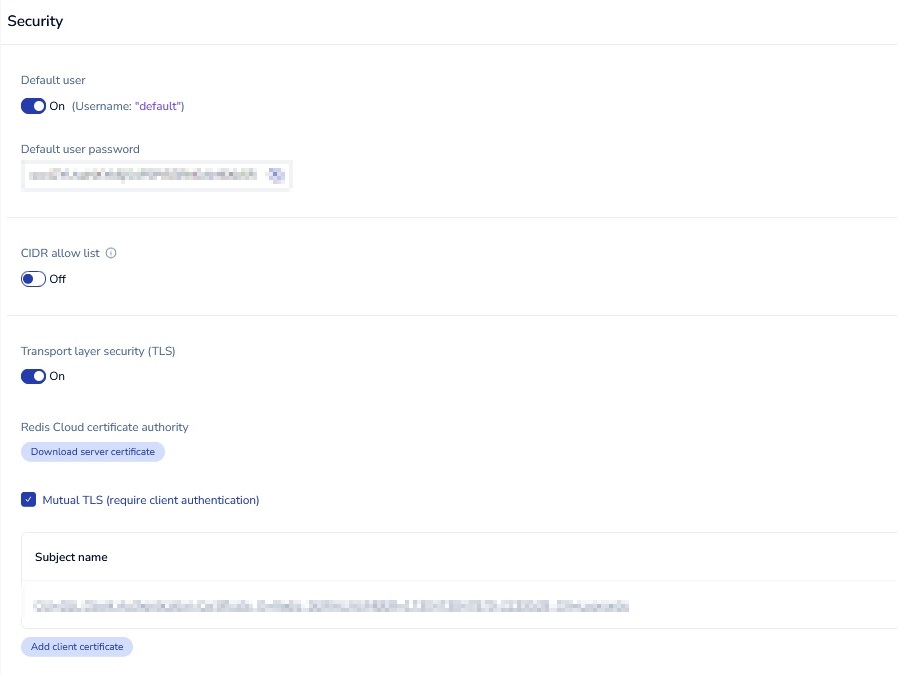
Notice how the default user’s username and password are also shown here. You will need all these details when configuring Amazon Bedrock to use your Redis database for knowledge base storage. Make sure to click “Save database” once you’re done to persist these changes!
Finally, you need to create a vector index where Amazon Bedrock Knowledge Bases will store the vector embeddings for all the content that you store in the configured data source. But let’s not get ahead of ourselves, we should create the vector index first.
You can use Redis Insight, the Redis command line interface (CLI), or any other ways in which you can connect and run commands against your Redis Cloud database. Please note that once Redis Cloud Database is configured in mutual TLS mode, connection to the Redis Cloud Database from Redis Insight, VSCode plugin, Redis CLI, source code, all require to provide the certificates, keys and configurations. Below you can see how it looks in Redis Insight:
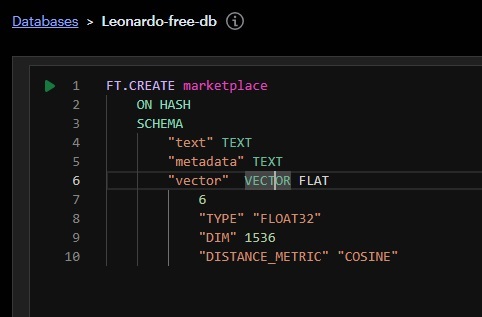
In the example above, we’ve defined four different parameters that will be required in the knowledge base configuration and that you can configure based on your own preferences:
“marketplace” is the name of the vector index, on line 1.
“text” is the name of the field in which we will save the textual representation of the vector.
“metadata” is the field where Amazon Bedrock will store metadata that it will require for its own operation.
“vector” holds the actual vector representation of the data.
Remember you can modify these values to match your own scenario.
Now let’s get some requirements set up in AWS
Before we can get started with Amazon Bedrock Knowledge Bases and Amazon Bedrock Agents, we need to do a few things:
Create an Amazon S3 bucket where we’ll store the documents that will feed the knowledge base.
Get access to two models: the embedding model that will be used to generate the
vector embeddings and the text model that we will use to generate responses that rely on our knowledge base.Create a secret with your Redis Cloud access details that will be required when configuring the knowledge base later.
Let’s start with the Amazon S3 bucket, which doesn’t require much configuration:

Create a bucket using the standard configuration, ensuring that its contents are not public. In the example above you can see the “marketplace-knowledge” bucket. This will be used for us to store all our documents, which will be used by Amazon Bedrock Knowledge Bases.
For the purpose of this guide, we’ll add a single PDF to the bucket, the book “2000 Leagues Under the Sea,” that we’ll use to test the knowledge base:
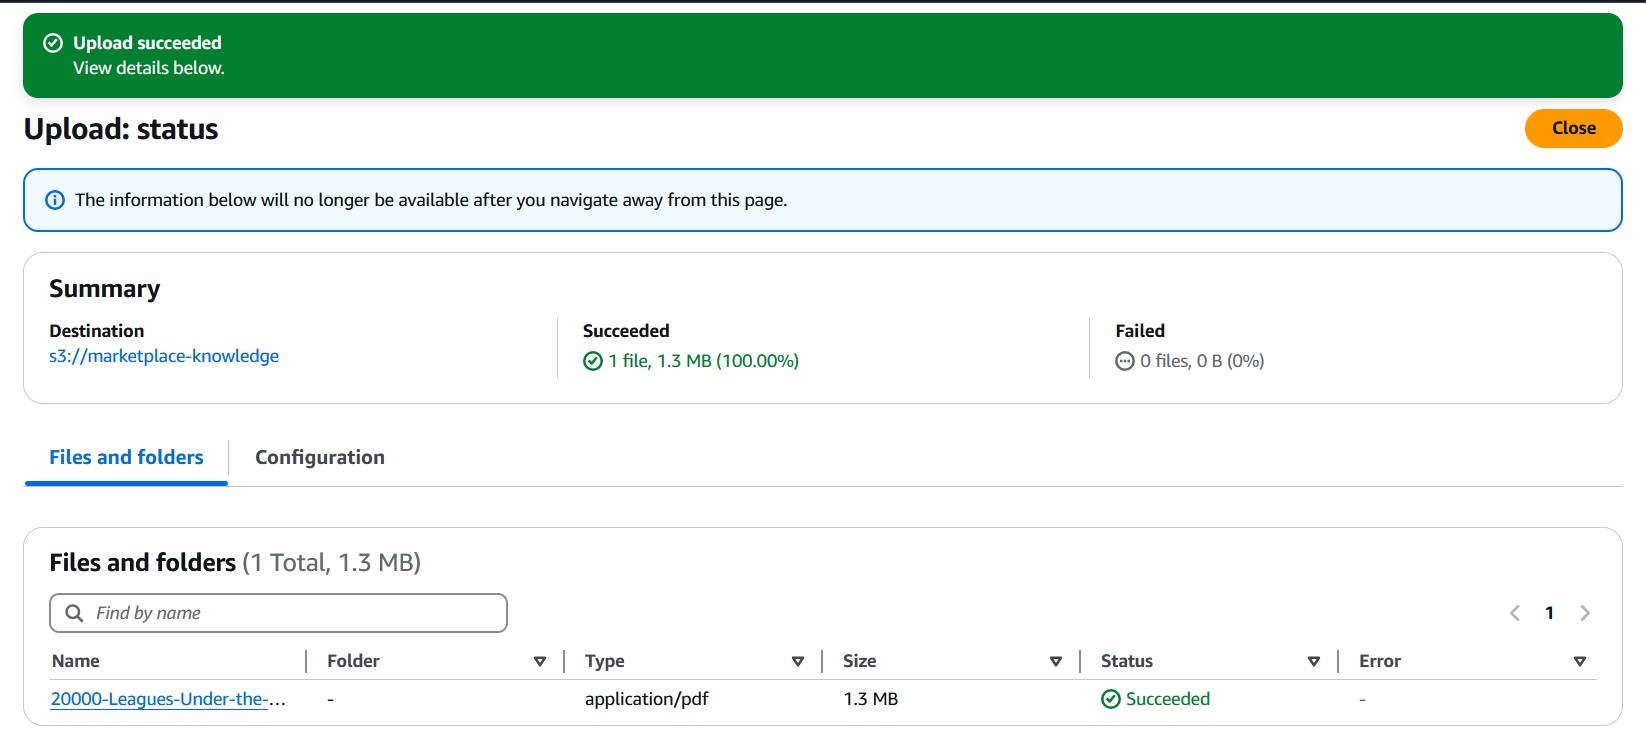
Now you need to move on to ensure you have access to the models that will be used by Amazon Bedrock. One model will be used to generate vector embeddings while the other will be used to generate responses by taking advantage of the context provided by the knowledge base.
From “Model Access” in your Amazon Bedrock configurations section, ensure you have access to two models:
Titan Text G1 – Premier: This model will be used to generate responses.
Titan Text Embeddings V2: This model will be used to generate the vector embeddings.

If you don’t have access to either of them, click on “Available to request” and follow the process. Access should be granted almost immediately.
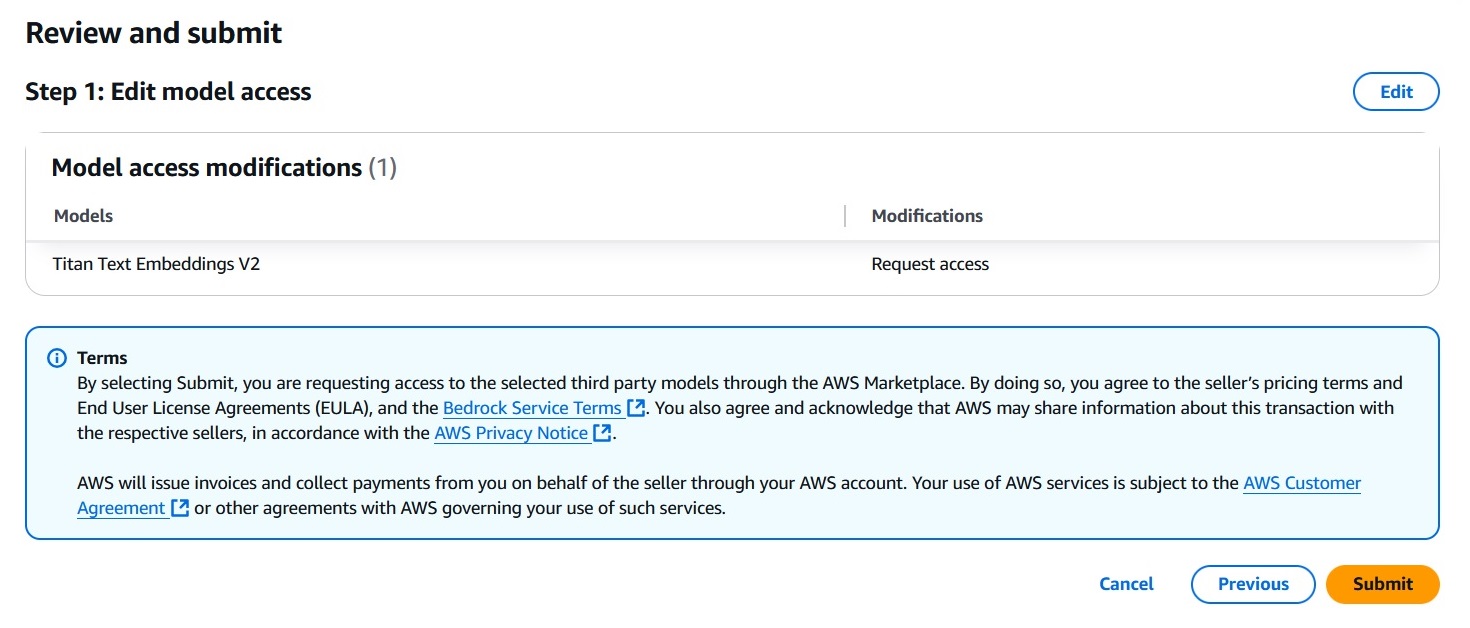
And, finally, let’s create a secret where you will store the access details to your Redis Cloud database.
In the configuring Redis section of this guide you’ll remember we made a note of the username and password of your Redis database as well as downloaded a set of certificates. Go back and get that information since it will be required to create the secret.
Go to Amazon Secrets Manager and create a new secret, choosing “Other type of secret” for secret type, and add the following “Key/values” to it:
username: The username to your Redis Cloud Database
password: The password to your Redis Cloud Database
serverCertificate: Paste the full contents of the single file that came in your Server Certificate ZIP file
clientCertificate: Paste the full contents of the certificate file that came in your client certificate ZIP file
clientPrivateKey: Paste the full contents of the key file in your client certificate ZIP file
You can follow the steps in this guide for detailed instructions. Your secret should end up looking something like this:
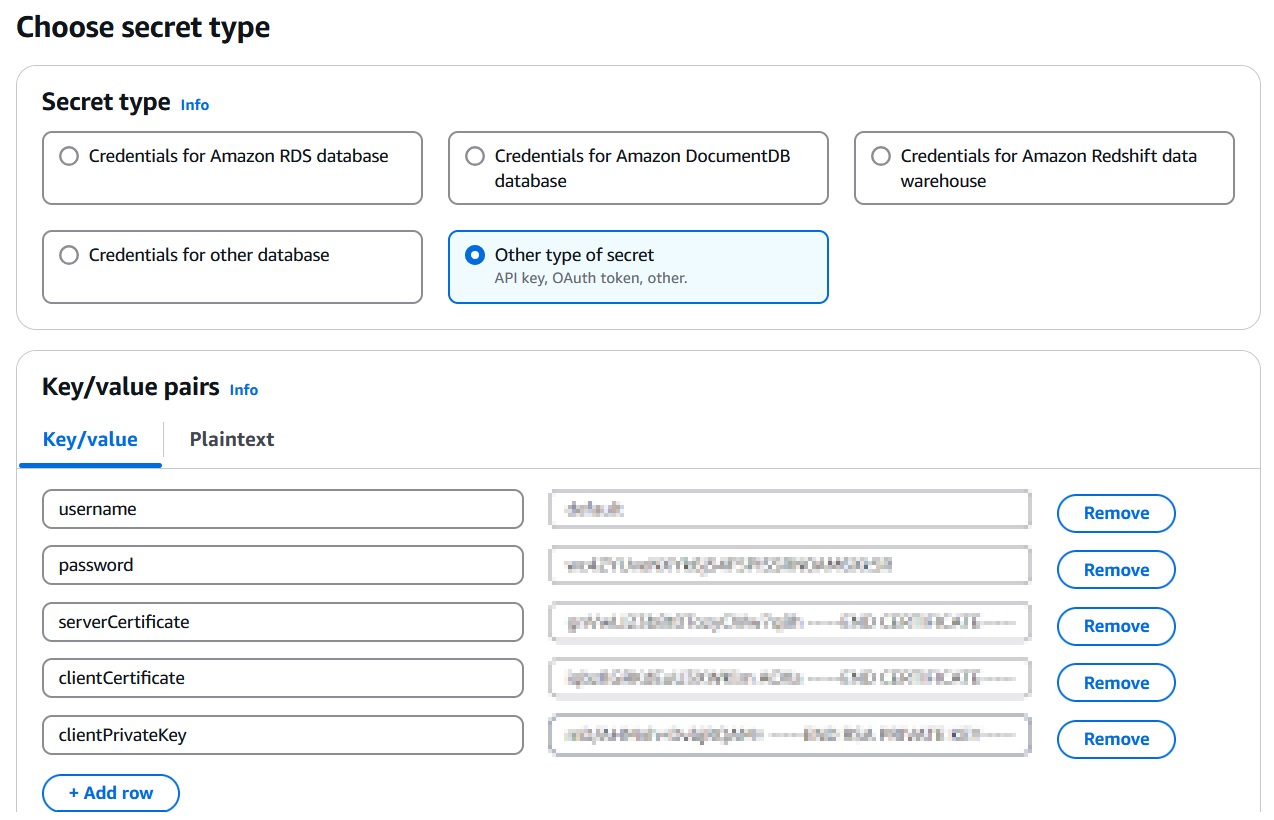
Once saved, take note of the secret Amazon Resource Names (ARN), which we will use when configuring Amazon Bedrock Knowledge Bases.

We’re now ready to connect all the pieces together! Let’s get started.
Configuring Amazon Bedrock with Redis Cloud
At the core of our implementation lies Amazon Bedrock Knowledge Bases, which allows you to use your own custom data as context for foundational large language models through a method called RAG. Amazon Bedrock Knowledge Bases manages the entire workflow required to get custom data available for use through RAG.
Creating the knowledge base
Start by going to “Knowledge bases” under “Builder tools” in your Amazon Bedrock console and click “Create knowledge base”:

Now enter the required details, including a name and description. It’s easiest to have a new service role created automatically, but you can also pick one that you created prior. Now it’s time to choose your data source, which is the Amazon S3bucket we created earlier.
Select “Amazon S3” for data source and click “Next” so you can select the created Amazon S3 bucket in the following screen:
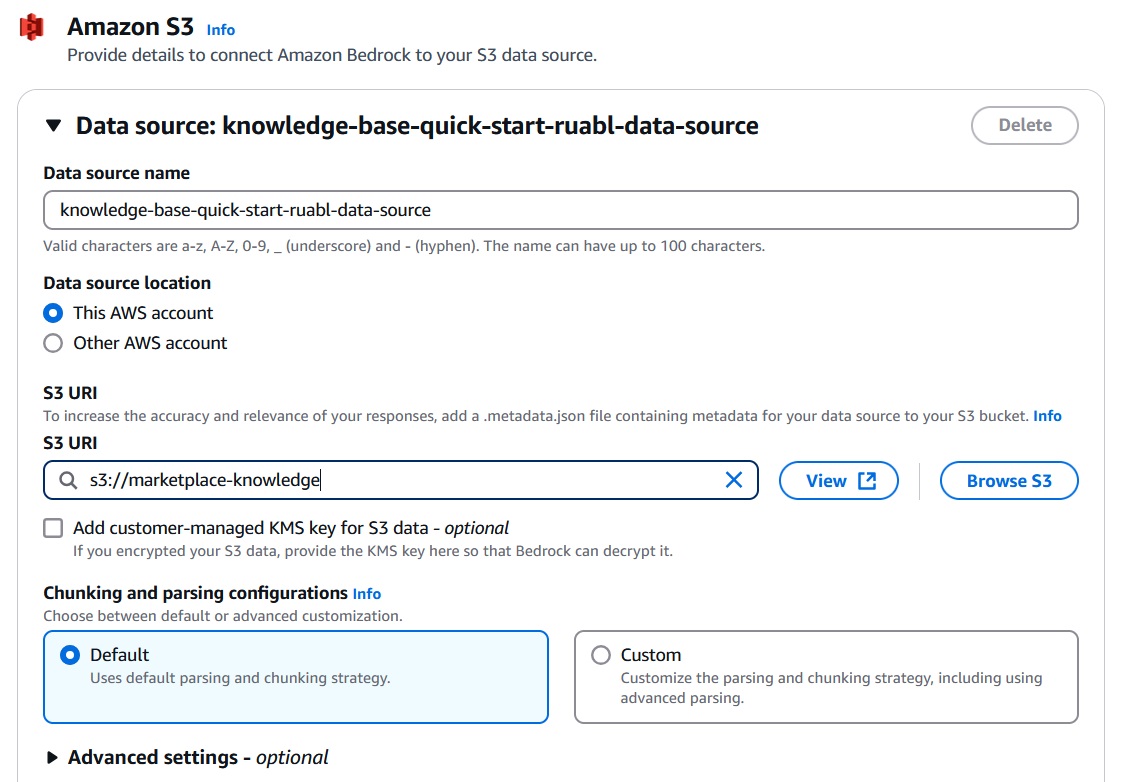
When you click on “Browse S3” you can see the different buckets that you have access to, including the one created earlier for selection:

Now, select the model you want to use to generate your embeddings and connect this knowledge base to your Redis Cloud database:
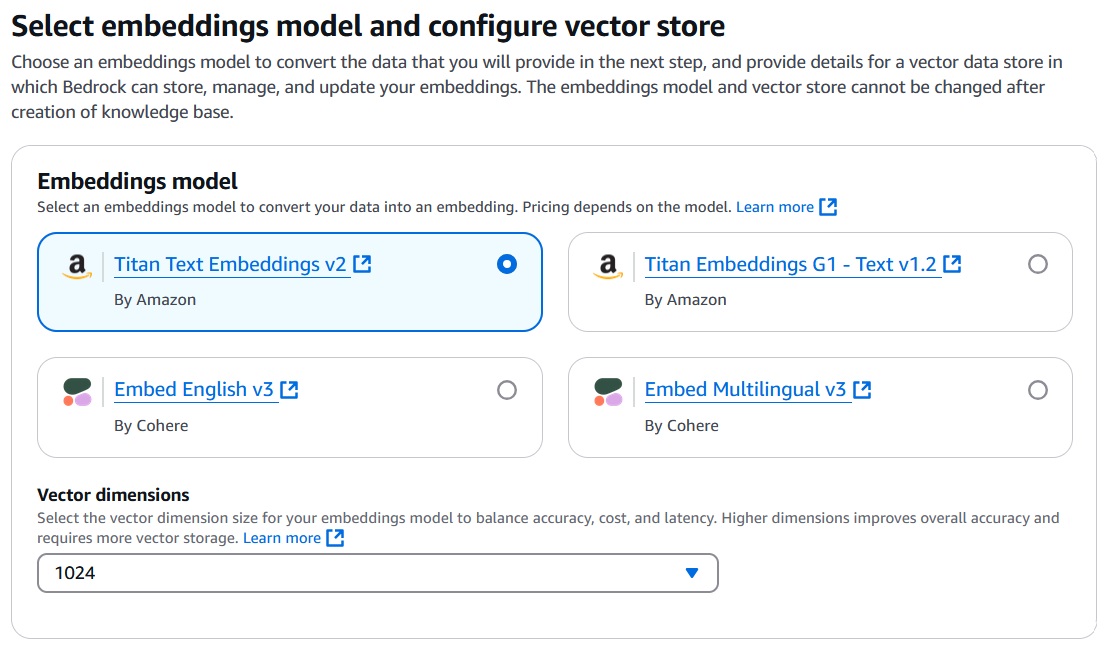
For “embedding model” make sure you select the embeddings model that matches the one to which you requested access. Now, to connect your knowledge base to Redis Cloud, select “Choose a vector store that you have created” in the “Vector database” section of the dialog as shown below and select “Redis Enterprise Cloud” from the list. Make sure you check the authorization checkbox to allow AWS to access the Redis Cloud resource.
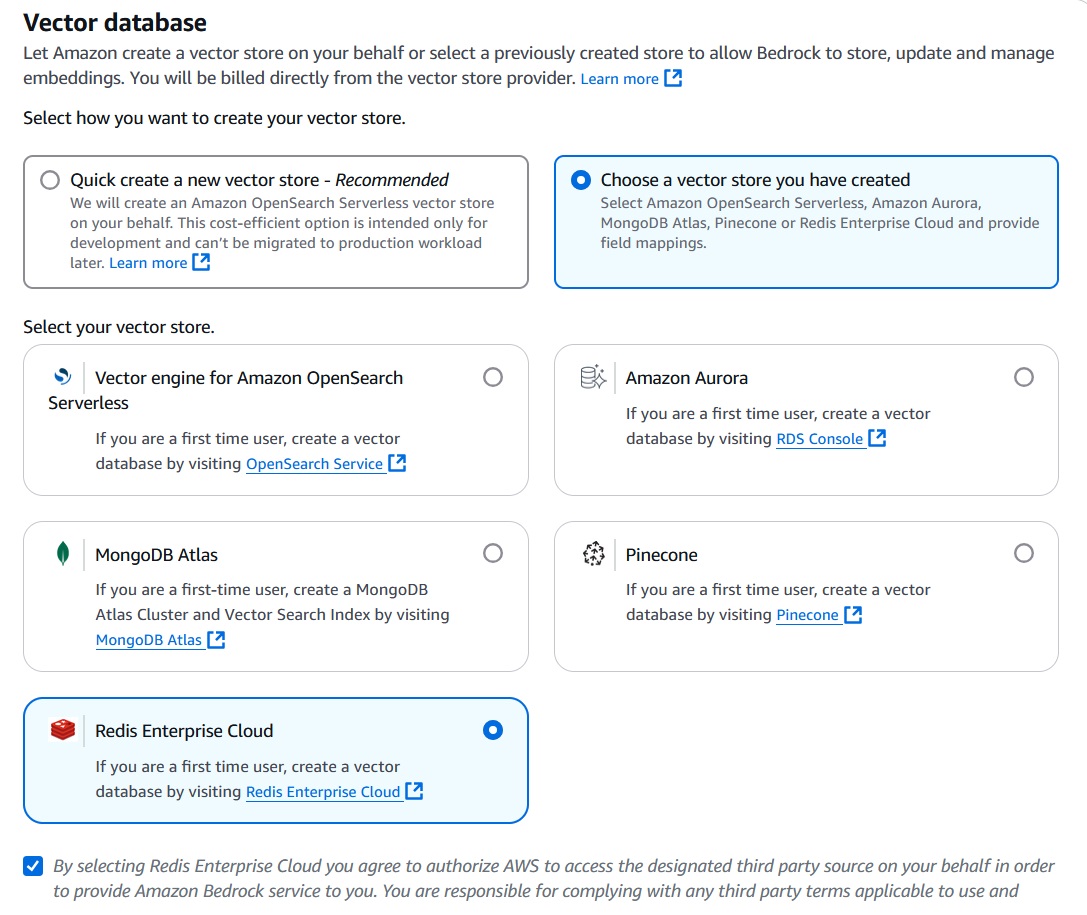
Now you are ready to configure your Redis Cloud access and database details. In the first section you must enter the TLS-enabled endpoint URL to your Redis Cloud database, which you can see from the Redis Cloud database configuration and that you configured in the Redis Cloud configuration section of this guide. You also need to enter the ARN to the secret which holds access details to your cloud, also created earlier in this guide.

Finally, use the vector index details that you defined when creating the index in your Redis Cloud database, as shown below. Remember that you must use the values that apply to the naming you used when creating the index, which may be different from the ones that have been used as examples in this guide.
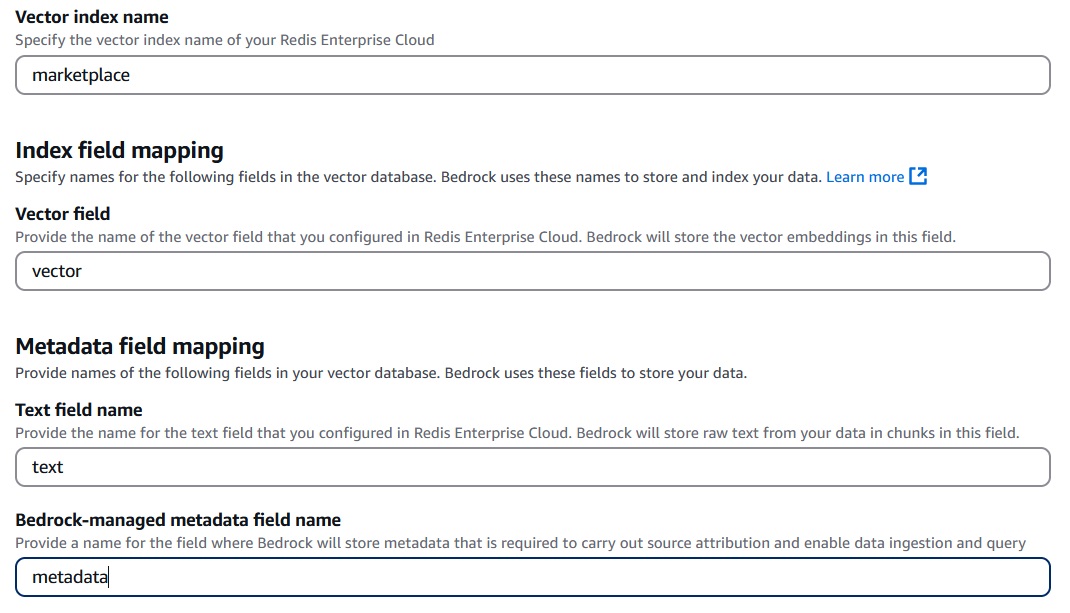
Having done this, you are ready to create Amazon Bedrock Knowledge Bases. Click “Next,” review the configuration and, if all looks good, click “Create!”
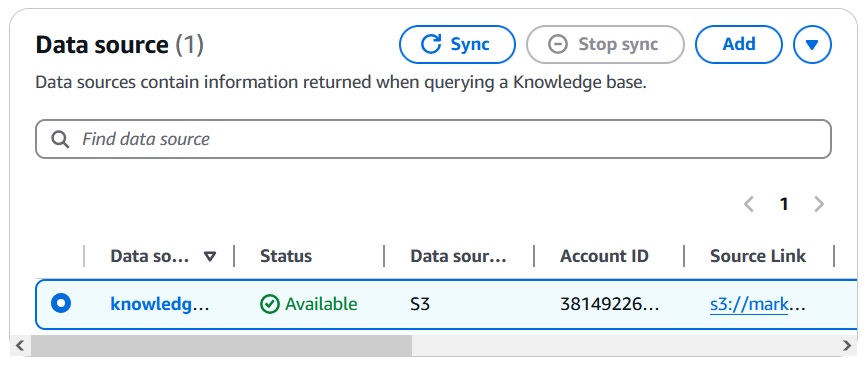
Notice that before you can use the knowledge base you must synchronize it, which will trigger the generation workflow for the vector embeddings of the data in your Amazon S3 bucket.
You can see whether a data source is available and also request synchronization by looking at the “Data source” section of your knowledge base and using the “Sync” option.
Now, let’s use this knowledge base in Amazon Bedrock Agents!
Configuring Amazon Bedrock Agents with your new knowledge base on Redis Cloud
In Amazon Bedrock under “Builder Tools,” you will also find the “Agents” option, click on it and choose “Create Agent.”

Give the agent a name and description and click on “Create.”
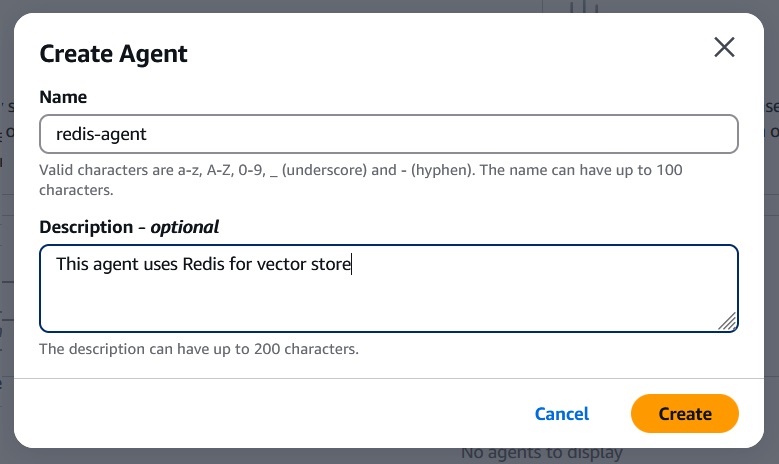
You will be taken to the agent builder interface where a few important steps must be completed.
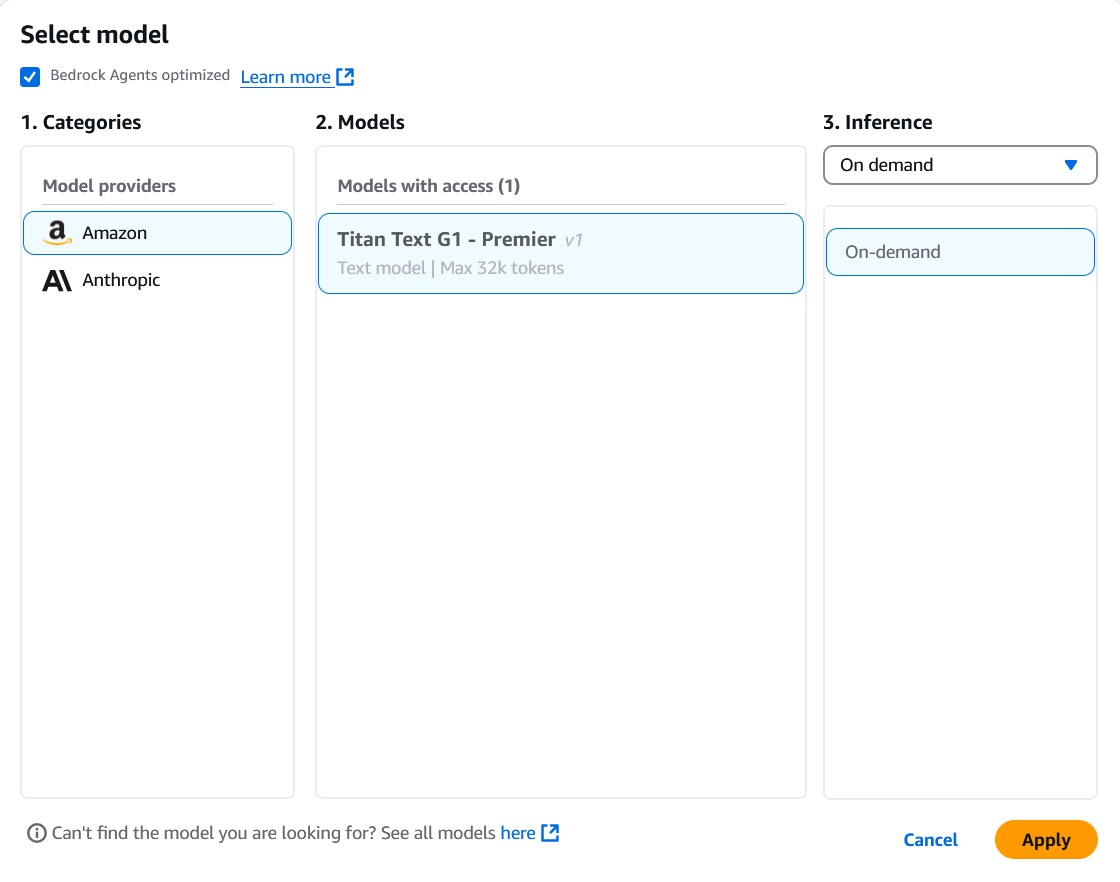
First, select the model that you want to use to generate your responses. This must also be the correct model for text generation from the list to which you requested access earlier in this guide. If you have followed this guide precisely, it will be “Titan Text G1 – Premier.” This is the foundation model that the agent will use to generate responses, leveraging the data that you stored for context in your Redis Cloud database.
Now you need to specify the knowledge base that you want to use to extend this foundation model’s knowledge. In our case you will want to select the knowledge base that we created prior. Scroll down to the “Knowledge bases” section and click “Add,” which will take you to a dialog to select the knowledge base from a handy drop down.
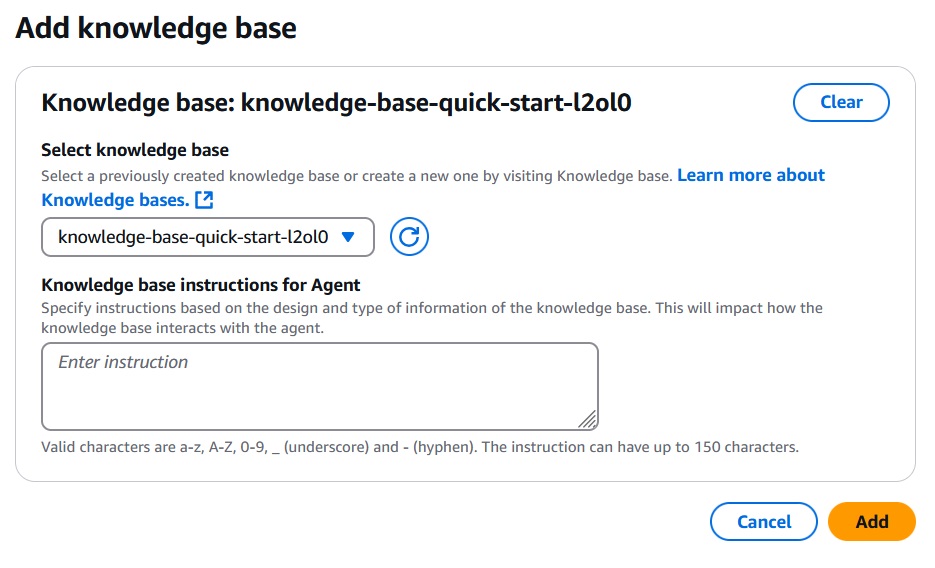
Once added, it will show on the list of knowledge bases available to the agent:

Once you are done with these steps, it’s only a matter of preparing the agent. You can do this by using the “Prepare” button in the agent builder. You can confirm that the agent is ready to generate answers by looking for the “Prepared” status in the “Agents” list.
Now you can talk to Amazon Bedrock Agents with knowledge bases backed by Redis Cloud!
Having completed these steps, now you are ready to ask Amazon Bedrock Agents questions and have it leverage your existing data for context by using RAG querying the vectorized representation of your data, stored in Redis Cloud!
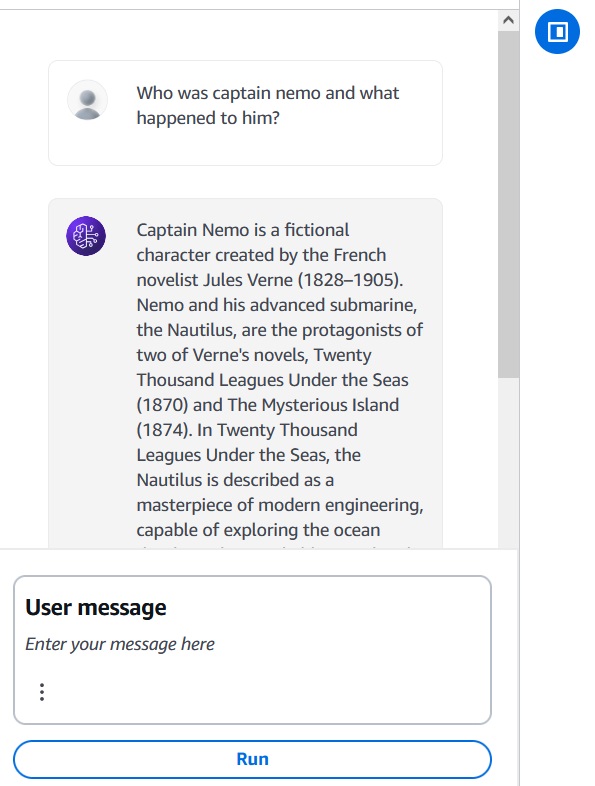
You can also access this newly created agent through code in an application using the AWS SDK for Python (boto3). Here is a sample function that calls this new agent:
import boto3
import json

def invoke_bedrock_rag_agent(agent_name, input_text):
    """
    Calls an Amazon Bedrock RAG agent and returns the response.
    :param agent_name: Name of the RAG agent deployed in Amazon Bedrock.
    :param input_text: The input question or query for the agent.
    :return: Response from the RAG agent.
    """
    bedrock_client = boto3.client('bedrock-runtime', region_name='us-east-1')
    try:
        payload = {
            "inputText": input_text,
            "parameters": {
                "retrieval_context": True,  # Indicate retrieval-augmented mode
                "max_contexts": 3          # Number of retrieval contexts to include
            }
        }
        response = bedrock_client.invoke_model(
            modelId=agent_name,
            body=json.dumps(payload),
            contentType="application/json"
        )
        result = json.loads(response['body'])
        return result
    except Exception as e:
        print(f"Error invoking RAG agent: {e}")
        return None
The added benefit of Redis in your stack
One of the key benefits—other than the outstanding simplicity you’ve experienced in getting a full RAG implementation built by simply putting pieces together—is the fact that Redis is a tool that already exists in the stack of many organizations and one that most developers are already closely familiar with.
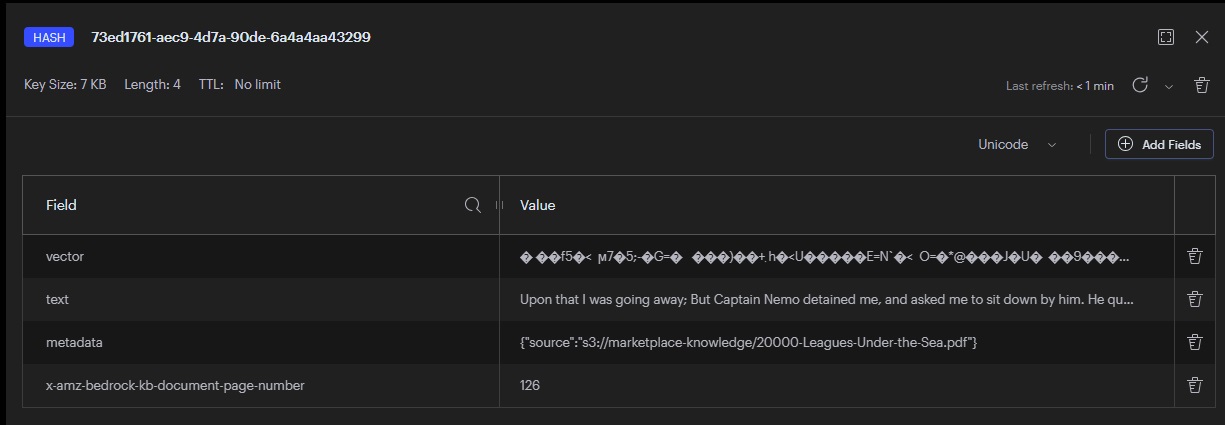
The Amazon Bedrock Knowledge Bases workflow, which stores data in your Redis vector index, allows developers to query, inspect, and understand the data using common tools and patterns that they are already very familiar with.
Using tools like Redis Insight or Redis for VS Code plugin, you can see and query the data in my Redis vector index very intuitively.
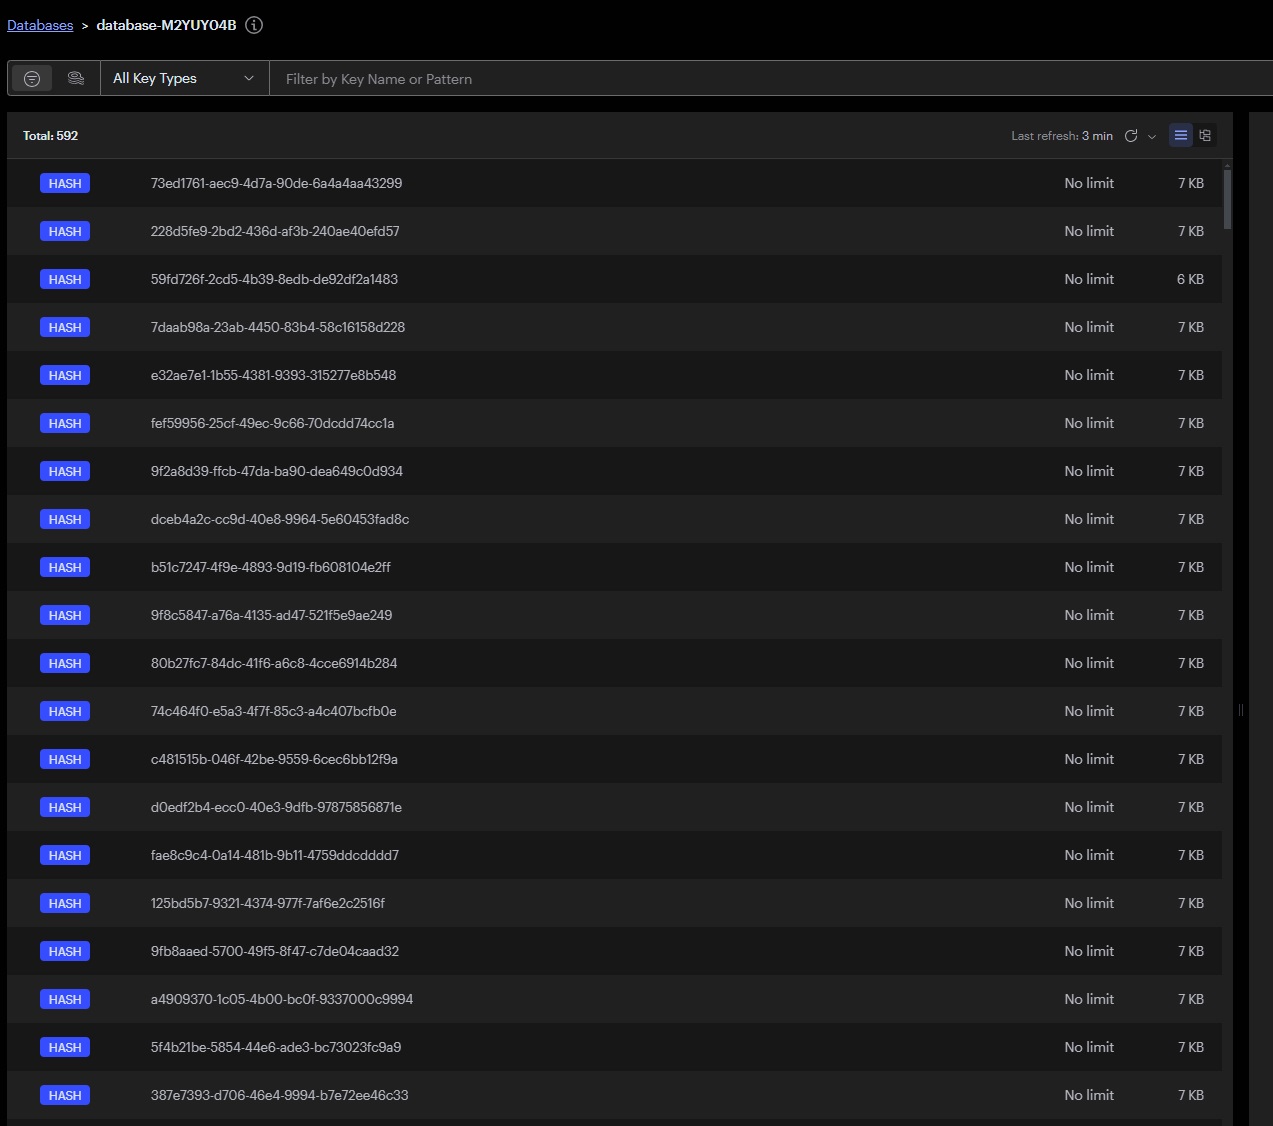
You can navigate all embeddings, query, and look into them just as before with Redis as key/vector storage.
Next steps
With this guide, you can see how simple it is to get a fully enabled RAG implementation using Amazon Bedrock thanks to Amazon Bedrock Knowledge Bases, Amazon Bedrock Agents, and the simplicity of Redis Cloud for vector storage. Try Redis Cloud in AWS Marketplace using your AWS account for free.
Disclaimer
This guide will help you understand implementation fundamentals and serve as a starting point. The reader is advised to consider security, availability and other production-grade deployment concerns and requirements that are not within scope of this implementation guide for a full scale, production-ready implementation.
Why AWS Marketplace for on-demand cloud tools
Free to try. Deploy in minutes. Pay only for what you use.