Amazon Web Services ブログ
AWS Systems Managerを使用して順番にパッケージをデプロイする
AWS Systems Managerを使うと、マネージドインスタンスへのパッケージデプロイの順序を制御できます。マネージドインスタンスとして管理できるものには、Amazon Elastic Compute Cloud(Amazon EC2)インスタンス、他のクラウド環境で稼働するVMを含む仮想マシン(VM)、そしてオンプレミスサーバーがあります。ハイブリッドインフラストラクチャの構成管理手順を自動化したいお客様もいらっしゃるでしょう。そのためには、特定のマネージドインスタンス上で特定のパッケージを順序立てた方法で実行し、インストール順序においてそれぞれのパッケージが干渉し合わないようにする必要があります。現在、Systems Manager Distributorパッケージを使用することで、マネージドインスタンスにソフトウェアパッケージを公開できます。ただし、それらが1回限りのインストール用に構成されている場合、パッケージの実行はマネージドインスタンスで同時に発生する可能性があります。
このブログ投稿では、特定のマネージドインスタンスに対し特定のパッケージを順番にインストールするための、2つの異なるアプローチについて説明します。最初のアプローチでは、Systems Manager Distributorを使用して、特定のマネージドインスタンスに対し特定のパッケージを順番にインストールする方法を説明します。 2番目のアプローチでは、Distributorと組み合わせてSystems Manager Automationドキュメントを使用し、順番にインストールを実行する方法について説明します。
Option 1: Systems Manager Distributorを使用する
Systems Manager Distributorを使うと、マネージドインスタンスへのパッケージの配布、インストール、および更新を簡素化できます。パッケージドキュメントは、ターゲットとなるオペレーティングシステム用のソフトウェアのZIPファイルと、パッケージの内容を説明するマニフェストファイルからなります。例として、Systems Manager Distributorを使用して、3つのソフトウェアパッケージ(Example1.msi、Example2.msi、およびExample3.msi)を順番にインストールすることを考えます。ステートファイルを使用して、各インストールのステータスをトラッキングします。パッケージには、オペレーティングシステムごとに1つの.zipファイルが含まれます。この投稿では、Windowsオペレーティングシステム用のパッケージを作成します。
Step1 – Systems Manager Distributorを使って最初のパッケージを作成する
このステップでは、マネージドインスタンスにExample1.msiをインストールする例を示します。 Example1.msiをインストールする手順:
- 以下を含む
Package1.zipという名称のzipファイルを作成します。- インストールおよびアンインストールPowerShellスクリプト
- ソフトウェアバイナリ
- 次の図は、ソフトウェアの依存関係を確認するためのインストールスクリプトのビジネスロジックのフローを示します。
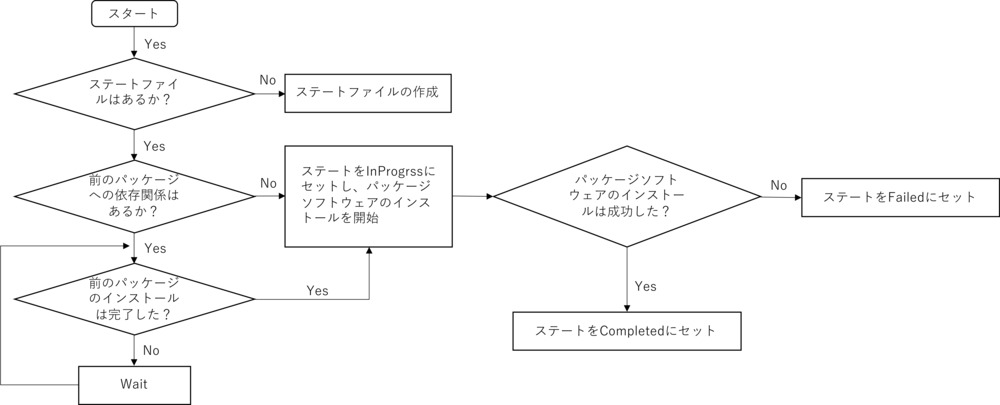
図1: インストールスクリプトのビジネスロジックフロー
-
- インストールスクリプトは、ステートファイルが存在するかどうかを確認します。ステートファイルが存在しない場合は、ステートファイルを作成します。ステートファイルがすでに存在する場合は、前のパッケージへの依存関係があるかどうかを確認します。
- 前のソフトウェアのインストールが完了している場合は、ステータスを「InProgress」にセットし、ソフトウェアのインストールの実行を開始します。
- 前のソフトウェアのインストールが完了していない場合は、設定された待機時間の間隔で、設定したカウント数まで確認します。
- 前のパッケージに依存関係がない場合は、ステータスを「InProgress」にセットして、ソフトウェアのインストールの実行を開始します。
- パッケージソフトウェアのインストールが完了したかを確認します。完了した場合は、ステータスを「Completed」にセットします。パッケージソフトウェアのインストールが失敗した場合は、ステータスを「Failed」にセットします。
Windowsインスタンスにおける、一つ目のパッケージインストール用の参考スクリプトを以下に示します。
3. zipファイルを準備した後、JSONパッケージのマニフェストを作成します。JSONパッケージマニフェストの参考例を以下に示します。
4. バケットを作成するか、既存のバケットを選択します。次の図に示すように、zipファイルをAmazon Simple Storage Service(Amazon S3)バケットにアップロードします。詳細については、バケットへのオブジェクトのアップロードをご覧ください。
5. AWSマネージメントコンソールにてパッケージを作成します。
- Systems Managerコンソールを開きます。
- ナビゲーションペインから、[ディストリビューター]を選択します。
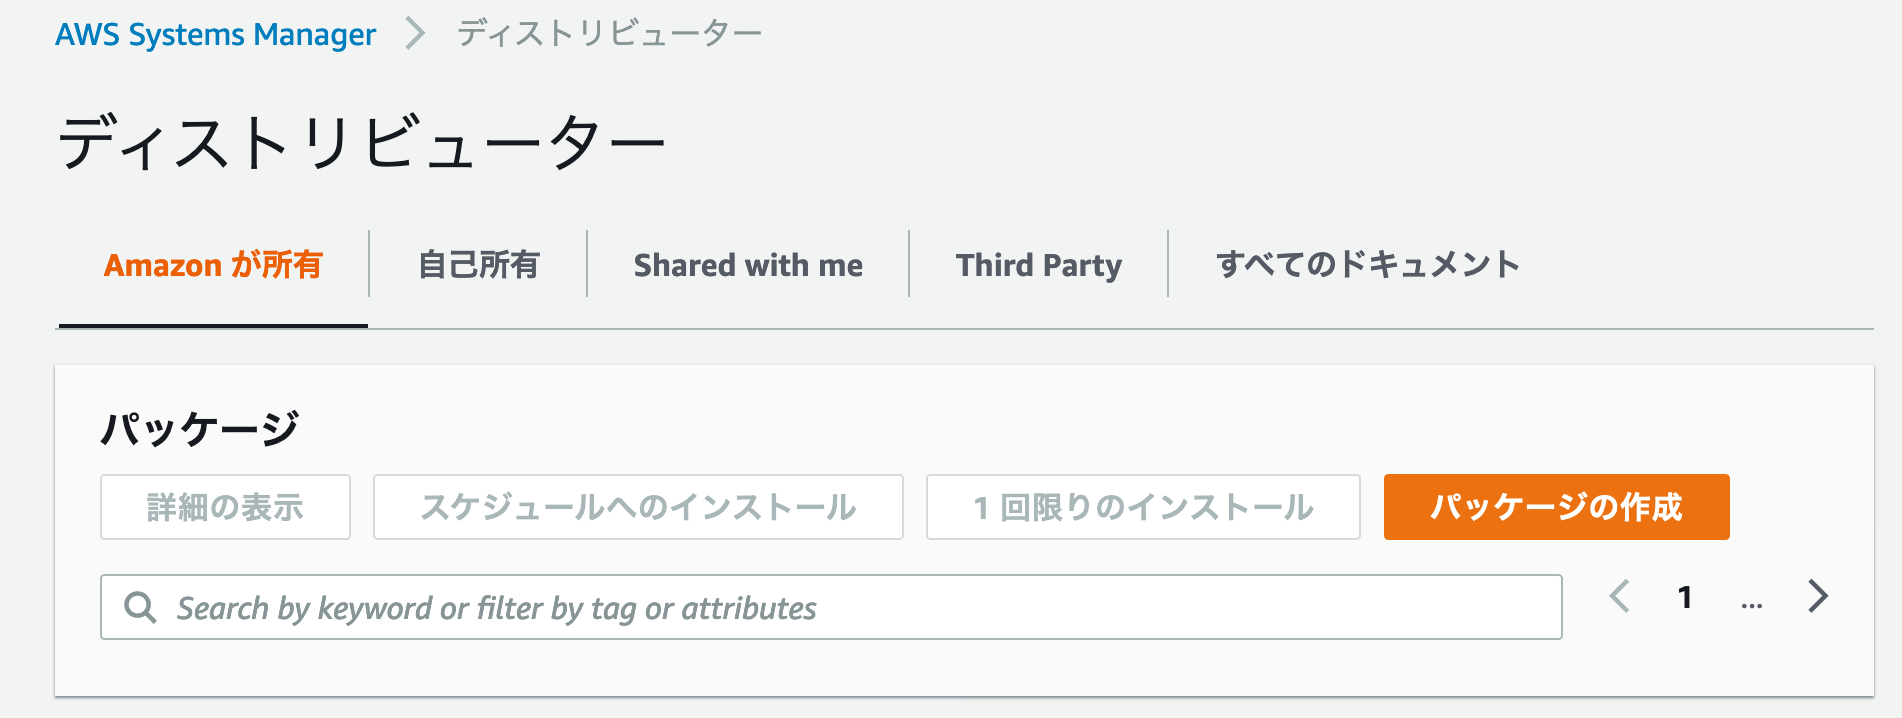
- Distributorのページにて、[パッケージの作成]をクリックします。

図2: Systems Manager Distributor
- パッケージの作成ページにて、[高度]を選択します。

図3: Distributorでのパッケージの作成
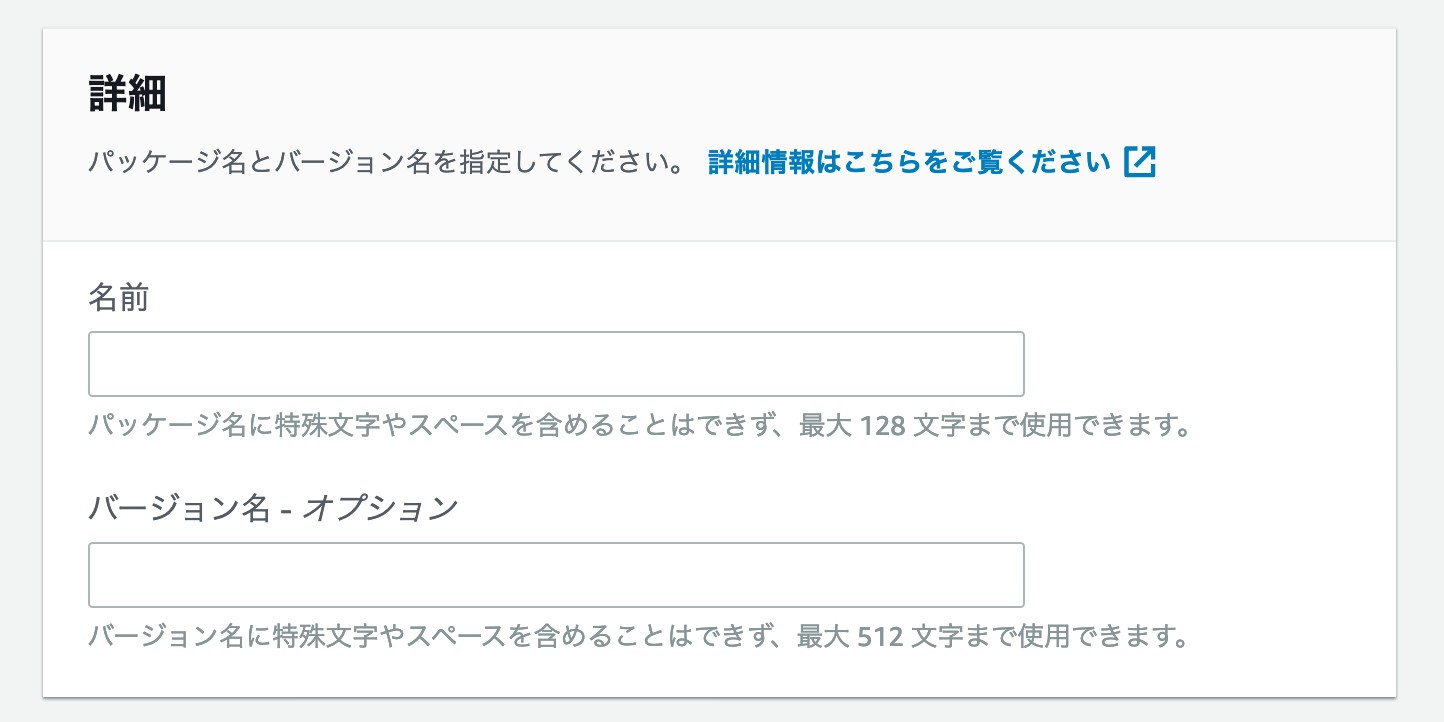
- パッケージの名前に
DistributorPKG1と入力します。
図4: Distributorでのパッケージ詳細
- zipファイルアップロード先のAmazon S3のバケットURLを入力します。

図5: Amazon S3バケットの指定
- 作成したマニフェストの詳細を入力します。

図6: マニフェストファイルの作成
- (オプション)パッケージのアクセス許可を変更します。デフォルトでは、パッケージはプライベートに設定されています。つまり、パッケージ作成者のAWSアカウントにアクセスできるユーザーのみが、パッケージ情報の表示、更新または削除ができます。Systems Managerコンソールでパッケージのアクセス許可を編集できます。
- Systems Managerコンソールにて、パッケージをインストールします。


Step2 – Systems Manager Distributorを使って二つ目のパッケージを作成する
このステップでは、マネージドインスタンスにExample2.msiをインストールします。この例の一部として、Windowsインスタンスを対象としています。「最初のパッケージを作成する」で説明した手順と同じ手順に従います。以下に示すように、DistributorPKG2のインストールの開始にあたってDistributorPKG1インストールの依存関係を追加するよう、インストールスクリプトを変更します。
$thisPkg = "Example2.msi"
$prevPkg = "Example1.msi"
Step3 – Systems Manager Distributorを使って三つ目のパッケージを作成する
このステップでは、例として、WindowsインスタンスにExample3.msiをインストールします。「最初のパッケージを作成する」で説明した手順と同じ手順に従います。インストールスクリプトを変更して、DistributorPKG3のインストールに開始にあたってPackage2インストールの依存関係を追加します。
$thisPkg = "Example3.msi"
$prevPkg = "Example2.msi"
Systems Managerコマンドドキュメントは、ランコマンドの実行に使用されます。 State Managerは、コマンドドキュメントを使用して、インスタンスのライフサイクル中のさまざまなタイミングで、複数のターゲットに構成設定を適用できます。これまでに説明したプロセスを使用してDistributorのパッケージを作成したら、Systems Manager複合ドキュメントを利用してパッケージをインストールできます。この複合ドキュメントは、マネージドインスタンスを起動する際にState Managerの関連付けを構成できます。この例では、DistributorPKG1、DistributorPKG2、およびDistributorPKG3としてDistributorパッケージを作成する方法を示しています。
コマンドドキュメントの参考例を以下に示します:
Option 2: Systems Manager Automationドキュメントの中でDistributorパッケージを使用する
Systems Manager Automationドキュメントを利用して、マネージドインスタンスに対してAutomationワークフロー内で実行するアクションを定義できます。Automationドキュメントは、JavaScript Object Notation(JSON)またはYAMLを使用して記述され、必要に応じてステップとパラメーターを定義します。
Automationドキュメントは、一般的なメンテナンスやデプロイタスクの実行に役立ちます。 State Managerは、Automationドキュメントを使用して、インスタンスのライフサイクル中のさまざまなタイミングで、複数のターゲットに構成設定を適用できます。コマンドドキュメントはドキュメントに記載されているすべてのソフトウェアをインストールしますが、Automationドキュメントはより柔軟です。条件付き分岐を実行するAutomationワークフローを作成できます。これにより、さまざまな選択肢を評価したり、ステップの完了時に変更に動的に応答したりするAutomationワークフローを作成できます。
例として、Automationドキュメントを使用してマネージドインスタンスにサンプルパッケージをインストールするオプションを示します。 PowerShellスクリプト内のスクリプトロジックではなく、aws:branchを使用してAutomationワークフローのロジックで分岐させることができます。これにより、次の手順に進む前にどのソフトウェアをインストールする必要があるかを、検証することができます。
Systems Manager Distributorパッケージをインストールするための、Automationドキュメントを作成する手順は次のとおりです。
- Systems ManagerコンソールでAutomationドキュメントを作成します :
- Systems Managerコンソールを開きます。
- ナビゲーションペインで[ドキュメント]を選択します。
- 自己所有タブを選択し、[オートメーションを作成する]をクリックします。
- [エディタ]モードを選択し、オートメーションドキュメントに貼り付けます。
- [オートメーションを作成する]をクリックして、ドキュメントを保存します。
Automationドキュメントの参考例はこちらです:
description: This is an example Automation Document to install Distributor Packages sequentially. Please make the required edits to the Package Names and installation order.
schemaVersion: '0.3'
parameters:
  Software1:
    type: Boolean
    description: (Required) Do you want to Install Software 1?
  Software2:
    type: Boolean
    description: (Required) Do you want to Install Software 2?
  Software3:
    type: Boolean
    description: (Required) Do you want to Install Software 3?
  InstanceID:
    type: String
    allowedPattern: '^[i|mi]-[a-z0-9]{8,17}$'
    description: (Required) ID of your EC2 instance where you want to install the software.
mainSteps:
  - name: checkSoft1
    action: 'aws:branch'
    inputs:
      Choices:
        - BooleanEquals: true
          NextStep: installSoftware1
          Variable: '{{Software1}}'
        - BooleanEquals: false
          NextStep: checkSoft2
          Variable: '{{Software1}}'
    description: This step checks if Software 1 is supposed to be installed or not
  - name: installSoftware1
    action: 'aws:runCommand'
    inputs:
      DocumentName: AWS-ConfigureAWSPackage
      InstanceIds:
        - '{{InstanceID}}'
      Parameters:
        action: Install
        name: Example1
    description: Install Software 1 on Instance
  - name: checkSoft2
    action: 'aws:branch'
    inputs:
      Choices:
        - BooleanEquals: true
          NextStep: installSoftware2
          Variable: '{{Software2}}'
        - BooleanEquals: false
          NextStep: checkSoft3
          Variable: '{{Software2}}'
    description: This step checks if Software 2 is supposed to be installed or not
  - name: installSoftware2
    action: 'aws:runCommand'
    inputs:
      DocumentName: AWS-ConfigureAWSPackage
      InstanceIds:
        - '{{InstanceID}}'
      Parameters:
        action: Install
        name: Example2
    description: Install Software 2 on Instance
  - name: checkSoft3
    action: 'aws:branch'
    inputs:
      Choices:
        - BooleanEquals: true
          NextStep: installSoftware3
          Variable: '{{Software3}}'
    description: This step checks if Software 3 is supposed to be installed or not
  - name: installSoftware3
    action: 'aws:runCommand'
    inputs:
      DocumentName: AWS-ConfigureAWSPackage
      InstanceIds:
        - '{{InstanceID}}'
      Parameters:
        action: Install
        name: Example3
    description: Install Software 3 on Instance
このAutomationドキュメントは、’aws:branch’ステートメントを使用して、必要なソフトウェアのみをインストールします。同時実行制御と順次実行は、Automationワークフローによって実現されます。重要なステップ(特定のソフトウェアのインストールなど)が失敗した場合、ワークフローはAutomationを継続しません。お客様は、依存関係の検出ロジック、承認手順、およびロールバックメカニズムを含めることにより、このドキュメントの機能を強化することもできます。
Automationドキュメント作成後、実行できます。Automationドキュメントのパラメーター構成設定に基づいて、インスタンスの詳細およびその他の詳細項目を入力します。

図7: Automationドキュメント設定
まとめ
このブログ投稿では、指定されたマネージドインスタンスに特定のパッケージを順番にインストールするための2つの異なるアプローチについて説明しました。最初のアプローチでは、Systems Manager Distributorを使用して、指定されたマネージドインスタンスに特定のパッケージを順番にインストールする方法を説明しました。 2つ目は、AutomationドキュメントをDistributorと組み合わせて使用して順次インストールを実行する方法を説明しました。
著者について

Suman Banerjeeは、グローバルエンタープライズソリューションアーキテクトであり、根からのビルダーです。彼は20年以上にわたり、企業がビジネス目標を達成するためのソリューションを設計および構築することを支援してきました。顧客向けのソリューションを設計することが、彼のモチベーションとなっています。また、彼は彼の2人の子供SwapnilとAyushmaanと遊ぶのを楽しんでいます。
SumanのLinkedIn Profileはこちら
 Aman Guptaは、AWSプレミアムサポートのクラウドサポートエンジニアです。彼はAWSテクノロジーを4年以上使用しています。 AmanはAWSのお客様と協力して、複雑なクラウドインフラストラクチャーを設計、実装、サポートしています。仕事以外では、犬や家族と一緒に時間を過ごしたり、The OfficeやParks and Recreationを見たりしています。
AmanのLinkedIn Profileはこちら
原文はこちら。翻訳はSA石橋が担当しました。