Front-End Web & Mobile
Building Offline first applications with AWS Amplify DataStore – Part 2
Building Offline first applications has been a challenge for developers, which have been relentlessly looking for ways to improve how applications are built. In the first part of this post, I revisited the concept of Offline first applications, some of the main challenges and how AWS Amplify DataStore can solve them.
In this post, I will show an example of how to develop a simple Flutter application following the Offline first approach and using AWS Amplify DataStore.
Building an Offline first application with Amplify DataStore and Flutter
This section will explore the concepts presented in Part 1 and showcase a strategy for building a mobile application following the Offline first approach using Amplify DataStore and Flutter.
Check the following prerequisites before getting started.
Prerequisites
These are the resources and versions used at the time that this post was written:
- Android Studio 2021.2.1 Patch 1
- Flutter 3.0.1+
- Amplify CLI 9.1.0+
- Device Simulator/Emulator
-
- In MacOS, Simulator.app
- Android Emulator – Check details in the Android setup section in the Flutter documentation
Configuring a Flutter project with Amplify DataStore
The following instructions follow similar steps as those presented in the Amplify documentation for Flutter to set up a full-stack project.
Step 1
Create a new Flutter project and run it with your preferred environment (Simulator, Android Emulator, etc.). Execute the following commands in a command line terminal:
Step 2
Once you’ve confirmed that the project is running properly in the environment of your preference, you must add Amplify for Flutter and Amplify DataStore to your application. In the project’s main folder, open the pubspec.yaml file with your favorite code editor and add the following lines under the dependencies section:
This is how the dependencies section will look after the change:
Step 3
Amplify for Flutter is distributed via pub.dev. To install the dependencies, run the following command in a command line terminal:
Step 4
Update the target iOS platform and the target Android version with the following code changes.
- In the project’s main folder, navigate to the
ios/folder and modify thePodfileby uncommenting and updating the target iOS platform version to 13.0 or higher:
- In the project’s main folder, navigate to the
android/app/directory and update theminSdkVerionproperty underdefaultConfigin thebuild.gradlefile with version 21 or higher:
Step 5
Generate the model files using the Amplify Studio Quick Start. At this stage, you don’t need to have an AWS account. From the Amplify Studio Quick Start, select the To-do list option with Flutter and select the Get started button (as presented in the following figure).
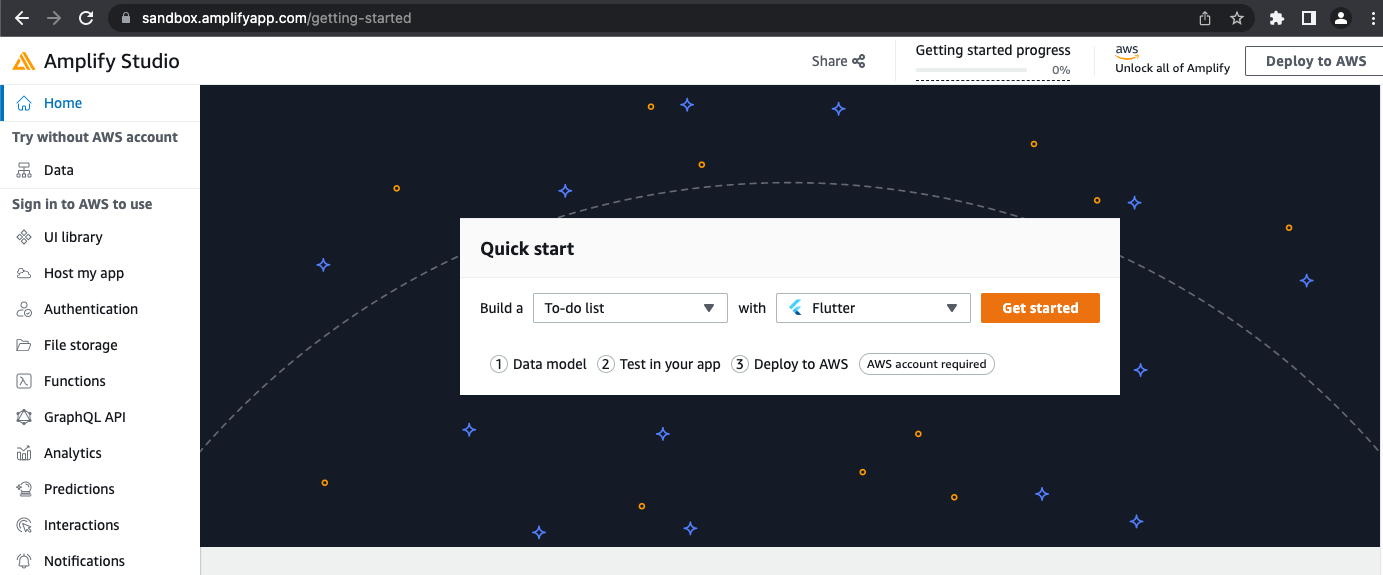
Figure 3: Amplify Studio Quick Start – Build a To-do list with Flutter
Add the field isComplete of type Boolean to the model and mark it as a required field. Then, select the Next: Test locally in your app button (as presented in the following figure).
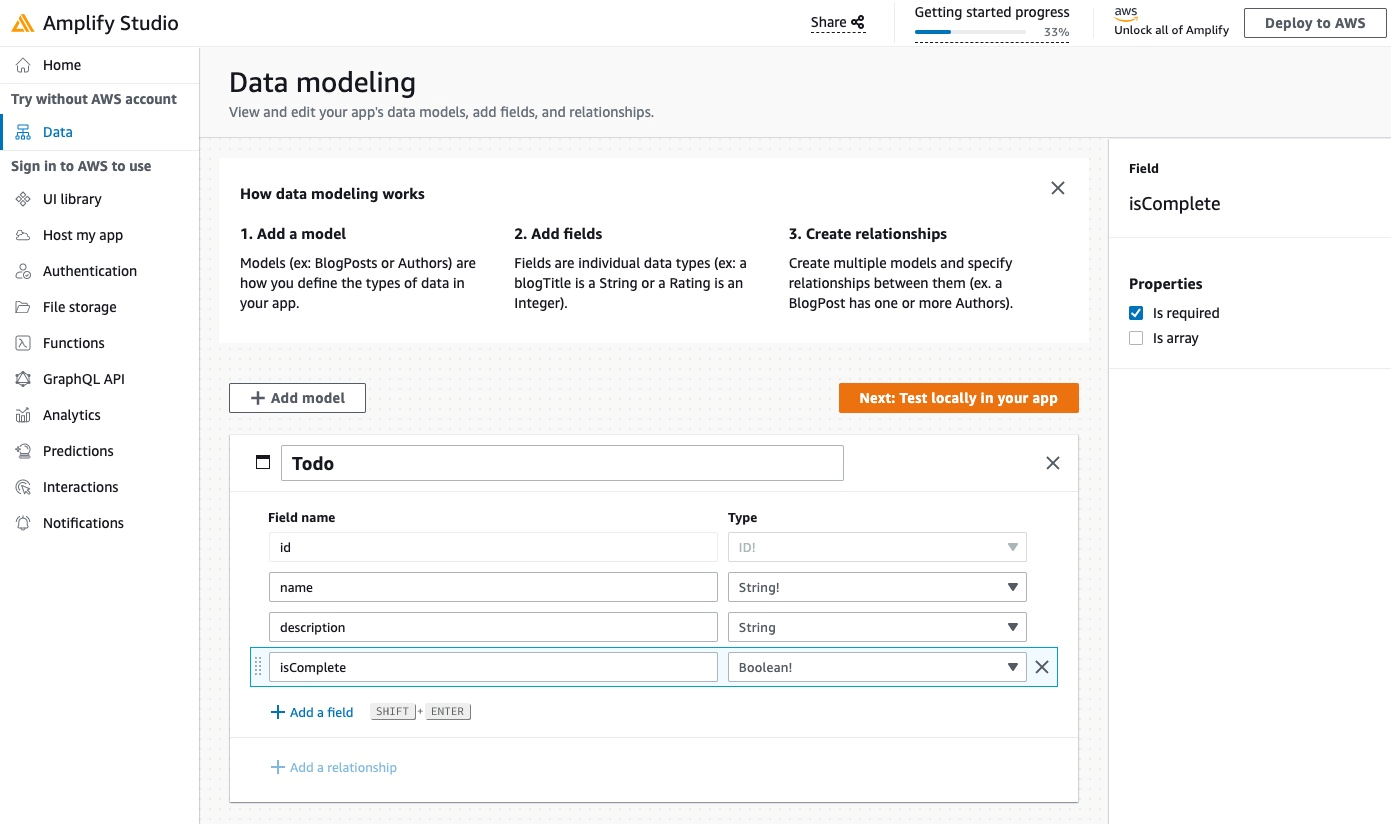
Figure 4: Update the data model
With the Amplify CLI already installed as part of the prerequisites, copy the command starting with amplify pull and run it in the project’s main folder using the command line terminal. Make sure that you add the sandboxId value corresponding to your data model (see the following figure for an example).
There’s no need to proceed with the steps to Install Amplify library and initialize Amplify and Test CRUD APIs locally with Amplify DataStore (Steps 2 and 3 in Figure 5) at this moment, as they can be done later.
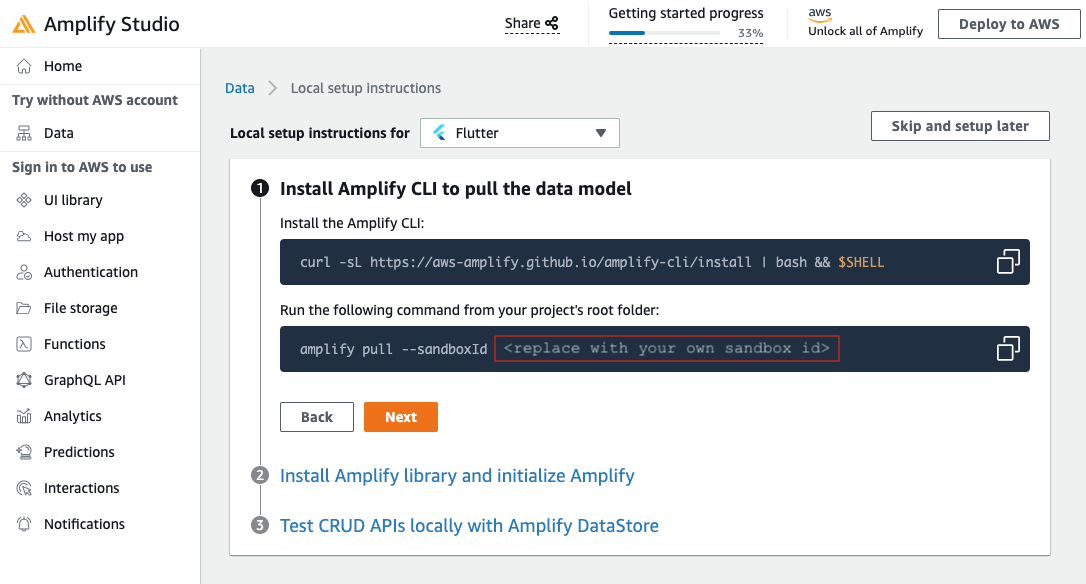
Figure 5: Pull the data model
Step 6
Integrate Amplify DataStore with your application. Follow these steps available in the tutorial for Flutter, update your project’s lib/main.dart file and save the changes.
Step 7
In the command line terminal, run the application with the device of your preference.
You can now create, update, and delete the ToDo items completely offline.

Cleaning up
As part of this post, no AWS resources were created. All of the instructions and steps were made in the front-end application without the need for creating backend resources.
Next steps
To connect your application to the cloud, follow the remaining steps shown in Figure 5 and follow the steps available in the tutorial.
Conclusion
This post shows an example of how to develop a simple Flutter application following the Offline first approach and using Amplify DataStore. This is the second part of a series of two posts and I invite you to read the first part to learn more about the challenges of building Offline first applications and how AWS Amplify DataStore simplifies this process.
Amplify DataStore provides a programming model that allows application developers to focus on features that add business value rather than undifferentiated code to handle caching, reconnection, data synchronization, and conflict resolution. With Amplify DataStore, you can start with the Offline first approach to design your model and develop the operations directly in your local storage before connecting it to cloud services, thereby saving in costs and resources.
I invite you to dive deep into the Amplify Datastore Use Cases and Implementation, as well as the Amplify DataStore documentation, and learn more about how it works and see other use case examples.
About the author: