AWS Compute Blog
Federating CloudEndure access with Microsoft Azure Active Directory
This post is written by Adeleke Coker, Sr. Cloud Support Engineer.
CloudEndure Migration simplifies the process of migrating applications from physical, virtual, and cloud-based infrastructure. It helps ensure that they are fully operational in any AWS Region without compatibility issues. Getting started is quick regardless of the application type. This enables customers to perform, large-scale migration projects, while significantly reducing risk.
CloudEndure supports Security Assertion Markup Language 2.0 (SAML). You can use existing user identities to federate to the CloudEndure console and assign projects to users or teams. In this blog, you learn how to use Azure Active Directory (AAD) identities to access the CloudEndure console with single sign-on (SSO).
To get started, you need:
- A CloudEndure Migration subscription on AWS (subscribe here).
- An administrator account in CloudEndure to configure SAML.
- An Azure account with an active subscription.
- A user with permissions to add an Enterprise application in Azure Active Directory.
Creating a new application in Azure
An application is a piece of software that is used for some purpose, mostly required for users to sign in. You manage applications on the Enterprise applications page located in the Manage section of the Azure Active Directory portal.
- Navigate to the Azure portal with a user that has permissions to create Enterprise applications.
- Go to Azure Active Directory pane, then Enterprise application.
- Under Enterprise applications, choose New application, then “Non-gallery application”.
- Enter a descriptive name for the application (for example, “CloudEndure Console”). If you use different CloudEndure accounts for projects, such as one for migration and another for disaster recovery (DR), you must create different enterprise applications for each one.
- Choose Add and wait until the creation to complete.

- Once the application is created, choose the application.
- In the manage section of the application, choose Single sign-on and select SAML as the method for single sign-on. This opens the setup section.


Configuring SAML in Azure Active Directory
SAML is an open federation standard that allows an identity provider (IdP) to authenticate users and pass identity and security information about them to a service provider (SP). This is typically an application, or service. With SAML, you can enable a single sign-on experience for your users across many SAML-enabled applications and services.
There are three sections to complete in the SAML configuration in Azure Active Directory:
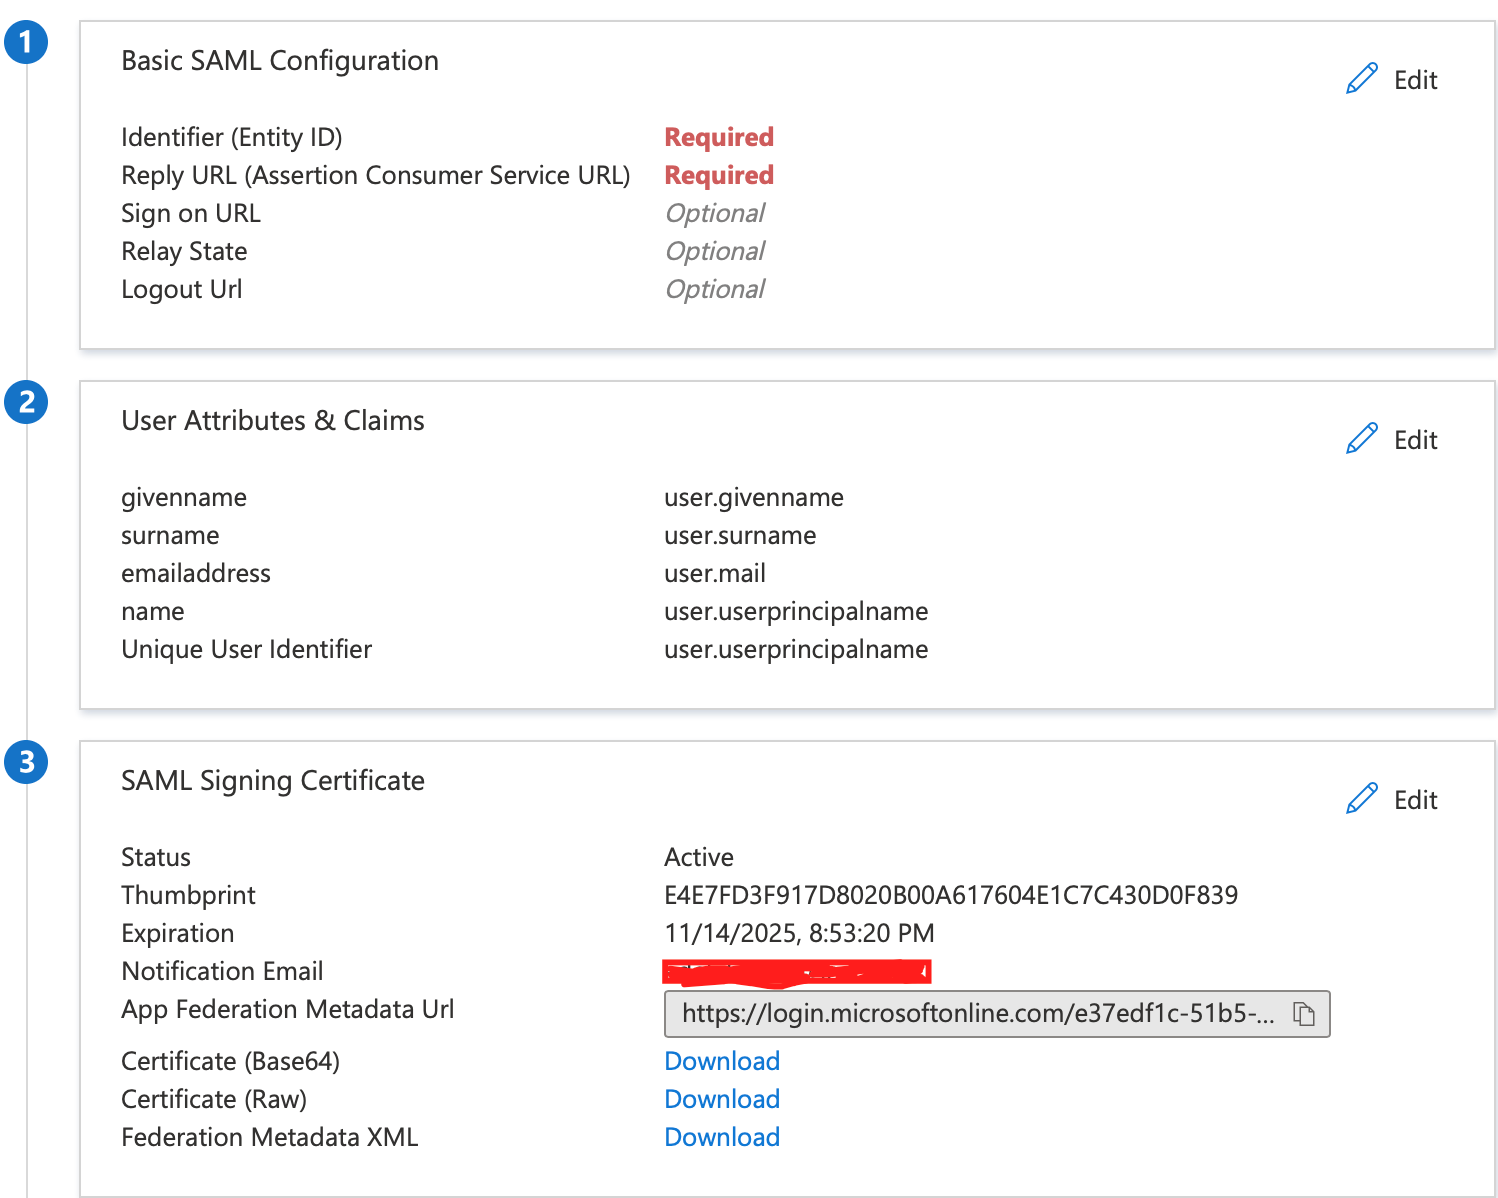
Basic SAML configuration: On the Set up single sign-on with SAML page, choose Edit to configure the settings. In this section, there are three required fields:
- Identifier (entity ID): Uniquely identifies the application. Azure Active Directory sends the identifier to the application as the audience parameter of the SAML token.
- Reply URL (assertion consumer service URL): Specifies where the application expects to receive the SAML token.
- Relay state: Specifies to the application where to redirect the user after authentication is completed.
For more information about the basic SAML configuration on Azure portal, refer to this documentation. For this walkthrough, supply the following information:
- Identifier (entity ID): https://console.cloudendure.com
- Reply URL (assertion consumer service URL): https://console.cloudendure.com/api/v5/assertionConsumerService
- Relay state: https://console.cloudendure.com/#/signIn;<cloudendure account id>
Obtain your CloudEndure account UUID by following “How do I obtain my CloudEndure Account UUID?” in this FAQ.

Keep the other fields empty and choose Save to commit the configuration changes.
- User attributes and claims: CloudEndure expects the SAML assertions in a specific format, which requires you to add custom attribute mappings to your SAML token attributes configuration. CloudEndure uses the email address for the primary login. You can set the attribute mapping to recognize the user’s email as the name ID.
- Choose Edit to configure the settings. Choose Add new claim. Enter username for Name and user.mail for Source attribute, as shown in the following screenshot.
- Edit the Unique User Identifier (Name ID) and change the Source attribute to user.mail. This should match the email address for logging in to the CloudEndure console or the email format you use to create users in the CloudEndure console.
- Remove the other claims such as givenName and surname.

- SAML signing certificate:
- Choose Edit to configure the SAML signing certificate.
- Choose Add a certificate. Generate a new SAML signing certificate and then choose New Certificate. For more information, refer to this guide.
- Choose the ellipsis (….) next to the certificate thumbprint in the context menu displayed, then choose Make certificate active.
- Choose Certificate (base64) to download it. You need this for CloudEndure SAML configuration.

Configuring SAML in CloudEndure console
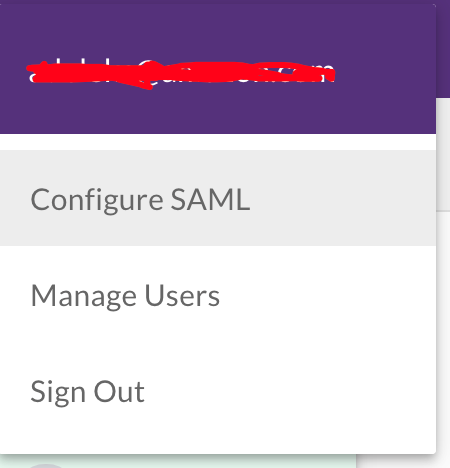
- Navigate to the CloudEndure console and log in with your email address and password. Choose the user settings icon in the user console.
- Choose Configure SAML.
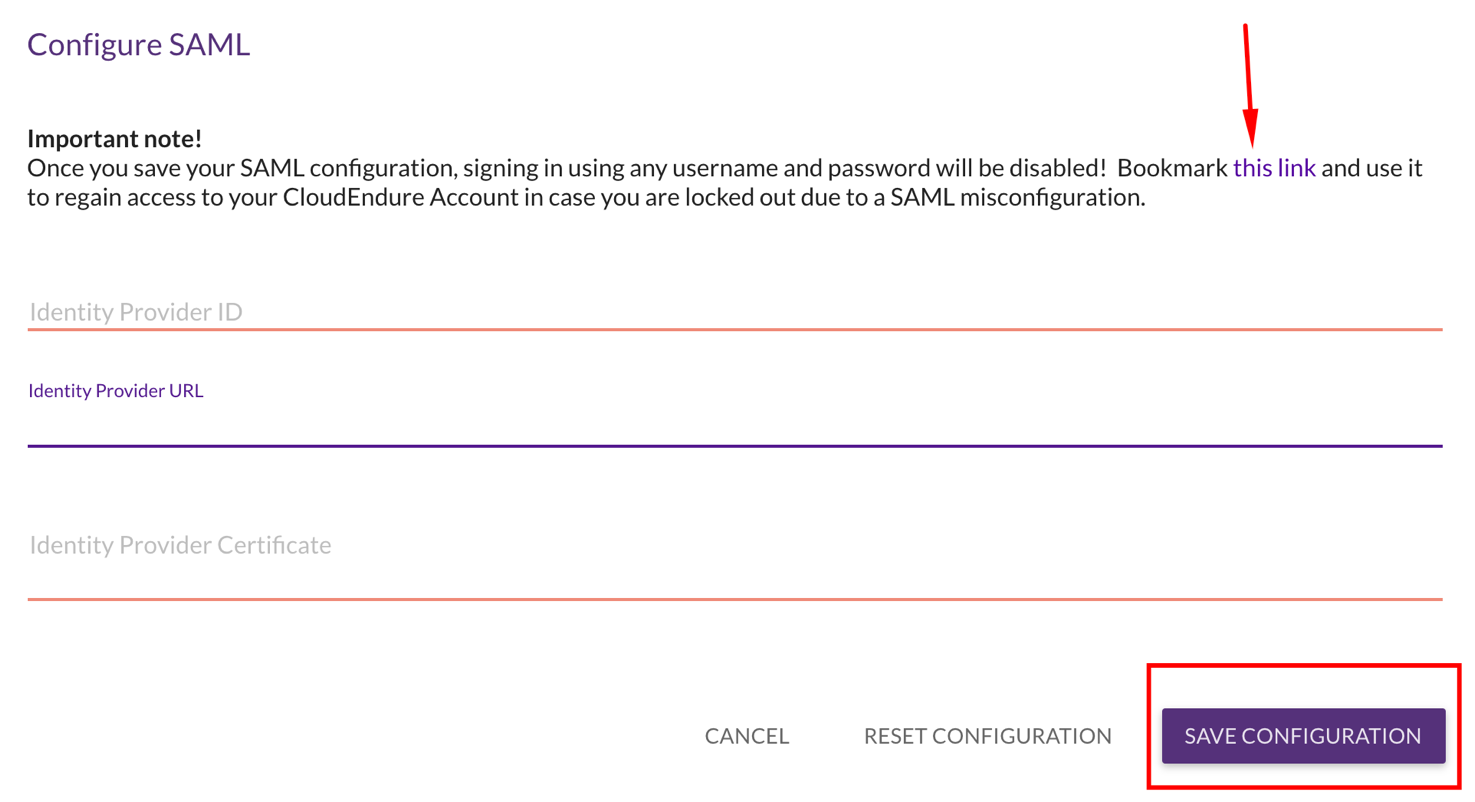
- For the CloudEndure SAML Configuration, use these values:
- Identity Provider ID: https://sts.windows.net/<guid> Listed as “Azure AD Identifier” in the Azure Active Directory Enterprise Application setup.
- Identity Provider URL: https://login.microsoftonline.com/<guid>/saml2 Listed as “Login URL” in Azure Active Directory Enterprise Application setup.
- Identity Provider Certificate: This is the base64 certificate you downloaded from the Azure Active Directory enterprise application. Copy the contents between
---BEGIN CERTIFICATE---and---END CERTIFICATE---.

- In the Configure SAML dialog box, bookmark the rescue link. This enables you to regain access using your email and password if SAML is misconfigured. Once you save the SAML configuration in CloudEndure, you cannot access the console again without SSO.
- Enter your account details, including your Identity Provider ID, Identity Provider URL, and Identity Provider Certificate. Choose Save configuration.


- Reset the SAML configuration by choosing Reset configuration. Note that resetting SAML settings may prevent other users from logging into the CloudEndure Account. Refer to this documentation for more information about configuring SAML single sign-on on CloudEndure console.

Assign the enterprise application to users in Azure and create a user in the CloudEndure console:
- Go to the “Users and groups” section of the enterprise application.
- Choose Add User, browse the user you want to add, then choose Assign to add the application to the user.
- Navigate to the CloudEndure console to create users. Select the User Settings icon in the User Console. Select Manage Users. Choose Create User and enter the user’s email address. Note that the status shows “Pending” until the user logs in, then it changes to “Confirmed”.
- The user receives an invitation email where they are required to create a password.
Testing the application
- Users should navigate to myapps and sign in with their Azure credentials. Use the email address that matches both the enterprise application claim rules and the email added in the CloudEndure console. Alternatively, users can directly log in to CloudEndure console with this link:
https://console.cloudendure.com/#/signIn?accountIdentifier=<CloudEndure Account UUID>. Obtain your account UUID with the steps mentioned here. - Choose the application (for example, “CloudEndure”). You are federated automatically to the CloudEndure console.
- On successful login, users are required to read and accept the terms of service.
- Users should now see the projects assigned to them and be able to perform machine migration and other assigned tasks.


Conclusion
In this post, you learn how to grant Azure Active Directory users Single Sign-On access to the CloudEndure console. You can now create multiple enterprise applications for different CloudEndure accounts. You can use the guide in this post to assign CloudEndure projects or accounts to users. To learn more, read about User Management in CloudEndure.