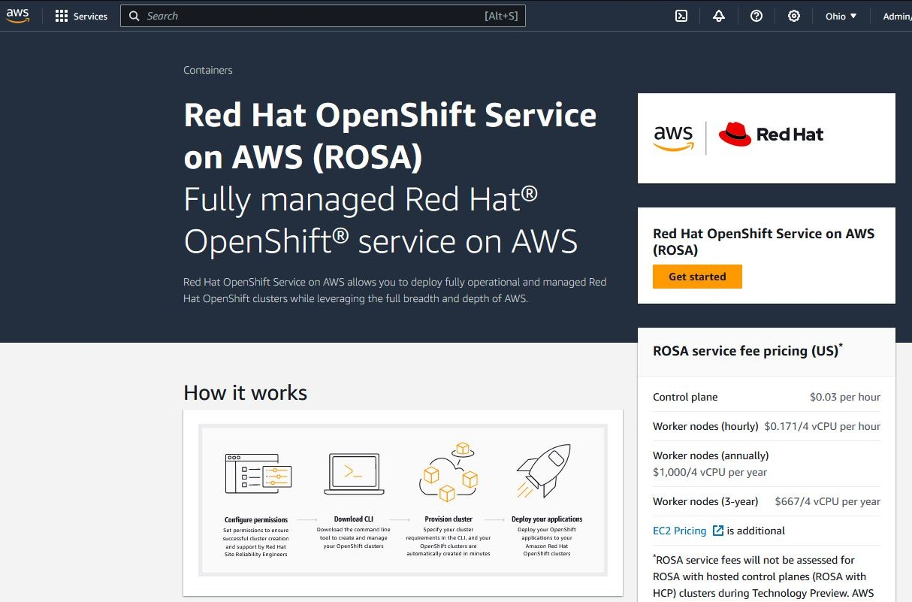
Containers
Build ROSA Clusters with Terraform
Introduction
With the recent release of the official Red Hat Cloud Services Provider for Terraform customers can now automate the provisioning Red Hat OpenShift Service on AWS clusters (ROSA) with Terraform. Previously, automating the creation of a ROSA cluster required using the OpenShift Command Line Interface (CLI), either wrapping it in code or using additional tools to automate the necessary CLI commands. Now customers using Terraform can integrate ROSA cluster creation into their existing pipelines. In addition to the Red Hat Cloud Services (RHCS) Provider, Red Hat has made available the ROSA STS Terraform module. This gives customers the option to automate ROSA prerequisites, like operator IAM roles, policies, and identity providers as a distinct step.
If you’re not familiar, Terraform is a popular Infrastructure as Code (IaC) tool that enables customers to provision cloud resources like Amazon Elastic Compute Cloud (Amazon EC2) instances, load balancers, and other AWS infrastructure in a standardized way. IaC allows you to create templated files that contain the specific configurations for your infrastructure; generating the environment consistently each time. This allows teams to apply DevOps workflows to the provisioning of infrastructure, pushing the templated files through a Continuous Integration/Continuous Deployment (CI/CD) pipeline with gates to enforce business logic or other requirements before promoting to production. Things to note with the new RHCS Provider.
- The RHCS Provider was built with security best practices and, as of today, supports building ROSA clusters with AWS Security Token Service (AWS STS). AWS STS creates temporary and limited in scope credentials to the resources in your AWS account. This allows the individual components of ROSA to make calls scoped only to the AWS Application Programming Interface (API) resources required to fulfill their job, aligning with a least-privileged security model.
- The RHCS provider currently supports building ROSA clusters with the classic control plane model, where the Amazon EC2 nodes that support the ROSA control plane and infrastructure nodes are provisioned within the customer’s AWS VPC. ROSA with Hosted Control Plane (HCP) is currently in Red Hat technology preview and isn’t yet supported by the RHCS Provider. RHCS Provider support for ROSA with HCP clusters will be added in the future.
Solution overview
Now that we know some of the benefits of using Terraform to create ROSA clusters on AWS, let’s work through an example. We’ll use the new RHCS Provider and the ROSA STS module in the following example to provision a ROSA cluster in our AWS account. Once it’s online, we’ll use Terraform to add a new Machine Pool to our new ROSA cluster.
Prerequisites
- AWS Account
- RedHat Account (In the blog we’ll walkthrough how to link your AWS and RedHat accounts)
- Access to a shell environment, either a local machine, AWS CloudShell, or an AWS Cloud9 instance.
- AWS Command Line Interface (CLI) and ROSA CLI
- Terraform version 1.4.6 or newer
- GoLang version 1.20 or newer
- To build components with Terraform, you must have the latest version of Go installed and usable on your system.
- Necessary AWS Identity and Access Management (AWS IAM) permissions for Terraform to run the examples.
Walkthrough
ROSA getting started requirements
If you’ve already enabled ROSA and you’re familiar with creating clusters in AWS, then skip down to the Terraform example.
Before we begin, we’ll need to enable ROSA in our AWS account, verify quotas, and create a service linked role for AWS Elastic Load Balancers and then AWS and ROSA CLI.
In the AWS Management Console, navigate to the ROSA service page. Search for ROSA in the upper search bar. Once at the ROSA service page, select Get Started button.
On the next page, we’ll enable the ROSA service for our AWS account by checking the box and selecting Enable ROSA with HCP and ROSA classic. Enabling ROSA for your account can take a few minutes, so please remain on the page.
Note: the Red Hat Cloud Services Provider only supports ROSA Classic clusters at this time.
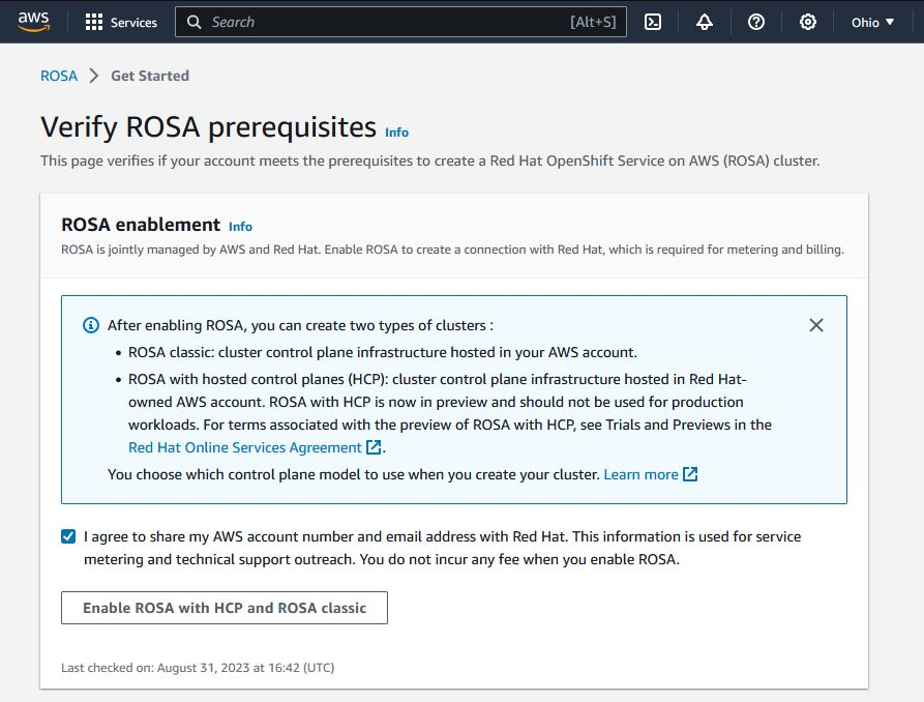
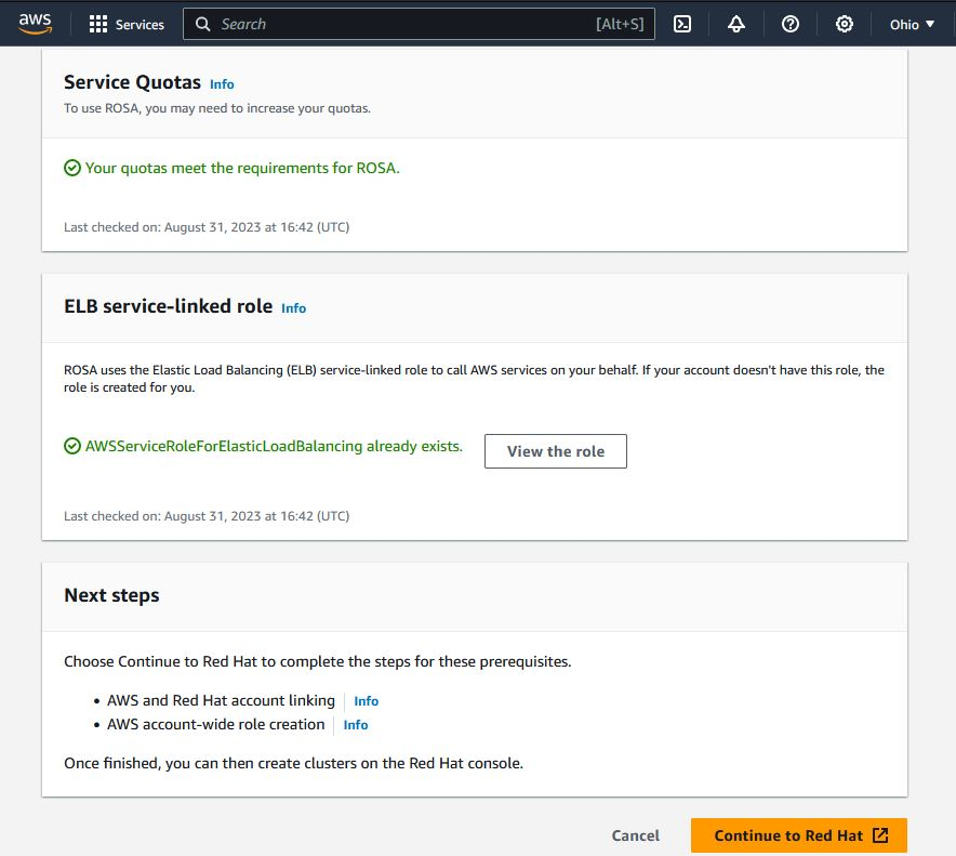
Once enabled, the page verifies your Service Quotas and either verifies or creates the necessary service-linked role.
Optionally, we can verify or create the service linked role for the Elastic Load Balancer via the AWS Command Line Interface (AWS CLI).
Once ROSA is enabled and everything is validated, then we proceed to Red Hat to link our AWS account with our Red Hat account.
After successfully linking our accounts, we’re presented with this page where we can install the AWS and ROSA CLI and copy our OpenShift Cluster Manager token. This token can be generated in the Red Hat Hybrid Cloud Console. In this example, we use the ROSA CLI to validate that we have the appropriate permissions and quotas for our account.

We can copy the AWS CLI command and API token and use this to authenticate, we can skip step 2 on this page because we’ll use Terraform to the account wide roles and policies.
Log in to the ROSA CLI with your Red Hat account token:
Verify your credentials and quota:
The following are the minimum AWS permission required to run the Terraform examples.
AWS permissions:
Verify the permission using below command:
Terraform repository examples:

Clone the Terraform provider for Red Hat Cloud Services example repository:
Creating ROSA account wide roles
Next, we’ll need to create the AWS account-wide roles. These are specific account-wide AWS IAM roles and policies that provide the AWS STS permissions required for ROSA support, installation, control plane, and compute functionality. This also includes the necessary account-wide Operator policies.
To create the account roles using Terraform, we’ll use the account roles terraform example.
Let’s export some variables to be used by Terraform:
From the account-roles folder, run the following commands to create the required account roles:
Next, we’ll use the ROSA CLI to verify that the account roles were created:
Creating a ROSA cluster
Now we’re going to create the ROSA cluster with a managed OpenID Connect (OIDC) configuration. This example creates the OIDC provider for us and the ROSA cluster. Optionally, you can use the ROSA STS Terraform module to create the OIDC provider and account-wide SAWS IAM roles as a distinct step.
We’ll export the following variables:
A cluster can take upwards of 40 minutes to provision. While we wait, let’s check and see if our ROSA cluster has finished provisioning.
Now that our cluster is provisioned, let’s list out the available machine pools and we should only see the default one.
Creating a new machine pool
A machine pool allows us to group similar Amazon EC2 instances together to deploy our containerized workloads on. For example, if our workload required a Graphic Processing Unit (GPU), then we would create a machine pool using GPU instances. At creation, our ROSA cluster comes with a default machine pool. Now, we’ll add an additional new machine pool to our ROSA cluster, using the following Terraform example.
Export the below variables and deploy the machine pool with Terraform. We’ll name our new machine pool blog-rosa-mp, provision it with three replicas, and select the same Amazon EC2 instance type as the default machine pool (i.e., m5.xlarge).
Let’s check and verify that our new machine pool has provisioned by listing all of the machine pools in our cluster.
Cleaning up
To avoid incurring any additional costs, destroy all the infrastructure that you provisioned working through the example described in this post.
Conclusion
In this post, we showed you an example of how to build a ROSA cluster and then add a new machine pool to it using the new RHCS Provider for Terraform. Demonstrating how you can use the concept of IaC to deploy ROSA clusters and related resources inside of your AWS account using Terraform. If you’d like to learn more about ROSA and how you can use it as part of your container strategy, reach out to your AWS account team today.