Front-End Web & Mobile
Automatically create and delete custom sub-domains for your branch deployments with Amplify Console
This article was written by Nikhil Swaminathan, Sr. Product Manager Technical, AWS.
Amplify Console launched two new pattern-based branch deployment features that enable teams to automatically create and delete sub-domains every time a new branch or pull-request is added or removed from a Git repository. This allows teams practicing feature branch or GitFlow workflows to spin up ephemeral branch or pull-request deployments tied to their custom domain on the fly without any extra configuration.
In this blog we are going to walkthrough deploying a react app and enabling all the pattern-based branch deployment features.
Step 1: Deploy an app
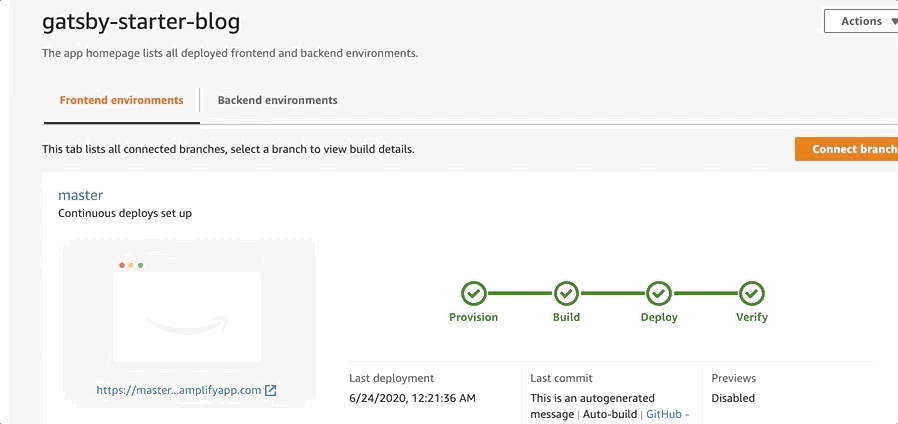
To start, let’s deploy an app to Amplify Console – for this tutorial, we will use the Gatsby starter blog, but you can use any project that is stored in a Git repository. Clicking on the link below will fork the repository in your GitHub account and then build, deploy, and host the Gatsby starter blog.
Once the build completes, you should be able to click on the image on the Amplify Console branch view to launch your Gatsby starter blog.
Step 2: Enable branch auto-detection
From the sidebar select App settings > General, and then choose Edit.

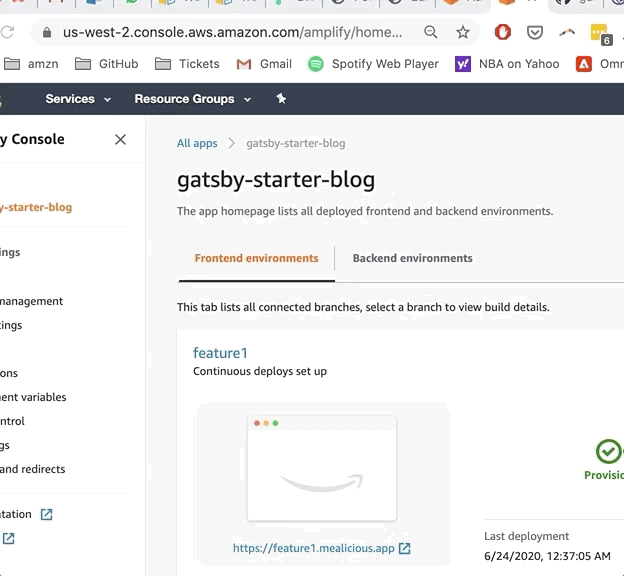
Enable auto-detection for all branches that match the pattern feature* – this means every time you create a branch in your Git repository that begins with feature, Amplify will automatically connect and deploy the branch.

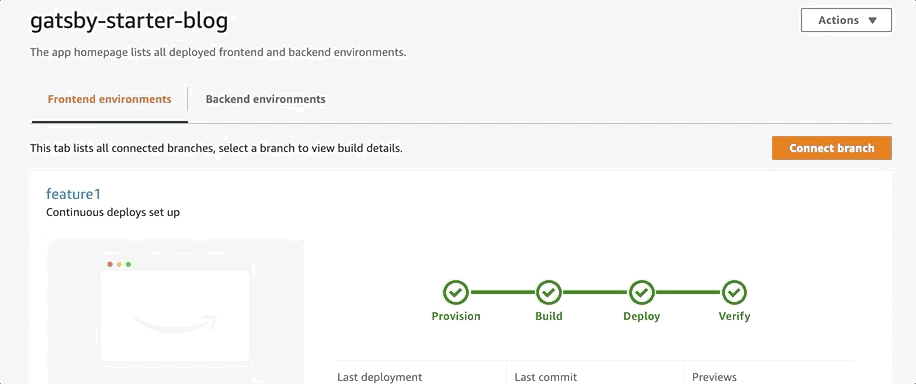
Let’s go ahead and test it out. In your Git repository, create a branch called feature1.

Back in the Amplify Console (refresh your page), a new branch deployment would have begun for your new feature branch. Once this completes, you will have two deployed branches accessible at https://feature1.appid.amplifyapp.com and https://master.appid.amplifyapp.com.

Step 3: Set up a custom domain
If you haven’t already, register a domain with Amazon Route 53, a DNS service provided by AWS. You can either register a domain you have set up with your own DNS provider, or purchase a domain directly on Route53. Purchasing a domain on Route53 simplifies the custom domain set up process with Amplify.
To connect a custom domain, go to the Amplify Console and navigate to App settings > Domain management, and then choose Add domain. The domain you purchased on Route 53 should appear in the dropdown list. Pick the domain, and choose Configure domain. This will show a list of subdomains to configure for the different branches. Modify the subdomains as shown in the screen below.

Choose Save. The Amplify Console will now issue an SSL certificate to secure traffic to your site, and create CNAME record pointing to the two branches. Wait for a few minutes while your SSL certificate is issued and the DNS settings are propagated to Available.

Go back to your branch list page and click on each URL. They should show feature1.yourdomain.com and master.yourdomain.com.
Step 4: Enable auto-subdomain creation
Now that your domain is set up, in the Domain management screen, choose Manage subdomains. Check the checkbox that says Subdomain auto-detection and leave the default options selected. The default options will ensure that all branches that are connected to Amplify Console will have automatic subdomains. Choose Update.

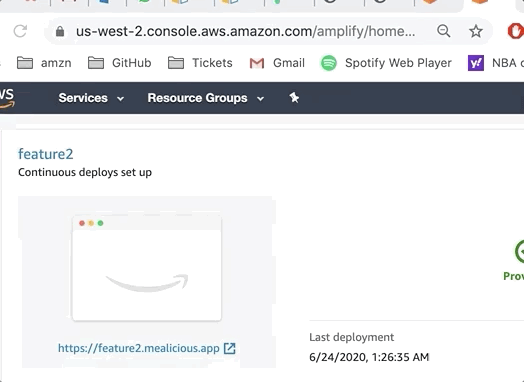
Let’s test this out by creating a feature2 branch on GitHub. Just like Step 2, you should see a deployed branch for feature2 in Amplify Console. The main difference this time round is that this branch will be accessible at https://feature2.yourdomain.com.
Step 5: Automatically delete deployed branches
Let’s say you are finished testing the new feature and no longer want the deployed branch. Go to your Git repository and delete branch named feature2. Navigate back to Amplify Console to observe that the feature2 branch is no longer available. Similarly under domain management you will no longer see https://feature2.mydomain.com.
That’s it! You can now deploy ephemeral branches to Amplify without visiting the Console to manually set up each connected branch. This feature works the exact same way for pull requests as well allowing developers to automatically have pull request subdomains (e.g. https://pr-1.mydomain.com)
To get started, connect your repository here.