Containers
Extending the EKS API: Managed Node Groups
By Raghav Tripathi, Michael Hausenblas, and Nathan Taber
From our first conversations with customers, our vision has always been that Amazon Elastic Kubernetes Service (EKS) should provide the best managed Kubernetes experience in the cloud. When we launched EKS, our first step was to provide a managed Kubernetes control plane, but we never intended to stop there. Today, we’re excited to show you part two of the Amazon EKS service, EKS managed node groups.
In this post, we will explain why we built EKS managed node groups, show you how to create and manage worker nodes for your clusters, and what’s next in our journey to make it even easier to run Kubernetes on the AWS cloud.
Overview
Managed node groups make it easy to add worker nodes (EC2 instances) that provide compute capacity for your clusters. You can create, update, scale, or terminate nodes for your cluster with a single command using the EKS console, eksctl, the AWS CLI, the AWS API, or infrastructure-as-code tools including CloudFormation and Terraform.
Each managed node group launches an ASG for your cluster, which can span multiple availability zones. EKS orchestrates rolling updates and node draining before terminations for nodes to ensure your applications are highly available.
All nodes run using the latest EKS-optimized AMIs in your AWS account, and there are no additional costs to use EKS managed node groups. You only pay for the AWS resources, such as EC2 instances or EBS volumes, which you provision.
Before we get into the nuts and bolts of how managed node groups work, let us step back a bit and see on a conceptual level how managed node groups changes the way you run your EKS clusters.
The extended EKS API
Managed node groups introduces some new concepts to the EKS API:

Before managed node groups, as shown on the left-hand side above, the EKS API provided a highly-available control plane across multiple availability zones (AZs), including logging and least privileges access (IAM) support on the pod level. Once your control plane was created, you would use eksctl, CloudFormation or other tools to create and manage the EC2 instances for your cluster. Now, we have extended the EKS API to natively manage the Kubernetes data plane, as depicted on the right. We’ve made node groups first class citizens in the EKS management console, which makes it easier to manage and visualize the infrastructure used to run your cluster in a single place.
Why is this an important step?
For us, this lays the groundwork to provide you with an end-to-end managed data plane, that is, we can take care of anything from security patches to Kubernetes version updates to monitoring and alerting. It’s one step closer to our vision of providing production-ready clusters, removing undifferentiated heavy lifting. Let’s take a closer look at what is new in the EKS API.
New API commands
First, let’s have a quick look at the new EKS node group API from the point of view of the AWS CLI. To keep things simple, we’re showing the command usage on a conceptual level, omitting additional parameters, such as --cluster-name, you would pass to a command when you are actually applying it.
In order to create a managed node group, you’d use:
$ aws eks create-nodegroupYou can only create a node group for your cluster that is equal to the current Kubernetes version for the cluster. All node groups are created with the latest AMI release version for the respective minor Kubernetes version of the cluster. At launch, managed worker nodes will only be available for newly created Kubernetes version 1.14 clusters (platform version 3). Additionally, there is a limit of 10 managed node groups per EKS cluster, each with a maximum of 100 nodes per node group. This means you can have a maximum of 1000 managed nodes running on a given EKS cluster.
To see the managed node groups running on a cluster you can use:
$ aws eks list-nodegroupsFor more details about a specific managed node group you can use:
$ aws eks describe-nodegroupTo edit the configuration of a node group, such as scaling parameters, you can use:
$ aws eks update-nodegroup-configWhile node groups are lightweight and generally immutable you can change three parameters:
- Add and remove Kubernetes labels. Any labels you change directly through the Kubernetes API or via
kubectlwill, for now, not be reflected in the EKS API and won’t be sticky in new nodes launched for this node group. - Add or remove AWS tags. The tags apply to the node group object within the EKS API and can be used to control IAM access. Note that at launch, these tags do not propagate down to the EC2 resources created by the node group.
- Change the size of your node groups (min., max., desired number of nodes).
Removing a managed node group is done via:
$ aws eks delete-nodegroupThe draining of the worker nodes is automatically handled when deleting a node group or updating its version, as well as for ASG rebalancing/scale in. This is a big improvement from running nodes yourself, where you need to have daemonset deployments or Lambda functions to orchestrate graceful node termination. During version updates, EKS will respect pod disruption budgets, which helps you explicitly control the node lifecycle to keep your critical pods alive until they can be safely rescheduled.
Note, however, that you have to delete node groups attached to an cluster before you can delete the cluster itself, see also the managed node groups docs.
EKS console walkthrough
One of the cool new features of managed node groups is the updated EKS console. Let’s take a look.
To get started, we’ll need to create a new EKS cluster. The first screen of creating the cluster with the general cluster configuration, VPC/security groups selection, logging settings, etc. is unchanged and hence skipped here. However, after your cluster is created you will need to create a Node IAM Role as per the EKS documentation.
Once the EKS cluster is active, that is, the control plane is up and running, you will see the cluster overview screen, note the new Node Groups list below the general configuration of the cluster:
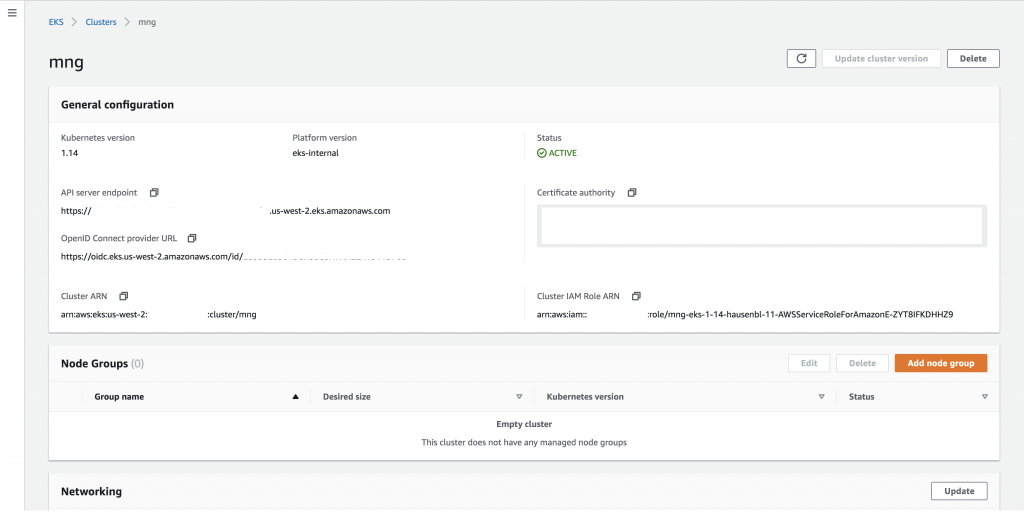
Let’s now create a node group with the default values by clicking the “Add node group” button:

In this first step you provide the name of the node group, ng0 in our case, specify the role to use for the node group, that is, the IAM role you created earlier on and select the subnets for the node group.
The next step is setting the compute configuration for the nodes:
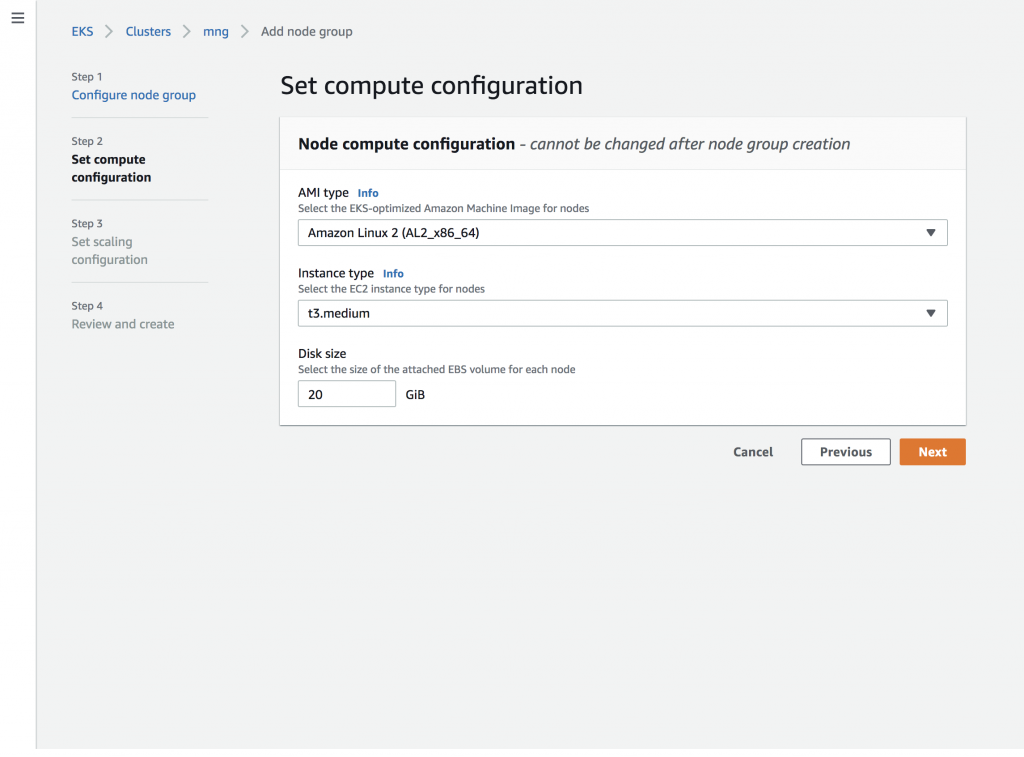
When specifying the compute configuration as shown above, you can select the AMI (with or without GPU support), the instance type, as well as the disk size of the attached EBS for every node in the node group.
Next, choose the scaling behavior:
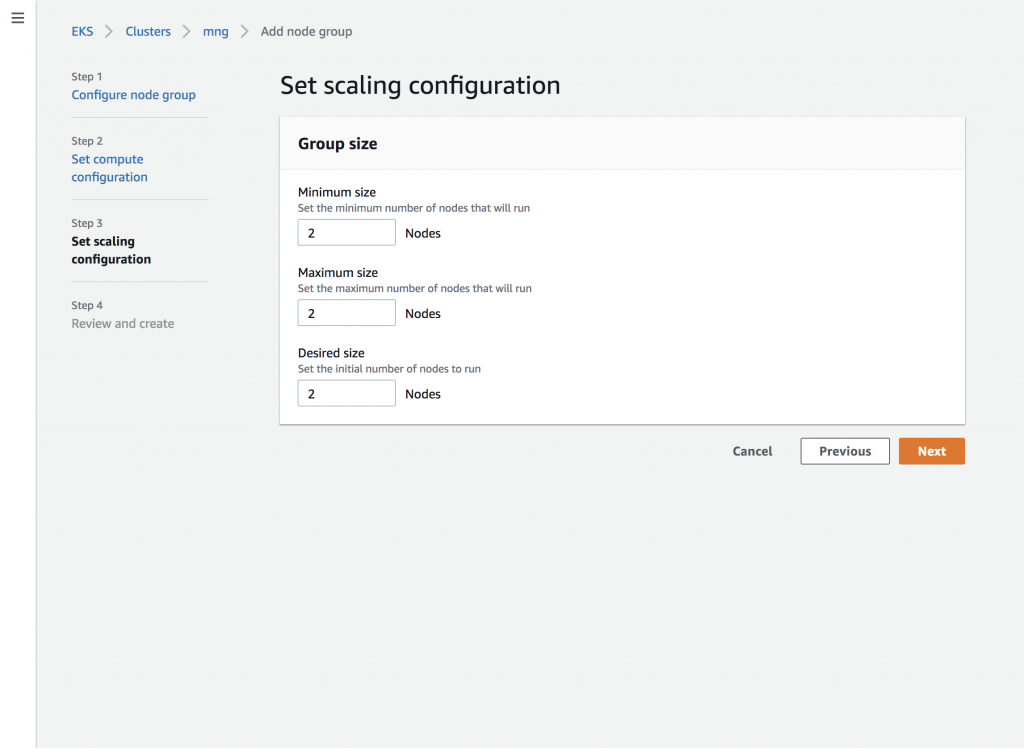
Outside of the scaling configuration, tags, and labels, the node group cannot be changed once it is created. Before you hit the button, you get a chance to review the node group and change any settings:

After a minute or so the EC2 instances are provisioned and join your cluster as worker nodes, so you would see this in the cluster overview screen:

Let’s check if we in fact see the nodes in Kubernetes as well:
$ kubectl get nodes
NAME                                           STATUS   ROLES    AGE     VERSION
ip-192-168-128-14.us-west-2.compute.internal   Ready    <none>   6m10s   v1.14.7-eks-1861c5
ip-192-168-192-6.us-west-2.compute.internal    Ready    <none>   6m3s    v1.14.7-eks-1861c5
Indeed, we have the two worker nodes, part of the node group ng0 , available now and ready for us to deploy our pods.
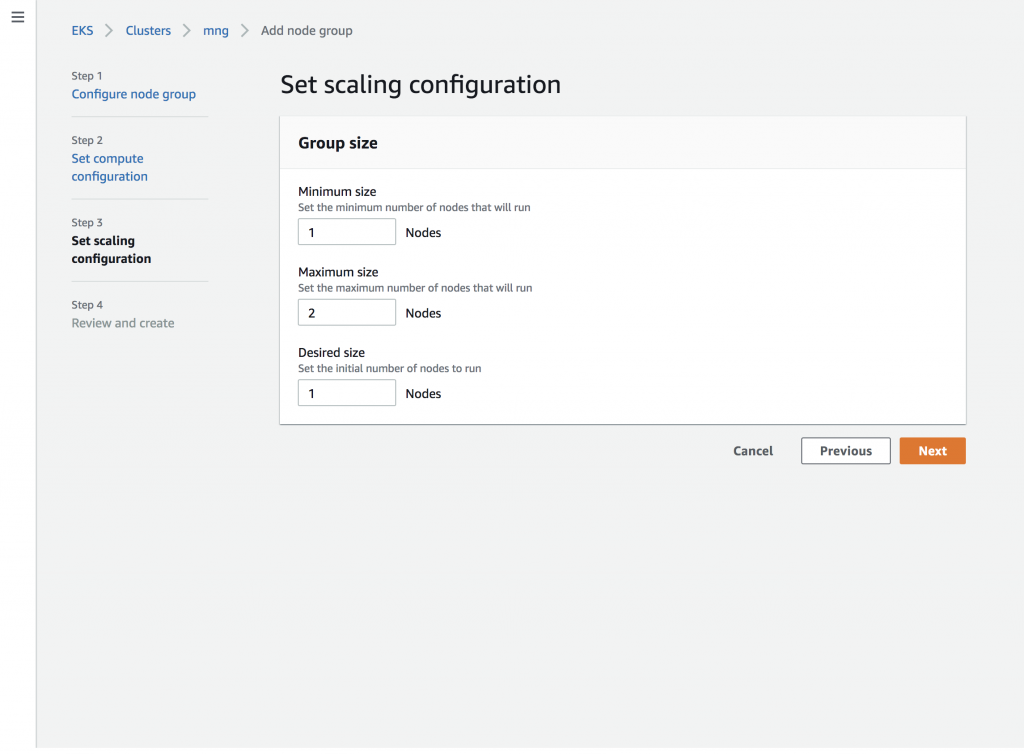
Let’s now add another node group called ng1 where we assign Kubernetes labels to the nodes and apply a different scaling config:

Note at the bottom of above screen shot, where we assign the label nodegroup=managed to nodes in the node group ng1.
And now the scaling config with an initial (and minimum) size of one node:
Again, after a few minutes we see the new node group ng1, in addition to the initial one ng0, in the overview, ready for workloads:

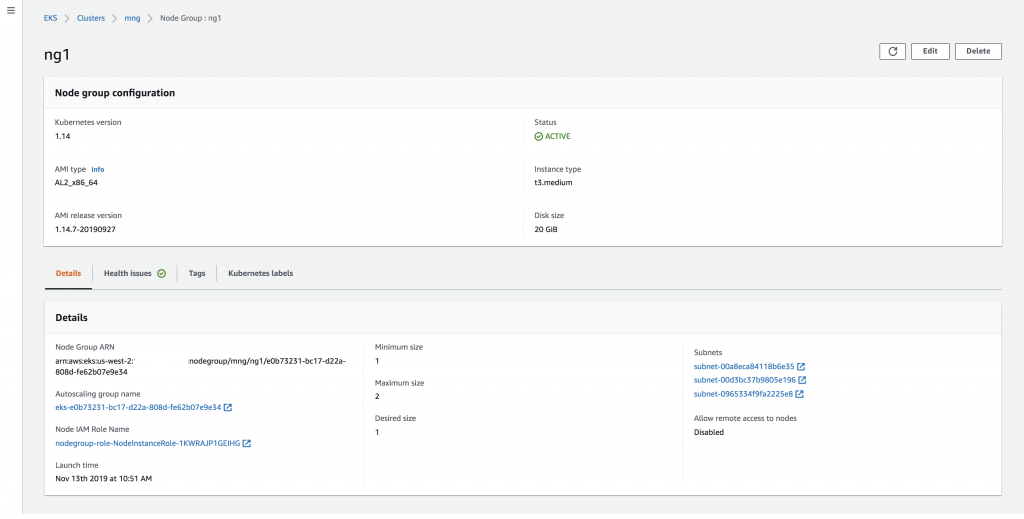
If you want, you can view details of a node group, shown here for ng1, and change its Kubernetes labels:
Last but not least, let’s view all the worker nodes we created, first and then filter by label (which shows the one node in the ng1 where we applied a label):
$ kubectl get nodes
NAME                                           STATUS   ROLES    AGE     VERSION
ip-192-168-128-14.us-west-2.compute.internal   Ready    <none>   7m50s   v1.14.7-eks-1861c5
ip-192-168-128-8.us-west-2.compute.internal    Ready    <none>   66s     v1.14.7-eks-1861c5
ip-192-168-192-6.us-west-2.compute.internal    Ready    <none>   7m43s   v1.14.7-eks-1861c5

$ kubectl get nodes -l=nodegroup=managed
NAME                                          STATUS   ROLES    AGE    VERSION
ip-192-168-128-8.us-west-2.compute.internal   Ready    <none>   116s   v1.14.7-eks-1861c5
At this point, you can add further node groups, change labelling and scale configuration of node groups or delete existing ones. I’m really excited about this new console experience for EKS and we plan to continue improving the EKS console over the next year.
Now that we’ve seen managed node groups in action, let’s turn our attention to a number of other relevant topics in relation to the extended API and its features.
Other important things
The EKS API and eksctl
Earlier this year we announced eksctl as the official CLI tool for EKS and we’re working closely with Weaveworks and the wider OSS community to ensure the eksctl UX is consistent across the available data plane options, that is, self-managed nodes and now managed node groups.
With the 0.10.1 release of eksctl you can as of today also benefit from the new node group API and manage your EKS clusters in a declarative manner, from the command line. At launch time of managed node groups, the default behavior of eksctl is unchanged to what you already have experienced. In order to use managed node groups you have to specify the --managed parameter like so:
$ eksctl create cluster --managed=true

$ eksctl create nodegroup --managed=true
In this context, it’s important to remember that eksctl is a CLI, thus while it provides useful functionality, if you’re not running it, you can’t use it. Managed nodes is a hosted system, so we’re constantly monitoring nodes and can take action at any time to respond to things like AZ rebalancing.
At launch of the managed worker nodes EKS API the feature coverages compared to eksctl looks as follows:
| Feature | EKS API | eksctl |
| Availability zone selection | x | x |
| Scaling configurations | x | x |
| Configuring volume sizes | x | x |
| SSH access support | x | x |
| Private networking configuration | x | x |
| Support for Amazon Linux 2 AMIs | x | x |
| Support for Ubuntu | x | |
| Support for Windows | x | |
| Fine-grained customization (kubelet, volumes) | x |
We’re working on getting the missing features in above table natively supported by the EKS API, so stay tuned!
Updating node version
You can update a managed node group to the latest EKS-optimized AMI release version for the AMI type you are using at any time. Note, this is a separate API call from updating the node group configuration.
If your node group is the same Kubernetes version as the control plane, you can update to the latest AMI release version for that Kubernetes version of the AMI type you are using.
If your node group is running an older Kubernetes version than the cluster, you can update the node group to the latest AMI release version that matches the node group’s Kubernetes version, or update to the latest AMI release version that matches the control plane’s Kubernetes version.
Note that version updates do require node restarts, though EKS will attempt to drain nodes first and any pod disruption budgets that you set are respected by default.
Node groups cannot be more than one Kubernetes version behind the cluster. This means that all of your node groups must be running the same version of Kubernetes as the cluster before you update the cluster to a new Kubernetes version. You cannot roll back a node group to an earlier Kubernetes version.
Health and observability
We automatically check the configuration of your node group and report any issues through the EKS API and console. This includes information about required resources being deleted, unreachable, or unavailable (such as “Ec2LaunchTemplateNotFound” and “InsufficientFreeAddresses”), issues we encounter during updates (for example “PodEvictionFailure” and “PodDeletionFailure”), limits (such as. “InstanceLimitExceeded”), as well as creation and deletion failures (such as “NodeCreationFailure”). In the EKS console, you’ll notice that any node groups with reported health issues will be flagged as DEGRADED and you can see more details in the Health Issues tab of the node group detail.
The familiar EKS logging capabilities are available for the control plane, and for the data plane logs and metrics you have a range of options, depending on the use case: from direct node-level SSH access to open source log routers to CloudWatch Container Insights. Note that any such agents you install are, as of time of launch, not managed by AWS.
In addition, a number of node group-level events, such as create, update and delete is recorded in AWS CloudTrail. Note that while we perform a drain on node termination and node group deletion, the respective events are, for now, not available through CloudTrial.
Next steps
Today’s launch of the managed node groups is a big leap forward for making it easier than ever to run a production-ready, highly-available Kubernetes cluster on AWS, but its only the first step for us to provide a fully managed data plane as part of EKS. We will continue to add new functionality and enhance the coverage of node groups, based on your feedback, including but not limited to support for additional AMI types (including Windows and custom AMIs), support for EC2 launch configurations, and automatic updates. Let us know what your priorities are and share if something doesn’t work the way you expect as feedback here on this post or via an issue on our AWS Containers Roadmap on GitHub.

Raghav Tripathi
Raghav is a Sr. Software Development Engineer in the container service team, working on Amazon EKS.

Nathan Taber
Nathan is a Sr. Product Manager for Amazon EKS. When he’s not writing and creating, he loves to sail, adventure, and roam with his Goldendoodle, Emma.