AWS News Blog
Resource Level IAM for Elastic Beanstalk
Today’s guest post comes to you from Saad Ladki, Product Manager for AWS Elastic Beanstalk.
— Jeff;
We are excited to announce that AWS Elastic Beanstalk now supports resource permissions through AWS Identity and Access Management (IAM). AWS Elastic Beanstalk provides a quick way to deploy and manage applications in the AWS cloud. IAM enables you to manage permissions for multiple users within your AWS account.
In this blog post, we will walk you through an example of how you can leverage resource permissions for Elastic Beanstalk. Lets assume that a consulting firm is developing multiple applications for different customers and that Jack is one of the developers working on an Elastic Beanstalk application App1. Jill tests the changes for App1 and for a second application App2. John is the manager overseeing the two applications and owns the AWS resources. John helps out with development and testing, and only he can update their production environments for App1 and App2. The following matrix describes the different levels of access needed for Jack, Jill, and John:
| Jack | Jill | John | ||
| Operation | ||||
| App1 | View application, application versions, environments and configuration |  |
|
|
| Create application versions and deploy them to the staging environment | |
|
||
| Update the production environment | |
|||
| Create and terminate environments | |
|||
| App2 | View application, application versions, environments and configuration | |
|
|
| Create application versions and deploy them to the staging environment | |
|||
| Update the production environment | |
|||
| Create and terminate environments | |
To create the IAM users and assign policies, do the following:
- Log into the IAM tab of the AWS Management Console.
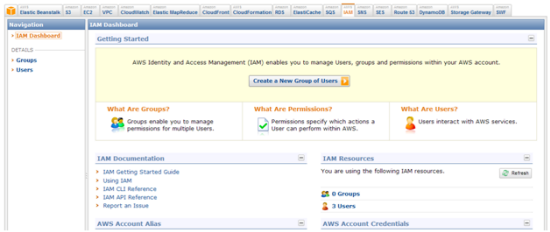
- In the Navigation pane, click Users.
- Click Create new Users. You can also create groups of users if you have multiple users with the same permissions.
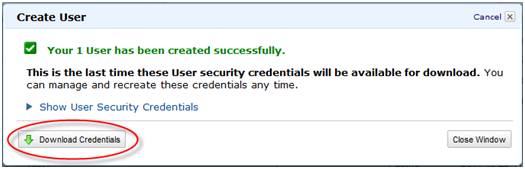
- In the Create User page, type the name of the user(s) and click Create.
- In the Create User confirmation page, click Download Credentials to store the credentials for each user.
- In the user list, select the user John, and then click the Permissions tab.
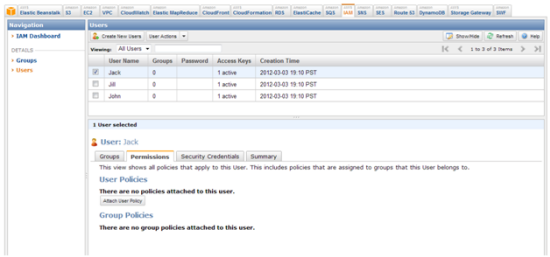
- In the Permissions tab, click Attach User Policy.
- Click Custom Policy, and then click Select.
- In the Manage User Permissions page, type a name for each policy and then copy/paste the policies below. Notice that Jack has permissions to perform all Describe operations on application App1, and he can update only the app1-staging environment. This prevents him from being able to deploy to the production environment, app1-prod.
Jack has three associated policies. Replace with your AWS account ID.
- Follow steps 7 through 10 to assign policies to John and Jill using policies modeled after the following:
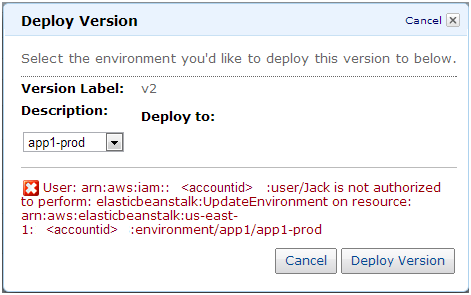
If Jack attempts to deploy an application version to the app1-prod environment, he will receive the following error:
To learn more about AWS Elastic Beanstalk or to get started setting up resource permissions for AWS Elastic Beanstalk, go to the Creating Policies to Control Access to Specific AWS Elastic Beanstalk Resources in the AWS Elastic Beanstalk Developer Guide.
— Saad