AWS Compute Blog
Enabling Identity Federation with AD FS 3.0 and Amazon AppStream 2.0
Want to provide users with single sign-on access to AppStream 2.0 using existing enterprise credentials? Active Directory Federation Services (AD FS) 3.0 can be used to provide single sign-on for Amazon AppStream 2.0 using SAML 2.0.
You can use your existing Active Directory or any SAML 2.0–compliant identity service to set up single sign-on access of AppStream 2.0 applications for your users. Identity federation using SAML 2.0 is currently available in all AppStream 2.0 regions.
This post explains how to configure federated identities for AppStream 2.0 using AD FS 3.0.
Walkthrough
After setting up SAML 2.0 federation for AppStream 2.0, users can browse to a specially crafted (AD FS RelayState) URL and be taken directly to their AppStream 2.0 applications.
When users sign in with this URL, they are authenticated against Active Directory. After they are authenticated, the browser receives a SAML assertion as an authentication response from AD FS, which is then posted by the browser to the AWS sign-in SAML endpoint. Temporary security credentials are issued after the assertion and the embedded attributes are validated. The temporary credentials are then used to create the sign-in URL. The user is redirected to the AppStream 2.0 streaming session. The following diagram shows the process.

- The user browses to https://applications.exampleco.com. The sign-on page requests authentication for the user.
- The federation service requests authentication from the organization’s identity store.
- The identity store authenticates the user and returns the authentication response to the federation service.
- On successful authentication, the federation service posts the SAML assertion to the user’s browser.
- The user’s browser posts the SAML assertion to the AWS Sign-In SAML endpoint (https://signin.aws.amazon.com/saml). AWS Sign-In receives the SAML request, processes the request, authenticates the user, and forwards the authentication token to the AppStream 2.0 service.
- Using the authentication token from AWS, AppStream 2.0 authorizes the user and presents applications to the browser.
In this post, use domain.local as the name of the Active Directory domain. Here are the steps in this walkthrough:
- Configure AppStream 2.0 identity federation.
- Configure the relying trust.
- Create claim rules.
- Enable RelayState and forms authentication.
- Create the AppStream 2.0 RelayState URL and access the stack.
- Test the configuration.
Prerequisites
This walkthrough assumes that you have the following prerequisites:
- An existing Active Directory forest
- An instance joined to a domain with the “Active Directory Federation Services” role installed and post-deployment configuration completed
- Familiarity with AppStream 2.0 resources
Configure AppStream 2.0 identity federation
First, create an AppStream 2.0 stack, as you reference the stack in upcoming steps. Name the stack ExampleStack. For this walkthrough, it doesn’t matter which underlying fleet you associate with the stack. You can create a fleet using one of the example Amazon-AppStream2-Sample-Image images available, or associate an existing fleet to the stack.
Get the AD FS metadata file
The first thing you need is the metadata file from your AD FS server. The metadata file is a signed document that is used later in this guide to establish the relying party trust. Don’t edit or reformat this file.
To download and save this file, navigate to the following location, replacing <FQDN_ADFS_SERVER> with your AD FS s fully qualified server name.
https://<FQDN_ADFS_SERVER>/FederationMetadata/2007-06/FederationMetadata.xml
Save the file to a local location that you can access from the AWS Management Console later.
Create the SAML provider
Next, create the SAML provider in IAM, using the console. You could also create it using the AWS CLI.
In the IAM console, choose Identity providers, Create provider.
On the Configure Provider page, for Provider Type, choose SAML. For Provider Name, type ADFS01 or similar name. Choose Choose File to upload the metadata document previously downloaded. Choose Next Step.
Verify the provider information and choose Create.
You need the Amazon Resource Name (ARN) of the identity provider (IdP) to configure claims rules later in this walkthrough. To get this, select the IdP that you just created. On the summary page, copy the value for Provider ARN. The ARN is in the following format:
arn:aws:iam::<AccountID>:saml-provider/<Provider Name>
Configure an IAM Policy
Next, configure a policy with permissions to the AppStream 2.0 stack. This is the level of permissions that federated users have within AWS.
In the IAM console, choose Policies, Create Policy, Create Your Own Policy.
For Policy Name, enter a descriptive name. For Description, enter the level of permissions. For Policy Document, you customize the Region-Code, AccountID (without hyphens), and case-sensitive Stack-Name values.
The following screenshot shows how to create a policy that gives users permissions to only a single AppStream 2.0 stack, named ExampleStack. For more information, see the Step 2: Configure Permissions in AWS for Your Federated Users topic.

For Region Codes, use one of the following values based on the region you are using AppStream 2.0 (the available regions for AppStream 2.0):
- us-east-1
- us-west-2
- eu-west-1
- ap-northeast-1
Choose Create Policy and you should see the following notification:

Create an IAM role
Here, you create a role that relates to an Active Directory group assigned to your AppStream 2.0 federated users. For this configuration, Active Directory groups and AWS roles are case-sensitive. Here you create an IAM Role named "ExampleStack" and an Active Directory group named in the format AWS-AccountNumber-RoleName, for example AWS-012345678910-ExampleStack.
In the IAM console, choose Roles, Create new role.
On the Select Role type page, choose Role for identity provider access. Choose Select next to Grant Web Single Sign-On (WebSSO) access to SAML providers.

On the Establish Trust page, make sure that the SAML provider that you just created (such as ADFS01) is selected. For Attribute and Value, keep the default values.
On the Verify Role Trust page, the Federated value matches the ARN noted previously for the principal IdP created earlier. The SAML: aud value equals https://signin.aws.amazon.com/saml, as shown below. This is prepopulated and does not require any change. Choose Next Step.

On the Attach policy page, attach the policy that you created earlier granting federated users access only to the AppStream 2.0 stack. In this walkthrough, the policy was named AppStream2_ExampleStack.
After selecting the correct policy, choose Next Step.
On the Set role name and review page, name the role ExampleStack. You can customize this naming convention, as I explain later when I create the claims rules.
You can describe the role as desired. Ensure that the trusted entities match the AD FS IdP ARN, and that the policy attached is the policy created earlier granting access only to this stack.
Choose Create Role.
Important: If you grant more than the stack permissions to federated users, you can give them access to other areas of the console as well. AWS strongly recommends that you attach policies to a role that grants access only to the resources to be shared with federated users.
For example, if you attach the AdministratorAccess policy instead of AppStream2_ExampleStack, any AppStream 2.0 federated user in the ExampleStack Active Directory group has AdministratorAccess in your AWS account. Even though AD FS routes users to the stack, users can still navigate to other areas of the console, using deep links that go directly to specific console locations.
Next, create the Active Directory group in the format AWS-AccountNumber-RoleName using the "ExampleStack" role name that you just created. You reference this Active Directory group in the AD FS claim rules later using regex. For Group scope, choose Global. For Group type, choose Security
Note: To follow this walkthrough exactly, name your Active Directory group in the format "AWS-AccountNumber-ExampleStack" replacing AccountNumber with your AWS AccountID (without hyphens). For example:
AWS-012345678910-ExampleStack
Configure the relying party trust
In this section, you configure AD FS 3.0 to communicate with the configurations made in AWS.
Open the AD FS console on your AD FS 3.0 server.

Open the context (right-click) menu for AD FS and choose Add Relying Party Trust…
On the Welcome page, choose Start. On the Select Data Source page, keep Import data about the relying party published online or on a local network checked. For Federation metadata address (host name or URL), type the following link to the SAML metadata to describe AWS as a relying party and then choose Next.
https://signin.aws.amazon.com/static/saml-metadata.xml
On the Specify Display Name page, for Display name, type "AppStream 2.0 – ExampleStack" or similar value. For Notes, provide a description. Choose Next.
On the Configure Multi-factor Authentication Now? page, choose I do not want to configure multi-factor authentication settings for this relying party trust at this time. Choose Next.
Because you are controlling access to the stack using an Active Directory group, and IAM role with an attached policy, on the Choose Issuance Authorization Rules page, check Permit all users to access this relying party. Choose Next.
On the Ready to Add Trust page, there shouldn't be any changes needed to be made. Choose Next.
On the Finish page, clear Open the edit Claim Rules dialog for this relying party trust when the wizard closes. You open this later.
Next, you add the https://signin.aws.amazon.com/saml URL is listed on the Identifiers tab within the properties of the trust. To do this, open the context (right-click) menu for the relying party trust that you just created and choose Properties.
On the Monitoring tab and clear Monitor relying party. Choose Apply. On the Identifiers tab, for Relying party identifier, add https://signin.aws.amazon.com/saml and choose OK.

Create claim rules
In this section, you create four AD FS claim rules, which identify accounts, set LDAP attributes, get the Active Directory groups, and match them to the role created earlier.
In the AD FS console, expand Trust Relationships, choose Relying Party Trusts, and then select the relying party trust that you just created (in this case, the display name is AppStream 2.0 - ExampleStack). Open the context (right-click) menu for the relying party trust and choose Edit Claim Rules. Choose Add Rule.
Rule 1: Name ID
This claim rule tells AD FS the type of expected incoming claim and how to send the claim to AWS. AD FS receives the UPN and tags it as the Name ID when it's forwarded to AWS. This rule interacts with the third rule, which fetches the user groups.
Claim rule template: Transform an Incoming Claim
Configure Claim Rule values:
Claim Rule Name: Name ID
Incoming Claim Type: UPN
Outgoing Claim Type: Name ID
Outgoing name ID format: Persistent Identifier
Pass through all claim values: selected
Rule 2: RoleSessionName
This rule sets a unique identifier for the user. In this case, use the E-Mail-Addresses values.
Claim rule template: Send LDAP Attributes as Claims
Configure Claim Rule values:
Claim rule name: RoleSessionName
Attribute store: Active Directory
LDAP Attribute: E-Mail-Addresses
Outgoing Claim Type: https://aws.amazon.com/SAML/Attributes/RoleSessionName
Rule 3: Get Active Directory groups
This rule queries Active Directory and returns the groups to which the user is assigned, such as AWS-012345678910-ExampleStack .
Claim rule template: Send Claims Using a Custom Rule
Configure Claim Rule values:
Claim Rule Name: Get Active Directory Groups
Custom Rule:
c:[Type == "http://schemas.microsoft.com/ws/2008/06/identity/claims/windowsaccountname", Issuer == "AD AUTHORITY"] => add(store = "Active Directory", types = ("http://temp/variable"), query = ";tokenGroups;{0}", param = c.Value);
Rule 4: Roles
This rule converts the value of the Active Directory group starting with AWS-AccountNumber prefix to the roles known by AWS. For this rule, you need the AWS IdP ARN that you noted earlier. If your IdP in AWS was named ADFS01 and the AccountID was 012345678910, the ARN would look like the following:
arn:aws:iam::012345678910:saml-provider/ADFS01
Claim rule template: Send Claims Using a Custom Rule
Configure Claim Rule values:
Claim Rule Name: Roles
Custom Rule:
c:[Type == "http://temp/variable", Value =~ "(?i)^AWS-"]

 => issue(Type = "https://aws.amazon.com/SAML/Attributes/Role", Value = RegExReplace(c.Value, "AWS-012345678910-", "arn:aws:iam::012345678910:saml-provider/ADFS01,arn:aws:iam::012345678910:role/"));
- Change arn:aws:iam::012345678910:saml-provider/ADFS01 to the ARN of your AWS IdP
- Change 012345678910 to the ID (without hyphens) of the AWS account.
In this walkthrough, "AWS-" returns the Active Directory groups that start with the AWS- prefix, then removes AWS-012345678910- leaving ExampleStack left on the Active Directory Group name to match the ExampleStack IAM role. To customize the role naming convention, for example to name the IAM Role ADFS-ExampleStack, add "ADFS-" to the end of the role ARN at the end of the rule: arn:aws:iam::012345678910:role/ADFS-.
You should now have four claims rules created:
- NameID
- RoleSessionName
- Get Active Directory Groups
- Role
Enable RelayState and forms authentication
By default, AD FS 3.0 doesn't have RelayState enabled. AppStream 2.0 uses RelayState to direct users to your AppStream 2.0 stack.
On your AD FS server, open the following with elevated (administrator) permissions:
%systemroot%\adfs\Microsoft.IdentityServer.Servicehost.exe.config
In the Microsoft.IdentityServer.Servicehost.exe.config file, find the section <microsoft.identityServer.web>. Within this section, add the following line:
<useRelayStateForIdpInitiatedSignOn enabled="true" />
The edit should look like the following:

In the AD FS console, verify that forms authentication is enabled. Choose Authentication Policies. Under Primary Authentication, for Global Settings, choose Edit.

For Extranet, choose Forms Authentication. For Intranet, do the same and choose OK.

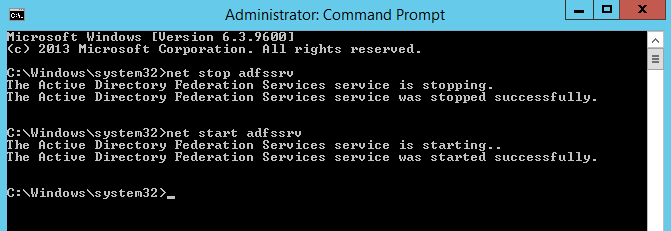
On the AD FS server, from an elevated (administrator) command prompt, run the following commands sequentially to stop, then start the AD FS service to register the changes:
net stop adfssrv
net start adfssrv
Create the AppStream 2.0 RelayState URL and access the stack
Now that RelayState is enabled, you can generate the URL.
There are third-party tools for RelayState URL generation. However, they do require some customization to work with AppStream 2.0. Example customization steps for one such tool are provided below.
CodePlex has an AD FS RelayState generator, which downloads an HTML file locally that you can use to create the RelayState URL. The generator says it's for AD FS 2.0; however, it also works for AD FS 3.0. You can generate the RelayState URL manually but if the syntax or case sensitivity is incorrect even slightly, it won't work. I recommend using the tool to ensure a valid URL.
When you open the URL generator, clear out the default text fields. You see a tool that looks like the following:

To generate the values, you need three pieces of information:
- IDP URL String
- Relying Party Identifier
- Relay State / Target App
IDP URL String
The IDP URL string is the URL you use to hit your AD FS sign-on page. For example:
https://<ADFSInstance>/adfs/ls/idpinitiatedsignon.aspx
In this configuration, use the following:
https://adfs01.domain.local/adfs/ls/idpinitiatedsignon.aspx
Relying Party Identifier
This value is always the following:
https://signin.aws.amazon.com/saml
Relay State / Target App
This is the RelayState link to your AppStream 2.0 stack. The format for this URL is as follows:
Ultimately, the URL looks like the following example, which is for us-east-1, with a stack name of ExampleStack, and an account ID of 012345678910. The stack name is case-sensitive.
https://appstream2.us-east-1.aws.amazon.com/saml?stack=ExampleStack&accountId=012345678910
For more information, see Step 5: Configure the Relay State of Your Federation.
Input these values into the URL generator, and generate a RelayState URL.
Generated URL (case sensitive):'
The generated RelayState URL can now be saved and used by users to log in directly from anywhere that can reach the AD FS server, using their existing domain credentials. After they are authenticated, users are directed seamlessly to the AppStream 2.0 stack.
Test the configuration
Create a new AD user in Domain.local named Test User, with a username TUser and an email address. An email address is required based on the claim rules.
Next, add TUser to the AD group you created for the AWS-012345678910-ExampleStack stack.

Next, navigate to the RelayState URL and log in with domain\TUser.
After you log in, you are directed to the streaming session for the ExampleStack stack. As an administrator, you can disassociate and associate different fleets of applications to this stack, without impacting federation, and deliver different applications to this group of federated users.
Because the policy attached to the role only allows access to this AppStream 2.0 stack, if a federated user were to try to access another section of the console, such as Amazon EC2, they would discover that they are not authorized to see (describe) any resources or perform any actions, as shown in the screenshot below. This is why it's important to grant access only to the AppStream 2.0 stack.

Configurations for AD FS 4.0
If you are using AD FS 4.0, there are a few differences from the procedures discussed earlier.
Do not customize the following file as described in the Enable RelayState and forms authentication of the AD FS 3.0 guide:
%systemroot%\adfs\Microsoft.IdentityServer.Servicehost.exe.config
Enable the IdP-initiated sign-on page that is used when generating the RelayState URL. To do this, open an elevated PowerShell terminal and run the following command:
Set-AdfsProperties -EnableIdPInitiatedSignonPage $true
This enables the following URL referenced earlier:
https://<ADFSInstance>/adfs/ls/idpinitiatedsignon.aspx
Next, enable Relay States. To do this, run the following command from an elevated PowerShell terminal:
Set-AdfsProperties -EnableRelayStateForIdpInitiatedSignOn $true
To register these changes with AD FS, restart the AD FS service from an elevated PowerShell terminal (or command prompt):
net stop adfssrv
net start adfssrv
After these changes are made, AD FS 4.0 should now work for AppStream 2.0 identity federation.
Troubleshooting
If you are still encountering errors with your setup, below are common error messages you may see, and configuration areas that I recommend that you check.
Invalid policy
This error message can occur when the IAM policy does not permit access to the AppStream 2.0 stack. However, it can also occur when the stack name is not entered into the policy or RelayState URL using case-sensitive characters. For example, if your stack name is "ExampleStack" in AppStream 2.0 and the policy has "examplestack" or if the Relay State URL has "examplestack" or any capitalization pattern other than the exact stack name, you see this error message.
Invalid relay state
Error: Bad Request.(Error Code: INVALID_RELAY_STATE);Status Code:400
This URL must contain the region-specific Relay State endpoint exactly as listed in the Step 5: Configure the Relay State of Your Federation topic.
Cross account access
If you see this error message, check to make sure that the AccountId number is correct in the Relay State URL.
Summary
In this post, you walked through enabling AD FS 3.0 for AppStream 2.0 identity federation. You should now be able to configure AD FS 3.0 or 4.0 for AppStream 2.0 identity federation. If you have questions or suggestions, please comment below.