AWS Compute Blog
Introducing attribute-based access controls (ABAC) for Amazon SQS
This post is written by Vikas Panghal (Principal Product Manager), and Hardik Vasa (Senior Solutions Architect).
Amazon Simple Queue Service (SQS) is a fully managed message queuing service that makes it easier to decouple and scale microservices, distributed systems, and serverless applications. SQS queues enable asynchronous communication between different application components and ensure that each of these components can keep functioning independently without losing data.
Today we’re announcing support for attribute-based access control (ABAC) using queue tags with the SQS service. As an AWS customer, if you use multiple SQS queues to achieve better application decoupling, it is often challenging to manage access to individual queues. In such cases, using tags can enable you to classify these resources in different ways, such as by owner, category, or environment.
This blog post demonstrates how to use tags to allow conditional access to SQS queues. You can use attribute-based access control (ABAC) policies to grant access rights to users through policies that combine attributes together. ABAC can be helpful in rapidly growing environments, where policy management for each individual resource can become cumbersome.
ABAC for SQS is supported in all Regions where SQS is currently available.
Overview
SQS supports tagging of queues. Each tag is a label comprising a customer-defined key and an optional value that can make it easier to manage, search for, and filter resources. Tags allows you to assign metadata to your SQS resources. This can help you track and manage the costs associated with your queues, provide enhanced security in your AWS Identity and Access Management (IAM) policies, and lets you easily filter through thousands of queues.

The preceding image shows SQS queue in AWS Management Console with two tags – ‘auto-delete’ with value of ‘no’ and ‘environment’ with value of ‘prod’.
Attribute-based access controls (ABAC) is an authorization strategy that defines permissions based on tags attached to users and AWS resources. With ABAC, you can use tags to configure IAM access permissions and policies for your queues. ABAC hence enables you to scale your permissions management easily. You can author a single permissions policy in IAM using tags that you create per business role, and you no longer need to update the policy while adding each new resource.
You can also attach tags to AWS Identity and Access Management (IAM) principals to create an ABAC policy. These ABAC policies can be designed to allow SQS operations when the tag on the IAM user or role making the call matches the SQS queue tag.
ABAC provides granular and flexible access control based on attributes and values, reduces security risk because of misconfigured role-based policy, and easily centralizes auditing and access policy management.
ABAC enables two key use cases:
- Tag-based Access Control: You can use tags to control access to your SQS queues, including control plane and data plane API calls.
- Tag-on-Create: You can enforce tags during the creation of SQS queues and deny the creation of SQS resources without tags.
Tagging for access control
Let’s take a look at a couple of examples on using tags for access control.
Let’s say that you would want to restrict IAM user to all SQS actions for all queues that include a resource tag with the key environment and the value production. The following IAM policy helps to fulfill the requirement.
{
    "Version": "2012-10-17",
    "Statement": [
        {
            "Sid": "DenyAccessForProd",
            "Effect": "Deny",
            "Action": "sqs:*",
            "Resource": "*",
            "Condition": {
                "StringEquals": {
                    "aws:ResourceTag/environment": "prod"
                }
            }
        }
    ]
}
Now, for instance you need to restrict IAM policy for any operation on resources with a given tag with key environment and value production as an argument within the API call, the following IAM policy helps fulfill the requirements.
{
    "Version": "2012-10-17",
    "Statement": [
        {
            "Sid": "DenyAccessForStageProduction",
            "Effect": "Deny",
            "Action": "sqs:*",
            "Resource": "*",
            "Condition": {
                "StringEquals": {
                    "aws:RequestTag/environment": "production"
                }
            }
        }
    ]
}
Creating IAM user and SQS queue using AWS Management Console
Configuration of the ABAC on SQS resources is a two-step process. The first step is to tag your SQS resources with tags. You can use the AWS API, the AWS CLI, or the AWS Management Console to tag your resources. Once you have tagged the resources, create an IAM policy that allows or denies access to SQS resources based on their tags.
This post reviews the step-by-step process of creating ABAC policies for controlling access to SQS queues.
Create an IAM user
- Navigate to the AWS IAM console and choose User from the left navigation pane.
- Choose Add Users and provide a name in the User name text box.
- Check the Access key – Programmatic access box and choose Next:Permissions.
- Choose Next:Tags.
- Add tag key as environment and tag value as beta
- Select Next:Review and then choose Create user
- Copy the access key ID and secret access key and store in a secure location.
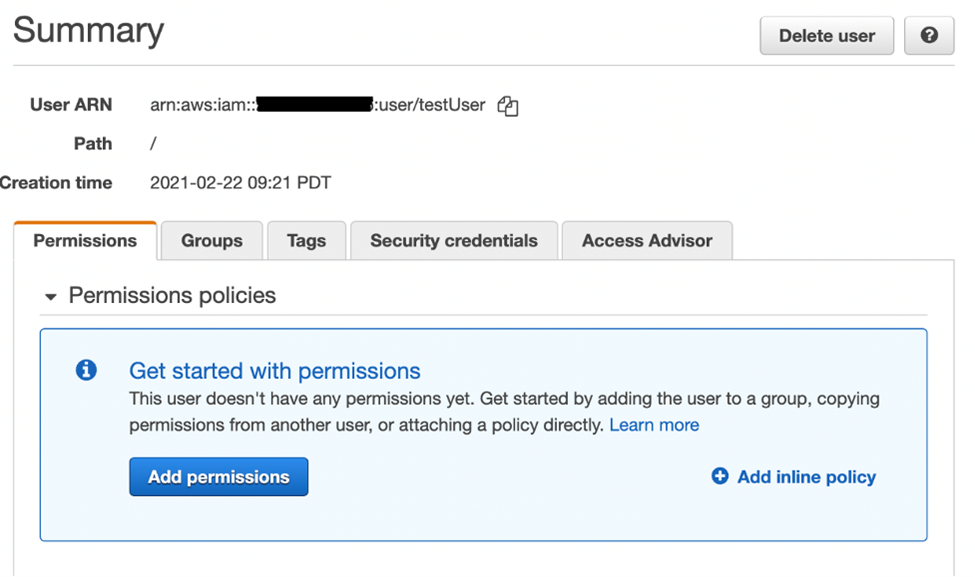
Add IAM user permissions
- Select the IAM user you created.
- Choose Add inline policy.
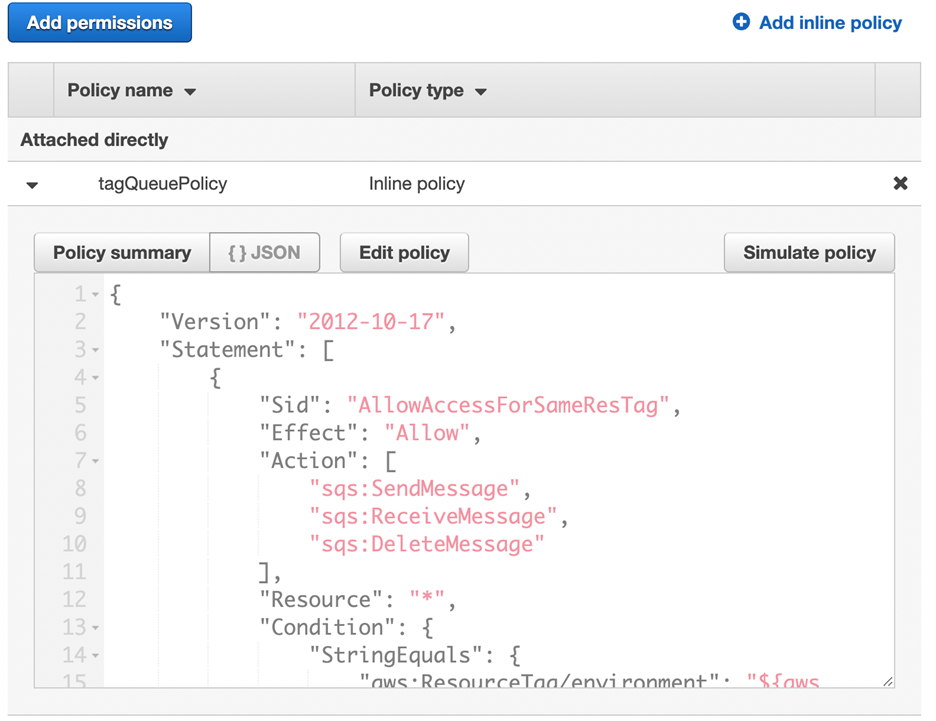
- In the JSON tab, paste the following policy:
{ "Version": "2012-10-17", "Statement": [ { "Sid": "AllowAccessForSameResTag", "Effect": "Allow", "Action": [ "sqs:SendMessage", "sqs:ReceiveMessage", "sqs:DeleteMessage" ], "Resource": "*", "Condition": { "StringEquals": { "aws:ResourceTag/environment": "${aws:PrincipalTag/environment}" } } }, { "Sid": "AllowAccessForSameReqTag", "Effect": "Allow", "Action": [ "sqs:CreateQueue", "sqs:DeleteQueue", "sqs:SetQueueAttributes", "sqs:tagqueue" ], "Resource": "*", "Condition": { "StringEquals": { "aws:RequestTag/environment": "${aws:PrincipalTag/environment}" } } }, { "Sid": "DenyAccessForProd", "Effect": "Deny", "Action": "sqs:*", "Resource": "*", "Condition": { "StringEquals": { "aws:ResourceTag/stage": "prod" } } } ] } - Choose Review policy.
- Choose Create policy.
The preceding permissions policy ensures that the IAM user can call SQS APIs only if the value of the request tag within the API call matches the value of the environment tag on the IAM principal. It also makes sure that the resource tag applied to the SQS queue matches the IAM tag applied on the user.
Creating IAM user and SQS queue using AWS CloudFormation
Here is the sample CloudFormation template to create an IAM user with an inline policy attached and an SQS queue.
AWSTemplateFormatVersion: "2010-09-09"
Description: "CloudFormation template to create IAM user with custom in-line policy"
Resources:
    IAMPolicy:
        Type: "AWS::IAM::Policy"
        Properties:
            PolicyDocument: |
                {
                    "Version": "2012-10-17",
                    "Statement": [
                        {
                            "Sid": "AllowAccessForSameResTag",
                            "Effect": "Allow",
                            "Action": [
                                "sqs:SendMessage",
                                "sqs:ReceiveMessage",
                                "sqs:DeleteMessage"
                            ],
                            "Resource": "*",
                            "Condition": {
                                "StringEquals": {
                                    "aws:ResourceTag/environment": "${aws:PrincipalTag/environment}"
                                }
                            }
                        },
                        {
                            "Sid": "AllowAccessForSameReqTag",
                            "Effect": "Allow",
                            "Action": [
                                "sqs:CreateQueue",
                                "sqs:DeleteQueue",
                                "sqs:SetQueueAttributes",
                                "sqs:tagqueue"
                            ],
                            "Resource": "*",
                            "Condition": {
                                "StringEquals": {
                                    "aws:RequestTag/environment": "${aws:PrincipalTag/environment}"
                                }
                            }
                        },
                        {
                            "Sid": "DenyAccessForProd",
                            "Effect": "Deny",
                            "Action": "sqs:*",
                            "Resource": "*",
                            "Condition": {
                                "StringEquals": {
                                    "aws:ResourceTag/stage": "prod"
                                }
                            }
                        }
                    ]
                }

            Users:
              - "testUser"
            PolicyName: tagQueuePolicy

    IAMUser:
        Type: "AWS::IAM::User"
        Properties:
            Path: "/"
            UserName: "testUser"
            Tags:
              -
                Key: "environment"
                Value: "beta"
Testing tag-based access control
Create queue with tag key as environment and tag value as prod
We will use AWS CLI to demonstrate the permission model. If you do not have AWS CLI, you can download and configure it for your machine.
Run this AWS CLI command to create the queue:
aws sqs create-queue --queue-name prodQueue —region us-east-1 —tags "environment=prod"You receive an AccessDenied error from the SQS endpoint:
An error occurred (AccessDenied) when calling the CreateQueue operation: Access to the resource <queueUrl> is denied.
This is because the tag value on the IAM user does not match the tag passed in the CreateQueue API call. Remember that we applied a tag to the IAM user with key as ‘environment’ and value as ‘beta’.
Create queue with tag key as environment and tag value as beta
aws sqs create-queue --queue-name betaQueue —region us-east-1 —tags "environment=beta"You see a response similar to the following, which shows the successful creation of the queue.
{
"QueueUrl": "<queueUrl>“
}
Sending message to the queue
aws sqs send-message --queue-url <queueUrl> —message-body testMessageYou will get a successful response from the SQS endpoint. The response will include MD5OfMessageBody and MessageId of the message.
{
"MD5OfMessageBody": "<MD5OfMessageBody>",
"MessageId": "<MessageId>"
}
The response shows successful message delivery to the SQS queue since the IAM user permission allows sending message with queue with tag ‘beta’.
Benefits of attribute-based access controls
The following are benefits of using attribute-based access controls (ABAC) in Amazon SQS:
- ABAC for SQS requires fewer permissions policies – You do not have to create different policies for different job functions. You can use the resource and request tags that apply to more than one queue. This reduces the operational overhead.
- Using ABAC, teams can scale quickly – Permissions for new resources are automatically granted based on tags when resources are appropriately tagged upon creation.
- Use permissions on the IAM principal to restrict resource access – You can create tags for the IAM principal and restrict access to specific action only if it matches the tag on the IAM principal. This helps automate granting of request permissions.
- Track who is accessing resources – Easily determine the identity of a session by looking at the user attributes in AWS CloudTrail to track user activity in AWS.
Conclusion
In this post, we have seen how Attribute-based access control (ABAC) policies allow you to grant access rights to users through IAM policies based on tags defined on the SQS queues.
ABAC for SQS supports all SQS API actions. Managing the access permissions via tags can save you engineering time creating complex access permissions as your applications and resources grow. With the flexibility of using multiple resource tags in the security policies, the data and compliance teams can now easily set more granular access permissions based on resource attributes.
For additional details on pricing, see Amazon SQS pricing. For additional details on programmatic access to the SQS data protection, see Actions in the Amazon SQS API Reference. For more information on SQS security, see the SQS security public documentation page. To get started with the attribute-based access control for SQS, navigate to the SQS console.
For more serverless learning resources, visit Serverless Land.