AWS Compute Blog
Set Up a Continuous Delivery Pipeline for Containers Using AWS CodePipeline and Amazon ECS
This post contributed by Abby Fuller, AWS Senior Technical Evangelist
Last week, AWS announced support for Amazon Elastic Container Service (ECS) targets (including AWS Fargate) in AWS CodePipeline. This support makes it easier to create a continuous delivery pipeline for container-based applications and microservices.
Building and deploying containerized services manually is slow and prone to errors. Continuous delivery with automated build and test mechanisms helps detect errors early, saves time, and reduces failures, making this a popular model for application deployments. Previously, to automate your container workflows with ECS, you had to build your own solution using AWS CloudFormation. Now, you can integrate CodePipeline and CodeBuild with ECS to automate your workflows in just a few steps.
A typical continuous delivery workflow with CodePipeline, CodeBuild, and ECS might look something like the following:
- Choosing your source
- Building your project
- Deploying your code
We also have a continuous deployment reference architecture on GitHub for this workflow.
Getting Started
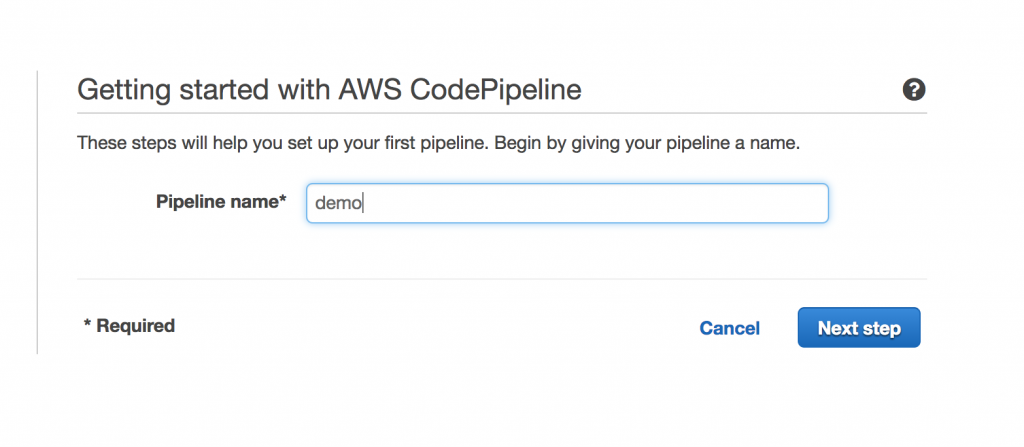
First, create a new project with CodePipeline and give the project a name, such as “demo”.
Next, choose a source location where the code is stored. This could be AWS CodeCommit, GitHub, or Amazon S3. For this example, enter GitHub and then give CodePipeline access to the repository.

Next, add a build step. You can import an existing build, such as a Jenkins server URL or CodeBuild project, or create a new step with CodeBuild. If you don’t have an existing build project in CodeBuild, create one from within CodePipeline:
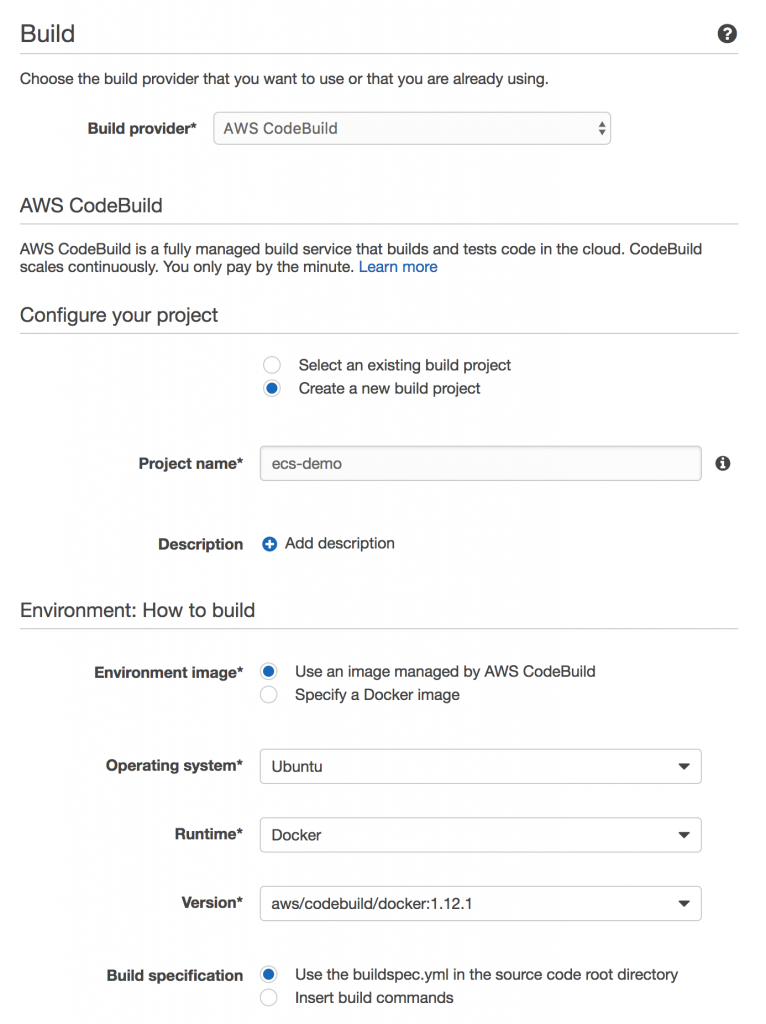
- Build provider: AWS CodeBuild
- Configure your project: Create a new build project
- Environment image: Use an image managed by AWS CodeBuild
- Operating system: Ubuntu
- Runtime: Docker
- Version: aws/codebuild/docker:1.12.1
- Build specification: Use the buildspec.yml in the source code root directory
Now that you’ve created the CodeBuild step, you can use it as an existing project in CodePipeline.

Next, add a deployment provider. This is where your built code is placed. It can be a number of different options, such as AWS CodeDeploy, AWS Elastic Beanstalk, AWS CloudFormation, or Amazon ECS. For this example, connect to Amazon ECS.
For CodeBuild to deploy to ECS, you must create an image definition JSON file. This requires adding some instructions to the pre-build, build, and post-build phases of the CodeBuild build process in your buildspec.yml file. For help with creating the image definition file, see Step 1 of the Tutorial: Continuous Deployment with AWS CodePipeline.

- Deployment provider: Amazon ECS
- Cluster name: enter your project name from the build step
- Service name: web
- Image filename: enter your image definition filename (“web.json”).
You are almost done!
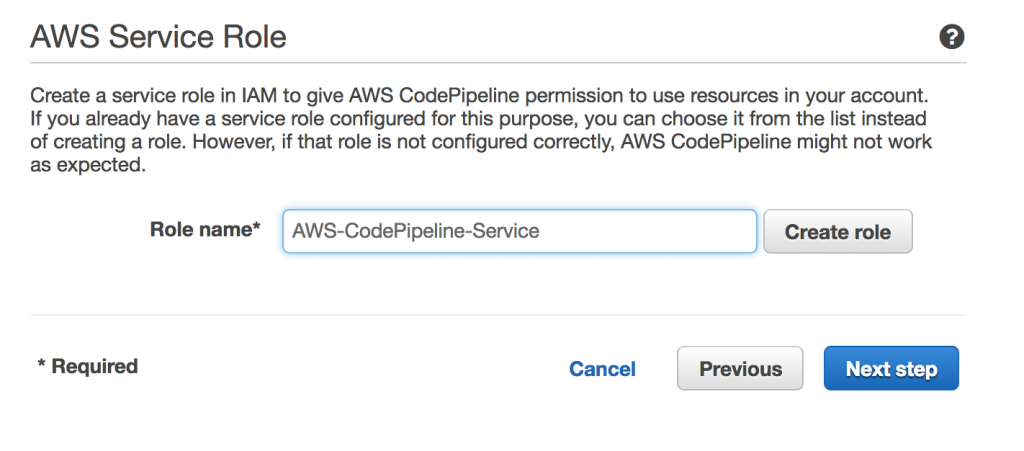
You can now choose an existing IAM service role that CodePipeline can use to access resources in your account, or let CodePipeline create one. For this example, use the wizard, and go with the role that it creates (AWS-CodePipeline-Service).
Finally, review all of your changes, and choose Create pipeline.
After the pipeline is created, you’ll have a model of your entire pipeline where you can view your executions, add different tests, add manual approvals, or release a change.

You can learn more in the AWS CodePipeline User Guide.
Happy automating!