The Internet of Things on AWS – Official Blog
AWS IoT SiteWise adds support for 10 new industrial protocols with Domatica EasyEdge integration
Introduction
Today, we announced the general availability of extended industrial protocol support for AWS IoT SiteWise – a managed service that makes it easy to collect, store, organize and monitor data from industrial equipment at scale to help you make data-driven decisions. AWS IoT SiteWise Edge, a feature of AWS IoT SiteWise, extends the cloud capabilities to collect, organize, process, and monitor equipment data on-premises. Through a new integration with AWS Partner Domatica, customers now have the ability ingest data from 10 additional industrial protocols including Modbus (TCP & RTU), Ethernet/IP, Siemens S7, KNX, LoRaWAN, MQTT, Profinet, Profibus, BACnet and Restfull (REST API) interfaces, in addition to native OPC UA support. Previously, ingesting data from these protocols required acquiring, provisioning, and configuring infrastructure and middleware for data collection and translation resulting in additional cost and time to value.
In this blog post, we will walk through the installation and configuration of AWS IoT SiteWise Edge gateway software with Domatica EasyEdge data collector to ingest equipment data from a Siemens S7 PLC into AWS IoT SiteWise. Refer to Domatica documentation on how to connect additional data sources.
Solution overview
Through the AWS Console, users can simply add AWS Partner Domatica’s EasyEdge software as a data source on their existing AWS IoT SiteWise Edge gateway. AWS IoT SiteWise Edge provides on-premises software to extend the cloud capabilities in AWS IoT SiteWise to the industrial edge. Users then configure the protocols, desired data flows, and data conditioning in the partner application. After configurations are deployed, the equipment data flows seamlessly to AWS IoT SiteWise Edge for local monitoring, storage, and access at the edge. The data flow It is also sent to AWS IoT SiteWise for integration with other industrial data and usage in other AWS Cloud services.
Once the data is ingested into AWS SiteWise, you can visualize the collected data with IoT SiteWise Monitor, a feature of AWS IoT SiteWise; it provides portals in the form of managed web applications where you can create dashboards. You can also leverage Amazon Managed Grafana to visualize and monitor data in dashboards by using the AWS IoT SiteWise data source; or store your data in hot and cold storage tiers of AWS IoT SiteWise: a hot tier optimized for real-time applications and frequently accessed data with lower write-to-read latency, and a cold tier optimized for analytical applications with less-frequently accessed data and historical data, such as business intelligence (BI) dashboards, artificial intelligence (AI) and machine learning (ML) training, historical reports, and backups. For more information on AWS IoT SiteWise, you can visit the AWS IoT SiteWise user guide.
These sections summarize how to create a SiteWise Edge gateway and include detailed instructions for steps that are specific to adding EasyEdge data source and connect to a Siemens S7 PLC. For this demonstration, we are using a virtual Siemens S7 PLC from this open source GitHub repo.
There are four key steps to consider when building this solution:
- Create AWS IoT SiteWise Edge Gateway
- Add data source for EasyEdge
- Connect EasyEdge to a Siemens S7 PLC
- Verify data flow into AWS IoT SiteWise
Prerequisites
- At a minimum, AWS IoT SiteWise Edge requires an industrial computer running Linux with a x86 64 bit quad-core processor, 16GB RAM, and 256GB in disk space. The gateway device must allow inbound traffic on port 443 and it must allow outbound traffic on ports 443 and 8883.
- A Siemens S7 PLC
- EasyEdge Studio account.
Solution Architecture

Walkthrough
1. Create AWS IoT SiteWise Gateway
In the AWS Management Console, create and install the SiteWise Edge gateway with a Linux machine, following these instructions. During this process, skip the data source as it will be configured after the gateway is connected.
2. Configure EasyEdge Data source
In this step, we will add EasyEdge as a data source in the SiteWise Edge gateway.
Before adding the EasyEdge data source, confirm that the SiteWise Edge gateway is connected by navigating to the AWS console (Services→AWS IoT SiteWise→Edge→Gateways) → select your gateway).
The Gateway configuration section of the Overview tab should now say “Connected.”
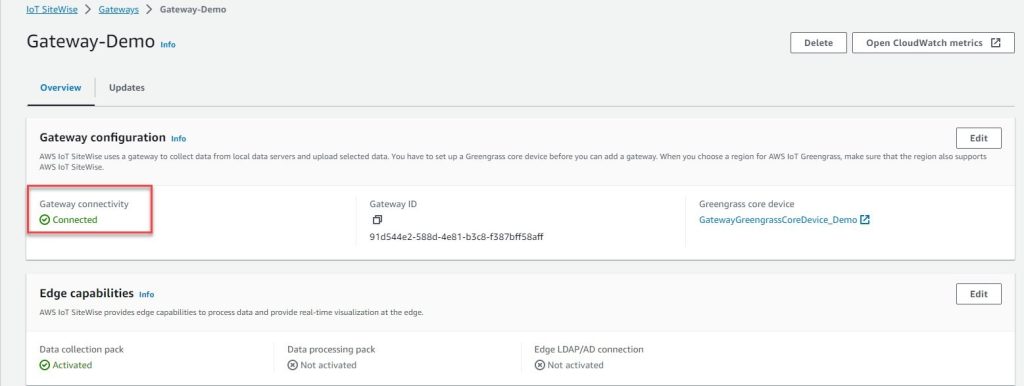
Figure 1: SiteWise Gateway
Click on the SiteWise Edge gateway you created and choose Add data source:
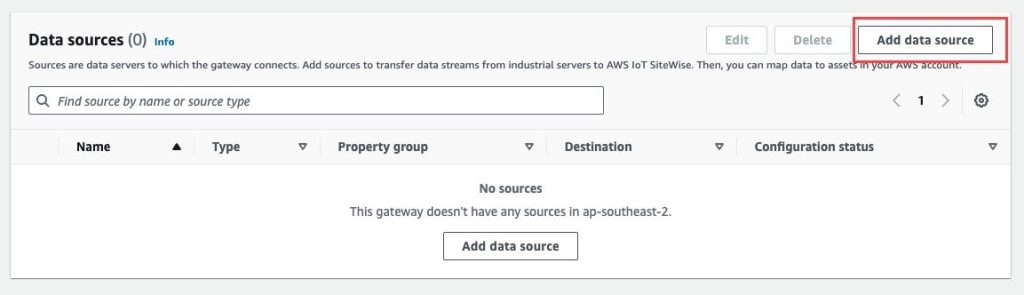
Figure 2: SiteWise data source
Select “EasyEdge” from the “Source Type“ drop-down list, provide a name for the data source, and select ”Authorize“ and ”Update components“. Note: EasyEdge requires that Docker is installed on the Edge Gateway, and that you create an account with EasyEdge.
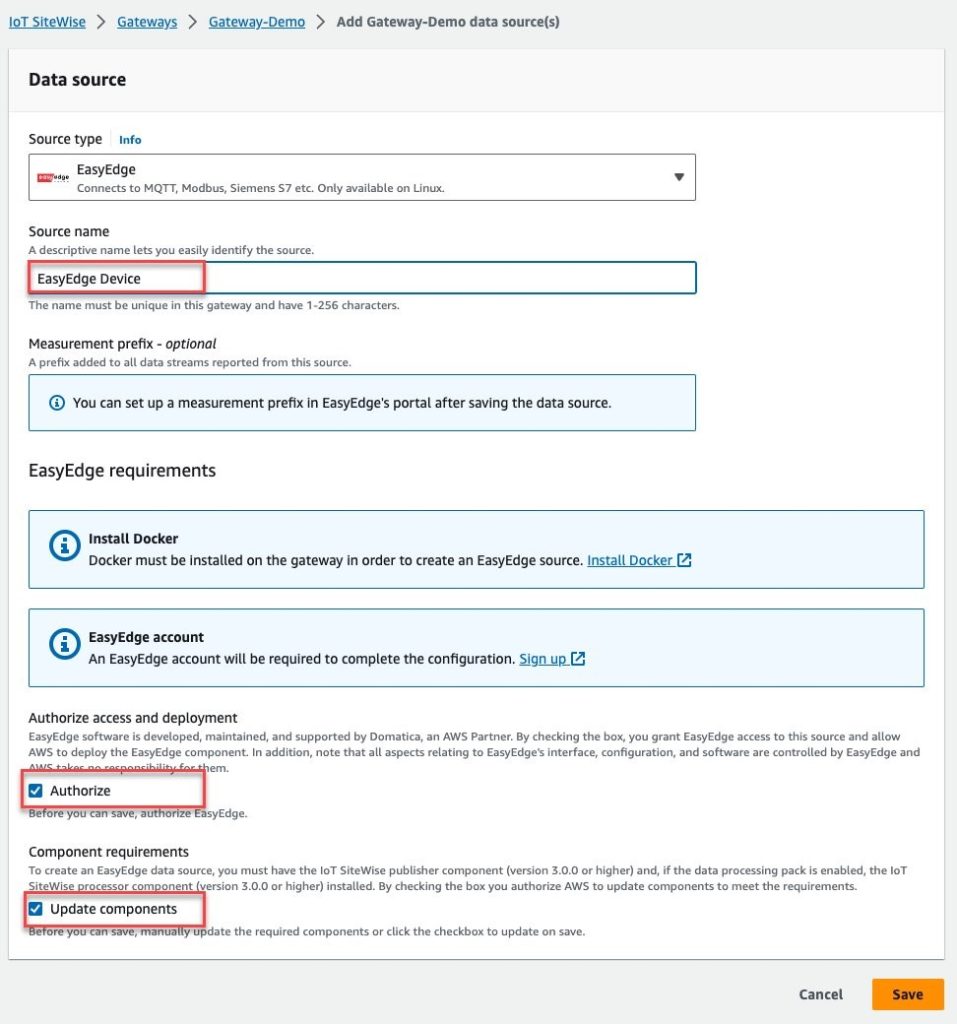
Figure 3: EasyEdge Data Source
After clicking “Save” you will be redirected to the EasyEdge Studio site. Proceed to Configure your EdgeNode and click Next on the following screen:
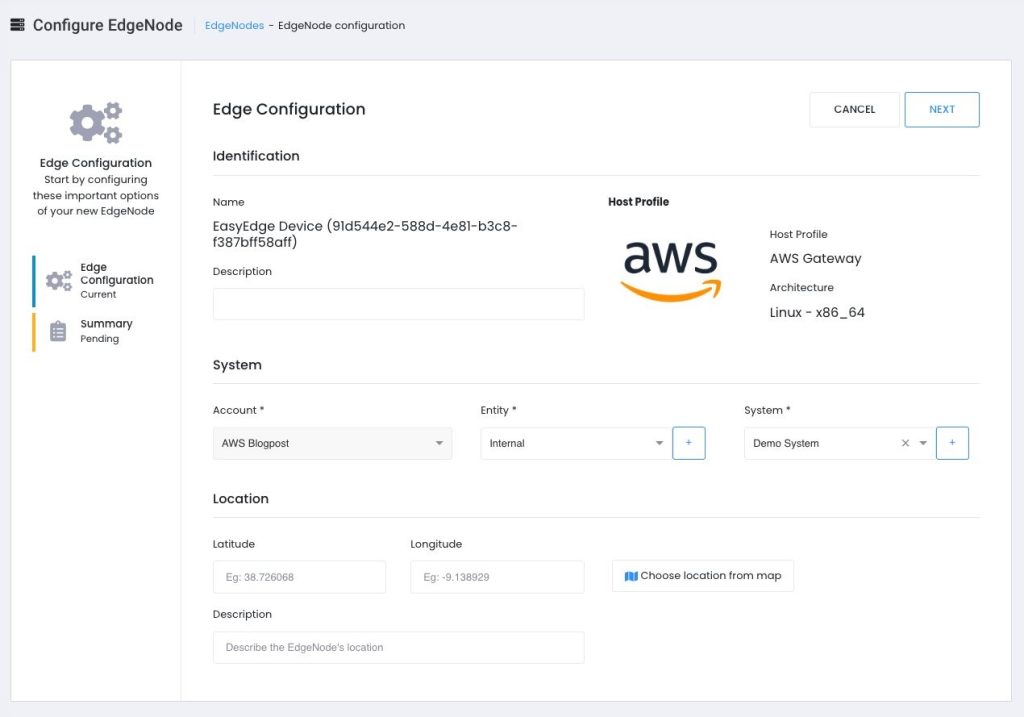
Figure 4: Edge Node Configuration
Review the settings and click “Finish” to complete creating the EdgeNode:
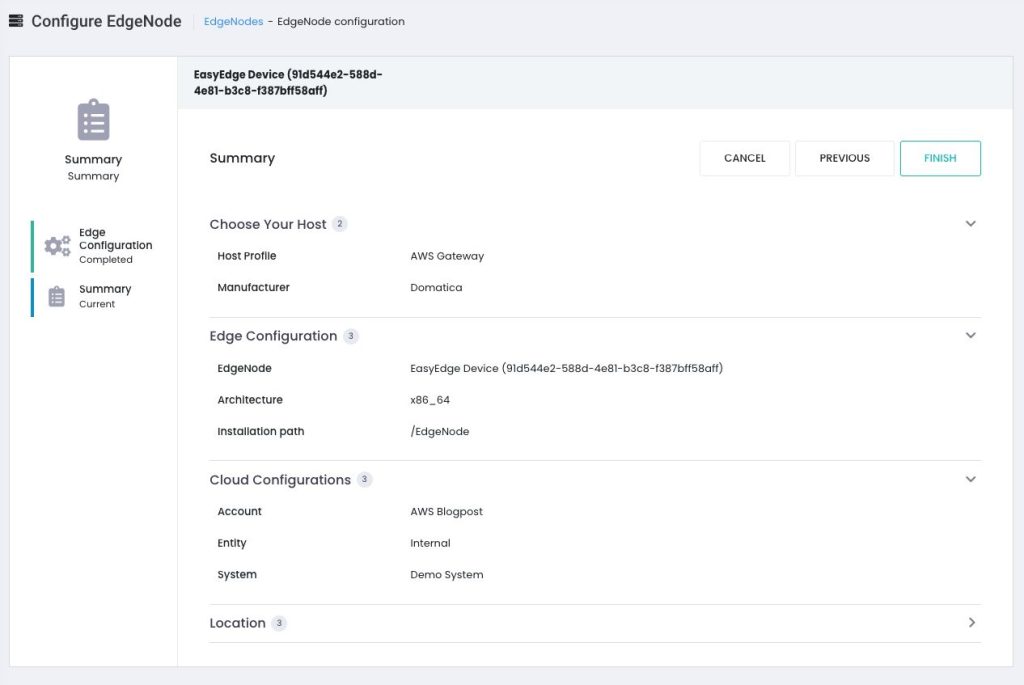
Figure 5: EasyEdge Data Source Summary
The EdgeNode status will be updated to “Online” which confirms a successful connectivity between the SiteWise Edge gateway and EasyEdge.
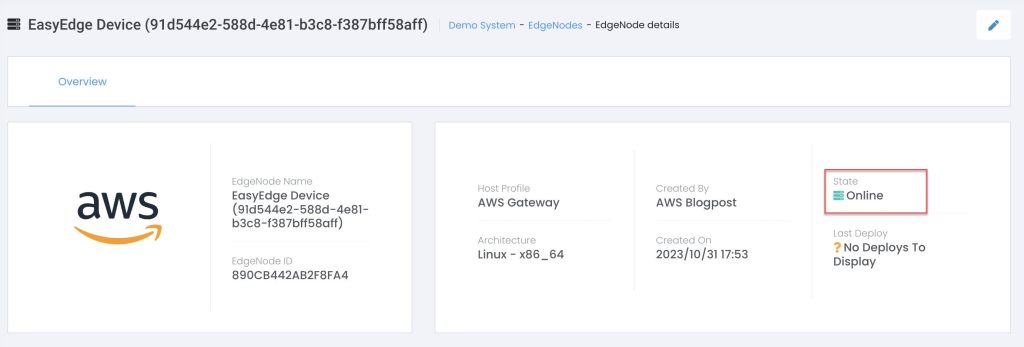
Figure 6: EasyEdge Online
Confirm that the SiteWise Edge deployment was successful: on the AWS Console, navigate to IoT Greengrass → Greengrass Devices → Deployments and confirm that the deployment status is “Completed”:

Figure 7: AWS IoT Greengrass Deployment
3. Connect EasyEdge to the Siemens S7 PLC
In this step, we will connect the Siemens S7 PLC as a device to the EdgeNode configured in Step 2.
Navigate back to the EasyEdge Studio console and click on “Devices” on the left navigation menu. Click on “Add” in the “Add Device” section and configure your device connection. Select “Siemens S7 Client” from the list:
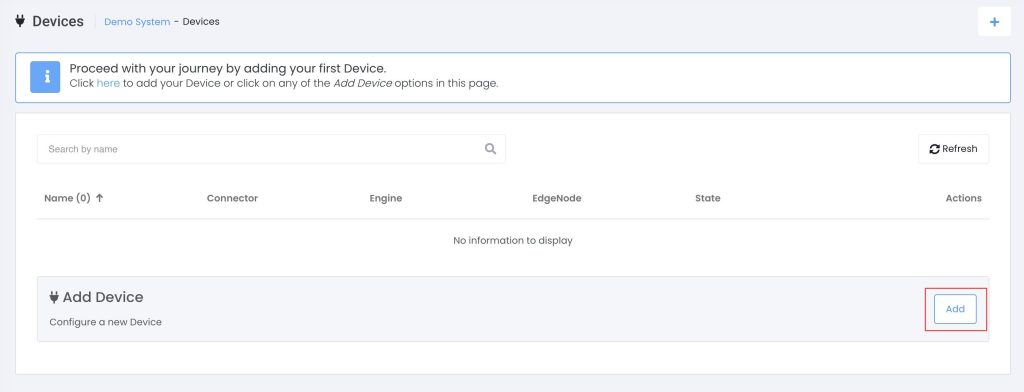
Figure 8: Add EasyEdge Device
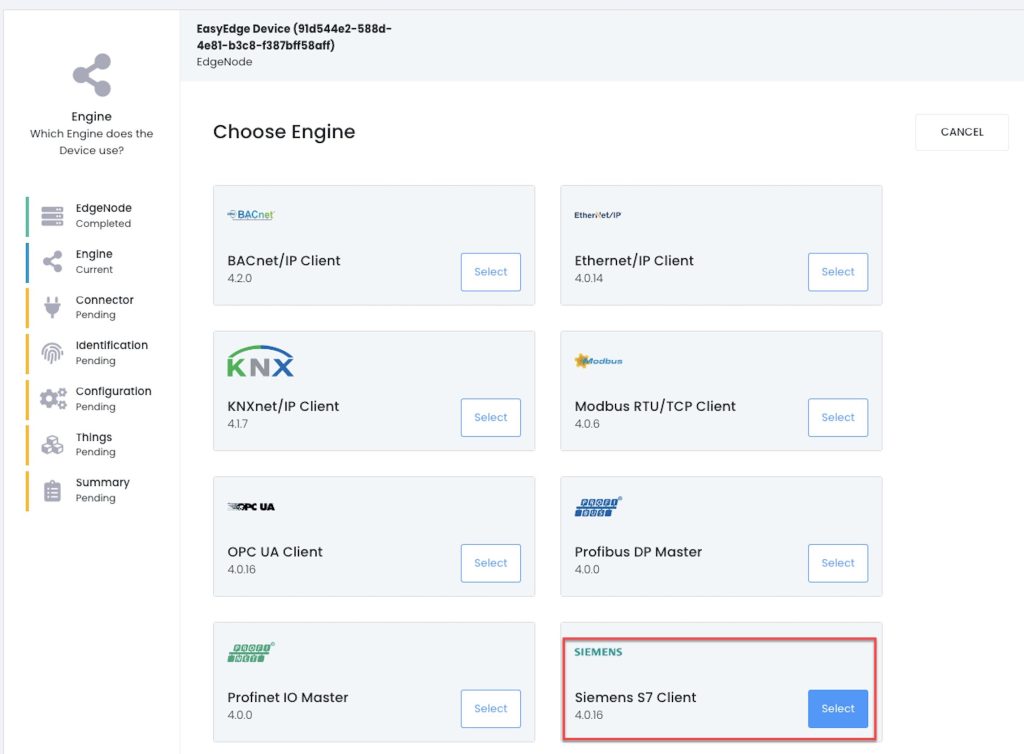
Figure 9: Add Siemens S7 Engine
Select “Create from scratch”:
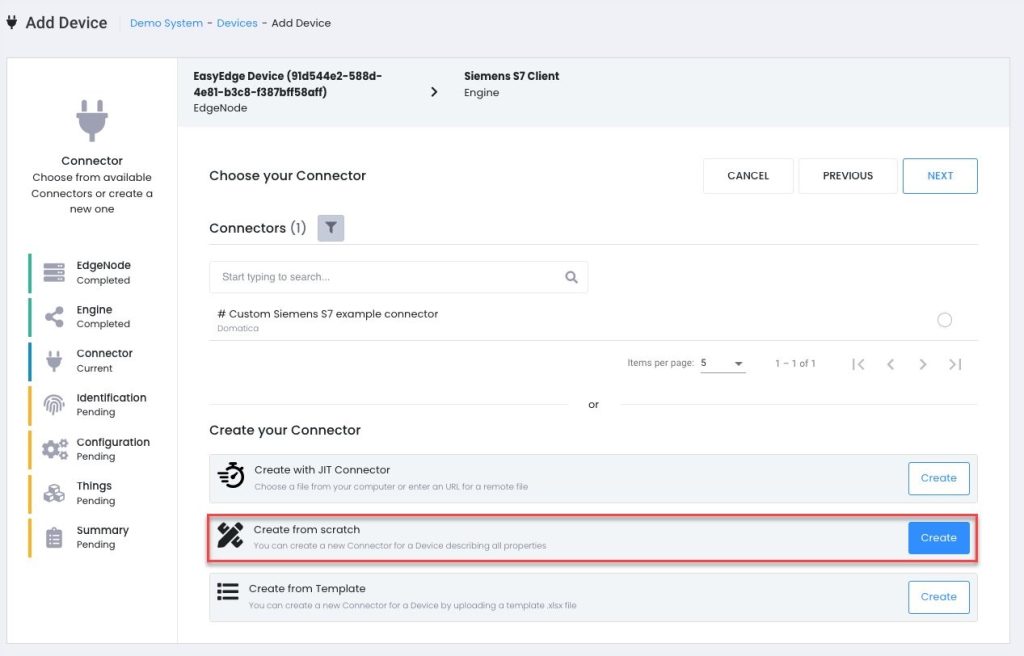
Figure 10: Siemens S7 Engine Configuration
Add the datapoints/register that you would like to collect from the S7 PLC and click “Next”:
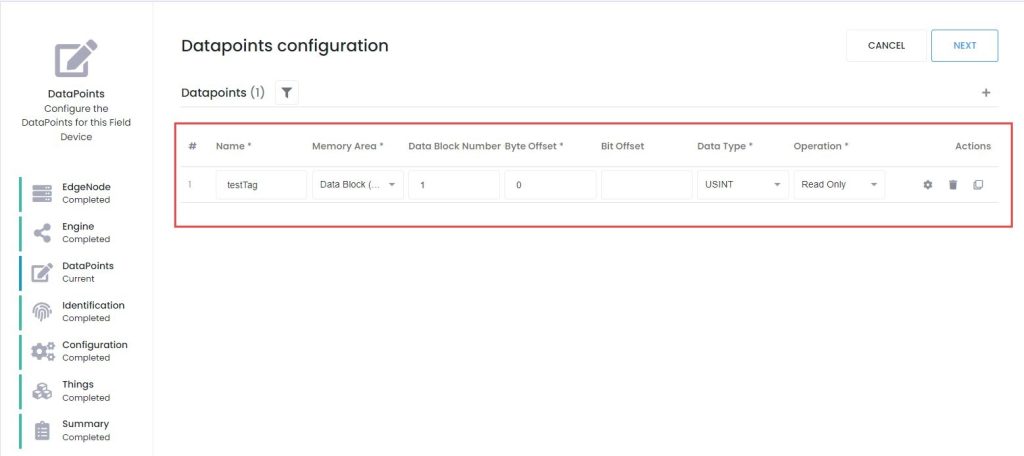
Figure 11: Siemens S7 Datapoints Configuration
Give the connection a name and location (optional) and select “Next”:

Figure 12: Siemens S7 Configuration
Configure the details for the S7 PLC and click “Next”:
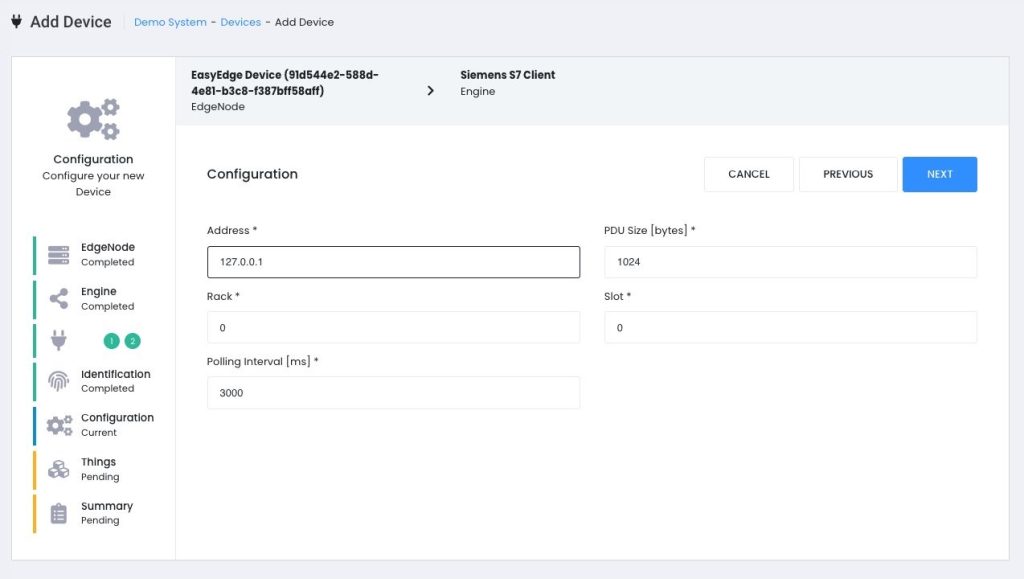
Figure 13: Siemens S7 IP Configuration
Select the list of datapoints that you want to enable:
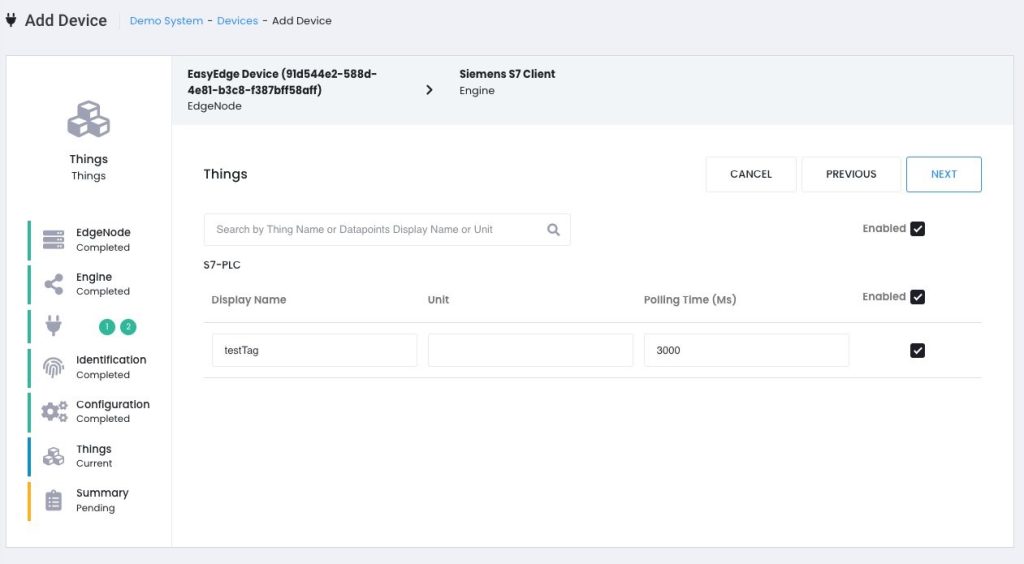
Figure 14: Siemens S7 Tag Configuration
Review the settings and click “Finish” to create your device connection:
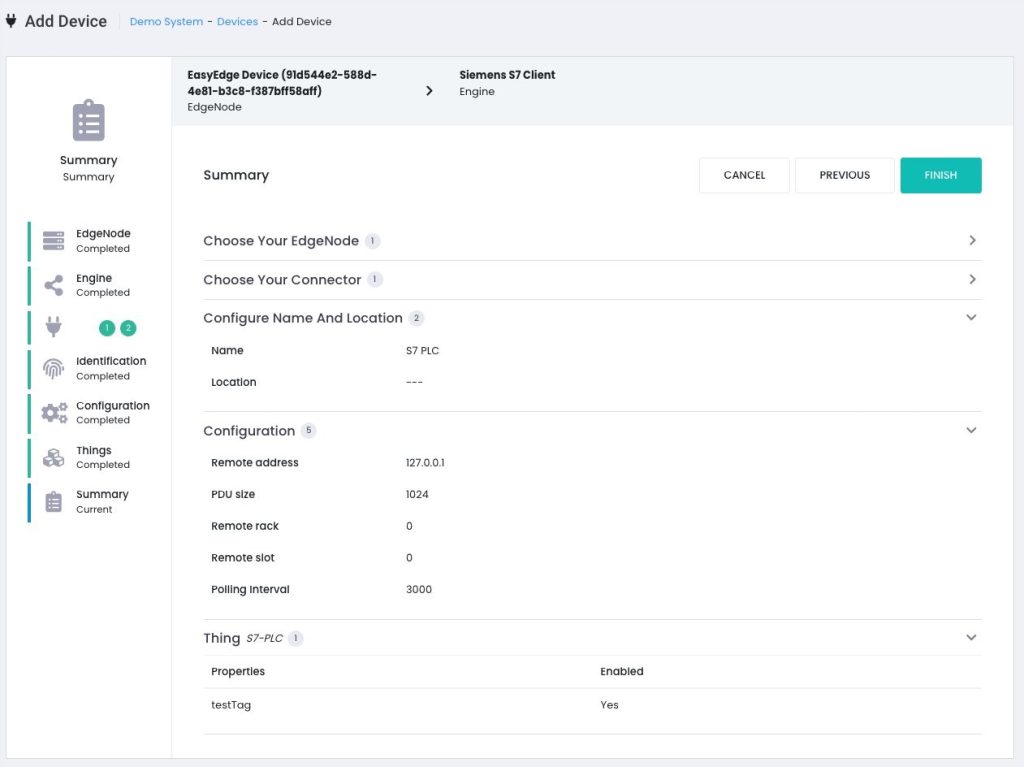
Figure 15: Siemens S7 Tag Configuration Summary
Click the deployment icon on the top navigation bar:
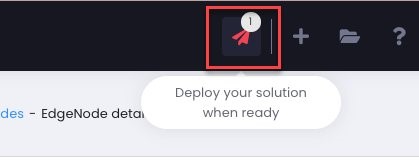
Figure 16: EdgeNode Deployment
Make sure the EdgeNode device you created earlier is selected, and click on “Deploy:
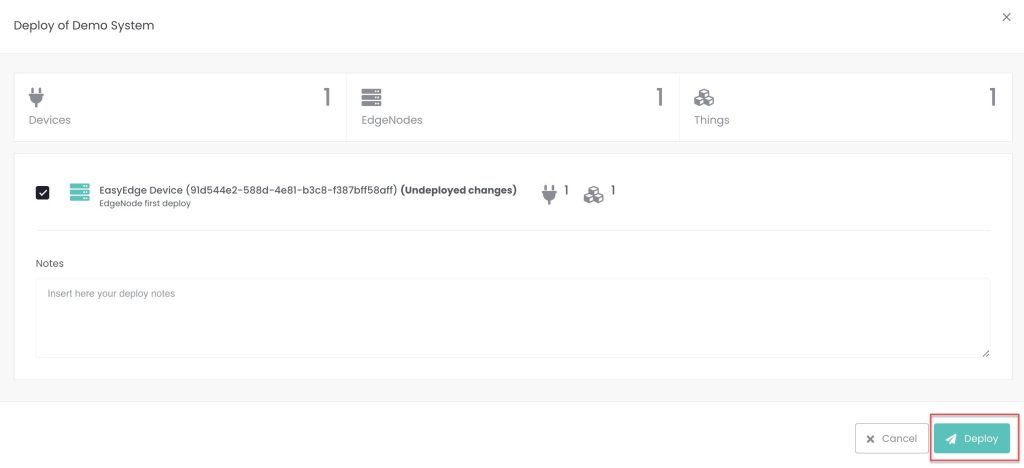
Figure 17: EdgeNode Deployment
You will see the following popup with a progress indicator; click “Close” after the deployment finishes successfully:
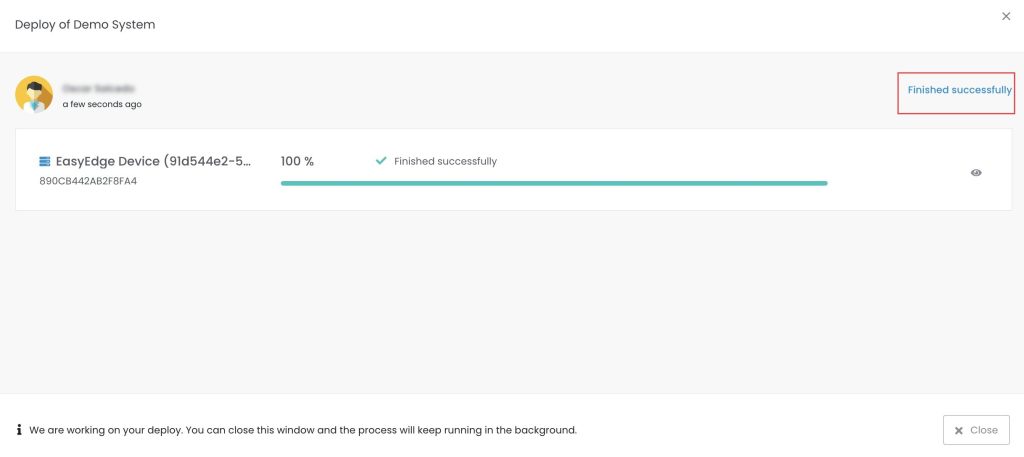
Figure 18: Successful EdgeNode Deployment
To verify that data is coming in from your device, select “Things” from the left navigation menu, and click on “View”:
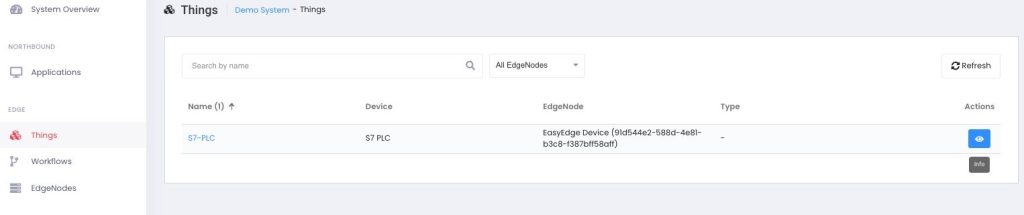
Figure 19: Verify data flow into EdgeNode
Select the “Realtime” icon on the right side of the screen and the console will poll your device for new values periodically. Your datapoint will be displayed at the bottom left of the pane with the updated value:
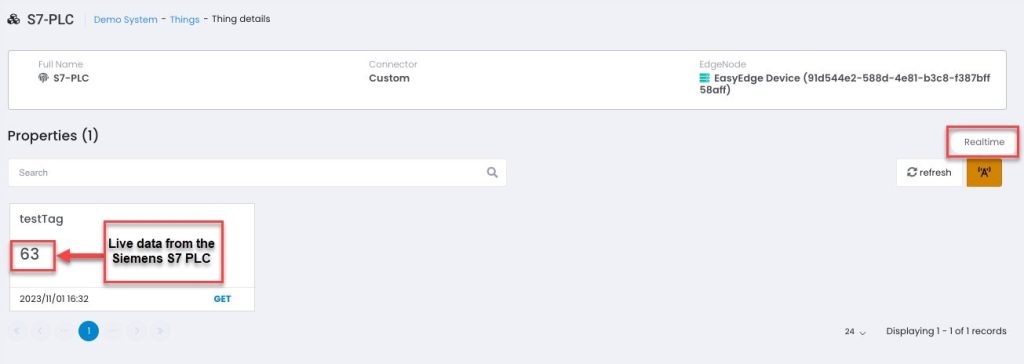
Figure 20: Confirm Data flow in EdgeNode
EasyEdge Workflow
EasyEdge also support workflows that allows you to build custom transformations of data at the edge, using an intuitive drag-and-drop user interface.
To create a workflow, click on “Workflows” on the left-side navigation menu, and click on “Add”:
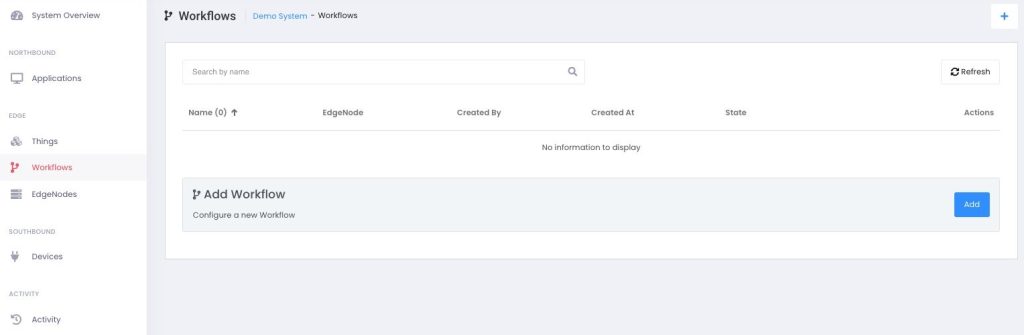
Figure 21: Create EdgeNode Workflow
Add the following blocks from the menu:
- Things → S7-PLC
- Code Blocks → Time-Series Min-Avg-Max
- Data Models → Single Input (Int) – rename as “testTagMaximum”
- Data Models → Single Input (Int) – rename as “testTagMinimum”
Select the “Time-Series Min-Avg-Max” block and click on the “Gear” (Properties) icon on the top right; set the “StorePeriod” property to 1, and enable the “Export Thing” selector.
Proceed to connecting the blocks as in the image below:
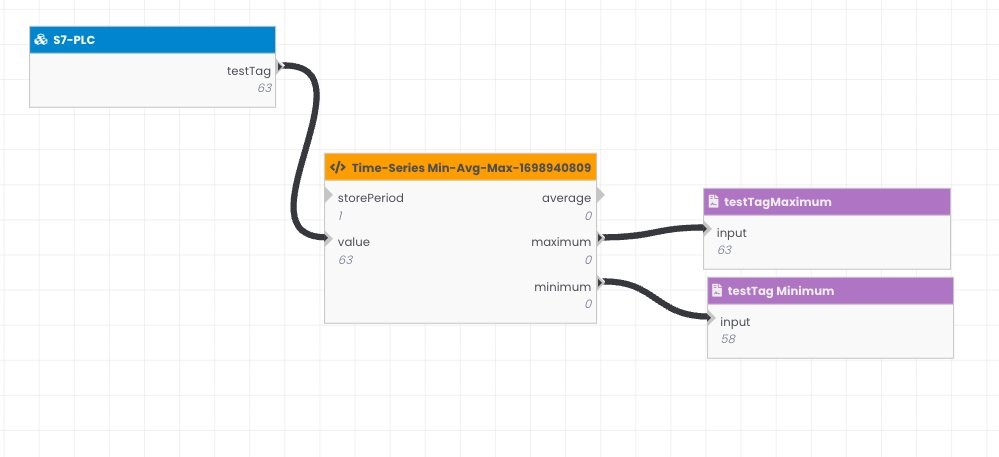
Figure 21: EdgeNode Workflow Configuration
Click on the “Save and deploy” option from the drop-down next to the “Save” icon (top-right navigation menu). Your workflow will be deployed to the Edge Node.
For more information on the EasyEdge workflows please refer to Domatica’s documentation.
4. Verify data in AWS IoT SiteWise
In this step, we will verify that the data from the Siemens S7 PLC is ingested in AWS IoT SiteWise using the data streams. AWS IoT SiteWise automatically creates data streams to receive streams of raw data from your equipment.
Navigate to the AWS console (Services→AWS IoT SiteWise→Build→Data streams).
Select the data streams and expand the panel at the bottom of the page to visualize the data.
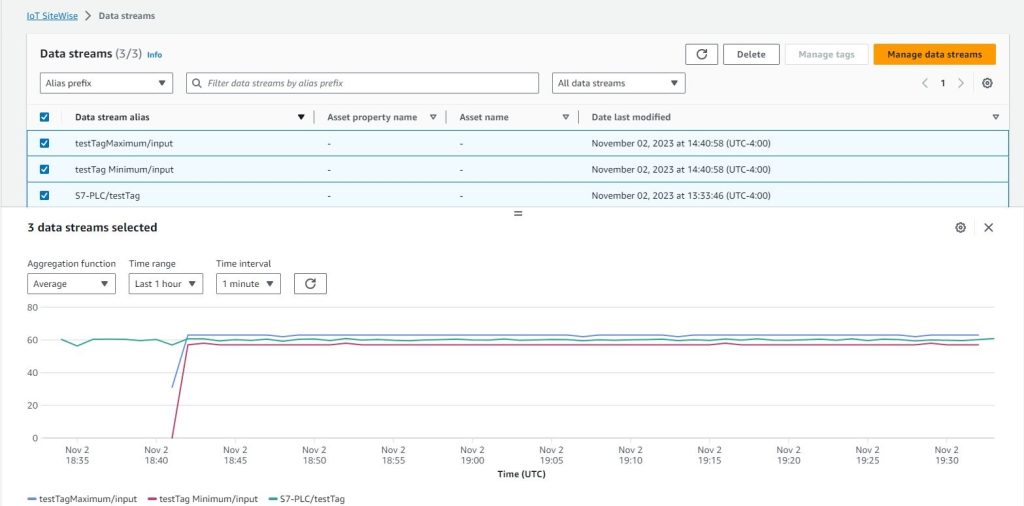
Figure 22: AWS IoT SiteWise Data Streams
The data is now ingested from the Siemens S7 PLC into AWS SiteWise. From this point, you can map data streams to assets using the AWS SiteWise Console.
Conclusion
In this blog post, we walked through how to collect data from a Siemens S7 PLC into AWS IoT SiteWise using AWS Partner Domatica EasyEdge software as a data source on a SiteWise Edge gateway. This solution enables you to ingest your industrial data sources into AWS IoT and opens up multiple use-cases for your industrial data in the cloud.
For more hands-on instructions on how to add EasyEdge from Domatica data source to your AWS IoT SiteWise Edge gateway, you can follow the steps in AWS documentation and the videos below:
Quick Start Guide to EasyEdge with AWS IoT SiteWise
Building Advanced Capabilities in AWS IoT SiteWise Edge with EasyEdge
About the authors
 |
Oscar Salcedo is Specialist Solutions Architect for IoT & Robotics at Amazon Web Services (AWS). He has over 20 years of experience in Smart Manufacturing, Industrial Automation, Building Automation, and IT/OT systems across diverse industries. He leverages the depth and breadth of AWS platform capabilities to architect and develop scalable and innovative solutions, driving measurable business outcomes for Customers. |
 |
Seibou Gounteni is a Specialist Solutions Architect for IoT & Robotics at Amazon Web Services (AWS). He helps customers architect, develop, operate scalable and highly innovative solutions using the depth and breadth of AWS platform capabilities to deliver measurable business outcomes. Seibou has over 12 years of experience in digital platforms, smart manufacturing, energy management, industrial automation and IT/OT systems across a diverse range of industries. |
 |
Intissar Harrabi is a Solutions Architect, part of the Canadian Public Sector team at AWS. Intissar is passionate about helping customers to improve their knowledge of Amazon Web Services (AWS) and find solutions to their technical challenges in the cloud. IoT and security are among her topics of interest. |