AWS Messaging Blog
Practice Makes Perfect: Testing Campaigns Before You Send Them
In an article we posted to Medium in February, we talked about how to determine the best time to engage your customers by using Amazon Pinpoint’s built-in session heat map. The session heat map allows you to find the times that your customers are most likely to use your app. In this post, we continued on the topic of best practices—specifically, how to appropriately test a campaign before going live.
In this post, we’ll talk about the old adage “practice makes perfect,” and how it applies to the campaigns you send using Amazon Pinpoint. Let’s take a scenario many of our customers encounter daily: creating a campaign to engage users by sending a push notification.
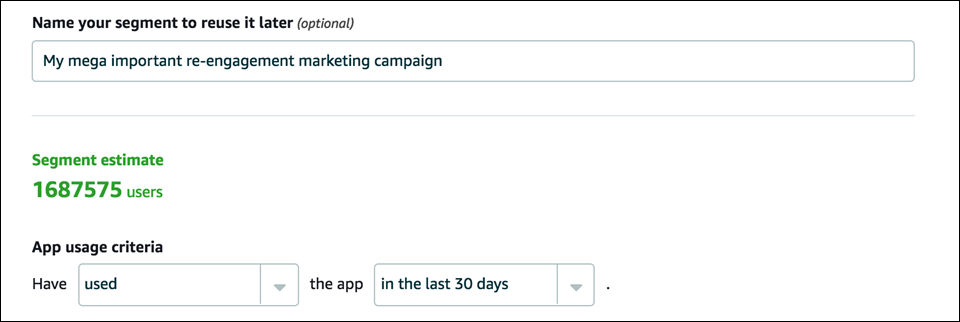
As you can see from the preceding screenshot, the segment we plan to target has nearly 1.7M recipients, which is a lot! Of course, before we got to this step, we already put several best practices into practice. For example, we determined the best time to engage our audience, scheduled the message based on recipients’ local time zones, performed A/B/N testing, measured lift using a hold-out group, and personalized the content for maximum effectiveness. Now that we’re ready to send the notification, we should test the message before we send it to all of the recipients in our segment. The reason for testing the message is pretty straightforward: we want to make sure every detail of the message is accurate before we send it to all 1,687,575 customers.
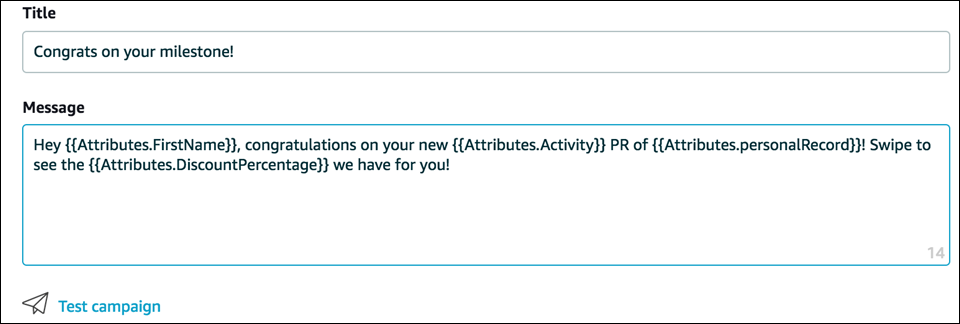
Fortunately, Amazon Pinpoint makes it easy to test your messages—in fact, you don’t even have to leave the campaign wizard in order to do so. In step 3 of the campaign wizard, below the message editor, there’s a button labelled Test campaign.
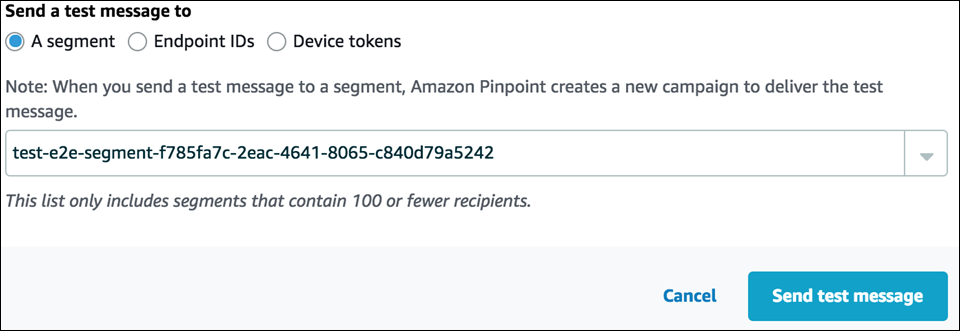
When you choose the Test campaign button, you have three options: you can send the test message to a segment of 100 endpoints or less, or to a set of specific endpoint IDs (up to 10), or to a set of specific device tokens (up to 10), as shown in the following image.

In our case, we’ve already created a segment of internal recipients who will test our message. On the Test Campaign window, under Send a test message to, we choose A segment. Then, in the drop-down menu, we select our test segment, and then choose Send test message.
Because we’re sending the test message to a segment, Amazon Pinpoint automatically creates a new campaign dedicated to this test. This process executes a test campaign, complete with message analytics, which allows you to perform end-to-end testing as if you sent the message to your production audience. To see the analytics for your test campaign, go to the Campaigns tab, and then choose the campaign (the name of the campaign contains the word “test”, followed by four random characters, followed by the name of the campaign).

After you complete a successful test, you’re ready to launch your campaign. As a final check, the Review & Launch screen includes a reminder that indicates whether or not you’ve tested the campaign, as shown in the following image.

There are several other ways you can use this feature. For example, you could use it for troubleshooting a campaign, or for iterating on existing campaigns. To learn more about testing campaigns, see the Amazon Pinpoint User Guide.