Front-End Web & Mobile
Modern Tooling for Your Website using AWS, Contentful, and Next.js
Modern Tooling for Your Website using AWS, Contentful & Next.js
In this tutorial, we’ll build a blog website from beginning to end with an A-level Lighthouse performance scale and low maintenance friction. I’ll show you how to store your content with a Contentful model, access the content from a Next.js app and deploy the Next.js app for public access. I’ll show you how to use the new AWS Amplify Contentful integration to create a seamless content and build and deploy experience with Contentful and AWS Amplify.
Contentful is an intelligent Composable Content Platform that allows the creation and management of content to build digital experiences. Contentful is an AWS partner and created an AWS Amplify integration in the Contentful Marketplace.
If you prefer a video version of this article, you can watch it on YouTube.
Create Content Model
We’ll start with creating a content model with Contentful. Contentful will use this model as a blueprint for storing your content in its database. Persisting the content in a Contentful database allows you to access it later from your Contentful dashboard or API.
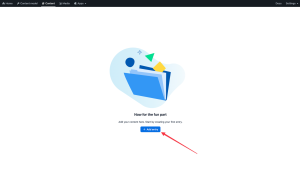
The first step would be to create a Contentful account if you don’t have one. Skip the onboarding process so you can end up with a blank space.
Once you have an account and signed in, click the Design your content model button:

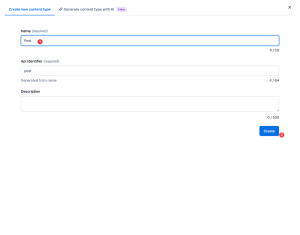
On the Pop up modal, name the the model “Post” and click the Create button to proceed:
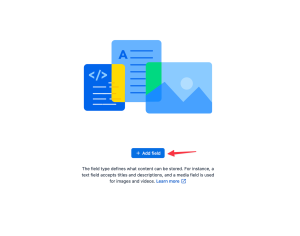
When you’ve created the content model, it will start off with empty fields. To add a field to it, click the Add field button:
For the title of the post, you’ll need a Text type field. Choose Text from the modal that pops up:

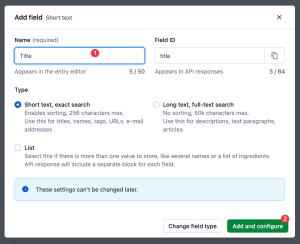
Name the field “Title”. Contentful will automatically populate the Field ID field. Leave the Type as Short text, exact search and click the Add and configure button:
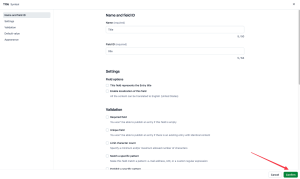
You have the option to configure the field further and set up things like validation rules. I won’t bore you with any of those in this article but feel free to explore the possibilities. Click Confirm to finish defining the field:
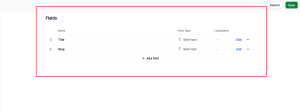
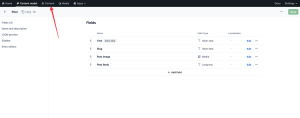
Repeat the same steps to create a Slug field. You should now have 2 fields in the model:
For the Post Image field, click Add Field but this time, you should select Media instead of Text.

Name the field “Post Image” and leave the Type as One file. Click Add and configure to proceed.
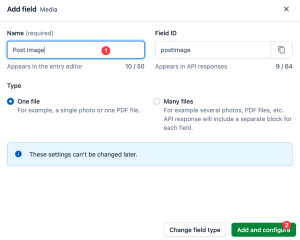
No need for any more configuration so click Confirm to finish defining the image field.
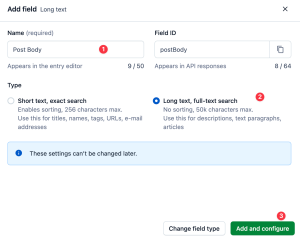
Time to create the last field for this model. The Post Body field is similar to the Post Title field with one difference — it’s a long text. Click Add field and choose Text field as we’ve done previously. Name the field “Post Body” but instead of leaving the Type as Short text, exact search, change it to Long text, full search. Click Add and configure to proceed.
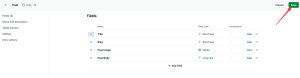
No need for any more configuration so click Confirm to finish defining the image field. Click Save to update your Post model.
Add Test Contents to Contentful
With the blueprint you’ve given Contentful, it has made a store for your content. The next thing you need to do is add content into that store. The content you add is what you can access from your API.
Switch to Content from the menu to switch to the Content page.
Click the Add entry button to create a new post.
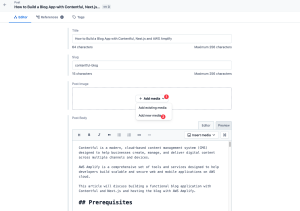
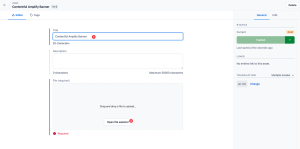
On the next page, fill in the values for the Title, the Slug and the Post Body.
To add an image for the Post Image, click the Add media dropdown and select Add new media:
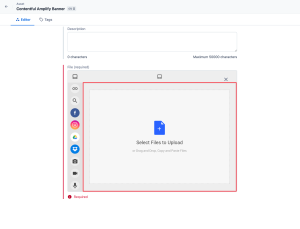
On the slide-in page, give the image a name and click the Open file selector button to pick a file:
Drop an image in the drop zone
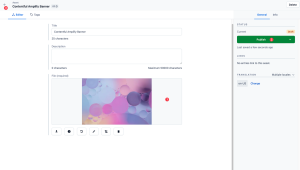
Once the image is uploaded, you should see a preview of the image replace the drop zone area. Click Publish to add save the image. Once the image is saved, click the back button to go back to the post edit page.
Click Publish to save the post and make it public

Grab Access Credentials from Contentful
Before you leave the Contentful dashboard to build an app that uses the Contentful API to access the content you just created, you need to grab your API access credentials. The Contentful JavaScript library you’ll use to access this API requires the credentials for authorization.
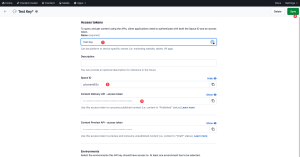
Click Settings from the navigation menu and click API keys.
Click the Add API key button to add a key.
Rename the key, copy the Space ID, copy the Content Delivery API – access token, then click Save.
Set up Website with Next.js
You have a public content and you also have an API credentials to access it from your app. The next step is to create an app where you can consume this content.
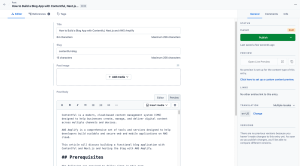
Instead of creating a new Next.js app from scratch, I’ve created a starter Next.js 13 app. The starter contains components for rendering a post, syntax highlighting, and uses Tailwind to make the post body content look pleasing. The starter saves you some time and allows you to focus on consuming the Contenful API.
Run the following degit command to create a Next.js project with the starter:
npx degit christiannwamba/contentful-amplify-demo#starter contentful-amplifyWhen the starter is pulled, change into the new folder that the degit command created and run npm install to install the dependencies:
cd contentful-amplify
npm install
Create a ./.env.local file and create the following environmental variables to store the Contentful credentials you copied:
CONTENTFUL_SPACE_ID=<SPACE_ID>
CONTENTFUL_ACCESS_TOKEN=<ACCESS_TOKEN>
One last thing you should to to complete the set up is configuring Next.js to allow remote images from Contentful. Since Next.js will build your website on the server, it’s going to access the remote images. Accessing a remote URL from a server makes you vulnerable to common attacks. Due to this fact, Next.js forces you to explicitly state that you are aware of the image source by setting the domain in the Next.js config file.
const nextConfig = {
    images: { domains: ["images.ctfassets.net"] },
};
// ...
You can start running the app on your local server now:
npm run devThere’s not much to see when you check the pages out in the browser. Let’s fix that.
List Posts on the Home Page
All the steps related to set up are now complete. From now on, you are going to see how to use the Contentful library to consume content you created in your Contentful Dashboard.
Create a Contentful Client
Open the ./app/page.js file and import the createClient function at the top of the file:
import { createClient } from "contentful";Create a client by calling the createClient function and passing it an object. The object you pass to this function must contain the Space ID and the Access Token:
const client = createClient({
  space: process.env.CONTENTFUL_SPACE_ID,
  accessToken: process.env.CONTENTFUL_ACCESS_TOKEN,
});
The createClient function returns an object which you can store in a variable.
Fetch Posts
Call the getEntries function from the client object to fetch a list from the Contentful API. Since it returns a promise you need to call it with await which also means you need to make the Home component async:
async function Home() {
   const entries = await client.getEntries();
   const posts = entries.items;
//...
}
You can store the items from the entries in a posts variable. Render Post Items Iterate through the list of posts and render each one with the PostCard component which I included in the starter. I’m also rendering the title of the page with a PostTitle component that I also included in the starter.
// ...
import { PostCard, PostTitle } from "../components/Post";
// ...
async function Home() {
// ...
return (
<div className="w-3/4 mx-auto">
<div className="py-16">
<PostTitle>My Blog Post</PostTitle>
</div>
<div className="grid grid-cols-2 gap-8">
{posts.map((post) => {
return (
<PostCard
id={post.sys.id}
key={post.sys.id}
slug={post.fields.slug + "___" + post.sys.id}
title={post.fields.title}
createdAt={post.sys.createdAt}
imageUrl={post.fields.postImage.fields.file.url}
/>;
);
})}
</div>
</div>
);
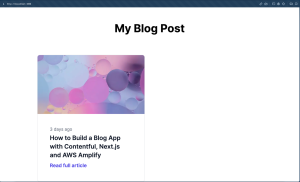
}I’ve passed the slug prop a concatenated value. The slug and the id separated by three underscore characters. Concatenating the values ensures that you always get a unique URL considering that the slug value is prone to having duplicates. Head back to the browser and you should see the one post we’ve created on the page:
Add Metadata You can use the Next.js metadata feature to add a title to the page. Before the Home component, create and export a metadata object. Next.js will pick this export up and use it as your page’s meta data:
export const metadata = {
   title: "Blog Posts",   description: "A demo to show Contentful and Amplify Integration",
};
Your browser tab should now read “Blog Posts” instead of a localhost URL.
Render Individual Post on the Slug Page
You’ve successfully rendered a list of posts but your users can’t read the posts yet. When a user clicks the read article link, they should be able to see the full content body on the slug page.
Configure Contentful
Just as you did in the previous page, import createClient and use it to create a Contentful client:
import { createClient } from "contentful";

const client = createClient({
   space: process.env.CONTENTFUL_SPACE_ID,   accessToken: process.env.CONTENTFUL_ACCESS_TOKEN,
 });
Fetch a Single Post
In the Post component call a fetchPost function which we’ll create in the next step. The function should accept the params object which Next.js passes to the Post component as prop.
async function Post({ params }) {
  const post = await fetchPost(params);
// ...
}
fetchPost also returns a promise which means you need to put await before and turn the Post component to an async function.
Create a fetchPost function right below the Post component. The function fetches a post using the post’s ID and returns the post.
async function Post({ params }) {}

async function fetPost(params) {
   const id = getIdFromSlug(params.slug);
   const post = await client.getEntry(id);
   return post;
 }
fetchPost calls getIdFromSlug which you’ll create in the next step. The function takes the slug and returns an ID which getEntry uses to fetch a post.
Create the getIdFromSlug function below the fetchPost function. You might recall that in the list post section, I concatenated the slug string and id to form a new slug value. Now you need the ID in that new slug value and need to grab it by splitting the slug.
async function fetPost(params) {}

function getIdFromSlug(slug) {
   const id = slug.split("___")[1];   return id;
}
Render the Post Content
Use the PostBody component and PostTitle component I included in the starter to render the content details.
import Image from "next/image"; import Link from "next/link"; import { PostBody, PostTitle } from "@/components/Post"; // ... async function Post({ params }) { const post = await fetPost(params); return ( <div className="w-3/4 mx-auto"> <div className="py-16"> <PostTitle>{post.fields.title}</PostTitle> </div> <Link href="/" className="text-base text-indigo-600 hover:text-indigo-500" > Home </Link> <div className="relative h-80 my-10"> <Image src={"https://" + post.fields.postImage.fields.file.url} alt="post-img" fill style={{ objectFit: "cover", }} /> </div> <PostBody>{post.fields.postBody}</PostBody> </div> ); }You should also use the Next.js Image to render the post image as a banner before the post body.
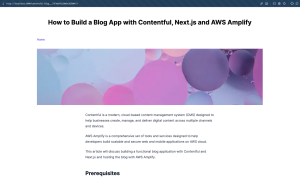
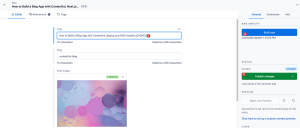
When you head back to the browser and access the slug page by clicking the read link from the list page, you’ll be able to read the exact post you clicked:
Add Metadata
Just one more step before I move on to deploying — metadata. Unlike the list page metadata that had static content, you need dynamic content for a dynamic page. So instead of exporting a metadata object, you need to export a generateMetadata function that fetches the dynamic content:
// ...
export async function generateMetadata({ params }) {
    const post = await fetPost(params);
    return {
     title: post.fields.title,
   }; }
async function Post({ params }) {...}
The function calls fetchPost again and returns a metadata object with a title from the fetched post. Thanks to Next.js 13’s caching strategy, your website will only make this fetchPost request once and reuse the response for both the metadata and the component.
Deploy the Website to AWS Amplify
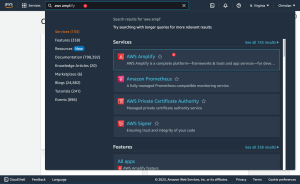
So far we’ve been able to set up a Contentful content model, put some content in that model, and consumed the content in a web app. The next step is to publish the content for public access by deploying the website to AWS Amplify. To take advantage of continuous delivery, push your code to GitHub before starting the deploy process. Head to console.aws.amazon.com and search for AWS Amplify from the console’s search bar. Click AWS Amplify from the search result.
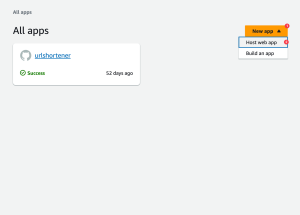
Click the New app dropdown and chose the Host web app option:
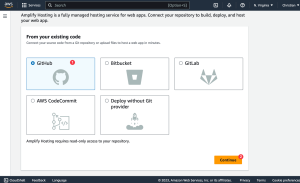
Choose GitHub as your source control provider and click Continue:
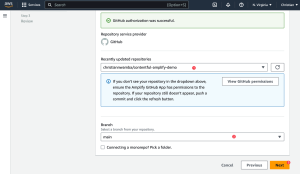
Select the repository, set the branch to “main” and click Next:
On the Build settings page, click Advanced settings and set the credentials from your ./.env.local file as environmental variables:
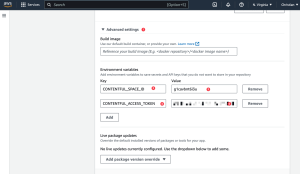
After you’ve set the environmental variables, you need to explicitely ask Amplify to include it in your build. To do so, click the Edit button to edit the build settings:
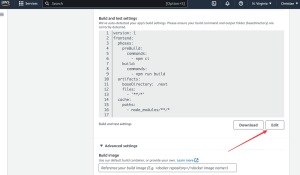
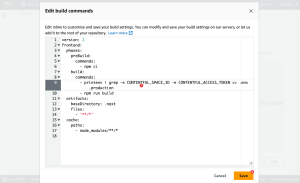
Under build commands, before the actual build command, print the env and copy them into a ./.env.production file:
- printenv | grep -e CONTENTFUL_SPACE_ID -e CONTENTFUL_ACCESS_TOKEN >> .env.productionClick the Save button to save the settings:
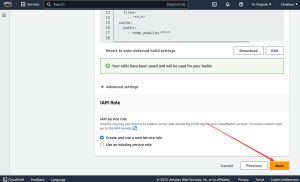
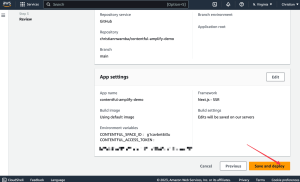
Click the Next button to review your settings:
Click Save and deploy to kick of the deploy process:
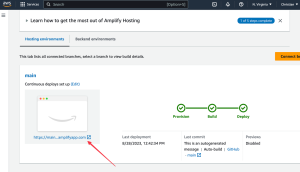
Once Amplify is done deploying the website, click the website URL to access it:
Trigger Builds after Content Update
Your website is live and it can start serving its purpose for your audience. I wanted to share one last step with you that makes it easier to make changes to your website without having to manually trigger the build.
Install and Configure the Amplify Plugin
To achieve this automation, you need to install an Amplify plugin to Contentful that triggers a build automatically when you change your content.
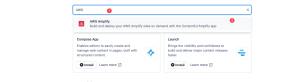
Click the Apps drop down menu from the nav menu and select the Marketplace option:
Search for “AWS Amplify” and select it:
Click the Install button from the modal:

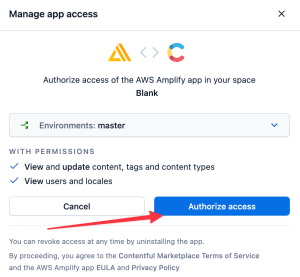
Click the Authorize access button from the next modal to give Contentful access to your Amplify app:
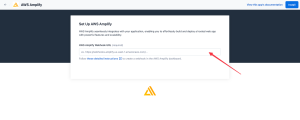
You should see a text box to paste your Amplify website webhook URL:
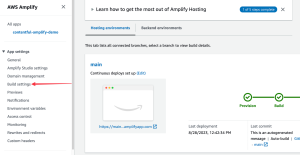
To get this URL, head to the Amplify app page and click the Build settings menu item from the side bar:
Click the Create webhook button:

Give it an identifiable name and click the Save button:

Copy the URL that Amplify creates after you save:

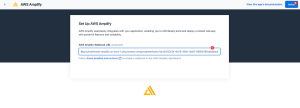
Head back to the authorize page, paste the URL and click Install:
Add Amplify Plugin to Contentful Sidebar
When you open a Contentful entry you’ll find that it has a side bar where you can change the status of your entry.

What you can also do is add a button to this sidebar that triggers a build on Amplify when you click the button.
To add this button, click Content model from the nav bar and click the Post type:
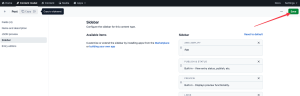
Click Sidebar on the Next page and add AWS Amplify to the Sidebar:
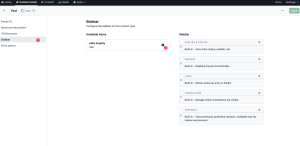
Save the Sidebar:
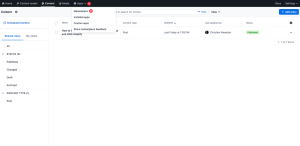
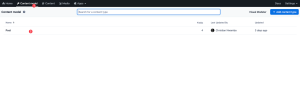
Head back to the content entry page, change the title, click the Publish changes button, and click the new Build now button.
Head back to your Amplify app to confirm that the deploy process has started:
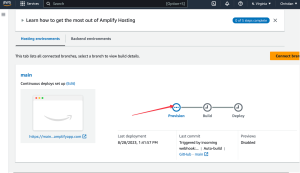
Once the deploy is complete, open the website again to confirm that the build picked up the change in title:
Finally, you can check how optimized the website is by running it through Lighthouse:
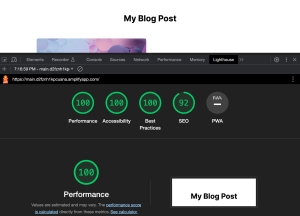
With zero config and optimization, you are able to get an A level score. This wouldn’t have been challenging to achieve if you aren’t intentional about the that are backing your website.
Conclusion
As a recap, you learned how to set up Contentful, model content types and store some content. You also learned how to fetch content from Contentful API in a web app. Finally, I showed you how to deploy to AWS Amplify and also how to trigger deployment from Contenful when you make changes to your content.