AWS News Blog
Amazon Machine Learning – Make Data-Driven Decisions at Scale
Today, it is relatively straightforward and inexpensive to observe and collect vast amounts of operational data about a system, product, or process. Not surprisingly, there can be tremendous amounts of information buried within gigabytes of customer purchase data, web site navigation trails, or responses to email campaigns. The good news is that all of this data can, when properly analyzed, lead to statistically significant results that can be used to make high-quality decisions. The bad news is that you need to find data scientists with relevant expertise in machine learning, hope that your infrastructure is able to support their chosen tool set, and hope (again) that the tool set is sufficiently reliable and scalable for production use.
The science of Machine Learning (often abbreviated as ML) provides the mathematical underpinnings needed to run the analysis and to make sense of the results. It can help you to turn all of that data into high-quality predictions by finding and codifying patterns and relationships within it. Properly used, Machine Learning can serve as the basis for systems that perform fraud detection (is this transaction legitimate or not?), demand forecasting (how many widgets can we expect to sell?), ad targeting (which ads should be shown to which users?), and so forth.
Introducing Amazon Machine Learning
Today we are introducing Amazon Machine Learning.  This new AWS service helps you to use all of that data you’ve been collecting to improve the quality of your decisions. You can build and fine-tune predictive models using large amounts of data, and then use Amazon Machine Learning to make predictions (in batch mode or in real-time) at scale. You can benefit from machine learning even if you don’t have an advanced degree in statistics or the desire to setup, run, and maintain your own processing and storage infrastructure.
I’ll get to the details in just a minute. Before I do so, I’d like to review some of the terminology and the concepts that you need to know in order to fully understand what machine learning does and how you can take advantage of it.
Introduction to Machine Learning
In order to benefit from machine learning, you need to have some existing data that you can use for training purposes. It is helpful to think of the training data as rows in a database or a spreadsheet. Each row represents a single data element (one purchase, one shipment, or one catalog item). The columns represent the attributes of the element: customer zip code, purchase price, type of credit card, item size, and so forth.
This training data must contain examples of actual outcomes. For example, if you have rows that represent completed transactions that were either legitimate or fraudulent, each row must contain a column that denotes the result, which is also known as the target variable. This data is used to create a Machine Learning Model that, when presented with fresh data on a proposed transaction, will return a prediction regarding its validity. Amazon Machine Learning supports three distinct types of predictions: binary classification, multiclass classification, and regression. Let’s take a look at each one:
Binary classification is used to predict one of two possible outcomes. Is this transaction legitimate, will the customer buy this product, or is the shipping address an apartment complex?
Multiclass classification is used to predict one of three or more possible outcomes and the likelihood of each one. Is this product a book, a movie, or an article of clothing? Is this movie a comedy, a documentary, or a thriller? Which category of products is of most interest to this customer?
Regression is used to predict a number. How many 27″ monitors should we place in inventory? How much should we charge for them? What percent of them are likely to be sold as gifts?
A properly trained and tuned model can be used to answer any one of the questions above. In some cases it is appropriate to use the same training data to build two or more models.
You should plan to spend some time enriching your data in order to ensure that it is a good match for the training process. As a simple example, you might start out with location data that is based on zip or postal codes. After some analysis, you could very well discover that you can improve the quality of the results by using a different location representation that contains greater or lesser resolution. The ML training process is iterative; you should definitely plan to spend some time understanding and evaluating your initial results and then using them to enrich your data.
You can measure the quality of each of your models using a set of performance metrics that are computed and made available to you. For example, the Area Under Curve (AUC) metric monitors the performance of a binary classification. This is a floating point value in the range 0.0 to 1.0 that expresses how often the model predicts the correct answer on data it was not trained with. Values rise from 0.5 to 1.0 as as the quality of the model rises. A score of 0.5 is no better than random guessing, while 0.9 would be a very good model for most cases. But a score of 0.9999 is probably too good to be true, and might indicate a problem with the training data.
As you build your binary prediction model, you will need to spend some time looking at the results and adjusting a value known as the cut-off. This represents the probability that the prediction is true; you can adjust it up or down based on the relative importance of false positives (predictions that should be false but were predicted as true) and false negatives (predictions that should be true but were predicted as false) in your particular situation. If you are building a spam filter for email, a false negative will route a piece of spam to your inbox and a false positive will route legitimate mail to your junk folder. In this case, false positives are undesirable. The tradeoffs between false positives and false negatives is going to depend on your business problem and how you plan to make use of the model in a production setting,
Amazon Machine Learning in Action
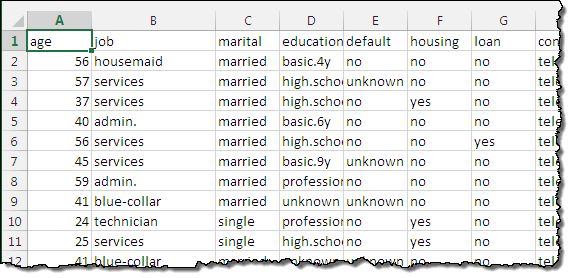
Let’s walk through the process of creating a model and generating some predictions using the steps described in the Tutorial section of the Amazon Machine Learning Developer Guide. You can sign up for Amazon Machine Learning and follow the steps in the guide on your own if you would like. The guide uses a lightly enhanced copy of the publicly available bank marketing dataset from the UC Irvine Machine Learning Repository. The model that we will build will answer the question “Will the customer subscribe to my new product?”
I downloaded a copy of banking.csv and uploaded it to Amazon Simple Storage Service (Amazon S3), and then agreed to allow the console to add an IAM policy so that Amazon Machine Learning could access it:

Then I created an Amazon Machine Learning Datasource object by referencing the item in the bucket and supplying a name for the object. This object holds the location of the data, the variable names and types, the name of the target variable, and descriptive statistics for each variable. Most of the operations within Amazon Machine Learning reference a Datasource. Here’s how I set everything up:
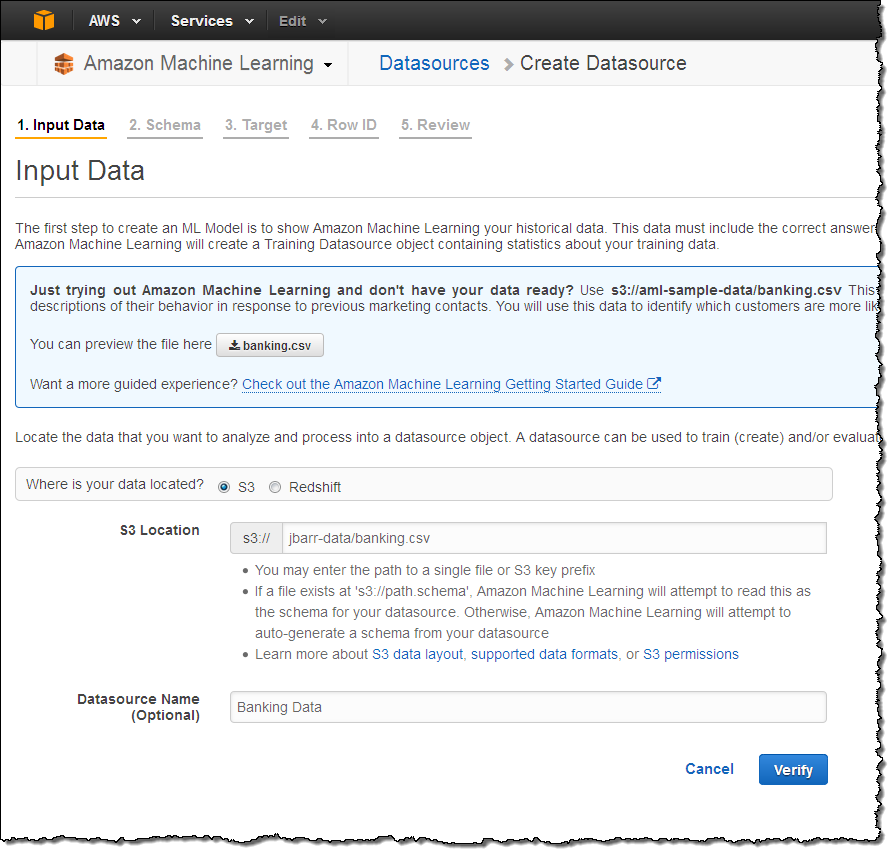
Amazon Machine Learning can also create a Datasource from Amazon Redshift or an Amazon RDS MySQL database. Selecting the Redshift option shown above would have given me the option to enter the name of my Amazon Redshift cluster, along with a database name, access credentials, and a SQL query. The Machine Learning API can be used to create a Datasource from an Amazon RDS for MySQL database.
Amazon Machine Learning opened and scanned the file, made a guess at the variable types, and then proposed the following schema:
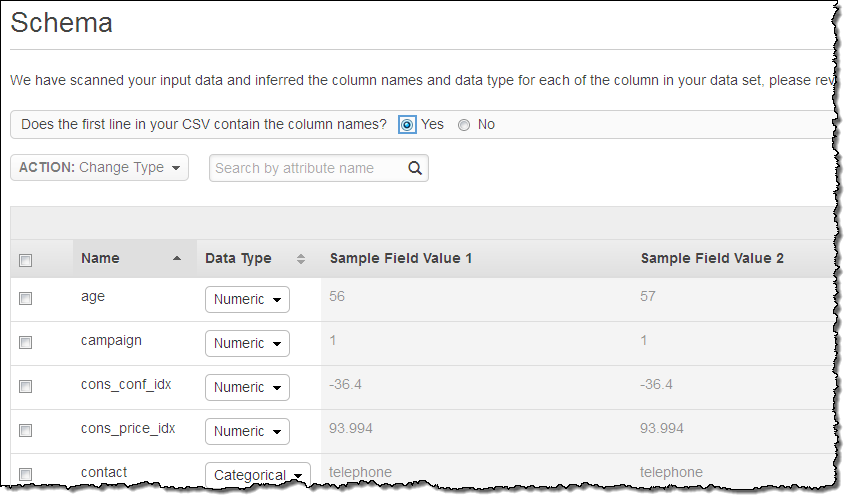
In this case all of its guesses were correct. If they weren’t, I could have selected one or more rows and clicked on Change Type to fix them.
Because I will use the Datasource to create and evaluate an ML model, I need to select the training variable. In this data set, the training variable (y) has the Binary data type so the models generated from it will use binary classification.
After a couple more clicks I was ready to create my Datasource:
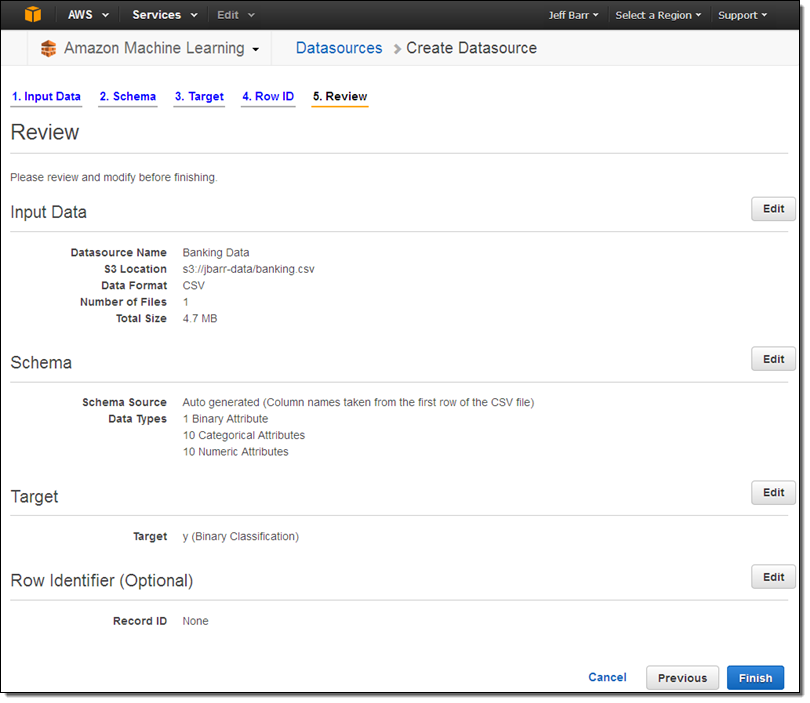
My Datasource was ready a minute or two later:
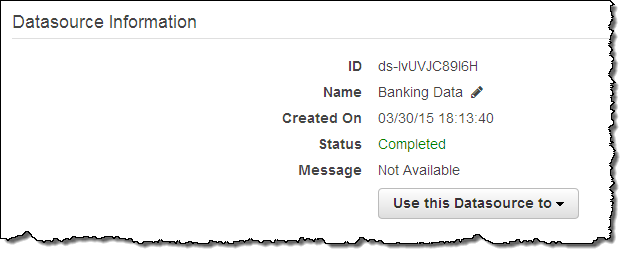
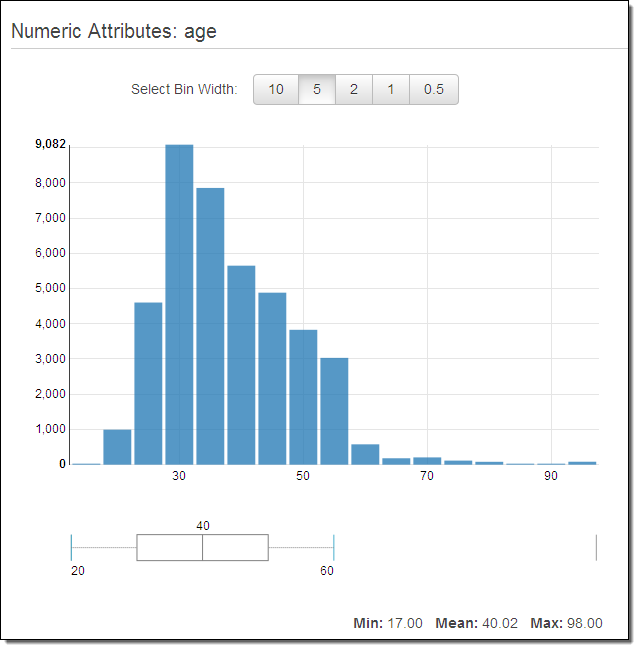
As I hinted at earlier, you can improve your models by knowing more about your data. The Amazon Machine Learning Console provides you with several different tools that you can use to learn more. For example, you can look at the distribution of values for any of the variables in a Datasource. Here’s what I saw when I inspected the age variable in mine:
The next step is to create my model:
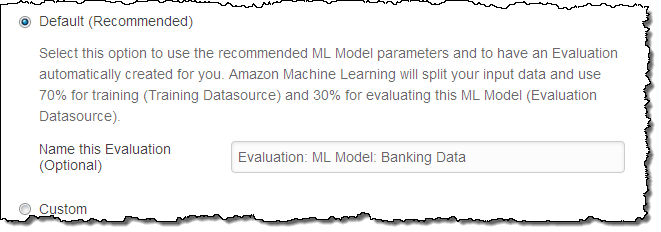
I chose to use the default settings. Amazon Machine Learning used 70% of the data for training and 30% to evaluate the model based on the defaults:
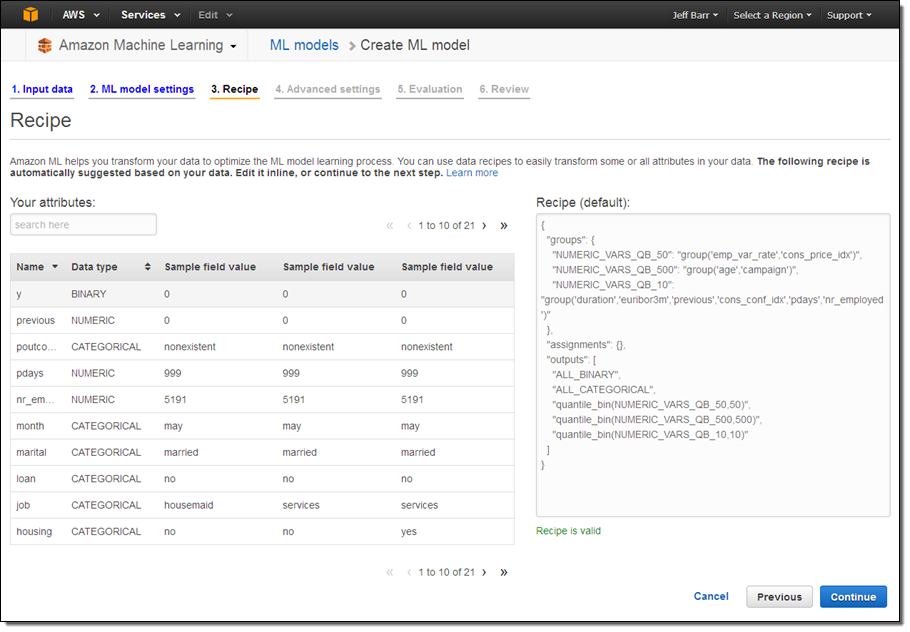
If I had chosen the Custom option, I would have had the opportunity to customize the “recipe” that Amazon Machine Learning uses to transform and process the data from the Datasource:
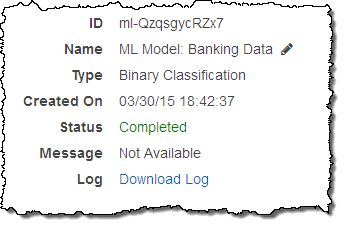
After a couple more clicks, Amazon Machine Learning started to create my model. I took a quick break to water my vegetable garden and returned to find that my model was ready to go:
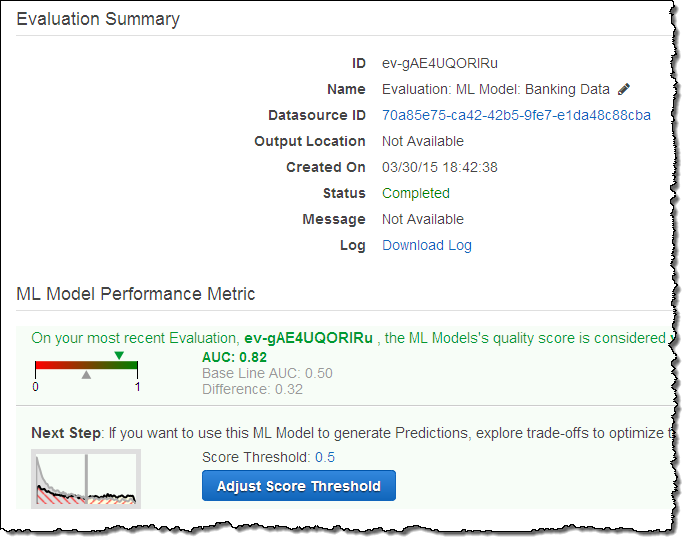
I took a quick look at the performance metrics:
In order to select the best customers (those most likely to make a purchase), I clicked on Adjust Score Threshold and bumped up the cut-off value until 5% of the records were expected to pass by predicting a value of “1” for y:
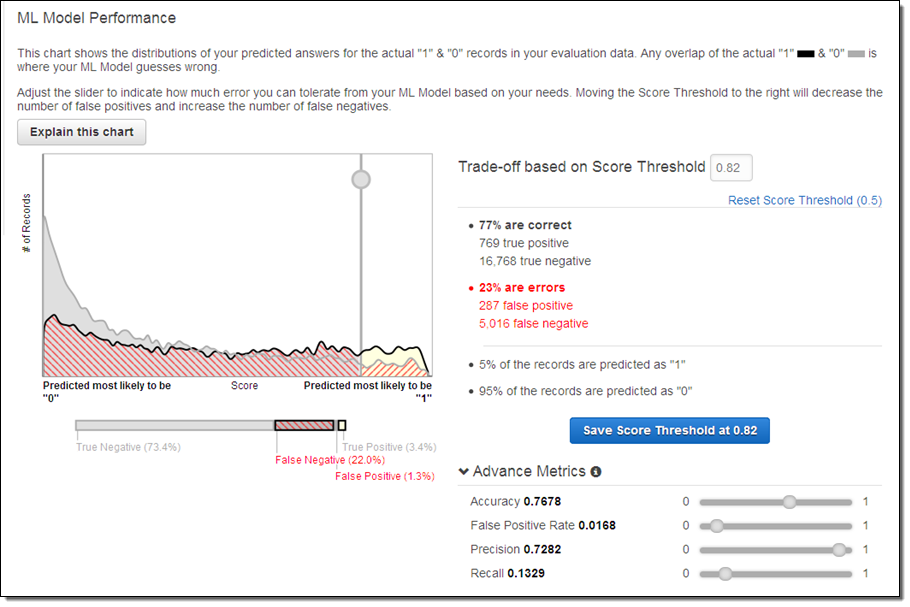
With this setting, only 1.3% of the predictions will be false positives, 22% will be false negatives, and 77% will be correct predictions. I chose to treat false positives as expensive, and decided to set the cut off value high in order to avoid them. In business terms this setting allowed me to avoid sending costly promotional materials to the “wrong” customers.
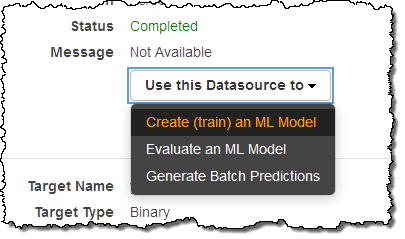
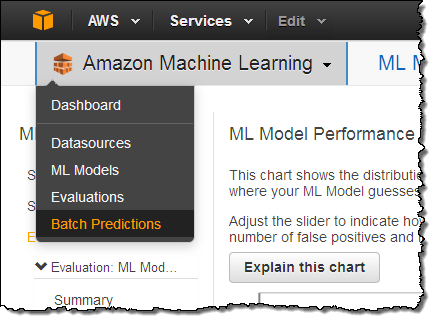
With my model built, I can now use it to create batch predictions (recall that Amazon Machine Learning supports both batch and real-time predictions). The batch model allows me to generate a set of predictions for a set of observations all at once. I start from the menu:
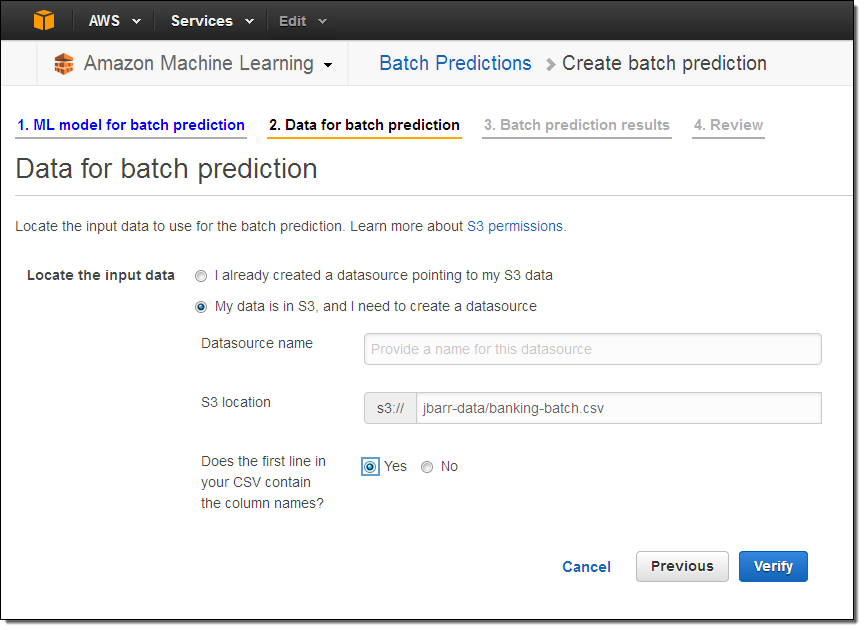
I created another Datasource using the file recommended by the Getting Started Guide. This file, unlike the first one, does not contain values for the y variable.
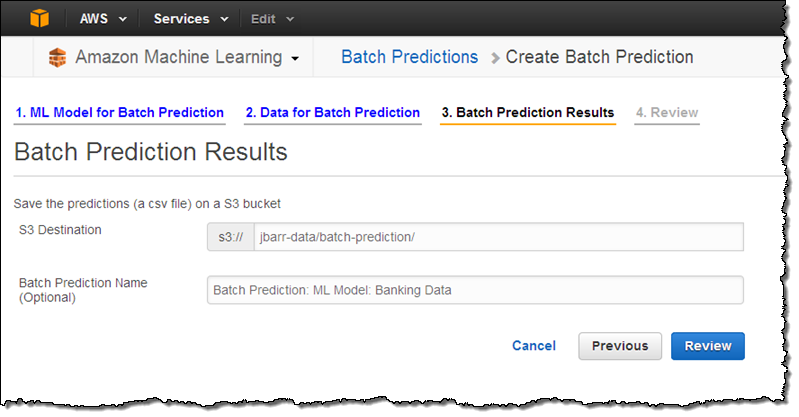
Then I selected a location (in S3) to store the predictions, reviewed my choices, and initiated the batch prediction:
After another quick trip to the garden, my predictions were ready! I downloaded the file from the bucket, unzipped it, and here’s what I saw:
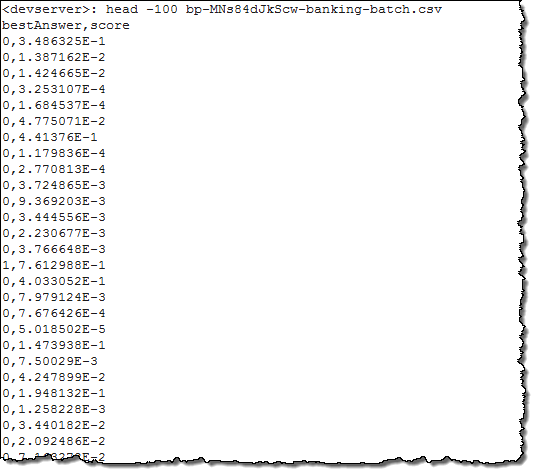
The rows correspond to those in the original file. The first value is the predicted y variable (computed by comparing the prediction score against the cut off that I set when I was building the model), and the second is the actual score. If I had included a Row Identifier, each prediction would include a unique “primary key” that would allow me to tie the results back to the source data.
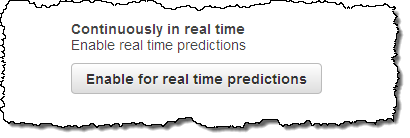
If I am building a real time application and I need to generate predictions as part of a request-response cycle, I can enable the model for real time predictions like this:
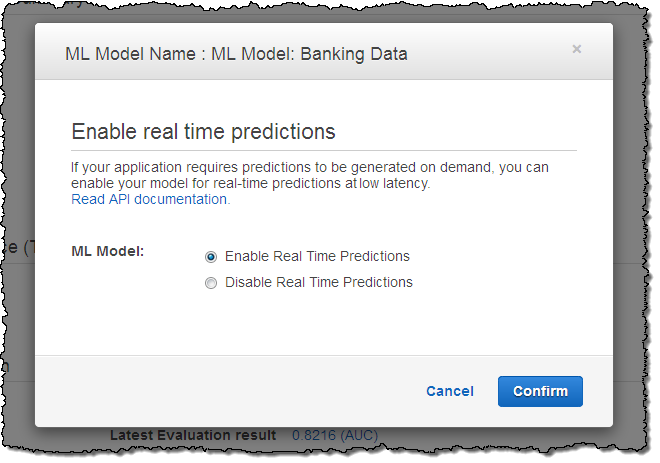
After real time predictions have been enable, I can write code to call Amazon Machine Learning‘s Predict function. Here’s some Java code that retrieves the metadata associated with an ML model (mlModelId in the code), finds the service endpoint in the metadata, makes a real-time prediction, and displays the result:
AmazonMachineLearningClient client = new AmazonMachineLearningClient();

GetMLModelRequest modelRequest = new GetMLModelRequest()
    .withMLModelId(mlModelId);
GetMLModelResult model = client.getMLModel(modelRequest);
String predictEndpoint = model.getEndpointInfo().getEndpointUrl();

PredictRequest predictRequest = new PredictRequest()
   .withMLModelId(mlModelId)
   .withPredictEndpoint(predictEndpoint)
   .withRecord(record);
 PredictResult prediction = client.predict(predictRequest);

System.out.println(prediction);
The code will produce output that looks like this:
{Prediction: {PredictedLabel: 0,PredictedScores: {0=0.10312237},Details: {PredictiveModelType=BINARY, Algorithm=SGD}}}
This means that the ML model type was Binary classification, the predicted score was 0.10312237, and based on the prediction threshold associated with the model when the code was run, the predicted response was ‘0’.
Check out our Machine Learning Samples to see some sample code (Python and Java) for targeted marketing, social media monitoring, and mobile predictions.
Things to Know
Amazon Machine Learning is available now and you can start using it today in the US East (N. Virginia) region.
Pricing, as usual, is on a pay-as-you-go basis:
- Data analysis, model training, and model evaluation will cost you $0.42 per compute hour.
- Batch predictions will cost $0.10 for every 1,000 predictions, rounded up to the next 1,000.
- Real time predictions cost $0.10 for every 1,000 predictions plus an hourly reserved capacity charge of $0.001 per hour for each 10 MB of memory provisioned for your model. During model creation, you specify the maximum memory size of each model to manage the cost and to control predictive performance.
- Charges for data stored in S3, Amazon RDS, and Amazon Redshift are billed separately.
Learning More
To learn more about Amazon Machine Learning, read the [Amazon Machine Learning] documentation!
— Jeff;