AWS Big Data Blog
Configure single sign-on authentication for Amazon Athena with Azure AD integrated to on-premises AD
Amazon Athena is an interactive query service that makes it easier to analyze data directly in Amazon Simple Storage Service (Amazon S3) using standard SQL. Cloud operation teams can use AWS Identity and Access Management (IAM) federation to centrally manage access to Athena. This simplifies administration by allowing a governing team to control user access to Athena workgroups from a centrally managed Azure AD connected to an on-premise Active Directory. This setup reduces the overhead experience by cloud operation teams when managing IAM users. Athena supports federation with Active Directory Federation Service (ADFS), PingFederate, Okta, and Microsoft Azure Active Directory (Azure AD) federation.
| For more information on how to use ADFS with Athena, see Enabling Federated Access to the Athena API. . |
This blog post illustrates how to set up AWS IAM federation with Azure AD connected to on-premises AD and configure Athena workgroup- level access for different users. We are going to cover two scenarios:
- Azure AD managed users and groups, and on-premises AD.
- On-prem Active directory managed users and groups synchronized to Azure AD.
We don’t cover how to setup synchronization between on-premises AD and Azure AD with the help of Azure AD connect. For more information on how to integrate Azure AD with an AWS Managed AD , see Enable Office 365 with AWS Managed Microsoft AD without user password synchronization and how to integrate Azure AD with an on-premises AD , see Microsoft article Custom installation of Azure Active Directory Connect.
Solution overview
This solution helps you configure IAM federation with Azure AD connected to on-premises AD and configure Athena workgroup-level access for users. You can control access to the workgroup by either an on-premises AD group or Azure AD group. The solution consists of four sections:
- Set up Azure AD as your identity provider (IdP):
- Set up Azure AD as your SAML IdP for an AWS single-account app.
- Configure the Azure AD app with delegated permissions.
- Set up your IAM IdP and roles:
- Set up an IdP trusting Azure AD.
- Set up an IAM user with read role permission.
- Set up an IAM role and policies for each Athena workgroup.
- Set up user access in Azure AD:
- Set up automatic IAM role provisioning.
- Set up user access to the Athena workgroup role.
- Access Athena:
- Access Athena using the web-based Microsoft My Apps portal.
- Access Athena using SQL Workbench/J a free, DBMS-independent, cross-platform SQL query tool.
The following diagram illustrates the architecture of the solution.

The solution workflow includes the following steps:
- The developer workstation connects to Azure AD via a SQL Workbench/j JDBC Athena driver to request a SAML token (two-step OAuth process).
- Azure AD sends authentication traffic back to on-premises via an Azure AD pass-through agent or ADFS.
- The Azure AD pass-through agent or ADFS connects to on-premises DC and authenticates the user.
- The pass-through agent or ADFS sends a success token to Azure AD.
- Azure AD constructs a SAML token containing the assigned IAM role and sends it to the client.
- The client connects to AWS Security Token Service (AWS STS) and presents the SAML token to assume the Athena role and generates temporary credentials.
- AWS STS sends temporary credentials to the client.
- The client uses the temporary credentials to connect to Athena.
Prerequisites
You must meet the following requirements prior to configuring the solution:
- On the Azure AD side, complete the following:
- Set up the Azure AD Connect server and sync with on-premises AD
- Set up the Azure AD pass-through or Microsoft ADFS federation between Azure AD and on-premises AD
- Create three users (
user1,user2,user3) and three groups (athena-admin-adgroup,athena-datascience-adgroup,athena-developer-adgroup) for three respective Athena workgroups
- On the Athena side, create three Athena workgroups:
athena-admin-workgroup,athena-datascience-workgroup,athena-developer-workgroup
For more information on using sample Athena workgroups, see A public data lake for analysis of COVID-19 data.
Set up Azure AD
In this section we will cover Azure AD configuration details for Athena in Microsoft Azure subscription. Mainly we will register an app, configure federation, delegate app permission and generate App secret.
Set Azure AD as SAML IdP for an AWS single-account app
To set up Azure AD as your SAML IdP, complete the following steps:
- Sign in to the Azure Portal with Azure AD global admin credentials.
- Choose Azure Active Directory.
- Choose Enterprise applications.
- Choose New application.

- Search for
Amazonin the search bar. - Choose AWS Single-Account Access.
- For Name, enter
Athena-App.

- Choose Create.
- In the Getting Started section, under Set up single sign on, choose Get started.
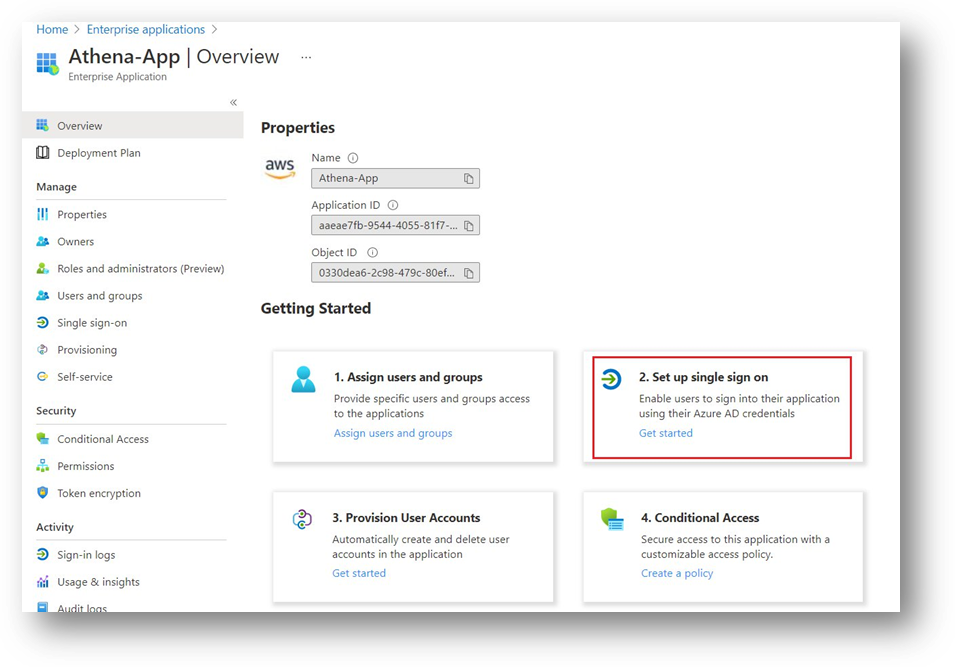
- For Select a single sign-on method, choose SAML.

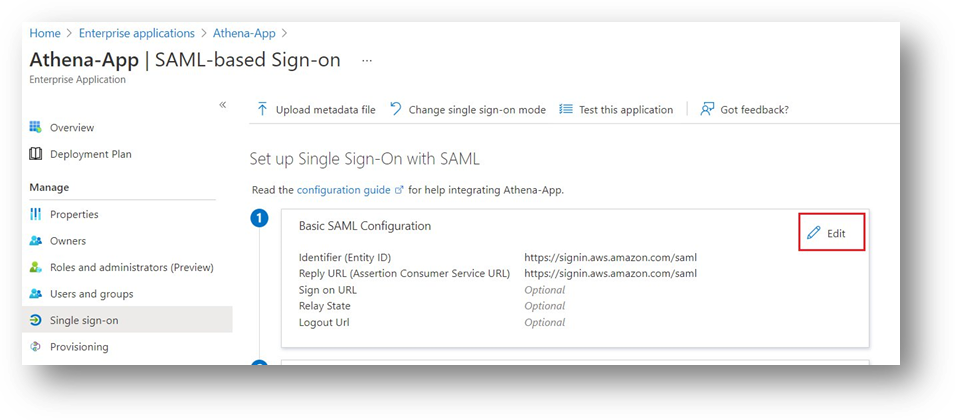
- For Basic SAML Configuration, choose Edit.
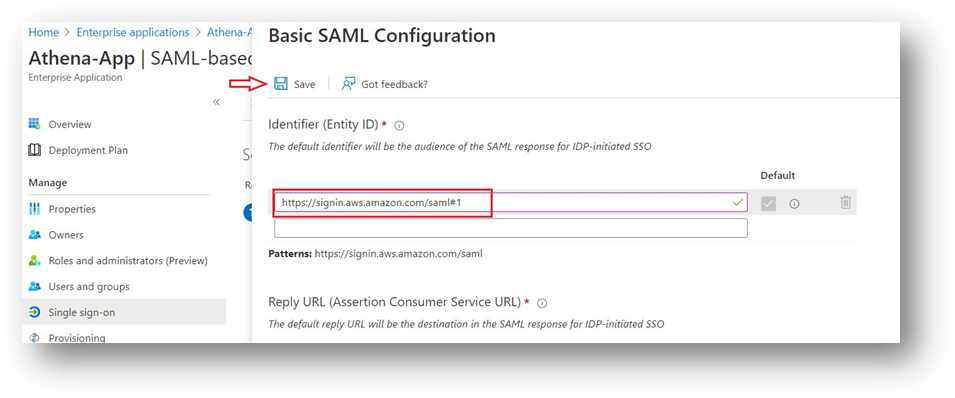
- For Identifier (Entity ID), enter
https://signin.aws.amazon.com/saml#1. - Choose Save.
- Under SAML Signing Certificate, for Federation Metadata XML, choose Download.
This file is required to configure your IAM IdP in the next section. Save this file on your local machine to use later when configuring IAM on AWS.

Configure your Azure AD app with delegated permissions
To configure your Azure AD app, complete the following steps:
- Choose Azure Active Directory.
- Choose App registrations and All Applications.
- Search for and choose Athena-App.
- Note the values for Application (client) ID and Directory (tenant) ID.
You need these values in the JDBC connection when you connect to Athena.
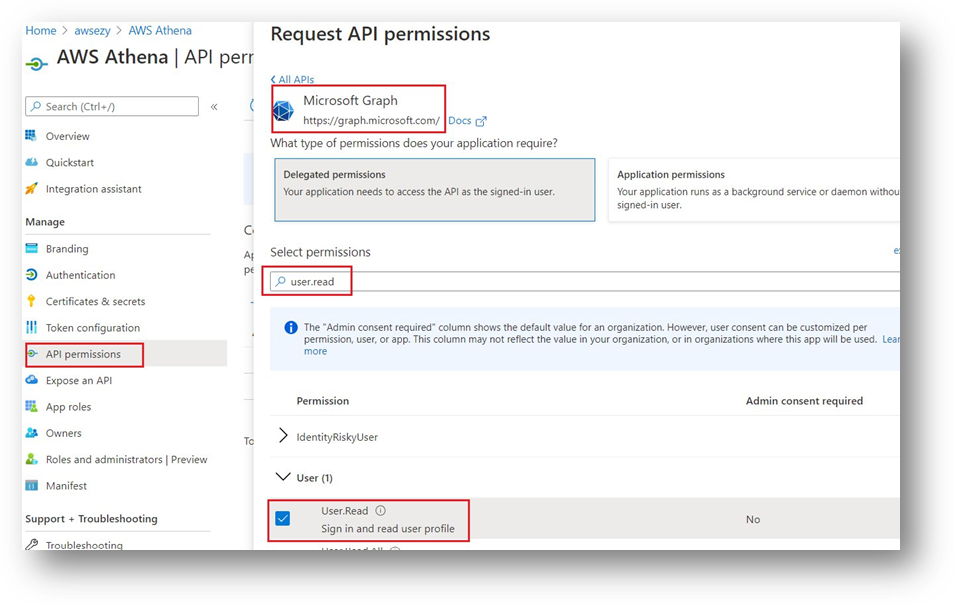
- Under API Permissions, choose Add a permission.
- Choose Microsoft Graph and Delegated permissions.
- For Select permissions, search for
user.read. - For User, choose User.Read.
- Choose Add permission.
- Choose Grant admin consent and Yes.

- Choose Authentication and Add a platform.
- Choose Mobile and Desktop applications.

- Under Custom redirect URIs, enter
http://localhost/athena. - Choose Configure.
- Choose Certificates & secrets and New client secret.
- Enter a description.
- For Expires, choose 24 months.

- Copy the client secret value to use when configuring the JDBC connection.
Set up the IAM IdP and roles
In this section we will cover IAM configuration in AWS account. Mainly we will create an IAM user, Roles and policies.
Set up an IdP trusting Azure AD
To set up your IdP trusting Azure AD, complete the following steps:
- On the IAM console, choose Identity providers in the navigation pane.
- Choose Add provider.
- For Provider Type, choose SAML.
- For Provider Name, enter
AzureADAthenaProvider. - For Metadata Document, upload the file downloaded from Azure Portal.
- Choose Add provider.
Set up an IAM user with read role permission
To set up your IAM user, complete the following steps:
- On the IAM console, choose Users in the navigation pane.
- Choose Add user.
- For User name, enter
ReadRoleUser. - For Access type, select Programmatic access.
- Choose Next: Permissions.
- For Set permissions, choose Attach existing policies directly.
- Choose Create policy.
- Select JSON and enter the following policy, which gives read access to enumerate roles in IAM:
- Choose Next: Tags.
- Choose Next: Review.
- For Name, enter
readrolepolicy. - Choose Create policy.
- On the Add User tab, search for and choose the role
readrole. - Choose Next: tags.
- Choose Next: Review.
- Choose Create user.
- Download the .csv file containing the access key ID and secret access key.
We use these when configuring Azure AD automatic provisioning.
Set up an IAM role and policies for each Athena workgroup
To set up IAM roles and policies for your Athena workgroups, complete the following steps:
- On the IAM console, choose Roles in the navigation pane.
- Choose Create role.
- For Select type of trusted entity, choose SAML 2.0 federation.
- For SAML provider, choose AzureADAthenaProvider.
- Choose Allow programmatic and AWS Management Console access.
- Under Condition, choose Key.
- Select SAML:aud.
- For Condition, select StringEquals.
- For Value, enter
http://localhost/athena. - Choose Next: Permissions.
- Choose Create policy.
- Choose JSON and enter the following policy (provide the ARN of your workgroup):
The policy grants full access to Athena workgroup. It’s based on the AWS managed policy AmazonAthenaFullAccess and workgroup example policies.
- Choose Next: Tags.
- Choose Next: Review.
- For Name, enter
athenaworkgroup1policy. - Choose Create policy.
- On the Create role tab, search for
athenaworkgroup1policyand select the policy. - Choose Next: Tags.
- Choose Next: Review.
- Choose Create role.
- For Name, enter
athenaworkgroup1role. - Choose Create role.
Set up user access in Azure AD
In this section we will setup Automatic provisioning and assign users to app from Microsoft Azure portal.
Set up automatic IAM role provisioning
To set up automatic IAM role provisioning, complete the following steps:
- Sign in to the Azure Portal with Azure AD global admin credentials.
- Choose Azure Active Directory.
- Choose Enterprise Applications and choose Athena-App.
- Choose Provision User Accounts.

- In the Provisioning section, choose Get started.
- For Provisioning Mode, choose Automatic.

- Expand Admin credentials and populate clientsecret and Secret Token with the access key ID and secret access key of
ReadRoleUser, respectively. - Choose Test Connection and Save.
- Choose Start provisioning.
The initial cycle can take some time to complete, after which the IAM roles are populated in Azure AD.
Set up user access to the Athena workgroup role
To set up user access to the workgroup role, complete the following steps:
- Sign in to Azure Portal with Azure AD global admin credentials.
- Choose Azure Active Directory.
- Choose Enterprise Applications and choose Athena-App.
- Choose Assign users and groups and Add user/group.
- Under Users and groups, select the group that you want to assign Athena permission to. For this post, we use
athena-admin-adgroup; alternatively, you can select user1. - Choose Select.
- For Select a role, select the role
athenaworkgroup1role. - Choose Select.
- Choose Assign.
Access Athena
In this section we will demonstrate how to access Athena from AWS console and developer tool SQL Workbench/J
Access Athena using the web-based Microsoft My Apps portal
To use the Microsoft My Apps portal to access Athena, complete the following steps:
- Sign in to Azure Portal with Azure AD global admin credentials.
- Choose Azure Active Directory
- Choose Enterprise Applications and choose Athena-App.
- Choose
- Properties.
- Copy the value for User access URL.
- Open a web browser and enter the URL.
The link redirects you to an Azure login page.

- Log in with the on-premises user credentials.
You’re redirected to the AWS Management Console.
Access Athena using SQL Workbench/J
In highly regulated organizations, internal users aren’t allowed to use the console to access Athena. In such cases, you can use SQL Workbench/J, an open-source tool that enables connectivity to Athena using a JDBC driver.
- Download the latest Athena JDBC driver (choose the appropriate driver based on your Java version).
- Download and install SQL Workbench/J.
- Open SQL Workbench/J.
- On the File menu, choose Connect Window.
- Choose Manage Drivers.
- For Name, enter a name for your driver.
- Browse to the folder location where you downloaded and unzipped the driver.
- Choose OK.

Now that we configured the Athena driver, it’s time to connect to Athena. You need to fill out the connection URL, user name, and password.
Use the following connection string to connect to Athena with a user account without MFA (provide the values collected earlier in the post):
To connect using a user account with MFA enabled, use the browser Azure AD Credentials Provider. You need to construct the connection URL and fill out the user name Username and password
Use the following connection string to connect to Athena with a user account that has MFA enabled (provide the values you collected earlier):
Replace text in red with details collected earlier in the article.

When the connection is established, you can run queries against Athena.
Proxy configuration
If you’re connecting to Athena through a proxy server, make sure that the proxy server allows port 444. The result set streaming API uses port 444 on the Athena server for outbound communications. Set the ProxyHost property to the IP address or host name of your proxy server. Set the ProxyPort property to the number of the TCP port that the proxy server uses to listen for client connections. See the following code:
Summary
In this post, we configured IAM federation with Azure AD connected to on-premises AD and set up granular access to an Athena workgroup. We also looked at how to access Athena through the console using the Microsoft My Apps web portal and SQL Workbench/J tool. We also discussed how the connection works over a proxy. The same federation infrastructure can also be leveraged for ODBC driver configuration. You can also use the instructions in this post to set up SAML-based Azure IdP to enable federated access to Athena Workgroups.
About the Author
 Niraj Kumar is a Principal Technical Account Manager for financial services at AWS, where he helps customers design, architect, build, operate, and support workloads on AWS in a secure and robust manner. He has over 20 years of diverse IT experience in the fields of enterprise architecture, cloud and virtualization, security, IAM, solution architecture, and information systems and technologies. In his free time, he enjoys mentoring, coaching, trekking, watching documentaries with his son, and reading something different every day.