With the rapid growth of software as a service (SaaS) and cloud adoption, identity is the new security perimeter. AWS Identity and Access Management (IAM) and Kubernetes role-based access control (RBAC) provide the tools to build a strong least-privilege security posture. Single sign-on (SSO) uses federation with a central identity provider (IdP) to improve security by allowing users and SecOps teams to manage a single set of credentials. When employees or contractors leave the organization, admins can disable a single account to remove all system and application access. This can also simplify periodic compliance audits.
In this blog, we demonstrate a quick and direct procedure to implement single sign-on to access Kubernetes resources running on your Amazon Elastic Kubernetes Service (Amazon EKS) clusters. You can use AWS Single Sign-On (AWS SSO) in combination with Kubernetes RBAC to manage access using AWS Command Line Interface (AWS CLI) and other Kubernetes CLI tools. You can follow the steps below to get up and running quickly, based on AWS best practices, and you can customize them according to your specific needs. There are good references available that describe specific aspects of SSO and IdP federation, and we recommend those at the end of this post to provide deep dives for specific use cases and challenges.
During the setup process, you will switch between these identities to issue commands against different components.
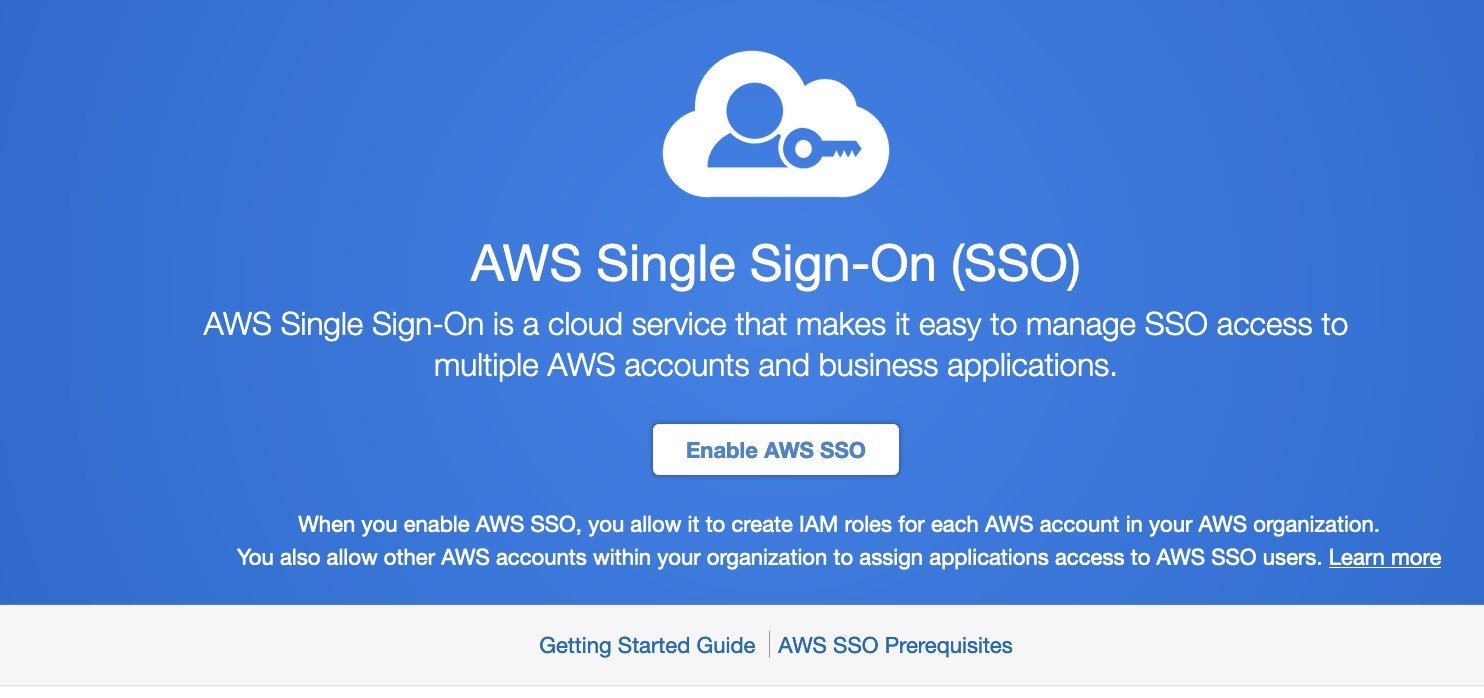
As the administrator of your AWS environment, you will enable AWS Organizations, create a member account to host your EKS cluster, enable AWS SSO, and create users and groups aligned with your organization’s roles and responsibilities.
AWS SSO requires AWS Organizations, two no-cost services for managing multiple AWS accounts. With AWS Organizations, AWS SSO can provide authentication and authorization across all accounts in an organization through a single login portal. AWS Organizations can simplify management and security through centralized security guardrails, cross-account administrative access, resource sharing, and organization-wide billing.
You can deploy AWS Organizations using a single AWS CLI command. The account where you issue this command will become the AWS Organizations root account. Your AWS user or role should have the AdministratorAccess managed IAM policy attached.
It will take a few minutes for AWS Organizations to provision.
When AWS Organizations provisioning completes, the original account email address will receive an email verification request. Open the email and select the Verify your email address button. That step enables you to create or invite additional AWS accounts into your new organization.
Now we’ll provision a new member account to host the EKS cluster. Provide a unique name and create an email address in your mail domain by replacing “youralias” and “yourdomain” in the command below. (If your email provider supports it, you can create multiple unique email aliases that go to the same mailbox by appending “+” and a unique string to an existing mail alias). The ${RANDOM} variable will generate a random 5-digit number. While the new account provisions, you can continue to enabling AWS SSO.
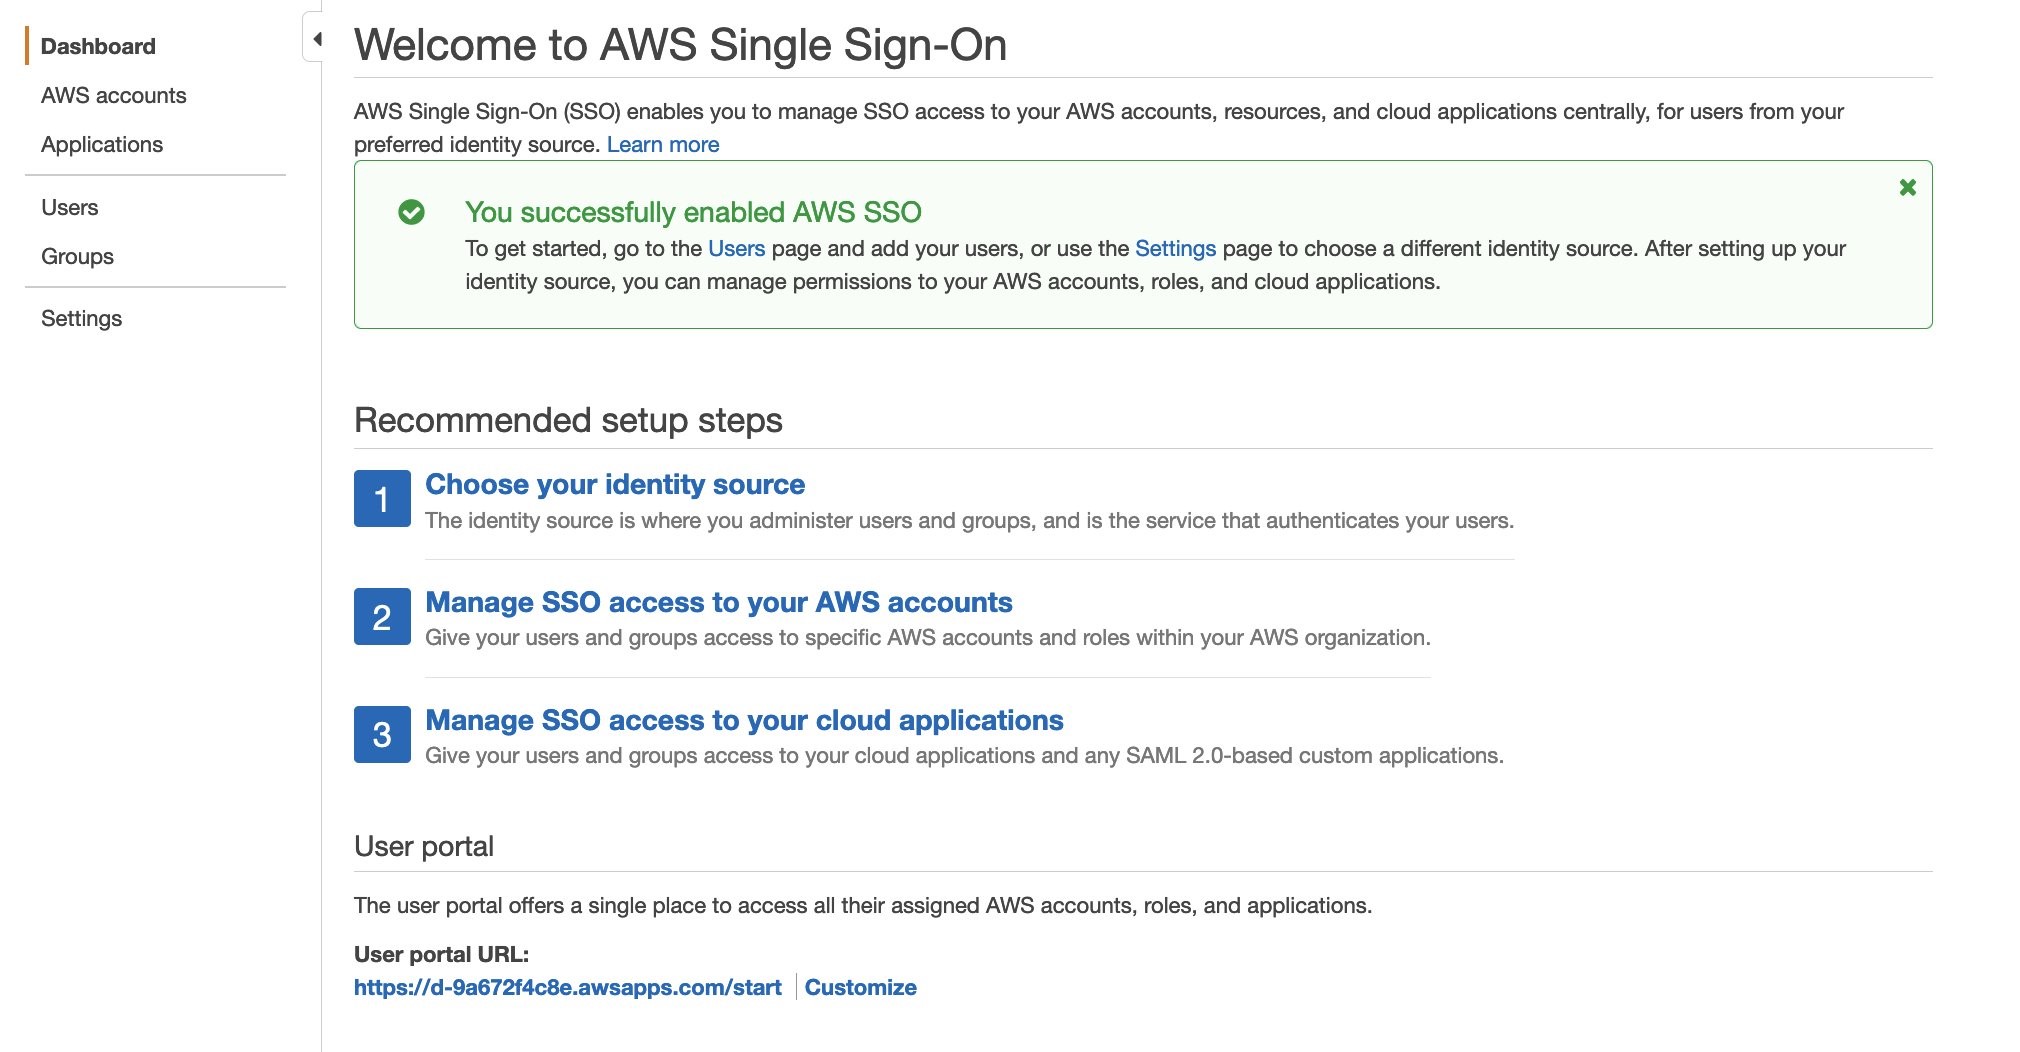
Once the initial setup completes, you’ll be returned to the AWS SSO configuration pages. Notice that your AWS SSO login portal has already been provisioned. The URL may be further customized by adding a unique host name to the “awsapps.com” parent domain. For now, copy the “User portal URL” from the SSO dashboard and paste it to a text editor for use in later steps below.
AWS SSO gets you up and running quickly by giving you the option of using the AWS SSO built-in identity store or your own IdP, such as AWS Managed Microsoft AD or an external SAML 2.0 compliant IdP. We will use the AWS SSO built-in identity store. The identity source can be changed later on as your requirements change.
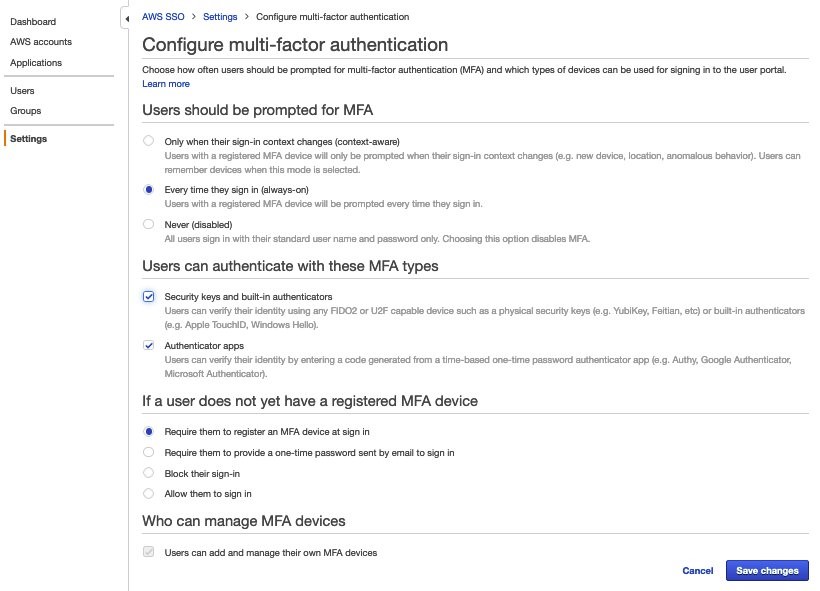
Before we create an identity in AWS SSO, we’ll turn on multi-factor authentication, which supports both security keys and mobile authenticator apps.
Now we’ll create a group for EKS cluster administration, associate the group with our member account EKS-Account-…, grant permissions, and add a new user to the group. Using groups in AWS SSO simplifies role-based access control (RBAC). In the steps below, we create a least-privilege IAM policy that grants view-only for key AWS resources, full access to EKS resources, and the ability to assume a special role we will use to create the cluster.
{
"Version": "2012-10-17",
"Statement": [
    {
        "Effect": "Allow",
        "Action": [
            "eks:*",
            "sts:AssumeRole"
        ],
        "Resource": "*"
    }
  ]
} 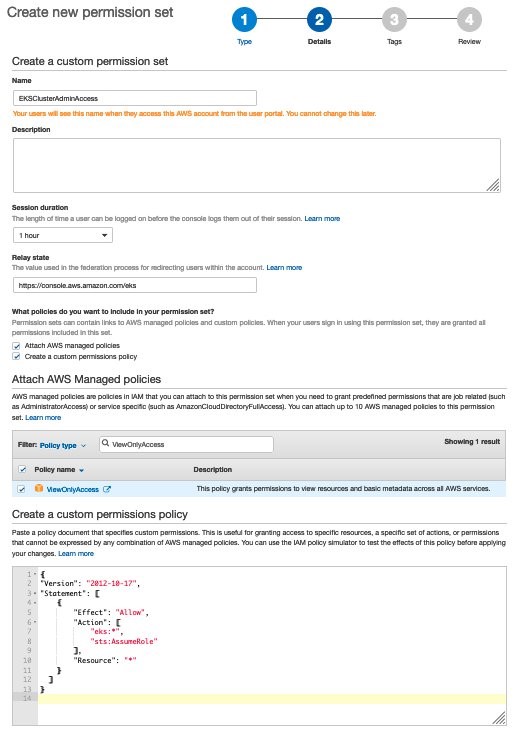
5) Back on the Select permission sets window, select the refresh arrows, and select the new EKSClusterAdminAccess permission set, and select Finish. Once your account is configured, select Proceed to AWS Accounts.
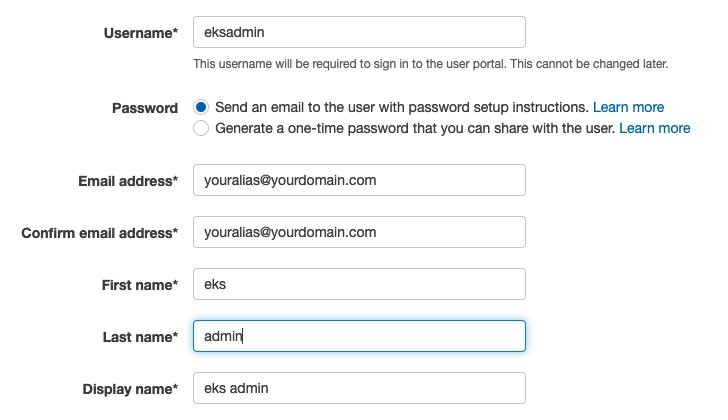
6) Select Users, then Add User, and type “eksadmin”.
- In the Password section, select Send an email to the user…, enter and confirm your email address, and then enter first, last, and display names.
- Select Next: Groups. Select EKS_Cluster_Admins and select Add User.
- Note that your username is case-sensitive.
When you receive the Invitation to join AWS Single Sign-On message in your inbox, select the Accept Invitation button, which brings you to the New user sign up window.
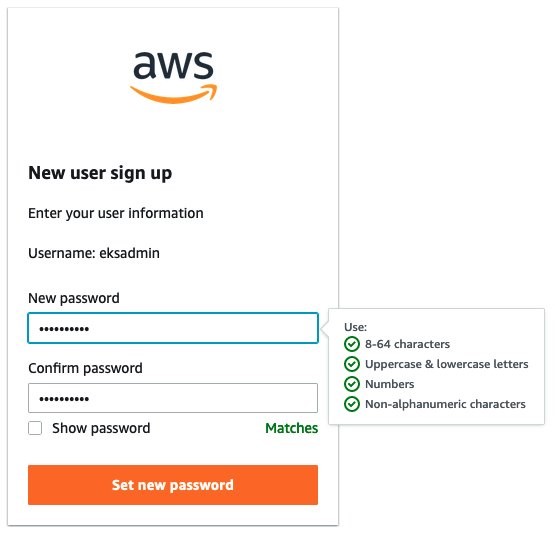
Enter and confirm your new password. As you type, password length and complexity requirements appear to the right, providing guidance as you satisfy those requirements. Once you select Set new password, you’ll be redirected to the AWS SSO sign-in page.
Note: If you have an existing AWS SSO session, make sure to sign out before continuing.
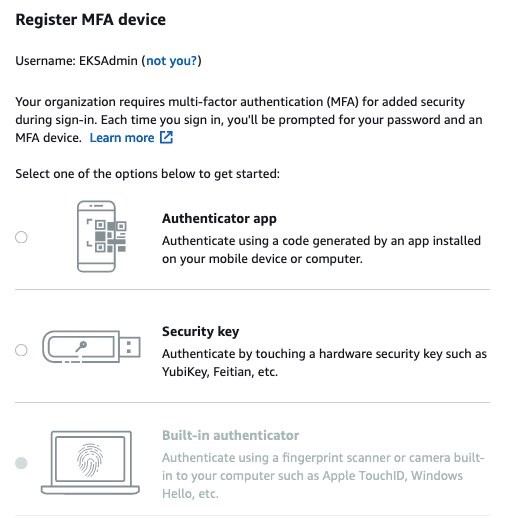
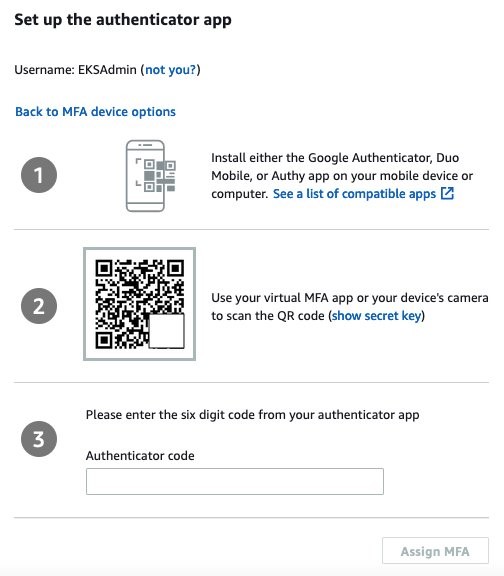
Sign in with your new credentials, and you’ll be prompted to set up multi-factor authentication. We are using Twilio Authy, but AWS SSO supports several popular physical security key and smartphone authenticator apps such as Google Authenticator and Yubikey. Open or install your desired authentication app on your smartphone. Go back to the MFA setup on the SSO sign-in page, select Authenticator app, select Next, and select Show QR code. Scan the QR code with your phone and enter the numeric code from your app to complete the new user setup.
Once you select Done, you will be redirected to the SSO account selection page, which will include the “EKS-Account-…” account you associated with the EKS_Cluster_Admins group earlier. Expand that account, select the EKSClusterAdminAccess role, and you are directed to the EKS service page of the AWS Management Console.
So far, we’ve created an organization and added an additional account with only two lines of code. Then we set up AWS Single Sign-on, created a group, and assigned that group to the new account with a least-privilege permission set related to the group’s job role. Finally, we added a new user to that group, set up MFA, and signed in to SSO as that user. If you wanted to use AWS Managed Active Directory or a third-party IdP such as Okta, you could federate those identity providers with AWS Single Sign-on and use those providers’ user identities instead of creating AWS SSO users such as “eksadmin.” All other steps would remain the same.
Set up CLI with SSO access to EKS
To simplify using SSO with the AWS CLI, AWS Single Sign-on provides an aws sso login command that integrates with AWS configuration profiles. To set that up, open your command-line terminal with the latest version of the AWS CLI installed and configured.
Automatically create a named SSO profile
aws configure sso
Supply the following values:
sso_start_url – “User portal URL” you copied earlier from the SSO management dashboardsso_region – the Region where SSO was originally deployed and is currently managed
When the browser window opens requesting your authorization, select Allow, and return to the CLI, which will guide you through selecting an account, a role, a default region for issuing commands, and output format. Assuming your browser has an authenticated AWS SSO session for the “eksadmin“ SSO user, you will only be offered accounts and roles associated with that user. When creating a profile name, select a name that you can easily remember for future reference since you must include --profile {profile_name} to issue CLI commands under that profile. In this example, we’re naming the profile “EKSClusterAdminAccess-EKSAccount1”.
Your SSO configuration session will resemble the following sample output.
$ aws configure sso
SSO start URL [None]: https://{hostname}.awsapps.com/start
SSO Region [None]: us-east-1
The only AWS account available to you is: 111222333444
Using the account ID 111222333444
The only role available to you is: EKSClusterAdminAccess
Using the role name "EKSClusterAdminAccess"
CLI default client Region [None]: us-east-1
CLI default output format [None]: json
CLI profile name [EKSClusterAdminAccess-111222333444]: EKSClusterAdminAccess-EKSAccount1
Once you create the SSO profile, you can use the command aws sso login in the future, which will open a browser window prompting you for credentials. Before proceeding, check your current identity:
aws sts get-caller-identity --profile EKSClusterAdminAccess-EKSAccount1
You should encounter something like:
{
 "UserId": "AZORYH847HJYD98SU:eksadmin",
 "Account": "111222333444",
 "Arn": "arn:aws:sts::111222333444:assumed-role/AWSReservedSSO_EKSClusterAdminAccess_4ffa4321e413c0b0/eksadmin"
}
Before we create an EKS cluster in our new account and associate your AWS SSO identity with a Kubernetes cluster role, we’ll create a special IAM role for the creation of your new EKS cluster. (As a trade-off between security and simplicity, this role permits all actions for a limited set of AWS services directly involved in cluster creation. For more stringent least-privilege scenarios, you may use services such as AWS IAM Access Analyzer to build a role based on actual CloudTrail access logs.)
Create IAM EKSClusterCreator role
When you create an EKS cluster, the user or role you use will inherit cluster administrator permissions. This identity principal retains cluster admin permissions for the life of the cluster and should be kept secure. It is best practice to create additional roles to delegate routine operational tasks while keeping the cluster creator role separate and secure. If you forget the name of that principal, it can be retrieved or changed by AWS Support for a limited time, or you can recreate the IAM principal if you remember the user or role name.
In the CLI code snippets below, your account number and SSO role name are extracted from your current SSO session and used to grant access to your AWS SSO group to assume the new EKSClusterCreator role. You will use that role to create a new EKS cluster using the eksctl command line tool.
Get current role and account to create the cluster creator policy
ssorole=$(aws sts get-caller-identity --query Arn --output text --profile EKSClusterAdminAccess-EKSAccount1 | cut -d/ -f2)
account=$(aws sts get-caller-identity --query Account --output text --profile EKSClusterAdminAccess-EKSAccount1)
echo $ssorole $account
Create a JSON file for the IAM cluster creator role trust policy
cat <<EOF > assume-role.json
{
  "Version": "2012-10-17",
  "Statement": [
    {
      "Effect": "Allow",
      "Principal": {
        "AWS": "arn:aws:iam::${account}:role/aws-reserved/sso.amazonaws.com/${ssorole}"
      },
      "Action": "sts:AssumeRole",
      "Condition": {}
    }
  ]
}
EOF
Note: If you configure SSO in a Region other than us-east-1, add the Region after “sso.amazonaws.com”. For example, for us-east-2, “…/sso.amazonaws.com/us-east-2/…”.
Create a JSON file for the IAM cluster creator role permissions policy
cat <<EOF > clustercreator-policy.json
{
    "Version": "2012-10-17",
    "Statement": [
        {
            "Effect": "Allow",
            "Action": [
                "eks:*",
                "iam:*",
                "cloudformation:*",
                "ec2:*",
                "autoscaling:*",
                "ssm:*",
                "kms:*",
                "sts:GetCallerIdentity"
            ],
            "Resource": "*"
        }
    ]
}
EOF
Even though the cluster creator role requires elevated permissions to create all of the EKS cluster resources, those permissions are only a subset of full AWS AdministratorAccess policy permissions. For simplicity, we will create a policy that allows all API actions for only the AWS services involved in cluster creation.
To create the IAM policy and role in the EKS-Account, we will temporarily assume the OrganizationAccountAccessRole that is created for all AWS Organizations member accounts. This feature of AWS Organizations offers a customizable level of centralized administrator access across the organization.
Assume the OrganizationAccountAccessRole to create the EKSClusterCreator role
adminrolearn="arn:aws:iam::${account}:role/OrganizationAccountAccessRole"
creds=$(aws sts assume-role --role-arn ${adminrolearn} --role-session-name "adminSession-CreateEKSCreatorRole" --query 'Credentials.[{AWS_ACCESS_KEY_ID: AccessKeyId}, {AWS_SESSION_TOKEN: SessionToken}, {AWS_SECRET_ACCESS_KEY: SecretAccessKey}]' | jq -r .[] | sed 's/{//;s/}//;s/"//g;s/ AWS_ACCESS_KEY_ID: /export AWS_ACCESS_KEY_ID=/;s/ AWS_SESSION_TOKEN: /export AWS_SESSION_TOKEN=/;s/ AWS_SECRET_ACCESS_KEY: /export AWS_SECRET_ACCESS_KEY=/')
eval ${creds}
Now when you enter aws sts get-caller-identity, you will see that we’ve assumed the OrganizationalAccountAccessRole. The previous script assumes that role and creates environment variables that set your default AWS CLI credentials until you change or unset the AWS_ACCESS_KEY_ID variable or specify an AWS configuration profile.
Create a cluster creator role and attach the policy
aws iam create-role --role-name EKSClusterCreator --assume-role-policy-document file://assume-role.json
aws iam create-policy --policy-name EKSClusterCreatorPolicy --policy-document file://clustercreator-policy.json
aws iam attach-role-policy --policy-arn arn:aws:iam::${account}:policy/EKSClusterCreatorPolicy --role-name EKSClusterCreator
Assume the role and apply new temporary credentials
rolearn="arn:aws:iam::${account}:role/EKSClusterCreator"

creds=$(aws sts assume-role --role-arn ${rolearn} \
  --role-session-name "create-eks-cluster" \
  --query 'Credentials.[{AWS_ACCESS_KEY_ID: AccessKeyId}, {AWS_SESSION_TOKEN: SessionToken}, {AWS_SECRET_ACCESS_KEY: SecretAccessKey}]' \
  --profile EKSClusterAdminAccess-EKSAccount1 | jq -r .[] | sed 's/{//;s/}//;s/"//g;s/ AWS_ACCESS_KEY_ID: /export AWS_ACCESS_KEY_ID=/;s/ AWS_SESSION_TOKEN: /export AWS_SESSION_TOKEN=/;s/ AWS_SECRET_ACCESS_KEY: /export AWS_SECRET_ACCESS_KEY=/')

eval ${creds}
Now that we have created our special EKSClusterCreator role, assumed that role in our command-line interface, and reset our environment variables, we are now ready to create our EKS cluster. Once created, we’ll use the eksctl utility to grant access to our EKSClusterAdminAccess role to the new EKS cluster.
Create EKS cluster
Create a new EKS cluster and managed nodegroup in a new VPC with default settings
eksctl create cluster
Note: By default, EKS will update the active kubeconfig file. You can specify another kube config file by setting the KUBECONFIG environment variable as follows:
export KUBECONFIG=~/.kube/config-ekssso-EKSClusterAdmin
Doing so will preserve your existing kube config file and create a new one when eksctl create cluster finishes.
Cluster creation will take about 15–20 minutes. While you wait, you might read the eksctl documentation to see what happens behind the scenes and learn about additional configuration options. To build the cluster and related infrastructure, eksctl uses AWS CloudFormation. Note the cluster name and continue to the next section when cluster creation completes.
Kubernetes RBAC and IAM federation
EKS provides multiple methods for controlling access to clusters, including webhook token authentication, service account tokens, and OIDC authentication. AWS CLI version 2.x and later transparently generates bearer tokens for authenticating kubectl commands. The kube-apiserver uses an authentication webhook to validate the token signature and forward the token for authentication with AWS Security Token Service (AWS STS). Once authenticated, kube-apiserver looks for an IAM to Kubernetes RBAC identity mapping in the aws-auth ConfigMap, created by default in all EKS clusters. We will use the already-assumed EKSClusterCreator role to delegate EKS cluster admin rights to our EKSClusterAdminAccess role. First, we’ll grant access to the AWS SSO EKSClusterAdminAccess role using the Kubernetes default cluster-admin role. If you only have one EKS cluster in the Region you’re using for this exercise, you can enter the full code block shown below. Otherwise, manually set the “cluster” variable with the command export cluster={cluster-name}, using the cluster name shown in the last line of your eksctl cluster creation process, or by issuing the CLI command aws eks list-clusters.
Create aws-auth identity mapping for EKSClusterAdminAccess role
cluster=$(aws eks list-clusters –query clusters –output text)

eksctl create iamidentitymapping \
 --cluster ${cluster} \
 --arn “arn:aws:iam::${account}:role/${ssorole}” \
 --username cluster-admin \
 --group system:masters
View the new IAM to Kubernetes RBAC mapping by viewing the aws-auth ConfigMap in your EKS cluster
kubectl get configmap -n kube-system aws-auth -o yaml
Your output will resemble the following:
apiVersion: v1
kind: ConfigMap
metadata:
  name: aws-auth
  namespace: kube-system
data:
  mapRoles: |
    - groups:
      - system:bootstrappers
      - system:nodes
      rolearn: arn:aws:iam::111222333444:role/eksctl-fabulous-wardrobe-16446157-NodeInstanceRole-L7A7NXU3DSJS
      username: system:node:{{EC2PrivateDNSName}}
    - groups:
      - system:masters
      rolearn: arn:aws:iam::111222333444:role/AWSReservedSSO_EKSClusterAdminAccess_6a316cc66d154241
      username: cluster-admin
By running the eksctl create iamidentitymapping command, we mapped our SSO permission set “EKSClusterAdminAccess” to the Kubernetes default cluster-admin role. The other entry, system:node:{{EC2PrivateDNSName}}, is mapped to the EKS nodegroup instance profile role eksctl-fabulous-wardrobe-16446157-NodeInstanceRole-L7A7NXU3DSJS, which grants each node’s kubelet system:bootstrappers and system:nodes permission inside the cluster. This nodegroup mapping is created each time a new nodegroup is created. Notice that there is no mention of the EKSClusterCreator role in the aws-auth ConfigMap. This identity principal retains cluster admin permissions for the life of the cluster and should be kept secure per the EKS Security Best Practices Guide.
Kubectl requires a configuration file entry to define the cluster, Region, identity, and authentication method for kubectl commands. You can generate that configuration for your EKSClusterAdminAccess role as follows.
Create kubeconfig to begin using the EKSClusterAdminAccess role
aws eks update-kubeconfig --name ${cluster} \
--profile EKSClusterAdminAccess-EKSAccount1
Note: If you receive a “No cluster found for name” error, append --region {cluster region} to the above code block, where {cluster region} is the Region where you created your EKS cluster.
Let’s test access to our EKS cluster. The output will list your worker nodes.
kubectl get nodes
Now that we have an AWS SSO role for EKS cluster admins mapped to a native Kubernetes cluster-admin role, we can create additional least-privilege roles (scoped by Kubernetes namespace) or cluster-wide clusterroles mapped to new AWS SSO permission sets using eksctl IAM identity mappings in the aws-auth ConfigMap.
Conclusion
In this blog, we walked you through setting up an organization and AWS Single Sign-on. We created a user, group, and role (also called permission set) associated with a new account for our EKS cluster. We also created a special role for creating our new EKS cluster, and we used that special role to map our AWS SSO role to a Kubernetes native RBAC cluster-admin role. With the exception of the AWS SSO configuration, all other tasks were completed using AWS CLI commands, an example of repeatable infrastructure as code.
Related blogs and documentation