Containers
Expanding modernization scenarios using the AWS App2Container integration with AWS App Runner
Many enterprises want to rapidly modernize their existing applications by containerizing them with minimal effort or investing time in gaining expertise in container technologies. That’s why AWS launched AWS App2Container (A2C) in June 2020, a service that helps customers containerize .NET and Java applications without making any code changes.
A2C analyzes the running applications and automatically generates a container image with the correct dependencies, network configurations, and deployment instructions for running containers on AWS. Since its launch, it supported deployment of containers to Amazon Elastic Container Service (Amazon ECS) and Amazon Elastic Kubernetes Service (Amazon EKS) including AWS Fargate options for both. Beginning with the version 1.4 of A2C, we are announcing support for deployment of containerized Java applications including Tomcat, Spring Boot and generic applications to AWS App Runner.
AWS App Runner is a fully managed container application service that makes it easy for customers without any prior containers or infrastructure experience to build, deploy, and run containerized web applications and APIs in just a few clicks.
In this blog post, I explore the modernization scenarios that are unlocked and simplified using A2C integration with App Runner. I will dive deep into three use cases: migrating an application running on-premises to AWS, migrating a web application running in to AWS App Runner and deploying Spring Boot applications with A2C and App Runner.
A2C integration with App Runner
With the integration between App2Container and App Runner, developers can take a running Linux-based web application, analyze, containerize, and deploy to App Runner in few simple steps and receive a secure URL to access the web service. Users can take advantage of continuous deployment, automatic scaling, and monitoring of deployed web service offered by App Runner.
While App2Container helps to simplify containerizing existing application, App Runner provides a DevOps-ready platform to run such applications on AWS.
Before you start, here are some important considerations to decide if App Runner is the right deployment choice for your application:
- Your application is using HTTP/2, HTTP/1.1, and HTTP/1.0 protocols to serve its clients using a single port.
- Your application processes requests synchronously and does not do any asynchronous processing after the response is sent. Any background processing outside of the context of a request must be limited to minor base activity such as garbage collection, logging, etc. Your application is stateless, meaning that it treats requests independently from each other and the instance on which they are being processed. It can still depend on the state stored external to the instance.
- Your application is able to scale horizontally and runs on ephemeral instances.
Also, the container image for your application using App2Cotainer must be built for Linux x64 platform and image size must not exceed 3 GiB.
Many of these requirements, such as stateless nature of the application and ability to scale horizontally, align with the principles of cloud-native application design.
Containerize and migrate existing applications to AWS
This use case remains to be one of the most popular areas where customers are looking for best practices around containerization and deployment. Let’s look at how to re-platform a tomcat app running on-premises and deploy it with AWS AppRunner.
A2C can be downloaded and installed by following instructions in the A2C service documentation. Our focus in this post is the practical aspects of A2C integration with App Runner.
Let’s assume that A2C is installed on the Linux box where the Tomcat server and your application are running. If your application passes the suitability check, A2C will provide you with an option to choose your deployment target as AWS App Runner.
All A2C commands must be run with sudo or under root.
As of this writing, App2Container does not handle escape characters in the generated JSON file. If you experience an issue running the “containerize” command, please inspect the analysis.json file for any escaped characters and remove them, for example “-DJDBC_CONNECTION_STRING=\”<somevalue>\””.
App Runner deployment steps
The containerization step will produce a deployment.json file in the directory named as the discovered application identifier. This file includes options for all the supported deployment destinations, including App Runner. To select App Runner as the deployment target make sure that the createAppRunnerArtifacts attribute is set to “true” while the rest of the options are set to false.
Consider changing the image name and tag to your application name and version as A2C could be used to containerize future versions as well.
I have used snakes application as an example of a Tomcat application running on-premises, hence the image name is set to “snakes-a2c-apprunner”:
Note, that the exposed port is set to 8080, however, it begs the question of handling SSL termination, since 8080 is a plain HTTP port. With App Runner, you don’t need to implement handling of HTTPS secure traffic. App Runner requires incoming HTTPS traffic and terminates HTTPS before passing requests to your container instance.
After containerization is complete run docker image list to check the image. You will see output similar to the following:
In this case, all parameters including image size in addition to a single HTTP port requirement satisfy the App Runner deployment requirements.
The next step is to generate application deployment using the following App2Container command, replacing the application identifier with the one discovered on your machine:
If the generated image does not meet App Runner deployment requirements, the command will fail. For example, if the image size exceeds the 3 GB threshold you will see an error message similar to this:
“App Runner requires container images of 3GB or less. Image sizes can be improved by excluding unnecessary files via "appExcludedFiles" in analysis.json prior to containerization".
Navigate to the AppRunnerDeployment directory to see the produced CloudFormation template named apprunner.yml. You can further tweak the deployment options and validate the CPU and memory requirements. This step is important as it affects the runtime behavior of your container. For example, if memory limit is exceeded at runtime, App runner will terminate the instance immediately.
Here is an example of the produced template (parameters only). Consider changing the service name to something more presentable than the discovered application id.
One important option to consider here is the “AutoDeploymentsEnabled” parameter. If set to true, it will enable automatic deployment of the new container instance when the image is updated in Amazon ECR. This option is a direct enabler of continuous delivery (CD) for your application, which means that your pipeline can be simplified for subsequent deployments.
The final deployment step is to run the deployment with CloudFormation CLI:
If you did not modify the produced CloudFormation template, you can also use the A2C generate-appdeployment --deploy command:
app2container generate app-deployment --application-id java-tomcat-10b413d7 --deploy
After a few minutes, you can navigate to the App Runner console and observe the service up and running. Navigate to the region where you deployed the application. The provided link assumes you are using us-west-2.

At this point, you can click the provided URL and make sure that the application is running.
Options to migrate from AWS Elastic Beanstalk
The application that I deployed was originally created for AWS Elastic Beanstalk. In most cases, it may indicate that the application meets the pre-requisites to be deployed with AWS App Runner.
To walk through this use case, I will run the snakes application with AWS Elastic Beanstalk. For this post, I will omit the section related to the database part and focus on the application deployment only.
Since App2Container is not deployed on the nodes running the application with AWS Elastic Beanstalk, I will use the “remote” feature of App2Container. It requires SSH connectivity to the target node. For this example, I will initialize the Elastic Beanstalk environment with an SSH key that I will generate and import using EC2 CLI command. I will also upload this key to AWS Secrets Manager as it will be needed in this form for App2Container.
Next, I will clone the sample repository, build it and initialize the Elastic Beanstalk environment with the generated SSH key:
It is possible that your Elastic Beanstalk environment was initialized without a key that enables remote access. In such a case, you can run eb ssh --setup to configure it. This step, however, will cause a reboot of the instances that back your application.
Add the following to .elasticbeanstalk/config.yml:
Create an environment:
Deploy the project WAR to your new environment:
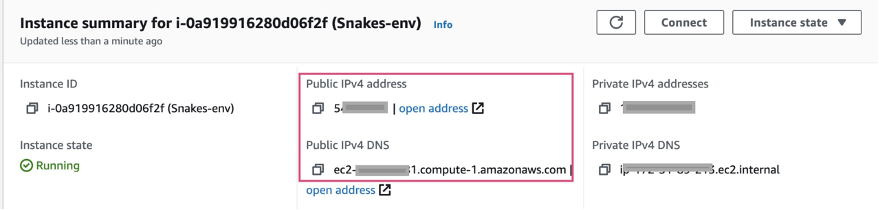
Now that the sample application is up and running, I will configure App2Container to communicate remotely to the instance. I need either IP or fully qualified DNS name of the instance, which could be looked up in the EC2 console:
At this point, let’s configure App2Container for remote access to the EC2 instance that backs the Elastic Beanstalk application. The command will require the ARN of the secret that contains the key. You can look it up with the following command:
Let’s run the remote configure command. It requires either IP or FQDN but not both:
Running App2Container commands remotely has a slightly different syntax and requires specification of the target remote host by either IP or FQDN.
Elastic Beanstalk leverages symbolic links for application deployment which are not fully handled by App2Container as of this writing. While this behavior is being addressed in the tool, you will need set the “appSpecificFiles” attribute in the analysis.json file to the following:
”appSpecificFiles": ["/var/app/current", "/var/log/tomcat"]The next step is to run the extraction command and bring the artifacts for containerization from the remote host.
$ app2container remote extract --target <YOUR_FQDN> --application-id YOUR_APP_ID
# Outputs reference to the containerize command
The last command is to containerize with the input archive produced in the previous step.
$ app2container containerize --input-archive YOUR_APP_ID-extraction.tarLet’s adjust deployment.json following the App Runner deployment steps described previously to set the createAppRunnerArtifacts attribute to true while keeping Amazon ECS and EKS deployment options set to false. The application is now ready to be deployed with App Runner:
Since by default the option to “AutoDeploymensEnabled” is set to “true”, you don’t have to to explicitly deploy the application from this point on. Create a new version of the container image and upload it to Amazon ECR to initiate automatic deployment.
Containerize and deploy a Spring Boot application
What if you are already running applications that are more cloud-native by design, such as a Spring Boot application? In this case, your application is already a single deployable component and is likely to follow the cloud-native design principles. Such applications are the primary targets for direct deployment with App Runner. However, even in this scenario, A2C can help customers to get started, by producing an example container image and a CloudFormation template that could be used to get started with modernization. Let’s run through the sequence of A2C inventory, analyze, and containerize commands to containerize this application that I described in the previous sections.
Even though your Spring Boot application may be running a tomcat HTTP connector, App2Container will not recognize it as a Tomcat application. That means that image optimizations for Tomcat or JBoss will not apply. The application will be identified as a generic Java process. The consequence of that is bloated image size because the tool uses a defensive approach when it comes to generic applications.
$ docker image list

REPOSITORY
spring-petclinic latest ca76f806f580 4 weeks ago 12.6GB
You may notice that the image size produced on a standard Ubuntu server node is 12.6 GB. There are definitely ways to optimize the image size by using exclude and include attributes in the analysis.json file produced after the analyze command. For example:
It may take a few iterations to get to the point when the image size becomes suitable for deployment with App Runner.
An alternative path is to modify the Dockerfile (located under app2container/YOUR_APP_ID/Artifacts) produced by the containerize command to something simple, for example:
After you adjust the Dockerfile, you can rerun the containerize command with the --build-only option enabled:
This may not be a production-ready build file as it is missing JVM options, but it is a reasonable starting point and will result in an acceptable image size of under 1 GB.
After Dockerfile has been modified to produce a more lightweight image, you can follow the App Runner deployment steps to generate application deployment as described in the previous sections.
Conclusion
In this blog post, I showcased how A2C integration with App Runner enables you to approach modernization for three use cases. This integration enables developers to quickly deploy containerized web applications and APIs with no prior infrastructure experience.
To get started with A2c and App Runner refer to the service documentation. If you have any comments or feedback about this blog, please post them in the comments section below. Have technical questions or feature requests related to App2Container tool? Email us at: app2container-support@amazon.com