AWS Developer Tools Blog
Send Real-Time Amazon CloudWatch Alarm Notifications to Amazon Chime
This post was authored by Trevor Sullivan, a Solutions Architect for Amazon Web Services (AWS) based in Seattle, Washington. The post was also peer-reviewed by Andy Elmhorst, Senior Solutions Architect for AWS.
Overview
When you’re developing, deploying, and supporting business-critical applications, timely system notifications are crucial to keeping your services up and running reliably for your customers. If your team actively collaborates using Amazon Chime, you might want to receive critical system notifications directly within your team chat rooms. This is possible using the Amazon Chime incoming webhooks feature.
Using Amazon CloudWatch alarms, you can set up metric thresholds and send alerts to Amazon Simple Notification Service (SNS). SNS can send notifications using e-mail, HTTP(S) endpoints, and Short Message Service (SMS) messages to mobile phones, and it can even trigger a Lambda function.
Because SNS doesn’t currently support sending messages directly to Amazon Chime chat rooms, we’ll insert a Lambda function in between them. By triggering a Lambda function from SNS instead, we can consume the event data from the CloudWatch alarm and craft a human-friendly message before sending it to Amazon Chime.
Here’s a simple architectural diagram that demonstrates how the various components will work together to make this solution work. Feel free to refer back to this diagram as you make your way through the remainder of this article.

Assumptions
Throughout this article, we make the following assumptions:
- You have created an Amazon EC2 instance running Ubuntu Linux.
- Detailed CloudWatch monitoring is enabled for this EC2 instance.
- Amazon Chime is already set up and accessible to you.
- You’ve installed PowerShell Core, or can run it in a Docker container.
- You have installed and configured IAM credentials for the AWS Tools for PowerShell.
- Python 3.6 and pip3 are installed on your development system.
NOTE: There is an additional cost to capture detailed CloudWatch metrics for EC2 instances, detailed here.
Set up Amazon Chime
Before implementing your backend application code, there are a couple steps you need to perform within Amazon Chime. To set up your incoming webhook, you first need to create a new Amazon Chime chat room. Webhooks are created as a resource in the context of the chat room. As of this writing, Chime Webhooks must be created using the native Amazon Chime client for Microsoft Windows or Apple MacOS.
Create an Amazon Chime chat room
First you create a new chat room in Amazon Chime. You’ll use this chat room for testing and, once you understand and successfully implement this solution, you can replicate it in your live chat rooms.
- Open Amazon Chime.
- Choose the Rooms button.
- Choose the New room button.
- Give the chat room a name, and then choose the Create button.
Create an Amazon Chime incoming webhook
Now that you’ve created your new Amazon Chime chat room, you need to generate a webhook URL. This webhook URL authorizes your application to send messages to the chat room. Be sure to handle the URL with the same level of security that you would handle any other secrets or passwords.
In the Amazon Chime chat room, click the gear icon, and then select the Manage Webhooks menu item. In the webhook management window, choose the New button and use the name CriticalAlerts. Click the Copy webhook URL link and paste it into a temporary notepad. We’ll need to configure this URL on our Lambda function later on.
Create an SNS topic
In this section, you create a Simple Notification Service (SNS) topic. This SNS topic will be triggered by a CloudWatch alarm when its configured metric threshold is exceeded. You can name the SNS topic whatever you prefer, but in this example, I’ll use the name chimewebhook.
It’s possible to create the SNS topic after creating your CloudWatch alarm. However, in this case, you would have to go back and reconfigure your CloudWatch alarm to point to the new SNS topic. In this example, we create the topic first to minimize the amount of context switching between services.
Use the following PowerShell command to create an SNS topic, and store the resulting topic Amazon Resource Name (ARN) in a variable named $Topic. We’ll use this variable later on, so don’t close your PowerShell session.
$TopicArn = New-SNSTopic -Name chimewebhook -Region us-west-2Create a CloudWatch alarm
In this section, you create an Amazon CloudWatch alarm. Then you configure this alarm to trigger an alert state when the CPU usage metric of your EC2 instance exceeds 10%. Alarms can be configured with zero or more actions; you’ll configure a single action to send a notification to the SNS topic you previously created.
- Navigate to the CloudWatch alarms feature in the AWS Management Console.
- Choose the blue Create Alarm button.
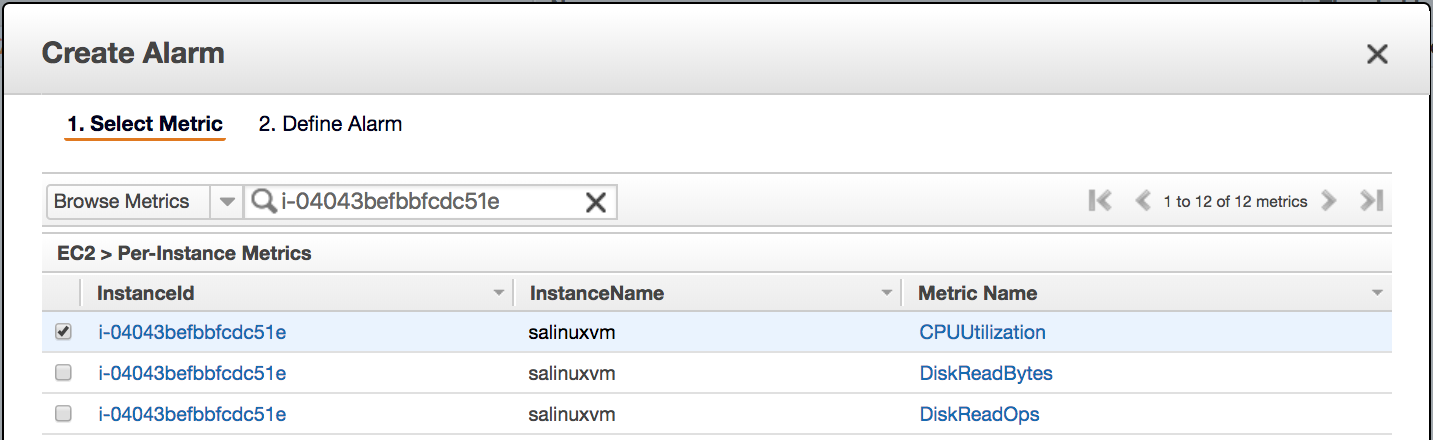
- Search for your EC2 instance ID.
- Select the CPUUtilization metric for your EC2 instance.

- On the next screen, give the CloudWatch alarm a name and useful description.
- Configure the CPUUtilization threshold for 10%, and be sure the Period is set to 1 minute.

- In the Actions section, select your SNS topic.
- Save the CloudWatch alarm.

If you’d prefer to use a PowerShell script to deploy the CloudWatch alarm, use the following example script. Be sure you specify the correct parameter values for your environment:
- EC2 instance ID that you’re monitoring
- AWS Region that your EC2 instance resides in
- ARN of the SNS topic that CloudWatch will publish alerts to
### Create a CloudWatch dimension object, to alarm against the correct EC2 instance ID
$MetricDimension = [Amazon.CloudWatch.Model.Dimension]::new()
$MetricDimension.Name = 'InstanceId'
$MetricDimension.Value = 'i-04043befbbfcdc51e'

### Set up the parameters to create a CloudWatch alarm in a PowerShell HashTable
$Alarm = @{
  AlarmName = 'EC2 instance exceeded 10% CPU'
  ActionsEnabled = $true
  AlarmAction = $TopicArn
  ComparisonOperator = ([Amazon.CloudWatch.ComparisonOperator]::GreaterThanOrEqualToThreshold)
  Threshold = 10
  Namespace = 'AWS/EC2'
  MetricName = 'CPUUtilization'
  Dimension = $MetricDimension
  Period = 60
  EvaluationPeriod = 1
  Statistic = [Amazon.CloudWatch.Statistic]::Maximum
  Region = 'us-west-2'
}
Write-CWMetricAlarm @Alarm
Set up AWS Lambda
In this section, you will create an AWS Lambda function, based on Python 3, that will be triggered by the SNS topic that you created earlier. This Lambda function will parse some of the fields of the message that’s forwarded from CloudWatch to SNS.
Create the Lambda Function
To successfully invoke an Amazon Chime webhook, your HTTP invocation must follow these criteria:
- Webhook URL is predefined by Amazon Chime
- Request is sent using the HTTP POST verb
- Content-Type HTTP header must be application/json
- HTTP body must contain a JSON object with Content property
We’ll use the open source Python requests library to make the Amazon Chime webhook invocation, as it provides a simple development interface. Because you’re adding a dependency on an external library, you need to author your Lambda function locally, package it up into a ZIP archive, and then deploy the ZIP archive to Lambda.
Start by creating the following three files in a working directory.
index.py
'''
This file contains the AWS Lambda function that is invoked when a CloudWatch alarm is triggered.
'''

import os
import boto3
import requests
from base64 import b64decode

def get_message(event):
  '''
  This function retrieves the message that will be sent to the Amazon Chime webhook. If the Lambda
  function is triggered manually, it will return some static text. However, if the Lambda function
  is invoked by SNS from CloudWatch Alarms, it will emit the Alarm's subject line.
  '''
  try:
    return event['Records'][0]['Sns']['Subject']
  except KeyError:
    return 'test message'

def handler(event, context):
  '''
  The 'handler' Python function is the entry point for AWS Lambda function invocations.
  '''
  print('Getting ready to send message to Amazon Chime room')
  content = 'CloudWatch Alarm! {0}'.format(get_message(event))
  webhook_uri = os.environ['CHIME_WEBHOOK']
  requests.post(url=webhook_uri, json={ 'Content': content })
  print('Finished sending notification to Amazon Chime room')
requirements.txt
requests
setup.cfg
[install]
prefix=
Build and deploy the Lambda package
Now that you’ve created the previous source files, you’ll need a PowerShell script to build the ZIP archive for Lambda, create the Lambda function, and give SNS access to invoke the Lambda function. Save the following PowerShell script file into the same working directory, update the <YourChimeWebhookURL> text with your actual Amazon Chime webhook URL, and then run the script.
NOTE: This PowerShell script has a dependency on the Mac and Linux zip utility. If you’re running this code on Windows 10, you can use the Compress-Archive PowerShell command, or run the PowerShell script in the Windows Subsystem for Linux feature.
Deploy.ps1
Set-DefaultAWSRegion -Region us-west-2

$ZipFileName = 'lambda.zip'

Set-Location -Path $PSScriptRoot

Write-Host -Object 'Restoring dependencies ...'
pip3 install -r $PSScriptRoot/requirements.txt -t $PSScriptRoot/

Write-Host -Object 'Compressing files ...'
Get-ChildItem -Recurse | ForEach-Object -Process {
  $NewPath = $PSItem.FullName.Substring($PSScriptRoot.Length + 1)
  zip -u "$PSScriptRoot/$ZipFileName" $NewPath
}

Write-Host -Object 'Deploying Lambda function'

$Function = @{
  FunctionName = 'AmazonChimeAlarm'
  Runtime = 'python3.6'
  Description = 'Sends a message to an Amazon Chime room when a CloudWatch alarm is triggered.'
  ZipFilename = $ZipFileName
  Handler = 'index.handler'
  Role = 'arn:aws:iam::{0}:role/service-role/lambda' -f (Get-STSCallerIdentity).Account
  Environment_Variable = @{
    CHIME_WEBHOOK = '<YourChimeWebhookURL>'
  }
}
Remove-LMFunction -FunctionName $Function.FunctionName -Force
Publish-LMFunction @Function

Write-Host -Object 'Deployment completed' -ForegroundColor Green
Once you’ve executed this deployment script, you should see an AWS Lambda function named AmazonChimeAlarm in the AWS Management Console.
Configure Lambda function policy
AWS Lambda functions have their own resource-level policies that are somewhat similar to IAM policies. These function policies are what grant other cloud resources the access that they need to invoke the function. In this scenario, you need to grant the SNS service access to trigger your Lambda function.
The following PowerShell script adds the necessary permissions to your Lamdba function.
### Enables the Amazon Simple Notification Service (SNS) to invoke your Lambda function
$LMPermission = @{
  FunctionName = $Function.FunctionName
  Action = 'lambda:InvokeFunction'
  Principal = 'sns.amazonaws.com'
  StatementId = 1
}
Add-LMPermission @LMPermission
Keep in mind that this Lambda function policy broadly allows any SNS topic, in any AWS account, to trigger your Lambda function. For production applications, you should use the -SourceArn parameter to restrict access to specific event sources that will be able to trigger your Lambda function.
Subscribe the Lambda function to the SNS topic
Now you’ve created your Lambda function, and granted access to SNS to trigger it, you need to subscribe the Lambda function to the topic. This subscription/association is what starts the flow of events from SNS to Lambda. Without the subscription, CloudWatch alarms would trigger your SNS topic successfully, but the event flow would stop there.
$Subscription = @{
  Protocol = 'lambda'
  Endpoint = $NewFunction.FunctionArn
  TopicArn = $TopicArn
}
Connect-SNSNotification @Subscription
Trigger a test event
Now that you’ve finished configuring your AWS account, you can go ahead and test the end-to-end process to ensure it’s working properly. Ensure you’ve got your Amazon Chime client running, and select your test chat room that you created earlier.
Next, invoke a process on your instance that will consume many CPU cycles. Connect to your EC2 instance using SSH and run the following shell commands.
sudo apt install docker.io --yes
sudo usermod --append --groups docker ubuntu
exit # SSH back in after this, so group memberships take effect

docker run --rm --detach trevorsullivan/cpuburn burnP5
This Ubuntu-based Docker container image contains the preinstalled CPU burn program, which will cause your EC2 instance’s CPU consumption to spike to 100%. Because you’ve enabled detailed CloudWatch metrics on your EC2 instance, after a couple of minutes, the CloudWatch alarm that you created should get triggered.
Once you’ve finished with the test, or if you want to trigger the CloudWatch alarm again, make sure that you stop the Docker container running the CPU burn program. Because you specified the --rm argument upon running the container, the container will be deleted after it has stopped.
docker ps # Find the container ID
docker rm -f <containerID> # Remove the container
Potential problems
If you run into any problems with testing the end-to-end solution, check out the following list of potential issues you could run into and ways to troubleshoot:
- The CPU burn program might not result in adequate CPU consumption, which wouldn’t trigger the test event correctly. Use the Linux top command to ensure that you trigger the test event. Or simply pull up the CPUUtilization metric in CloudWatch and see what values are being recorded.
- If your Lambda function is not correctly configured to accept invocations from SNS, your SNS topic will fail to invoke it. Be sure that you understand how Lambda function policies work, and ensure that your Lambda function has the appropriate resource-level IAM policy to enable SNS to invoke it.
- By default, your EC2 instances include basic metrics for a five-minute period. If you don’t have detailed monitoring enabled for the EC2 instance you’ve used in this article, you might have to wait several minutes for the next metric data point to be recorded. For more immediate feedback, ensure that your EC2 instance has detailed monitoring configured, so that you get instance-level metrics on a per-minute period instead.
- Ensure your Lambda function is subscribed to your SNS topic. If your SNS topic doesn’t have any subscribers, it won’t know how to “handle” the alarm state from CloudWatch, and will effectively discard the message.
- If you aren’t receiving any notifications in your Amazon Chime chat room, ensure that your CloudWatch alarm is in an OK state before attempting to retrigger it. CloudWatch sends a single notification to the configured SNS topics when the alarm’s threshold is breached, and doesn’t continually send notifications while it’s in an alarm state.
- If your HTTP POST request to the Chime Webhook URL fails with HTTP 429, then your application might be rate-limited by Amazon Chime. Please refer to the official product documentation for more information. As of this writing, Chime Webhook URLs support 1 transaction per second (TPS).
Conclusion
In this article, you configured your AWS account to send Amazon Chime notifications to a team chat room, when CloudWatch alarm thresholds are breached. You can repeat this process as many times as you need to, in order to send the right notifications to your team’s chat room. Chat rooms in general can get noisy quickly, if you don’t take care to determine which notifications are the most critical to your team. Hence, I recommend that you discuss with your team which notifications you need immediate notification about, before spending the effort to build a solution using this technique.
Thanks for taking the time to read this article and learn about how you can integrate Amazon Chime with your critical system notifications.
Build on!
Trevor Sullivan, Solutions Architect
Amazon Web Services (AWS)