AWS for Industries
Save time and money hosting QR code menus on Amazon Simple Storage Service (Amazon S3)
QR code menus have gained popularity due to the rise of the COVID-19 pandemic. Last year, CNBC reported that Bitly, a link management service, saw a 750 percent increase in the number of QR code downloads in the past 18 months.
There are many benefits to using QR code menus instead of printed menus. Restaurants can easily adjust menus on the fly to account for different factors such as menu item changes or fluctuations in food and commodity prices. QR code menus also help reduce waste and costs for restaurants that print menus quite frequently. And they are more sanitary.
This blog post dives into how to cost-effectively set up and test your very own QR code menu using Amazon Web Services (AWS) and buckets from Amazon Simple Storage Service (Amazon S3), object storage built to retrieve any amount of data from virtually anywhere. Once you’ve gone through these steps, you can print your QR code and display it however you’d like.
Important considerations before proceeding
- Please be mindful that the permissions we will be using for this Amazon S3 bucket allow for public access of your bucket, which allows access from all devices and users.
- For security reasons, use this bucket for your menu and nothing else.
Pricing
Please note that any pricing and charges discussed in this section are based solely off the US East (N. Virginia) region, and pricing may differ across different regions. However, the free tier for Amazon S3 applies for all regions except regions in China and GovCloud.
Before we dive into the details of how to implement this solution, let’s discuss how pricing works. With a standard Amazon S3 bucket, there is a free tier included, meaning that you receive 5 GB of available storage and 20,000 download requests each month at no cost. Once you exceed the first 5 GB of storage and 20,000 download requests for the month, you are then billed at about $0.023 per GB and $0.0004 per 1,000 downloads. There is also an associated cost with data transfer out, meaning when traffic leaves the AWS Cloud. However, customers also receive 100 GB of data transfer out to the internet each month aggregated across all AWS services (excluding China and GovCloud). If data transfer out exceeds 100 GB of data, you are then billed at $0.09 per GB.
Example scenario
Suppose we have a restaurant that uploads a menu to Amazon S3 that is 45.3 KB or 0.0000453 GB in size. This restaurant can expect 250 customers per day, and each customer will look at the menu three times before deciding on what to order. Converting this into what we should expect monthly, we should see about 250 * 31 = 7,750 customers total per month, which means that we should expect 7,750 * 3 = 23,250 requests to view the menu within Amazon S3 based on the assumption that each customer will view the menu three times each.
We can also assume that the restaurant will make 10 updates per month to its menu. Finally, we must factor in data transfer costs, which are priced based on the amount of gigabytes transferred out of AWS and to the internet. We can take the number of total requests expected per month and multiply that by the size of the file, and we should get 23,250 * 0.0000453 = 1.05 GB per month. This all comes out to $0.10 per month or $1.20 per year.
Let’s compare this price with the price of printing and replacing paper menus throughout the year. If a restaurant can seat a total of 250 total customers at a time, this means we will need at least 250 menus available at a time. If we decide to use AnyCompany Printing to print our menus, 250 8×11 custom restaurant flyer menus will cost a total of $69.99. We can also assume that a total of eight menus will either get lost or damaged each month. This means we will need to replace a total of 96 menus every month. AnyCompany Printing has the options to print either 50 or 100 menus, so we can round up from 96 and decide to print 100 extra every year as replacements for the damaged or lost menus, which comes out to a total of $22.99.
Lastly, we can assume that the menu might change either due to new specials or price changes to adjust for inflation. If the menu changes a total of four times per month, this comes out to 48 menu changes throughout the year. AnyCompany Printing’s minimum quantity for menu prints is 50 so we can round up to 50 menus, which comes out to $13.99. Adding up all of these transactions, we end up paying $8.91 per month or $106.97 per year when deciding to use paper menus rather than QR code menus.
Creating your Amazon S3 bucket
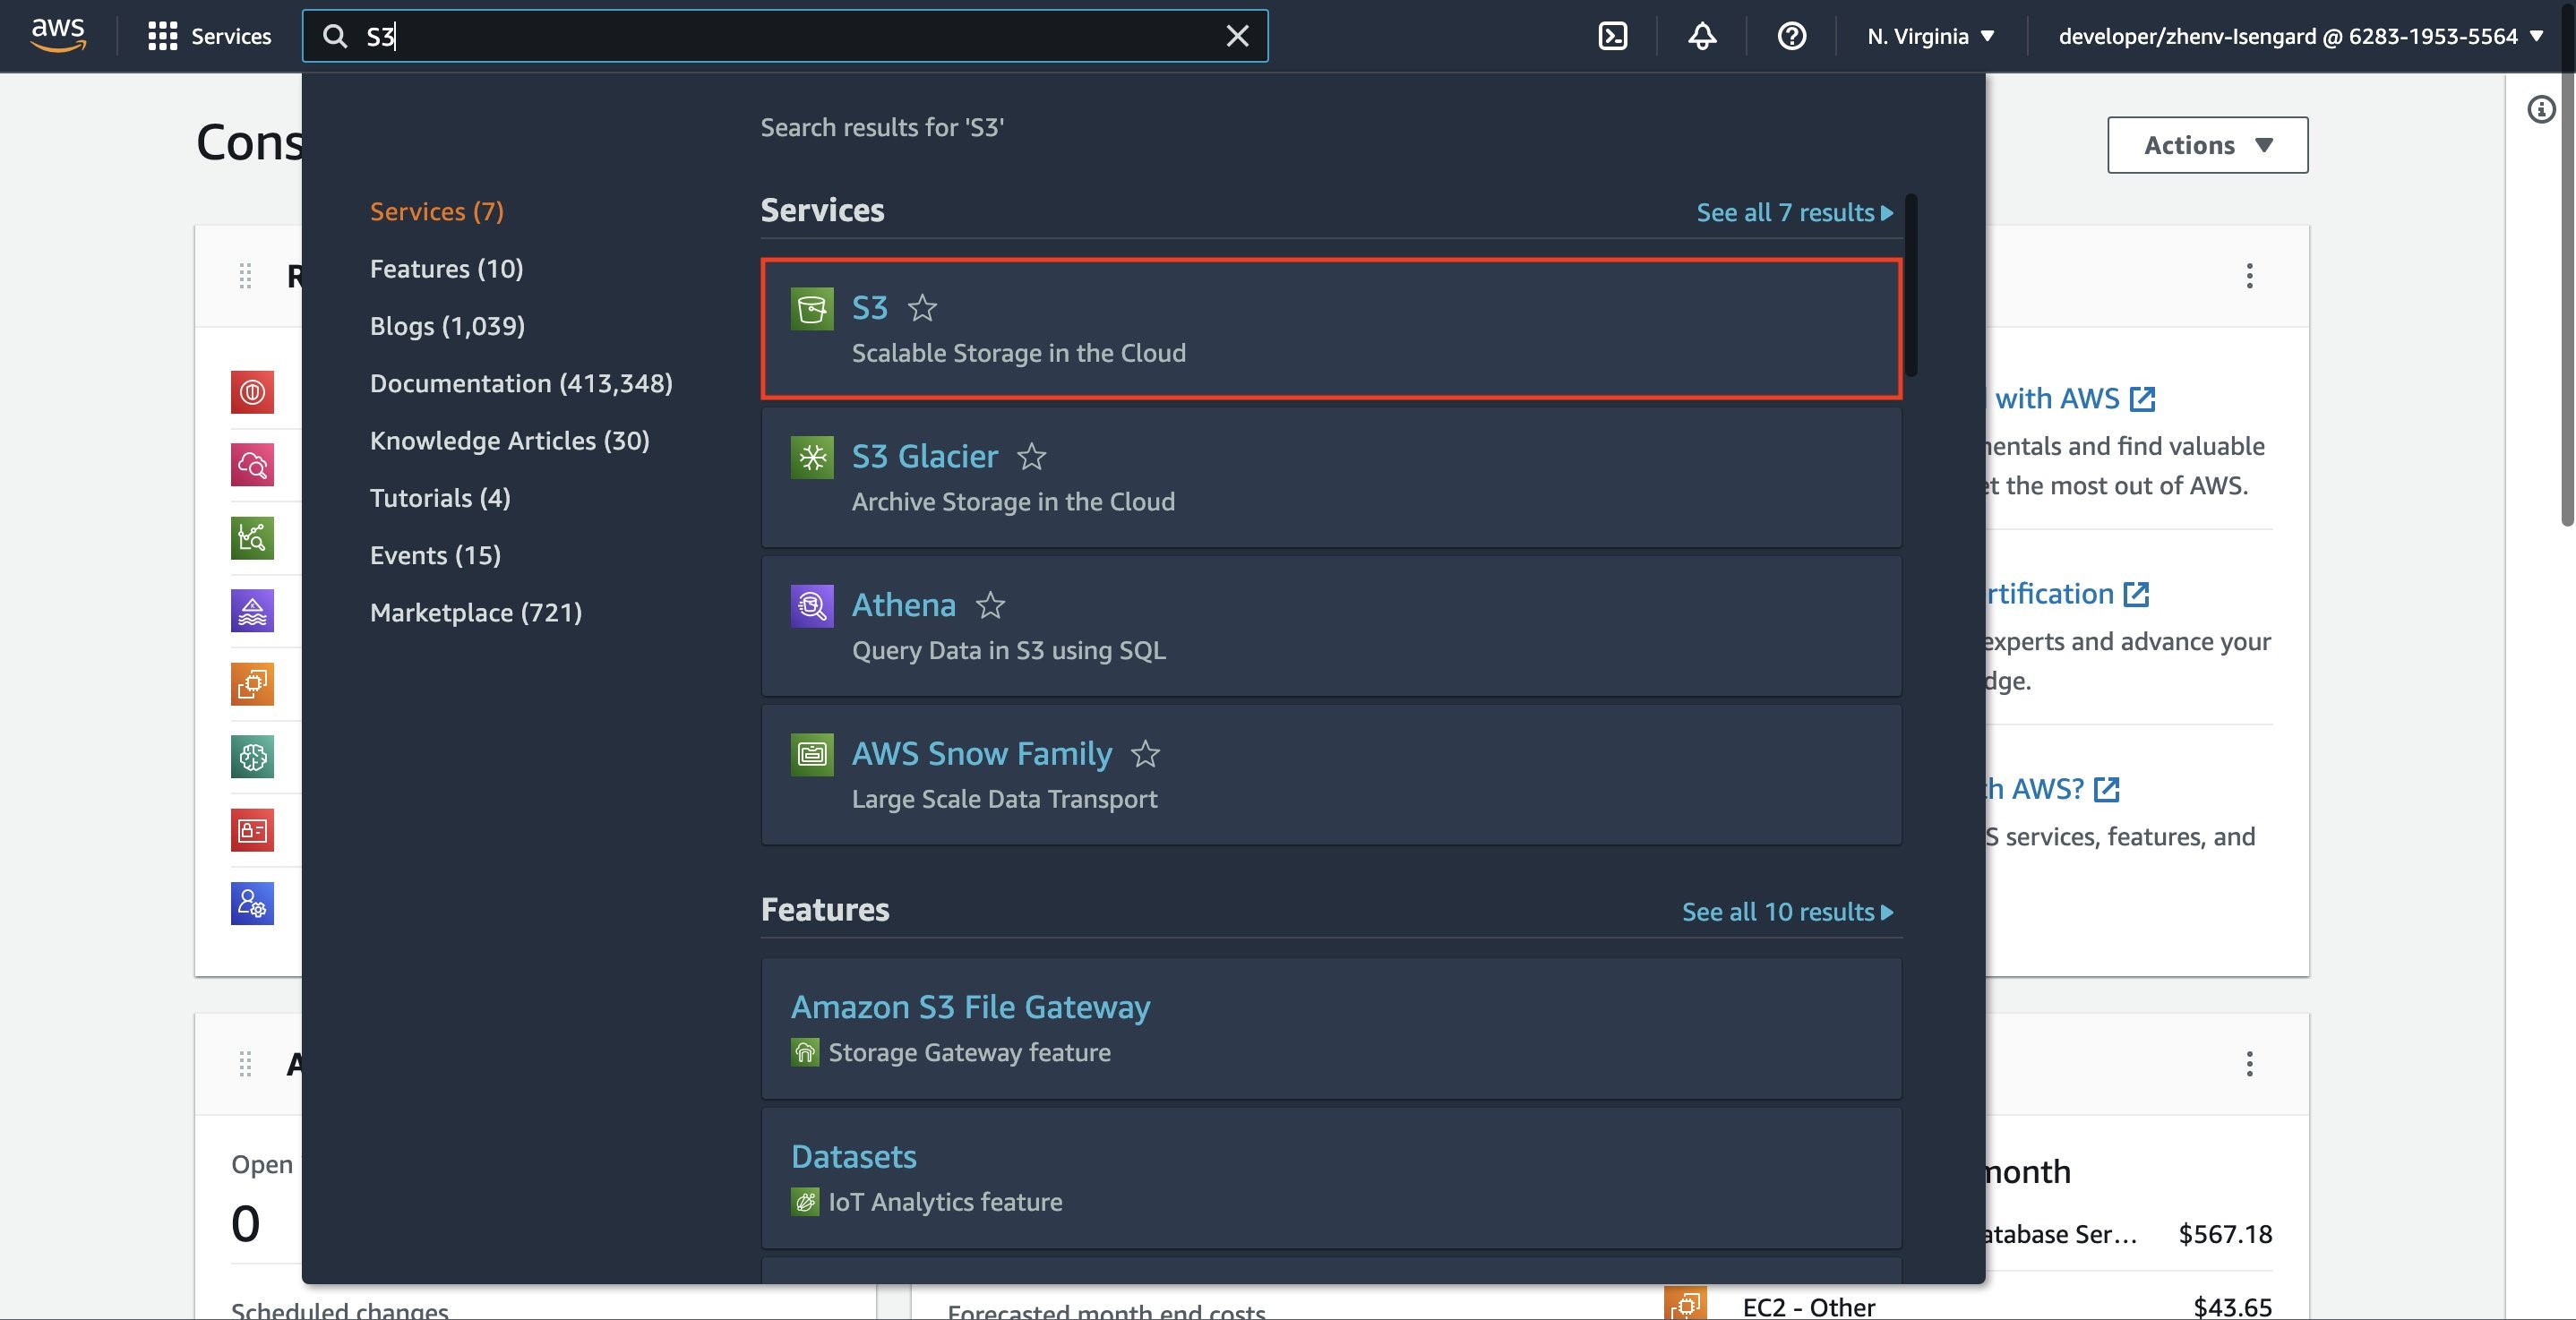
Navigate to the AWS Management Console and sign in. Search for “S3” in the search bar and select it to navigate to the Amazon S3 console page.
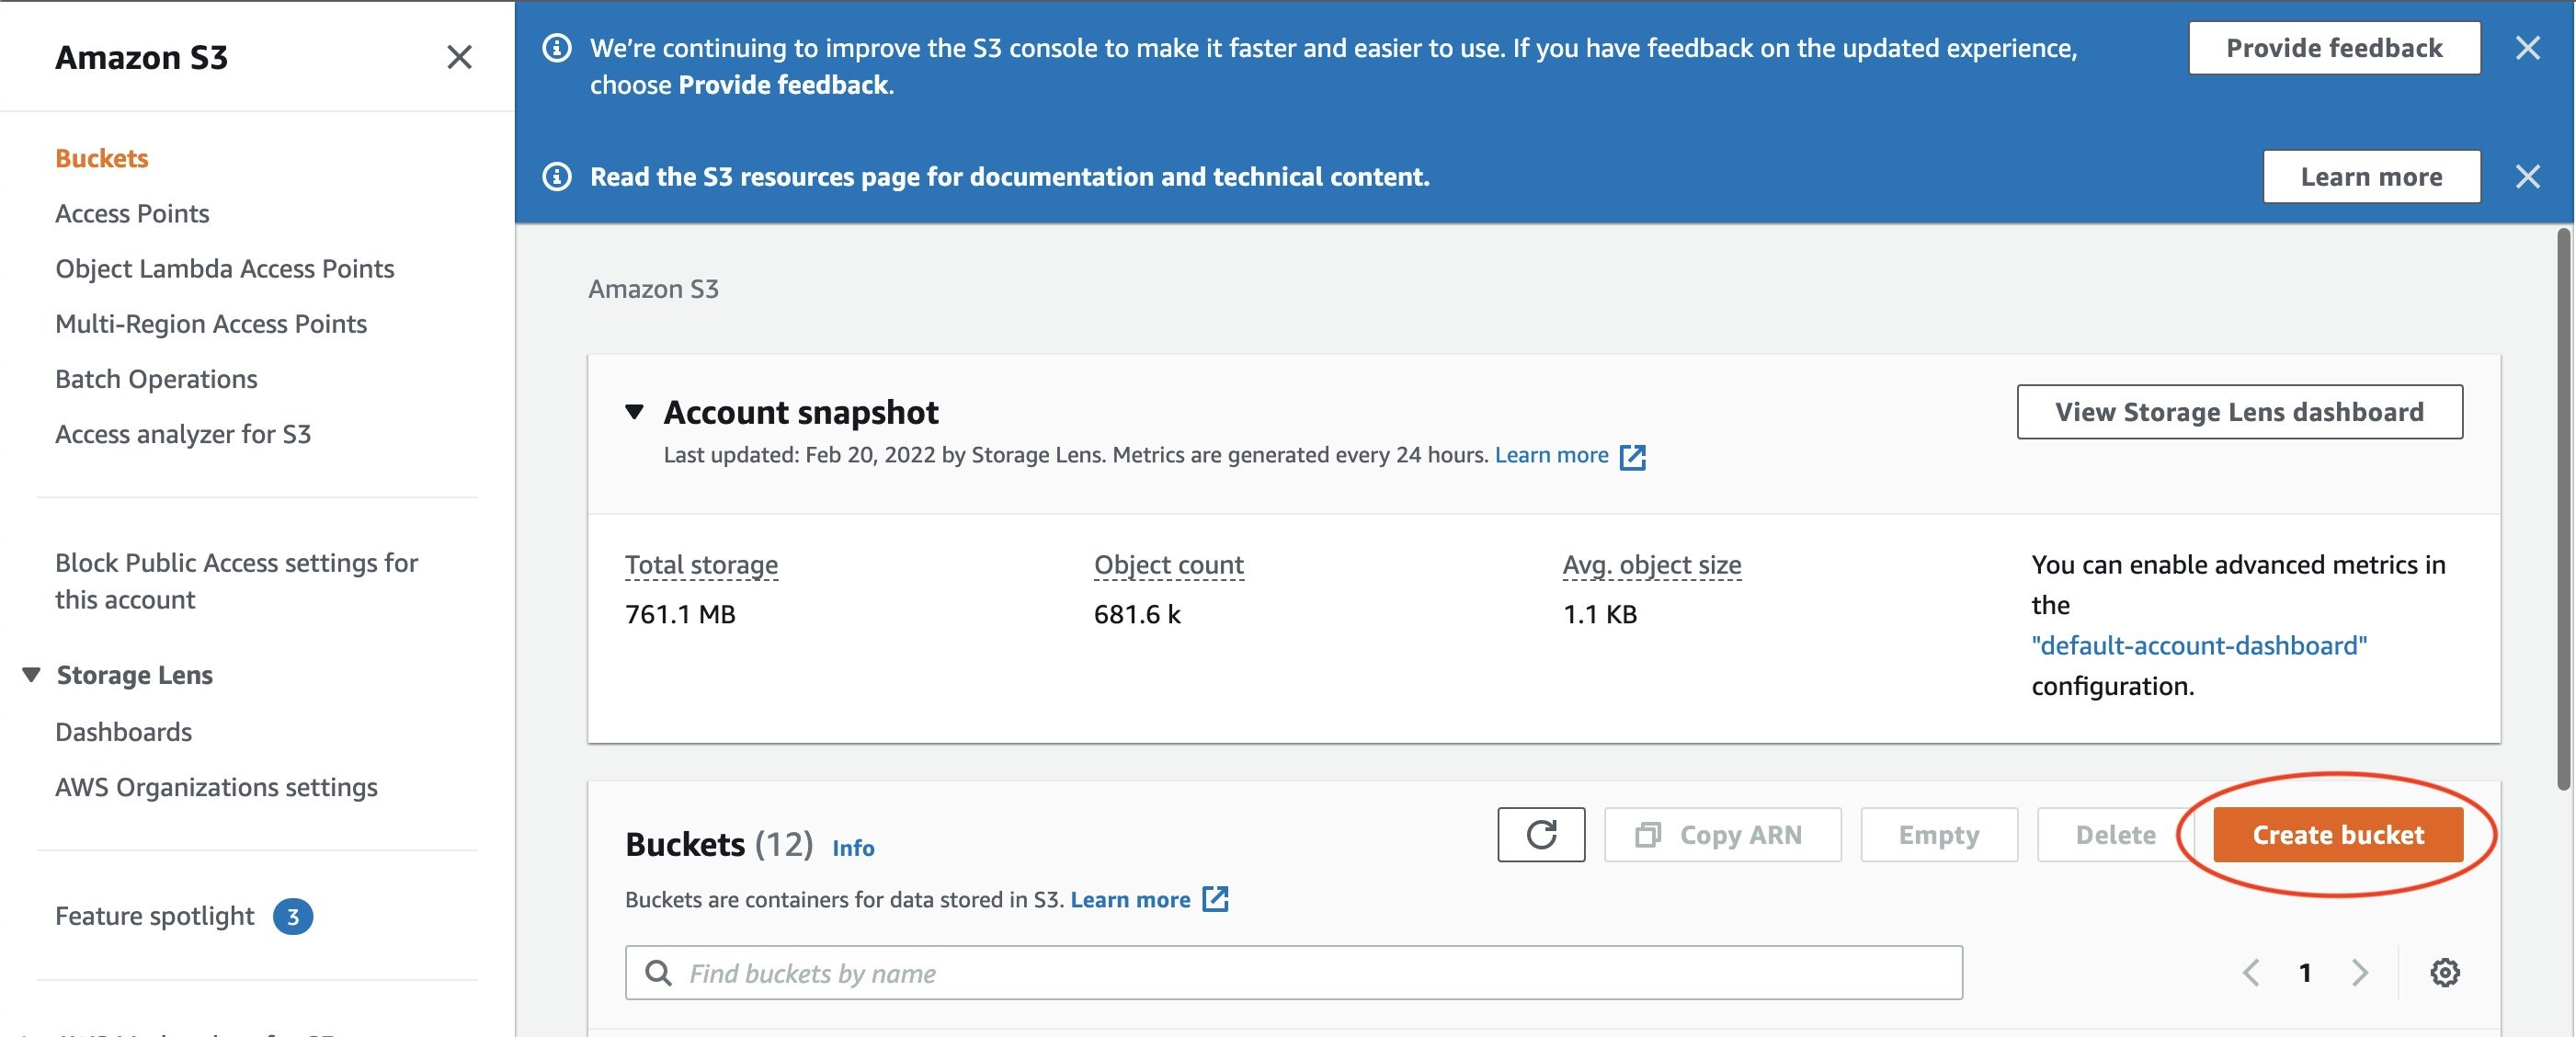
Click the Create Bucket button, which will take you to the configuration page for bucket creation.
Give your bucket a name and feel free to select the region. To get the best performance, choose the region closest to you.

Select ACLs enabled under Object Ownership. ACLs disabled is selected by default. This is a required step to make your menus accessible to your customers.

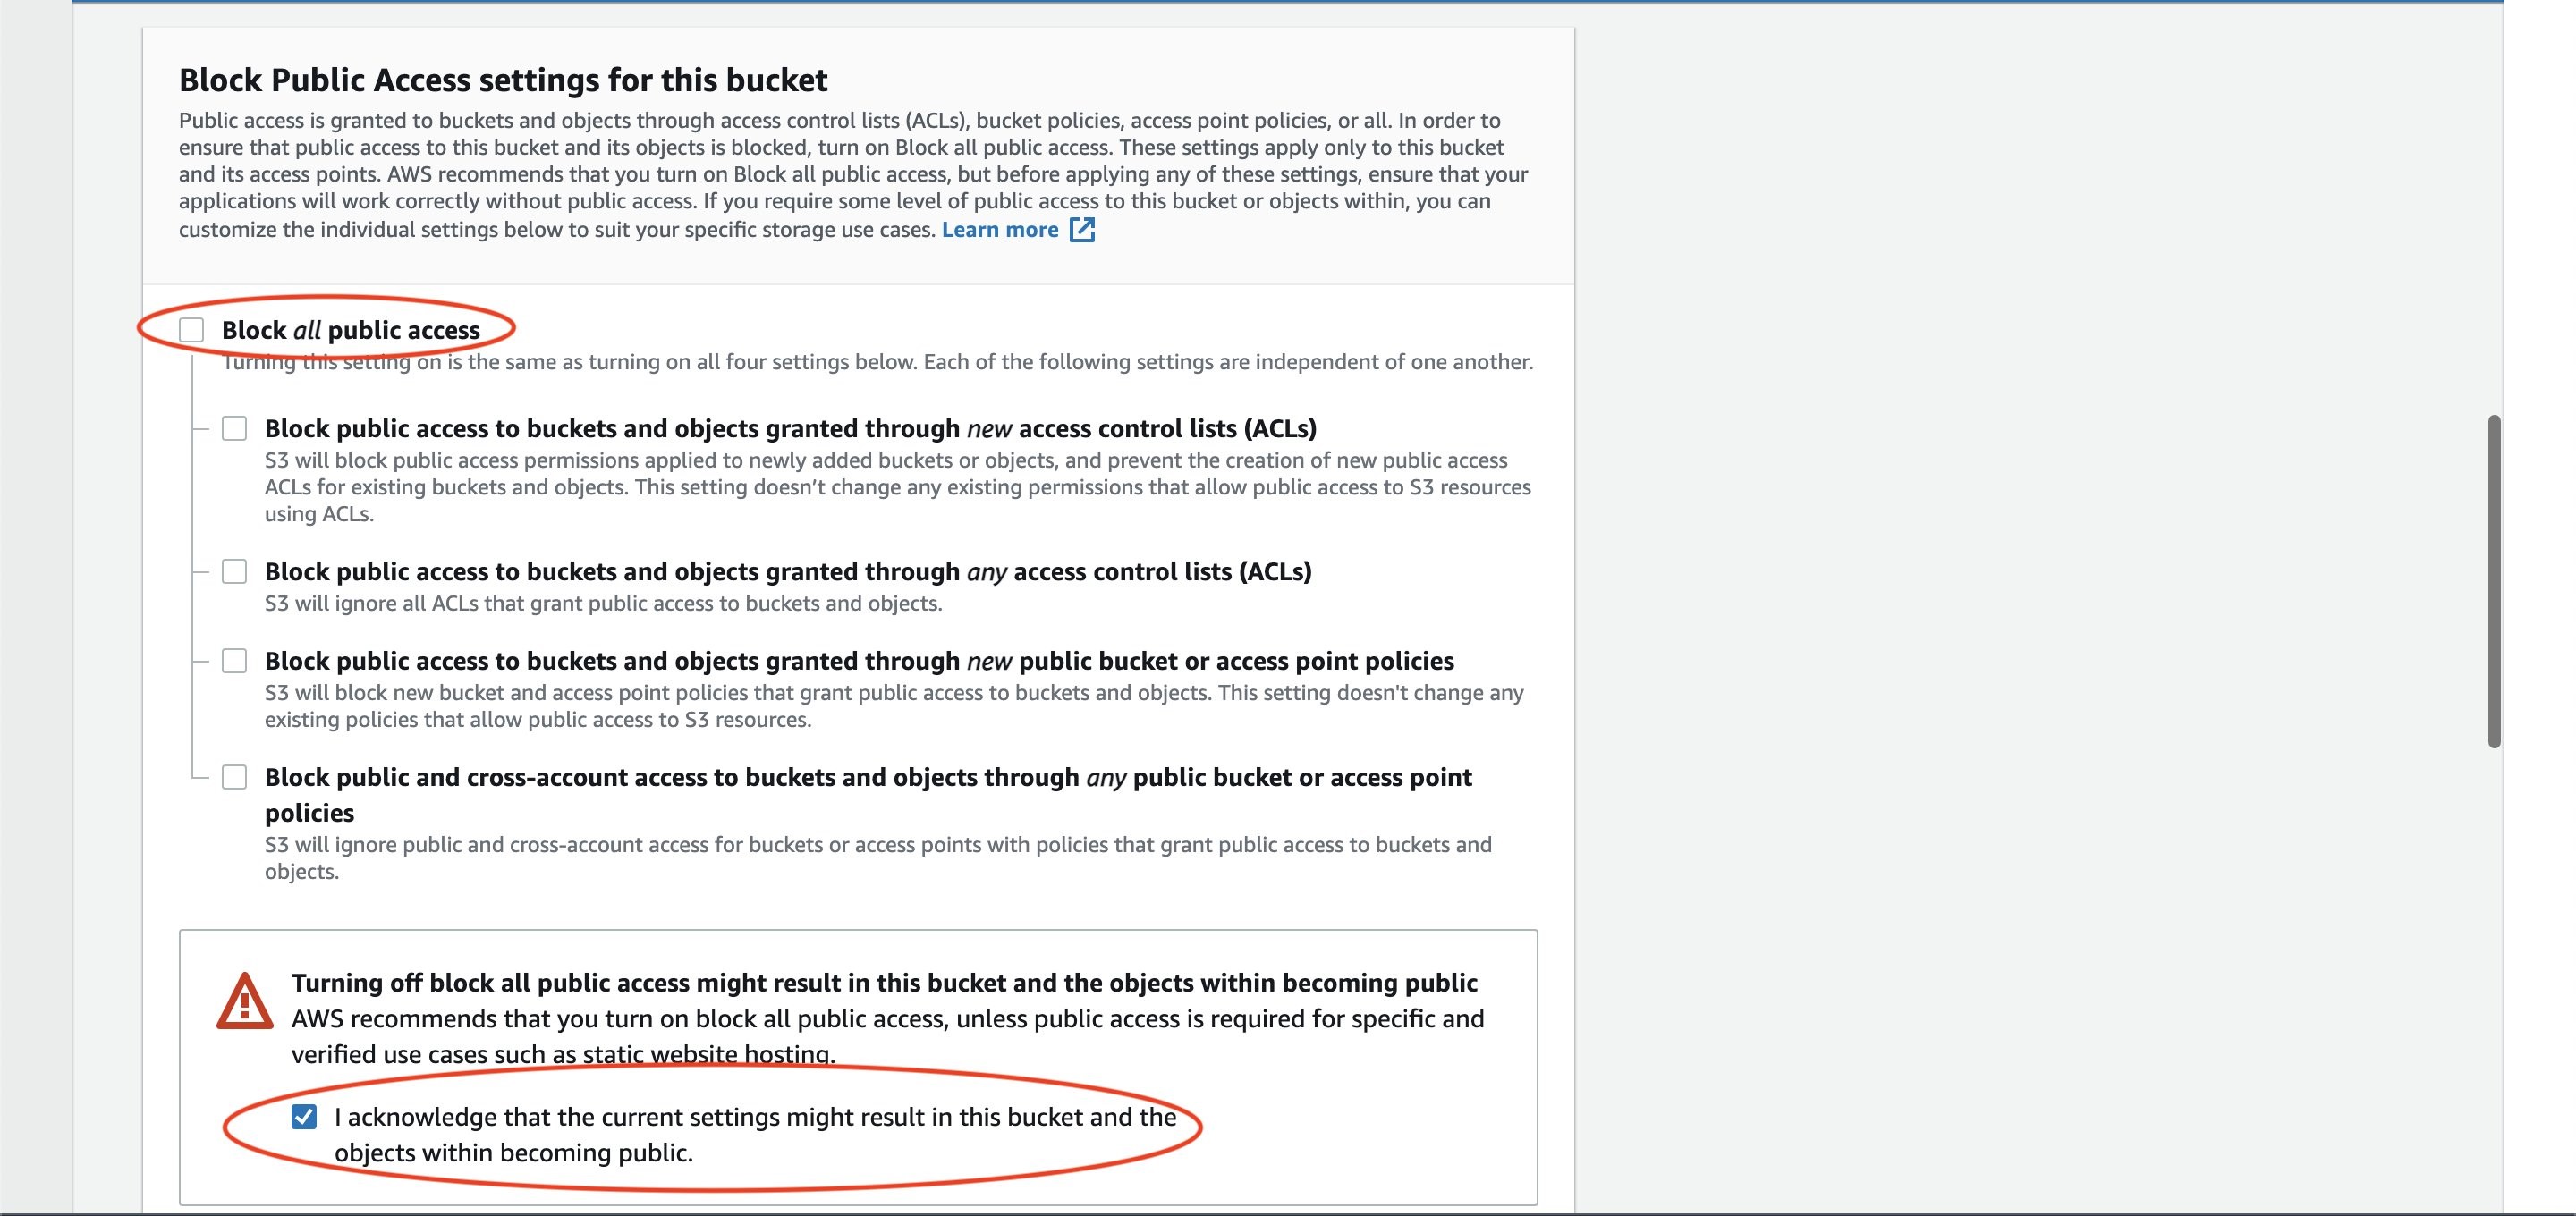
Under Block Public Access settings for this bucket uncheck the Block all public access box and check the acknowledgement below. This is also a crucial step to allowing your customers to view your menu.
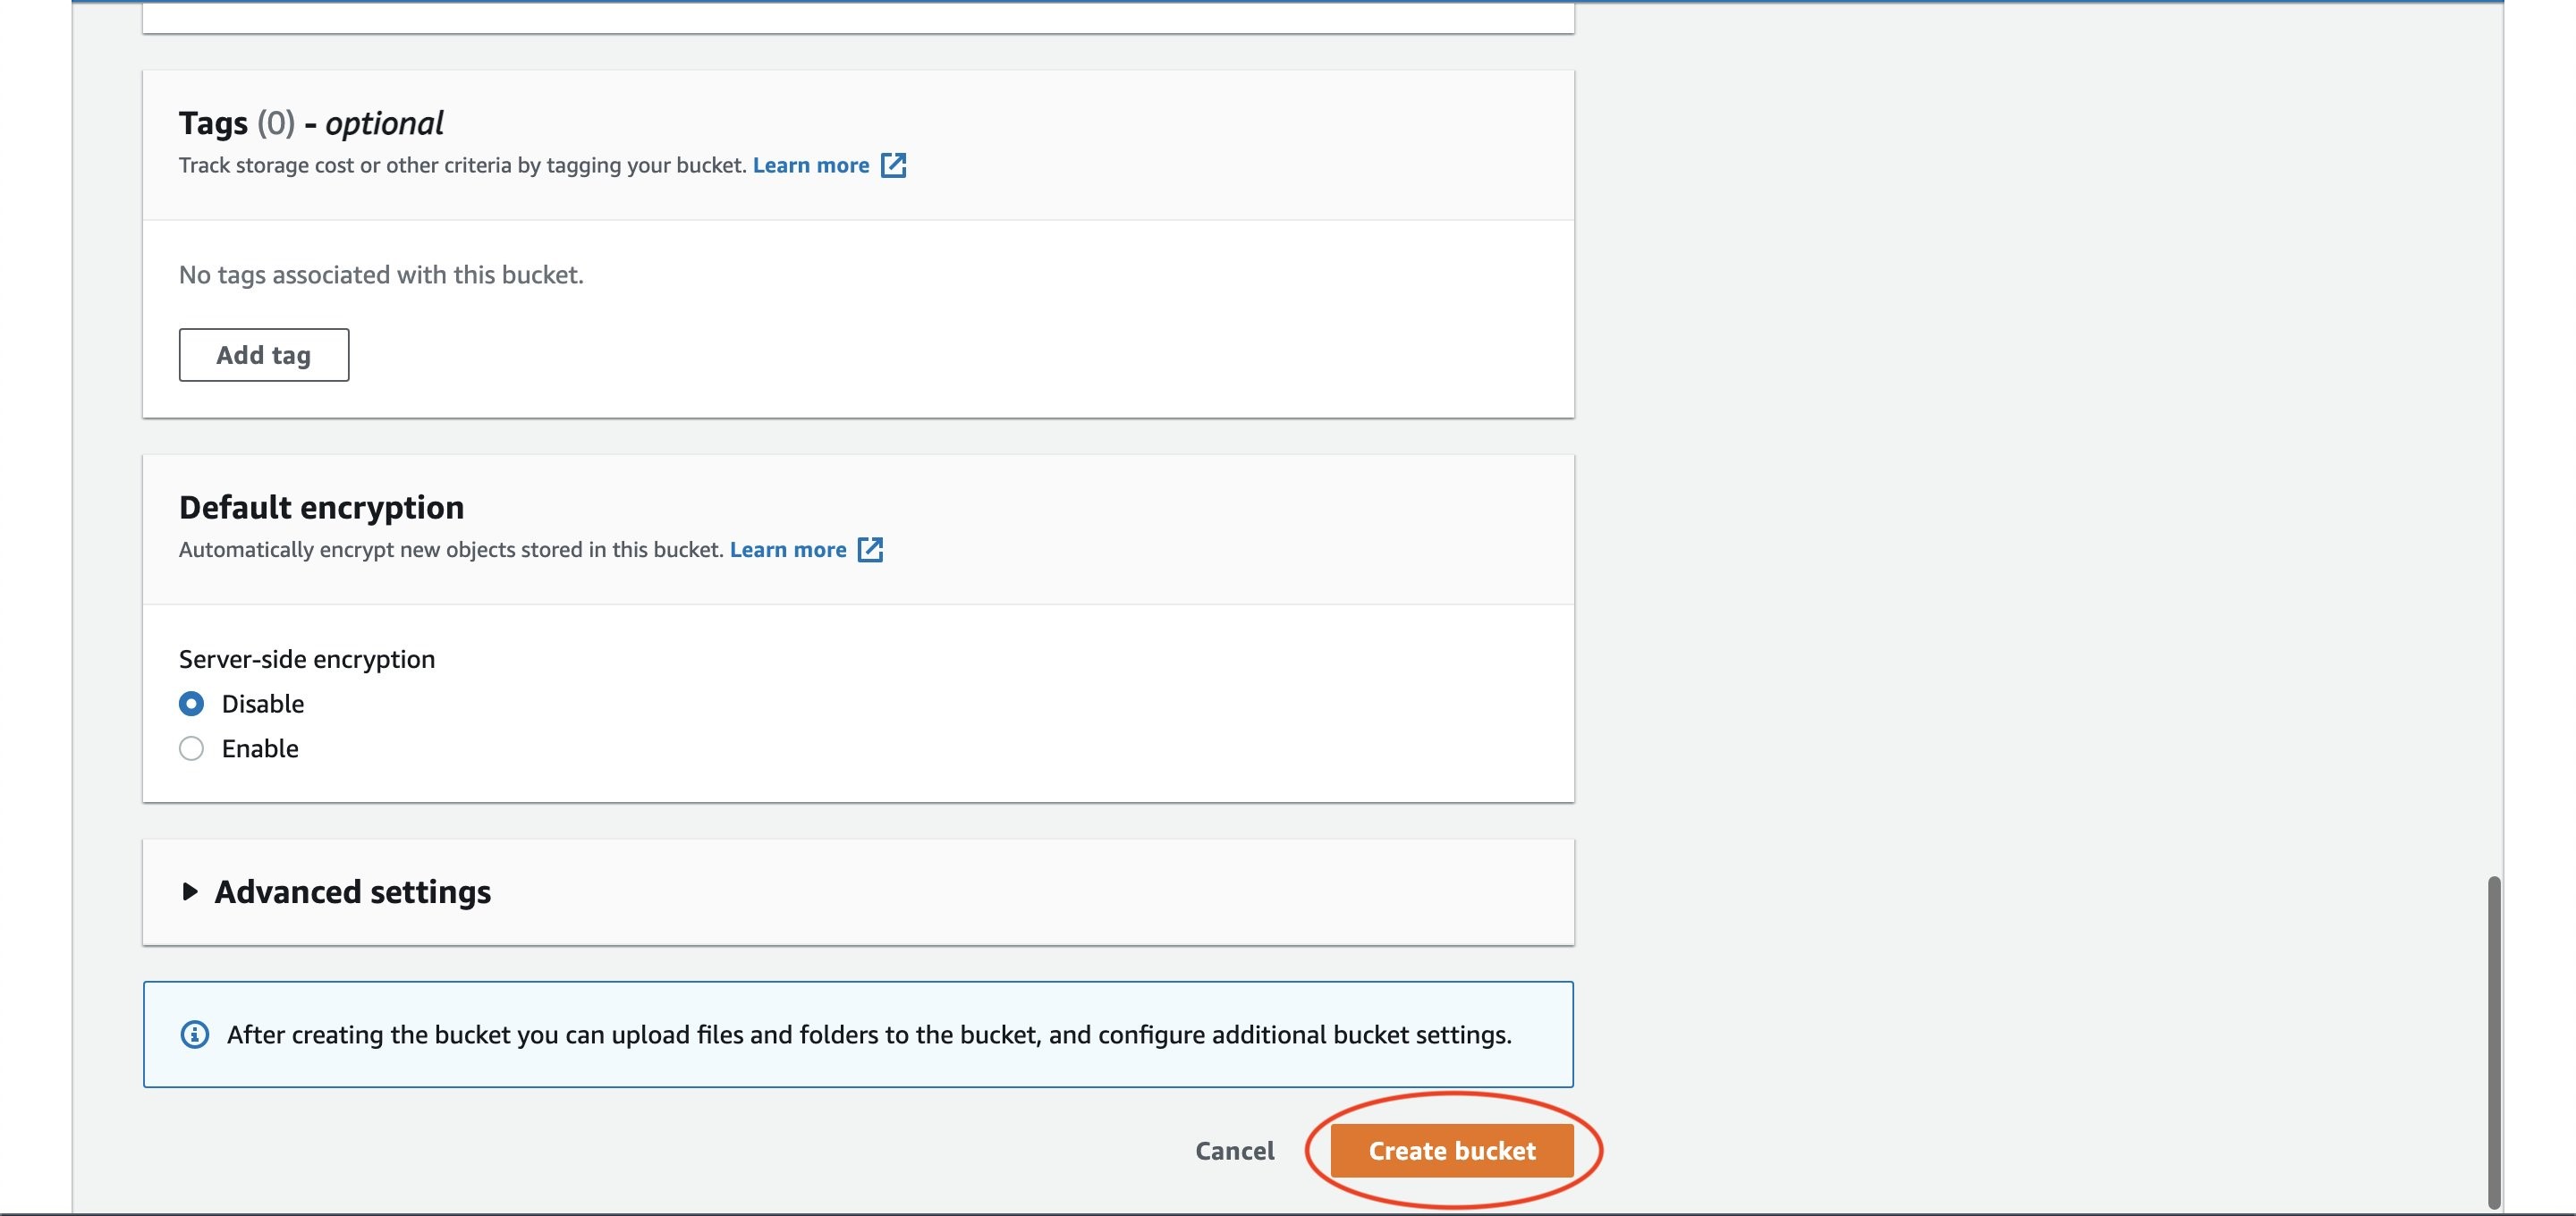
Leave the rest of the other configurations as-is and click on Create Bucket.
Once the bucket has been created, you should be taken to a page where you can view all your available Amazon S3 buckets. Click on the bucket you just created.

Uploading your menu
Once you click on your bucket, you will see what is inside this bucket. Currently the bucket is empty, but this is where your menu will reside. Click on the Upload button.

Click on Add Files.
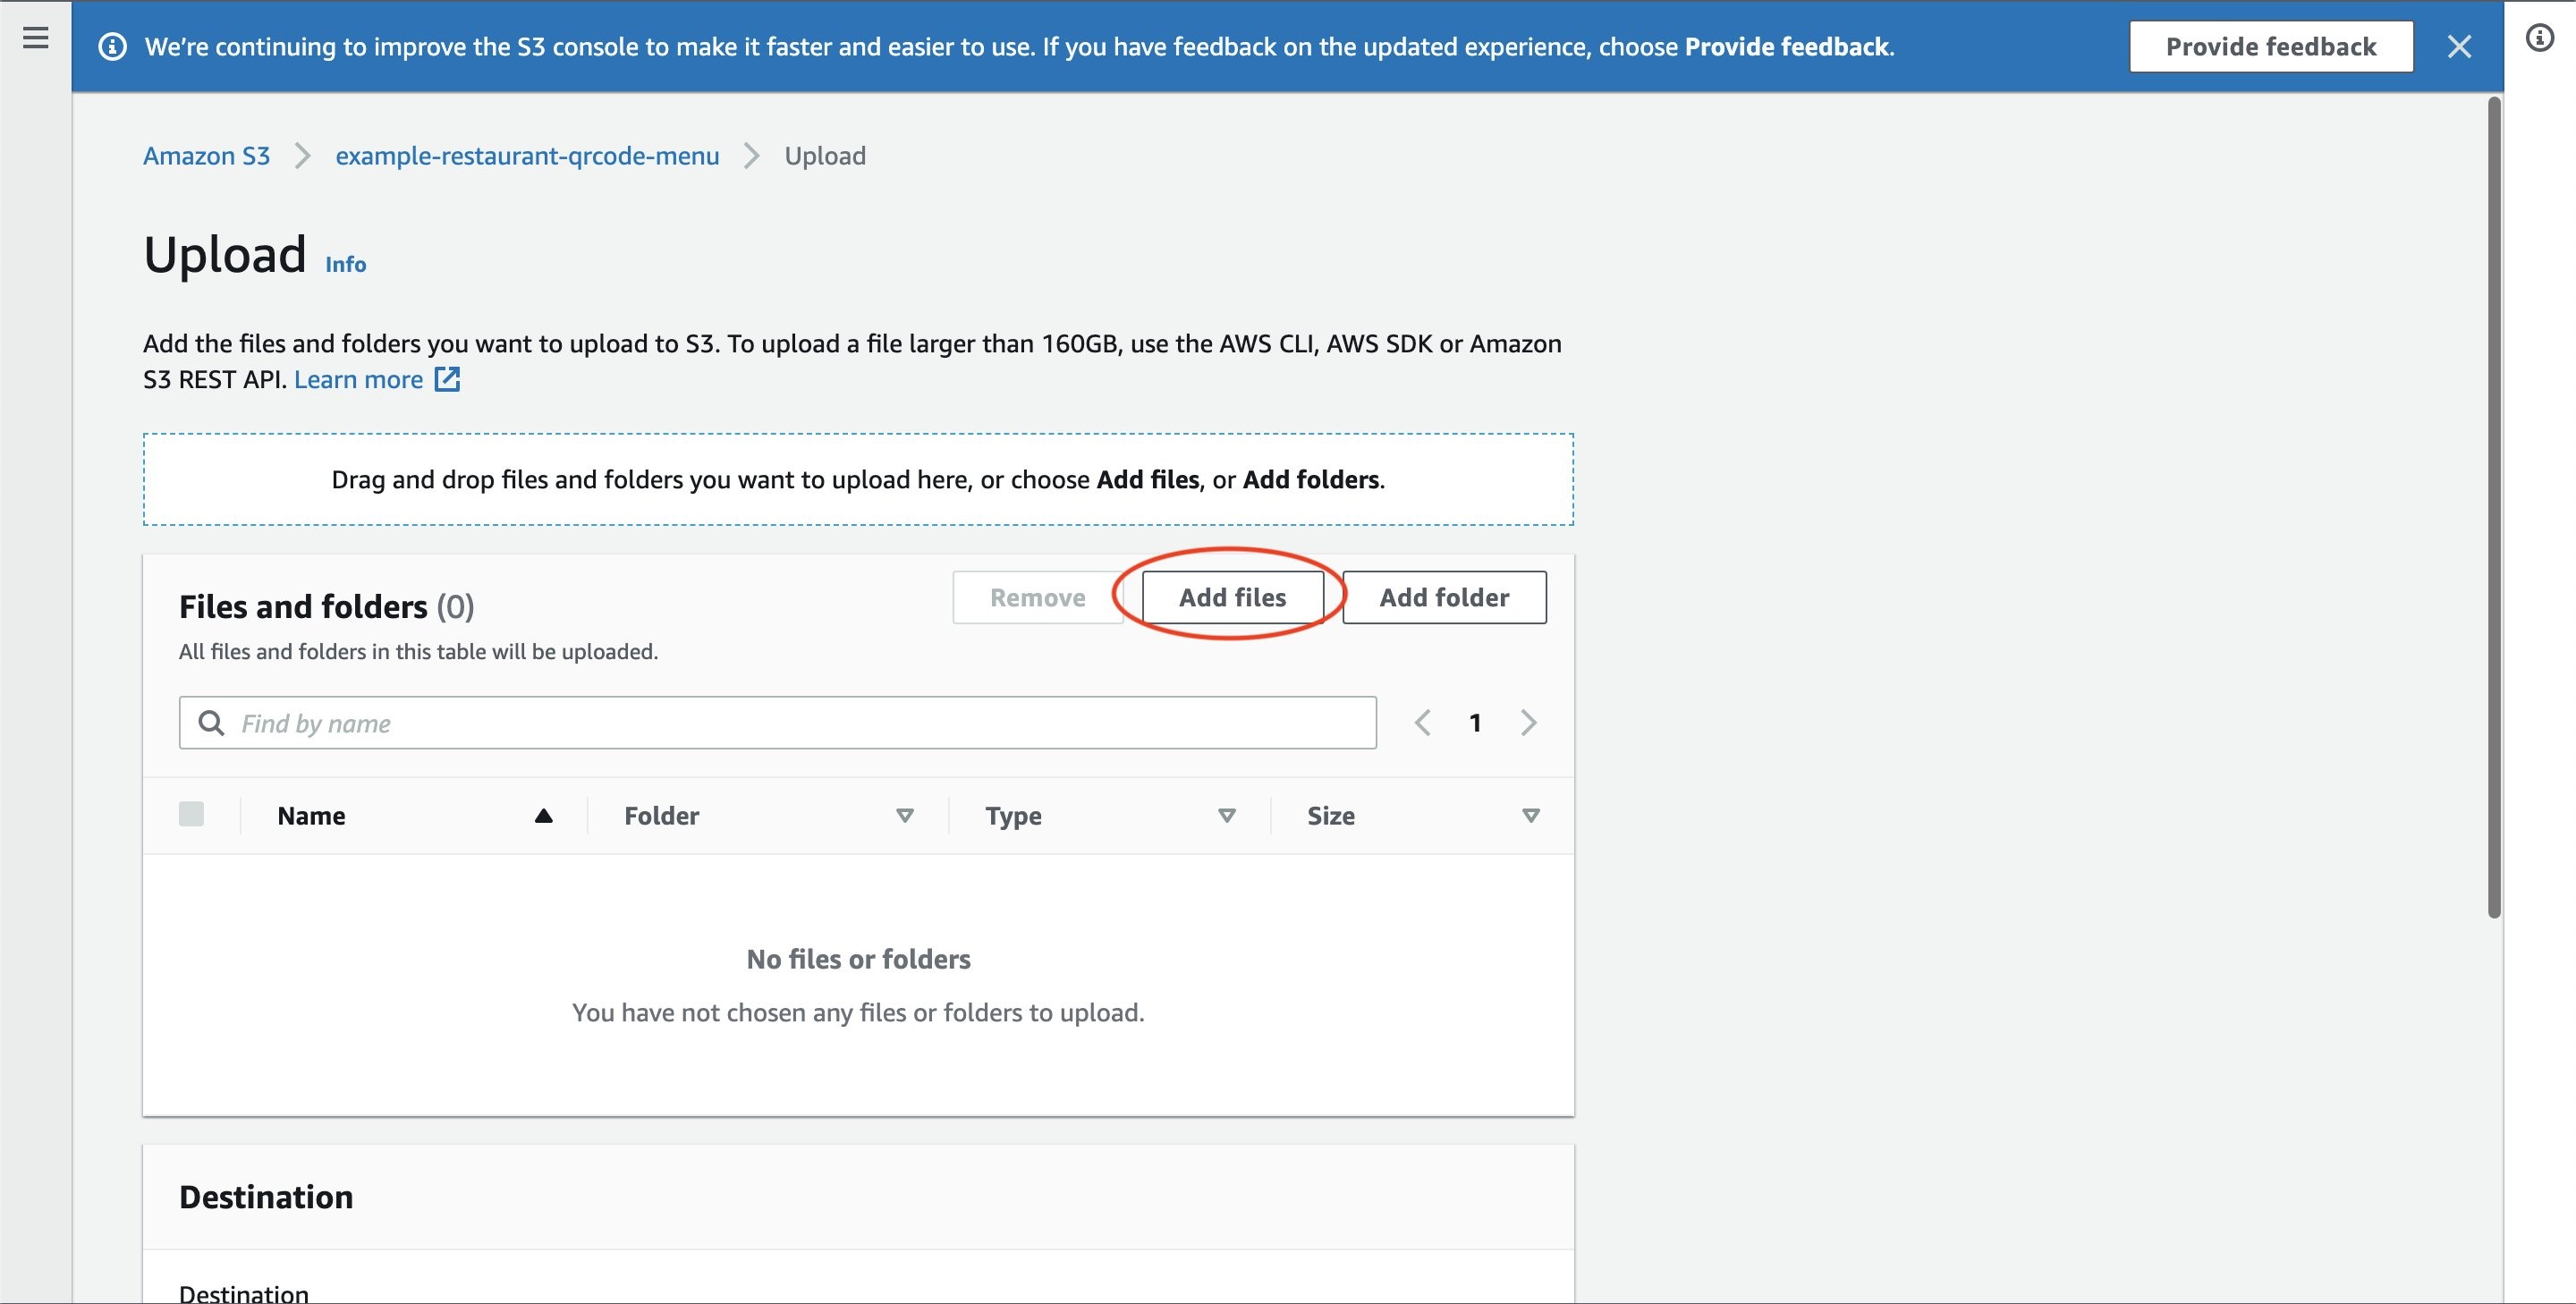
This step will vary based on where your menu resides on your current device. Find your menu on your device, select it, and click Open.

Once you see your menu under Files and folders, click the Upload button.

After you successfully upload the menu, you will get a notification in green on the top of your screen, and the status next to your menu file should say Succeeded with a green check mark. Click on the name of your menu below.

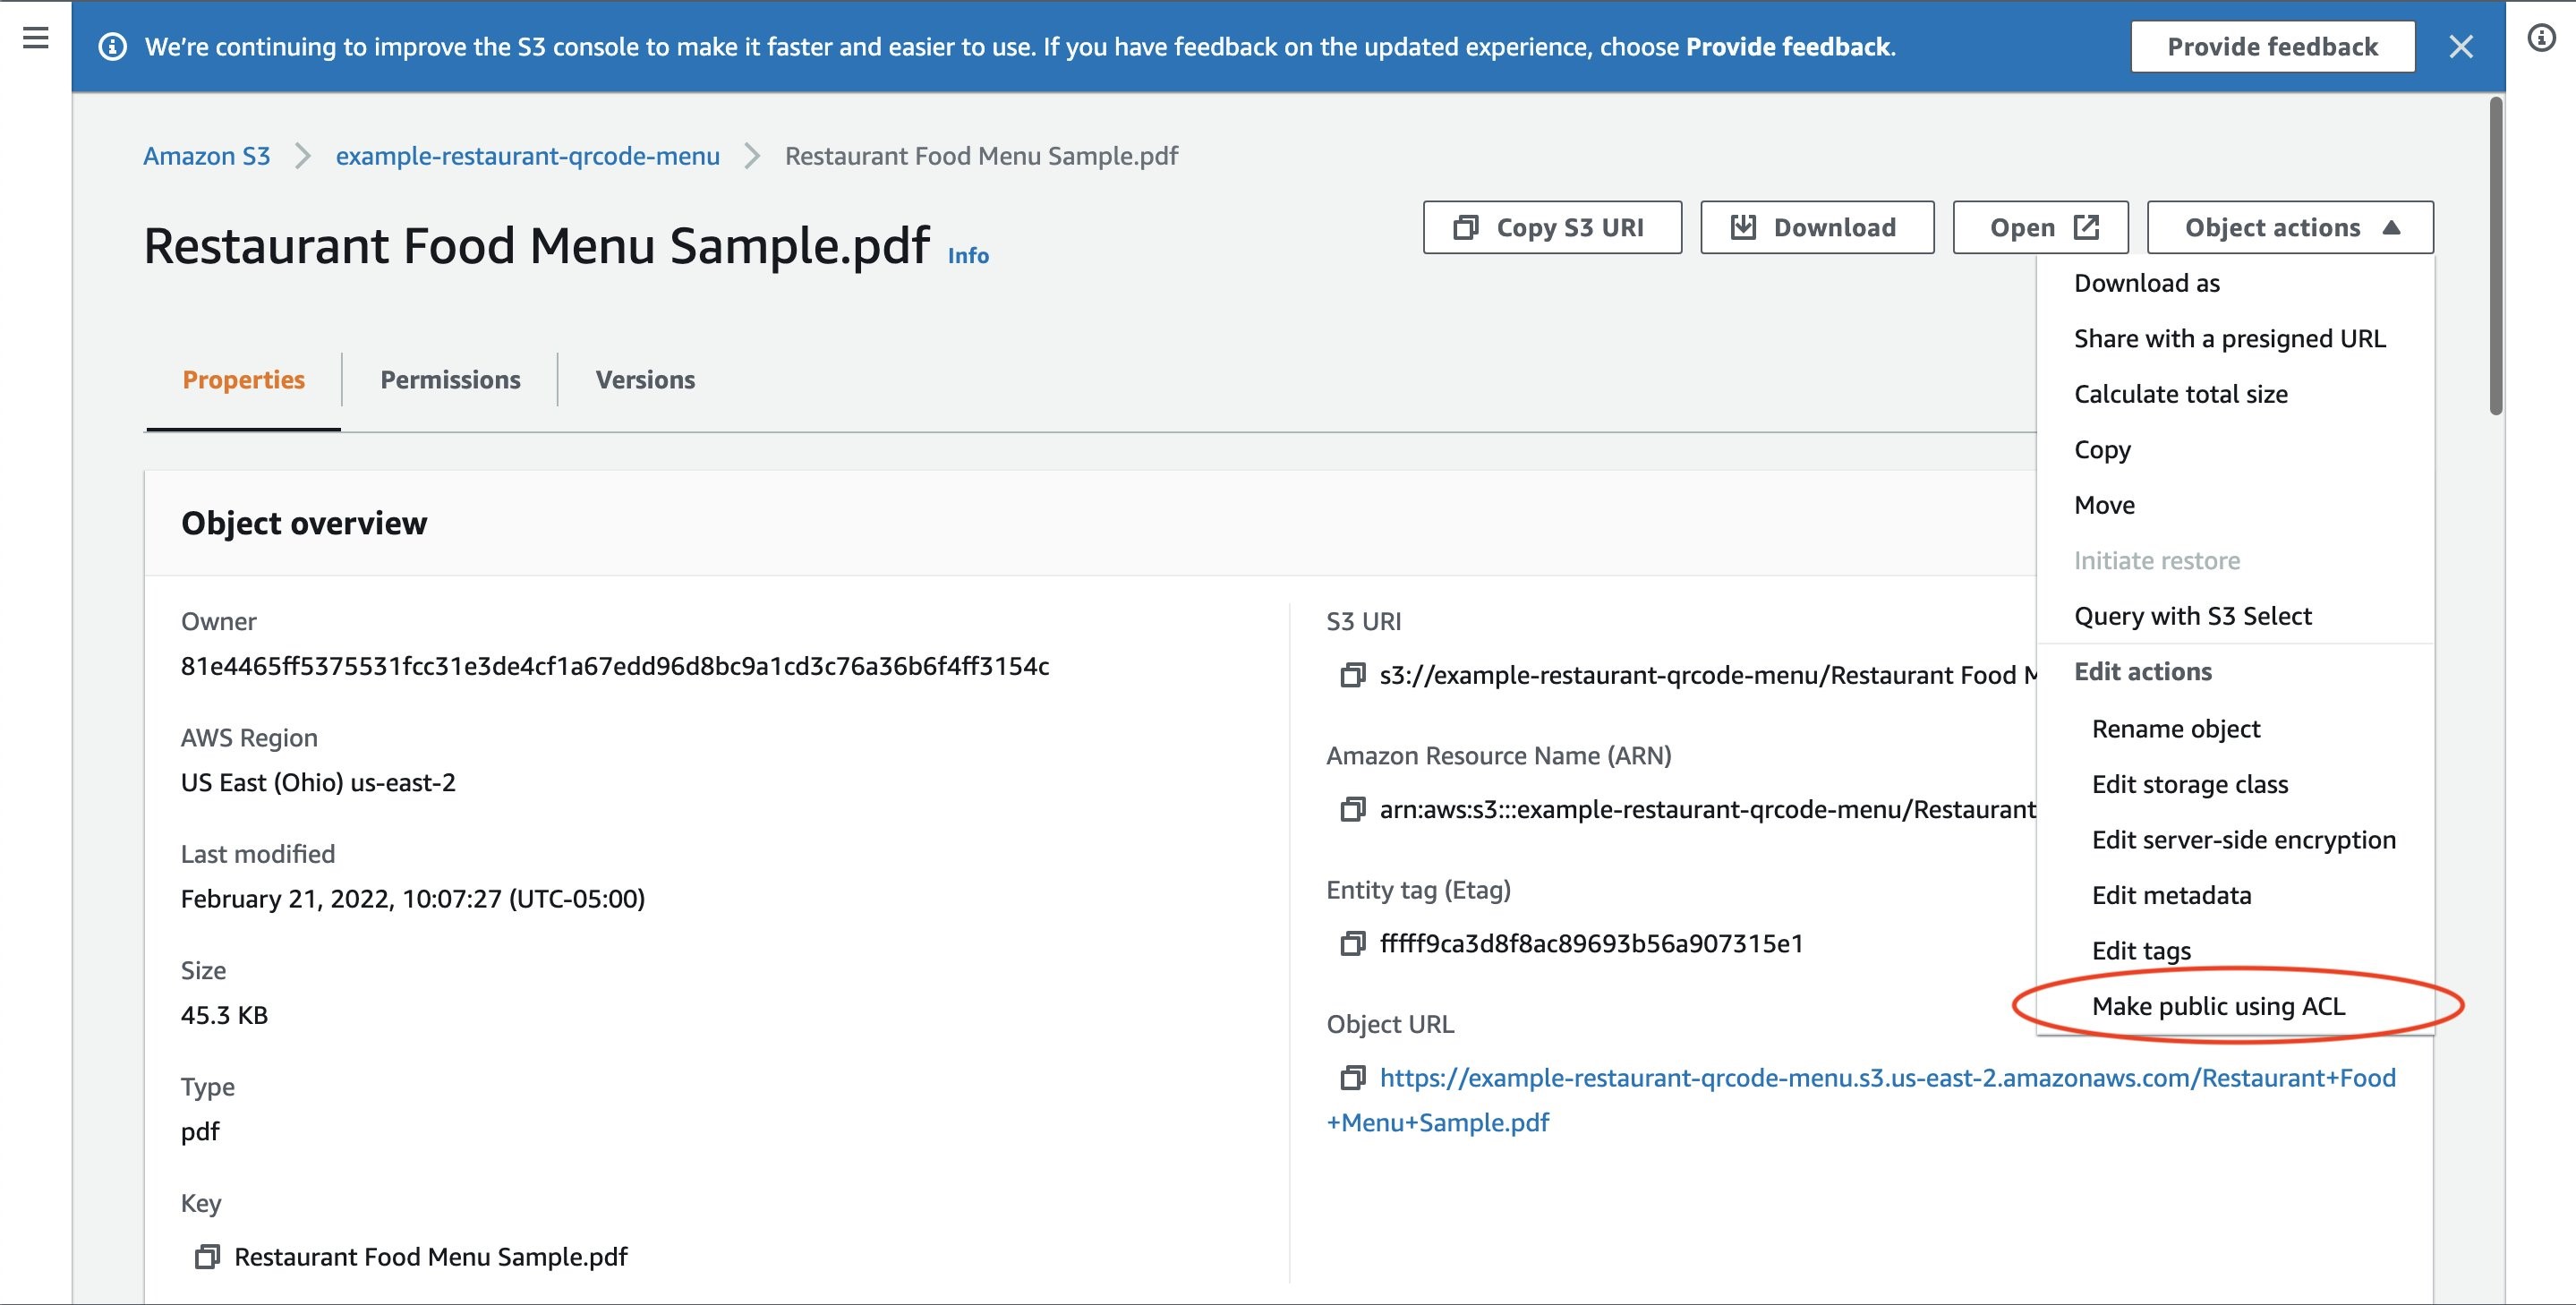
Allowing public access to your menu
Now that your bucket contains your menu, we need to allow others to access it.

Click on Object actions, which will show you a dropdown menu with a list of options. Click on the very last option: Make public using ACL.
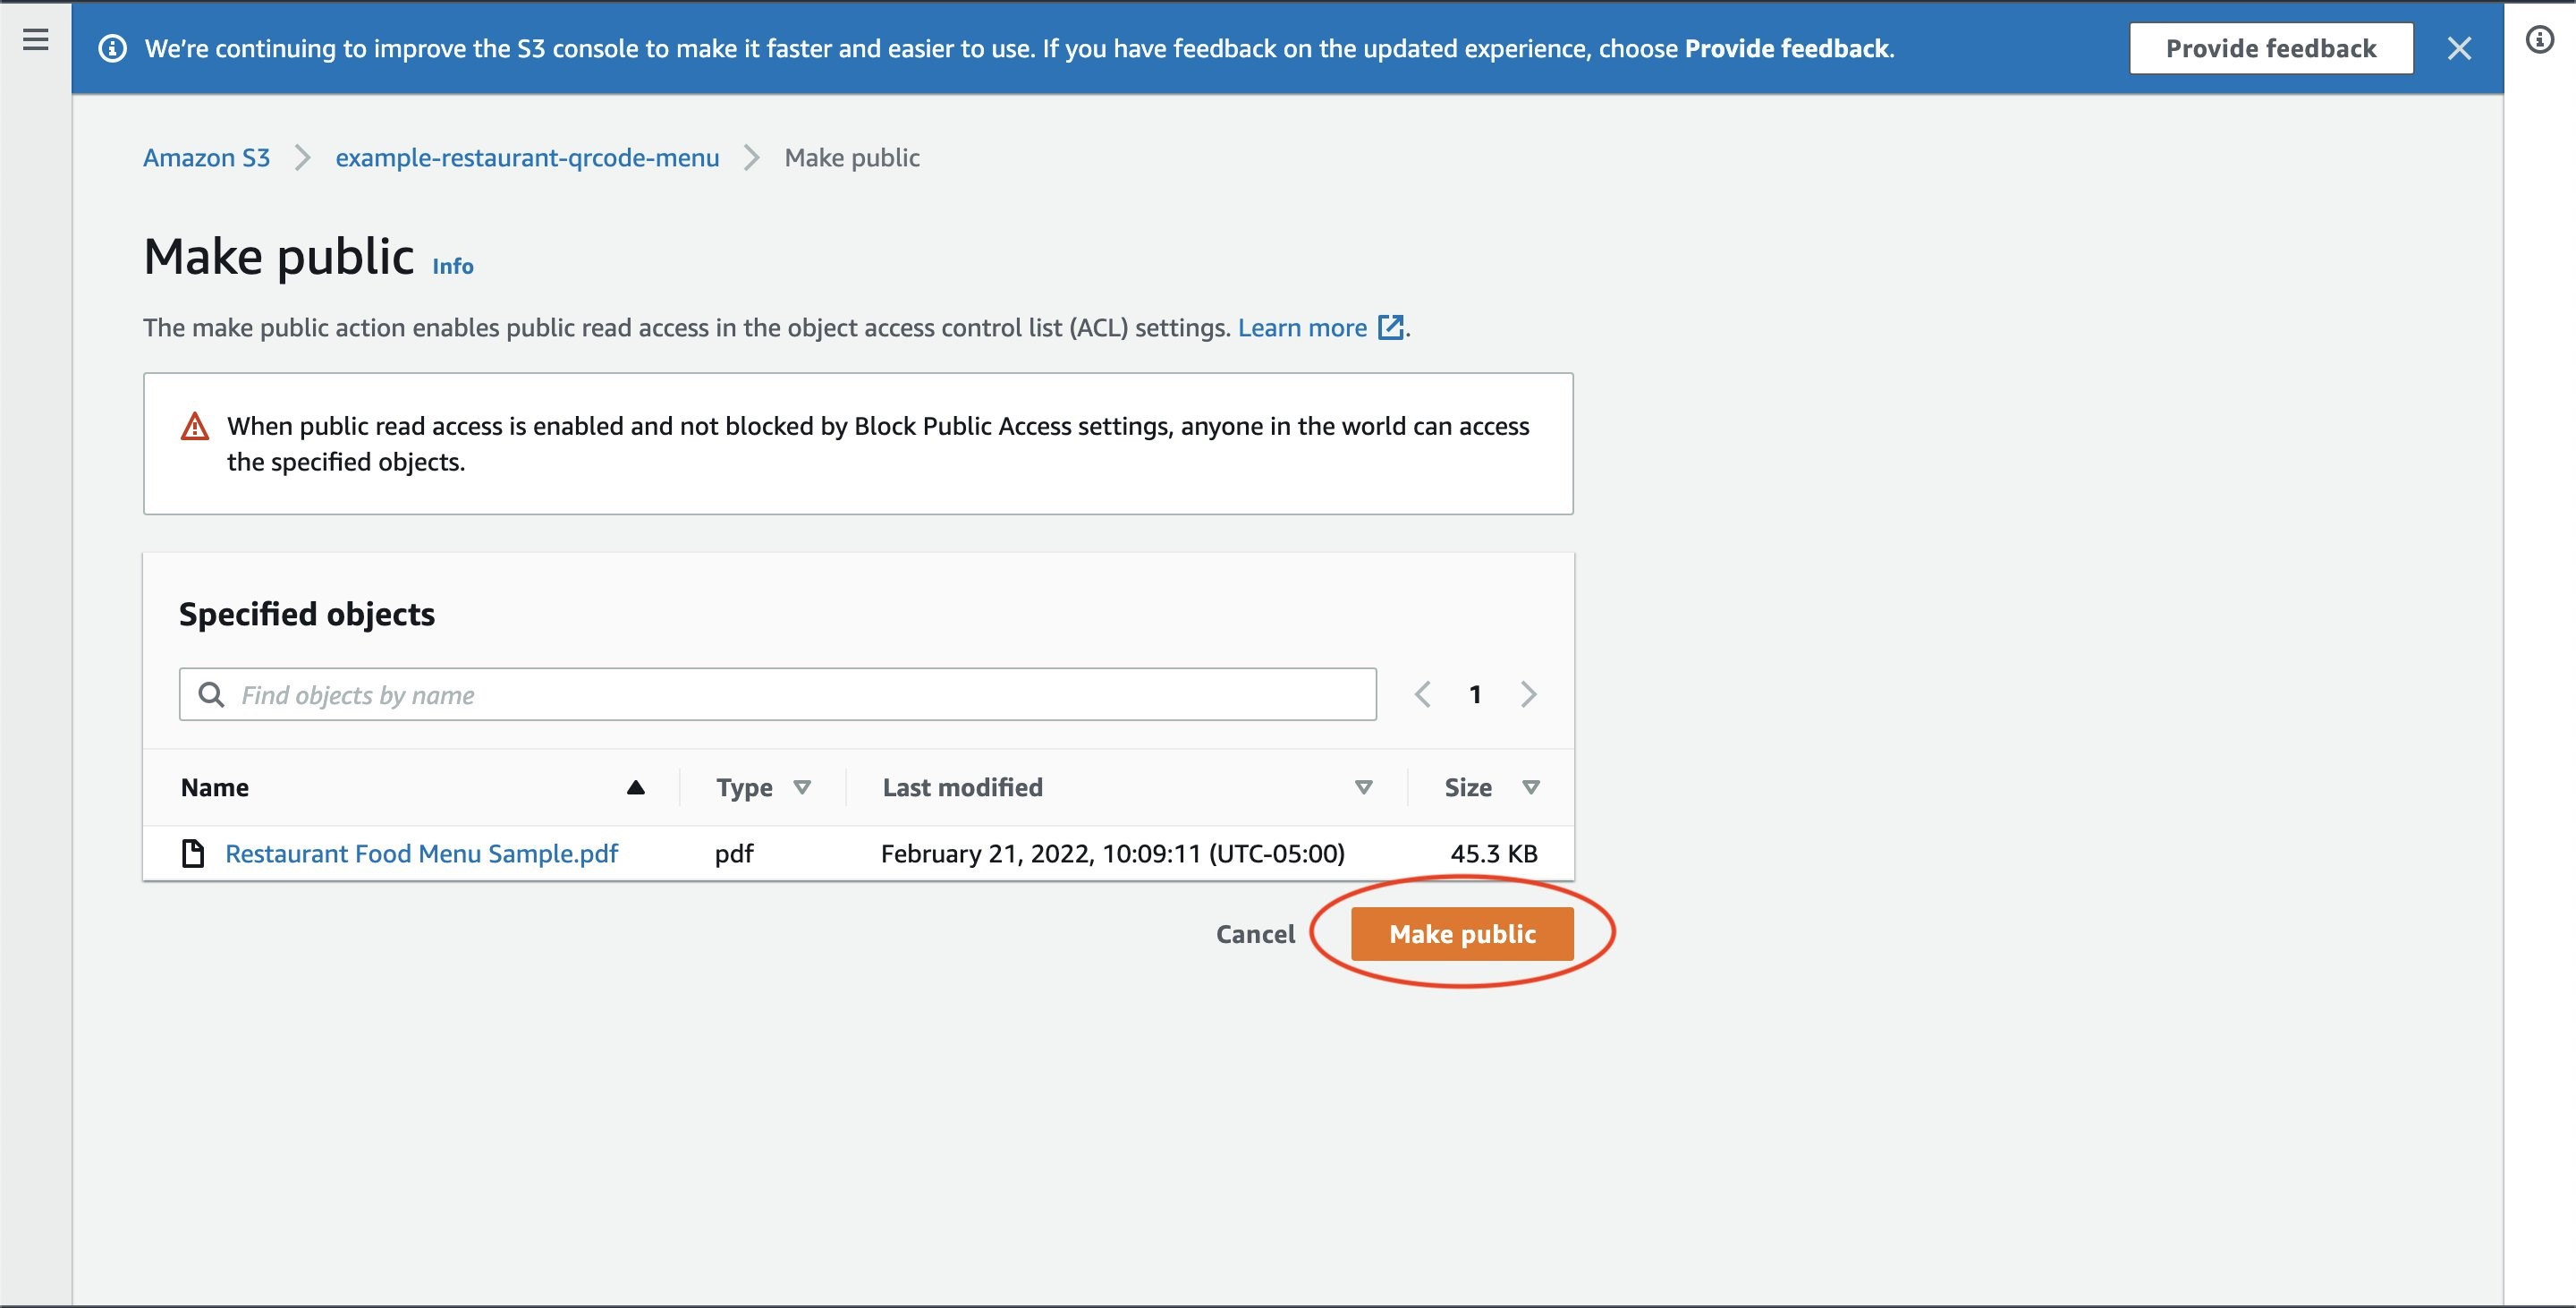
Click on the Make public button.
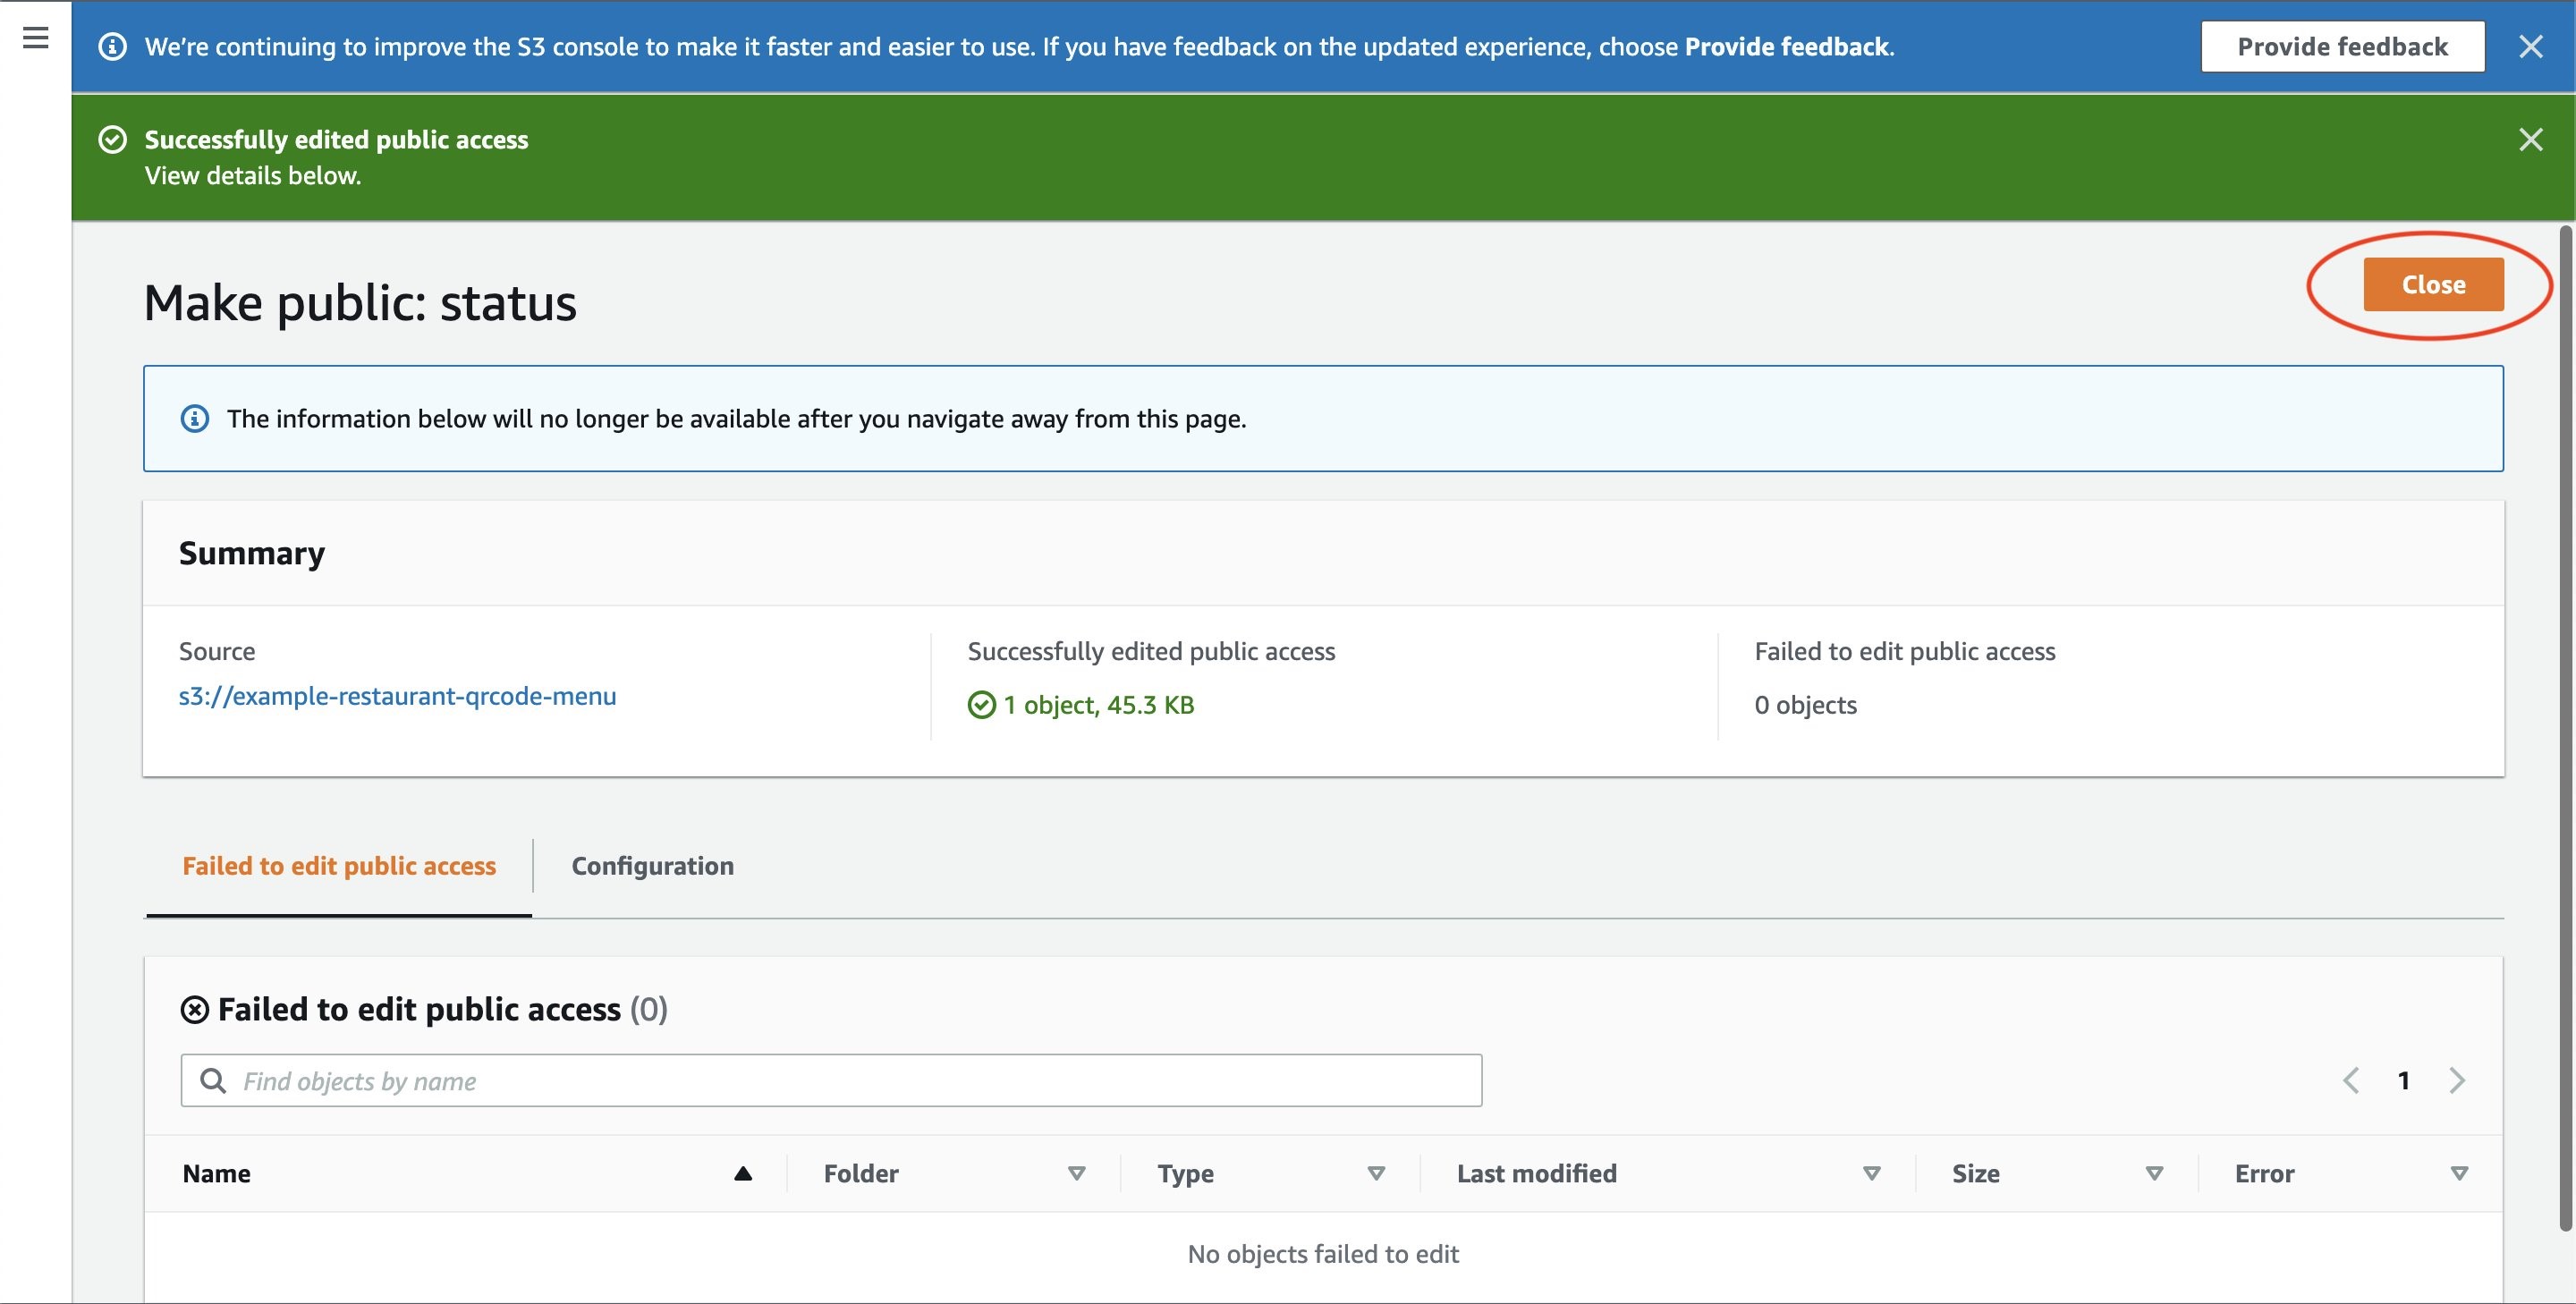
Once you see a notification that says “Successfully edited public access,” click the Close button on the top right side of your screen. Your bucket is now publicly accessible, and you are ready to create your QR code.
Creating your QR code
Once you hit the Close button in the previous step, you should be taken back to a page that displays the details of the menu you uploaded.

Click on the link under Object URL.

You should be able to view the menu that you uploaded. Copy the link.

In a separate tab, go to https://www.qrcode-monkey.com/.
Paste the link you just copied into the box that says Your URL.
Drag the slider on the right to adjust the quality.
Choose between PNG, SVG, PDF, or EPS.
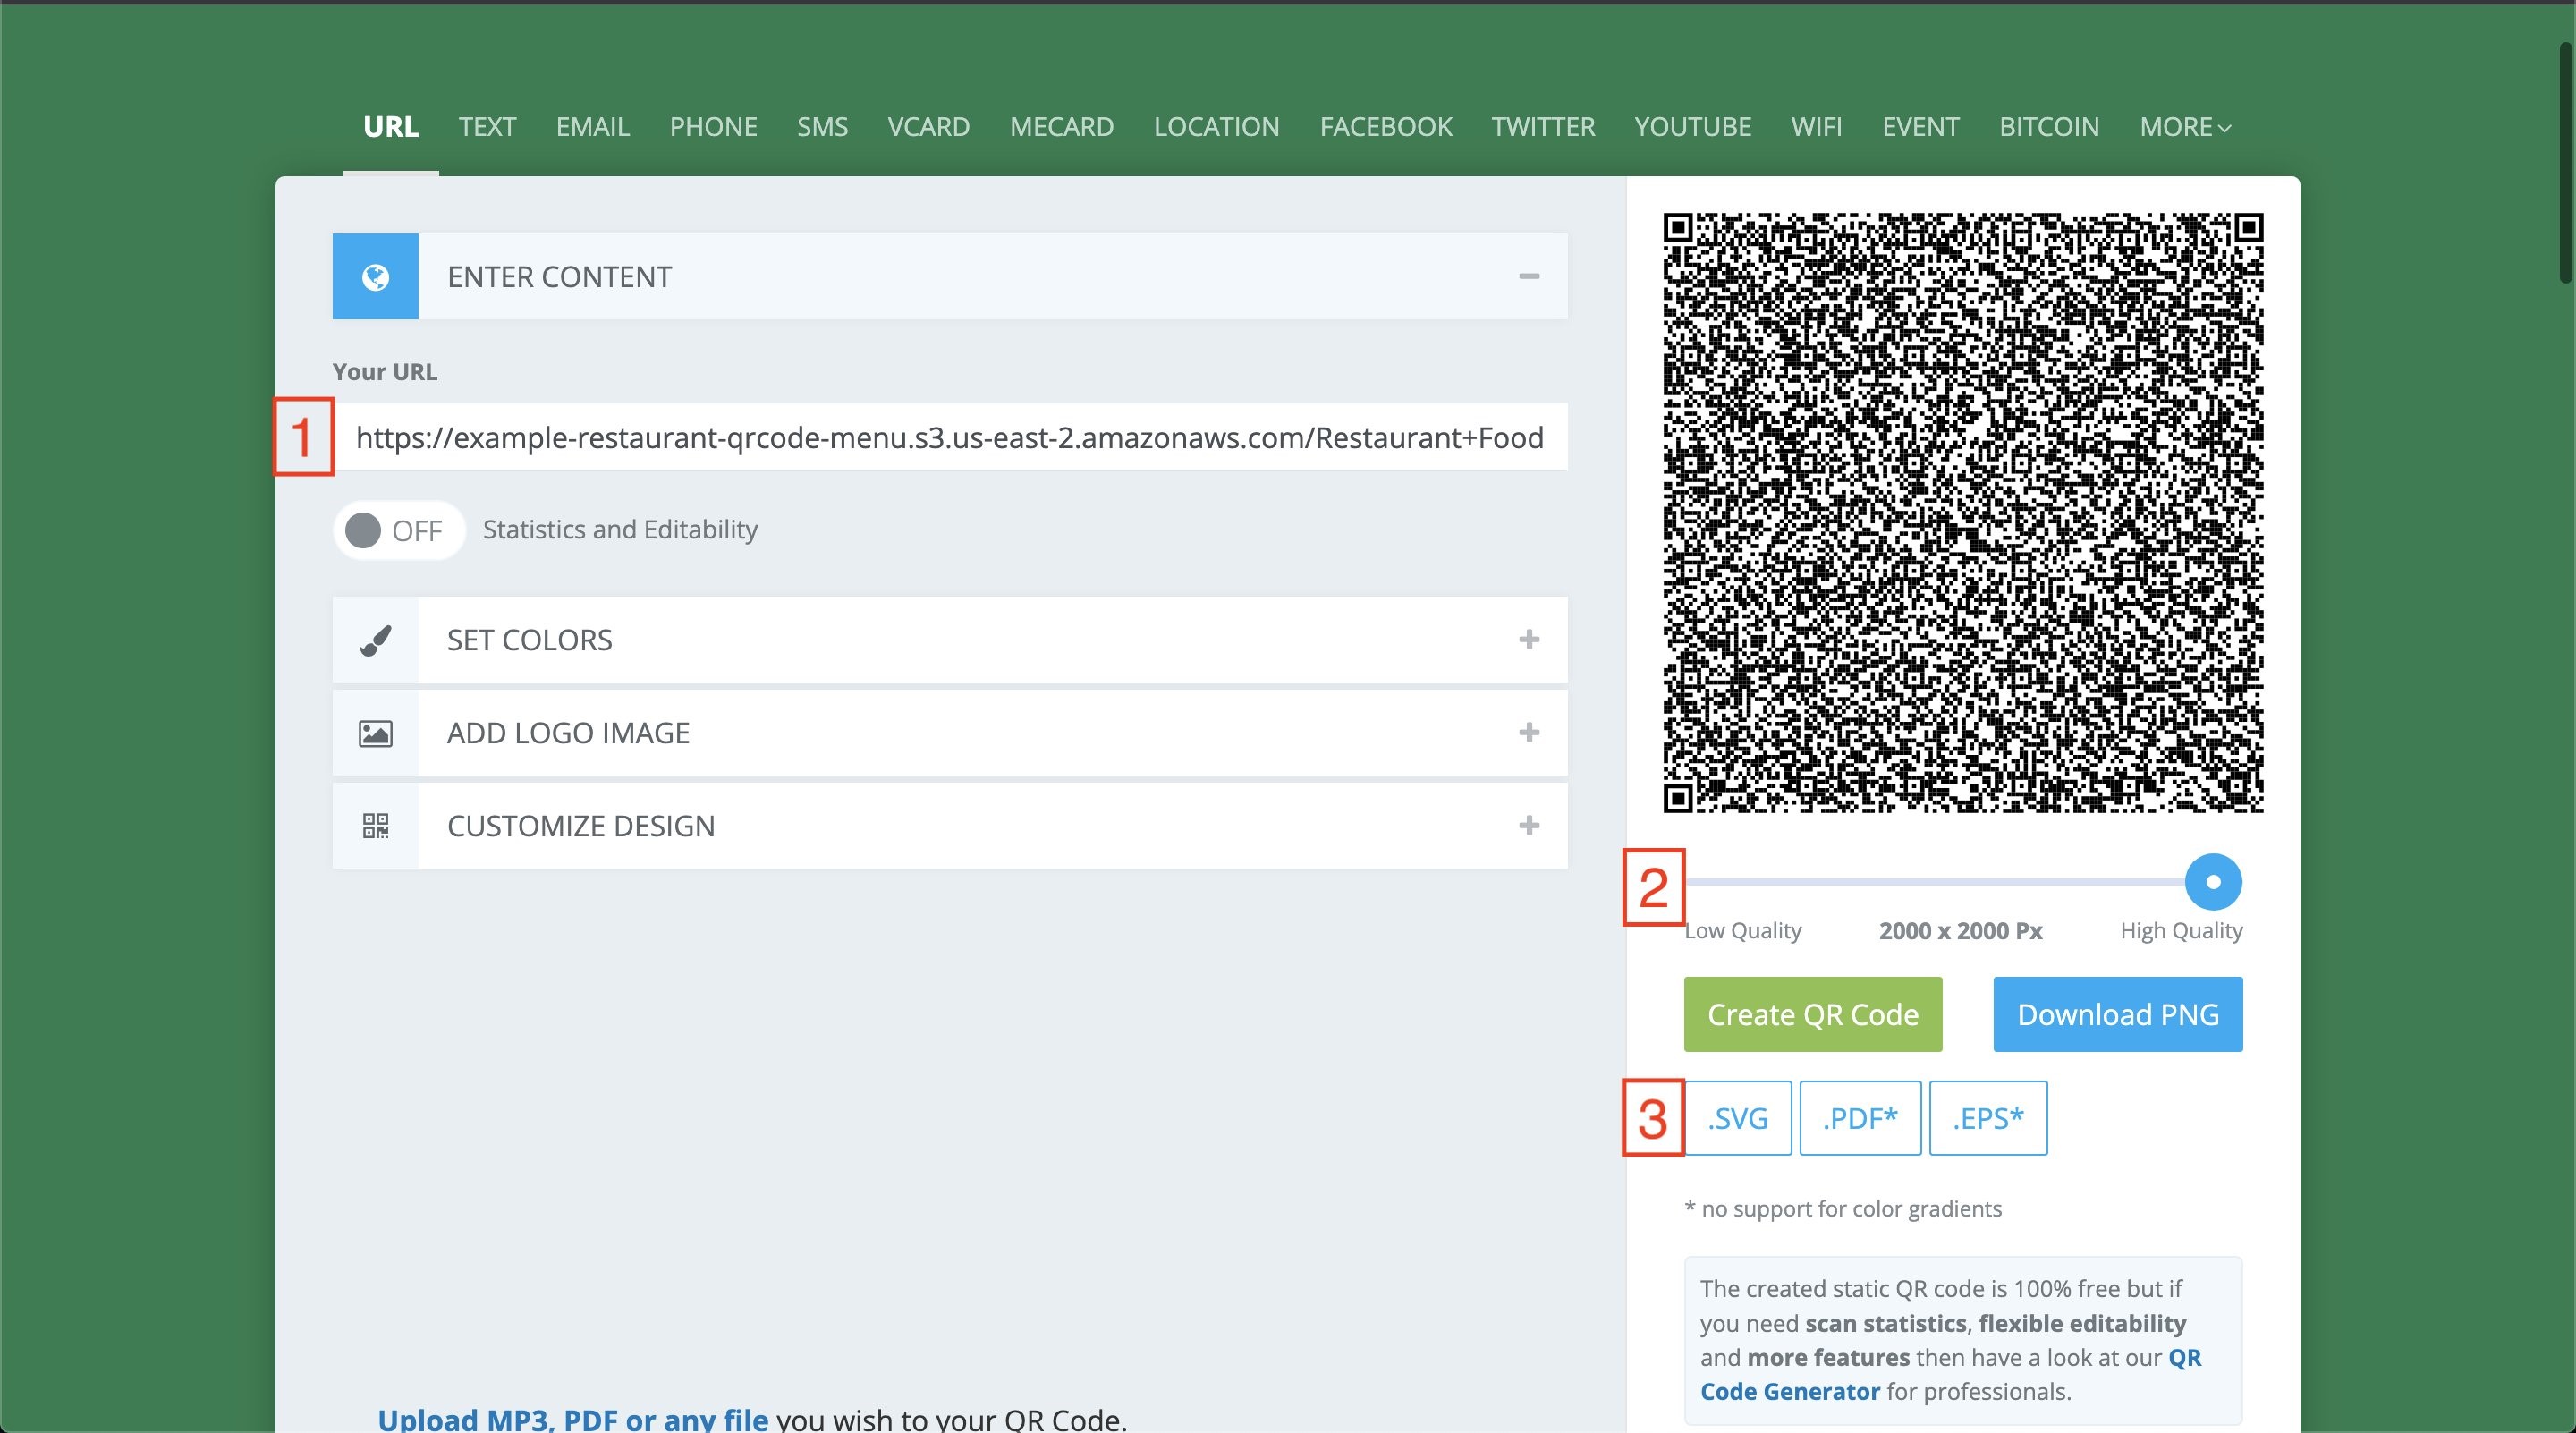
Save your menu to a folder of your choice.
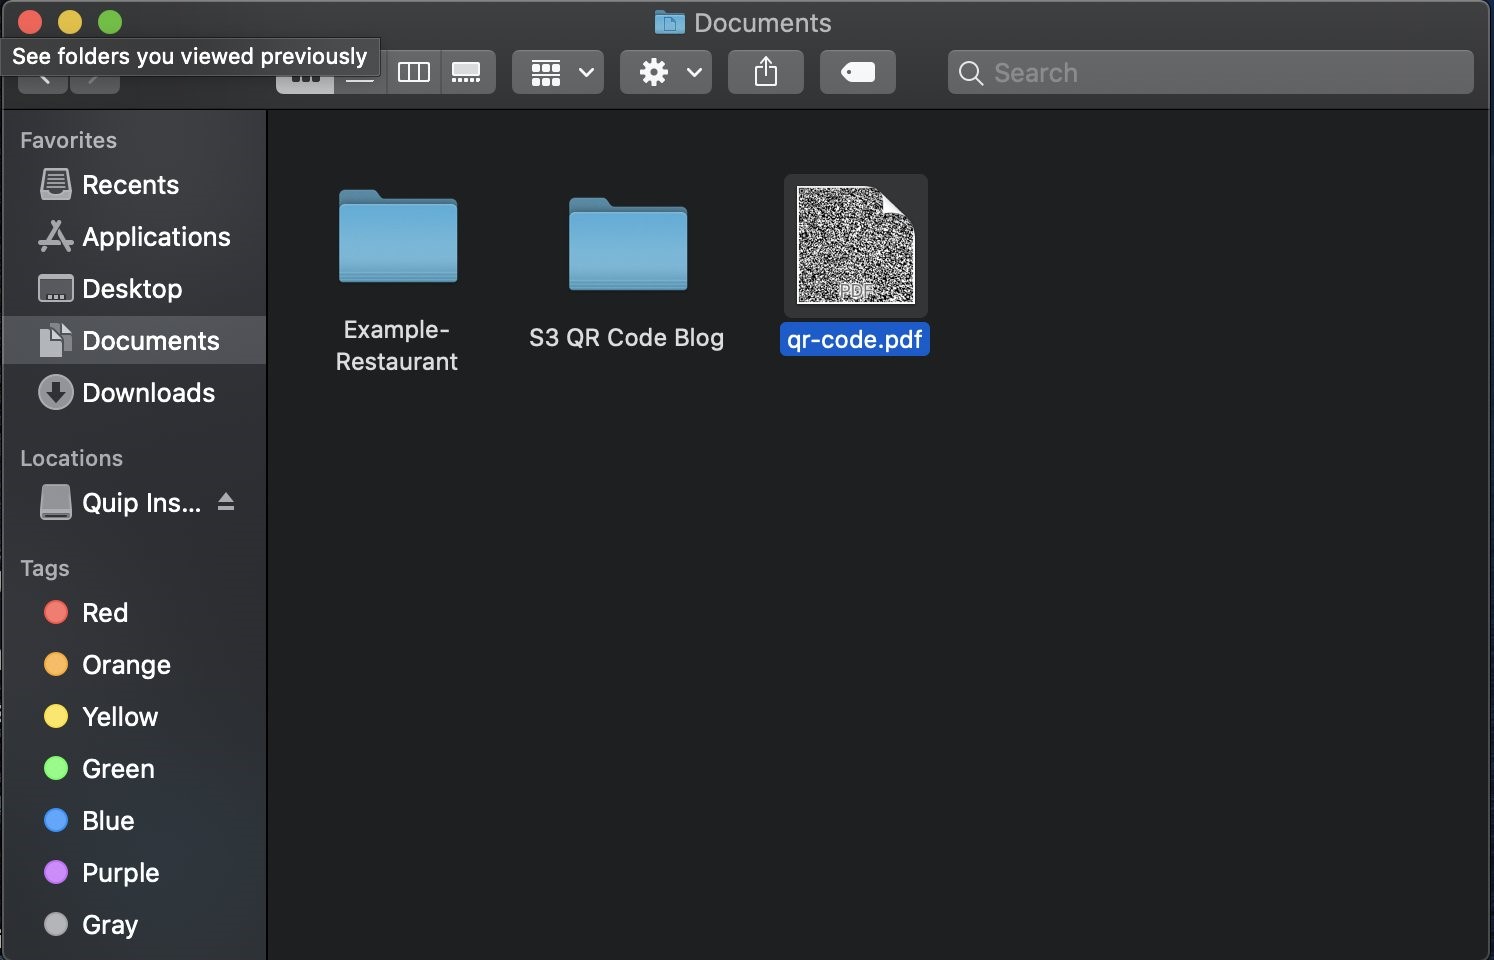
If you open this file, it should show you your QR code that leads to the menu you’ve uploaded on Amazon S3.

Testing your QR code
You can test this by using your phone’s camera. Once you point your camera at the QR code, your phone should prompt you to click on a link that pops up.
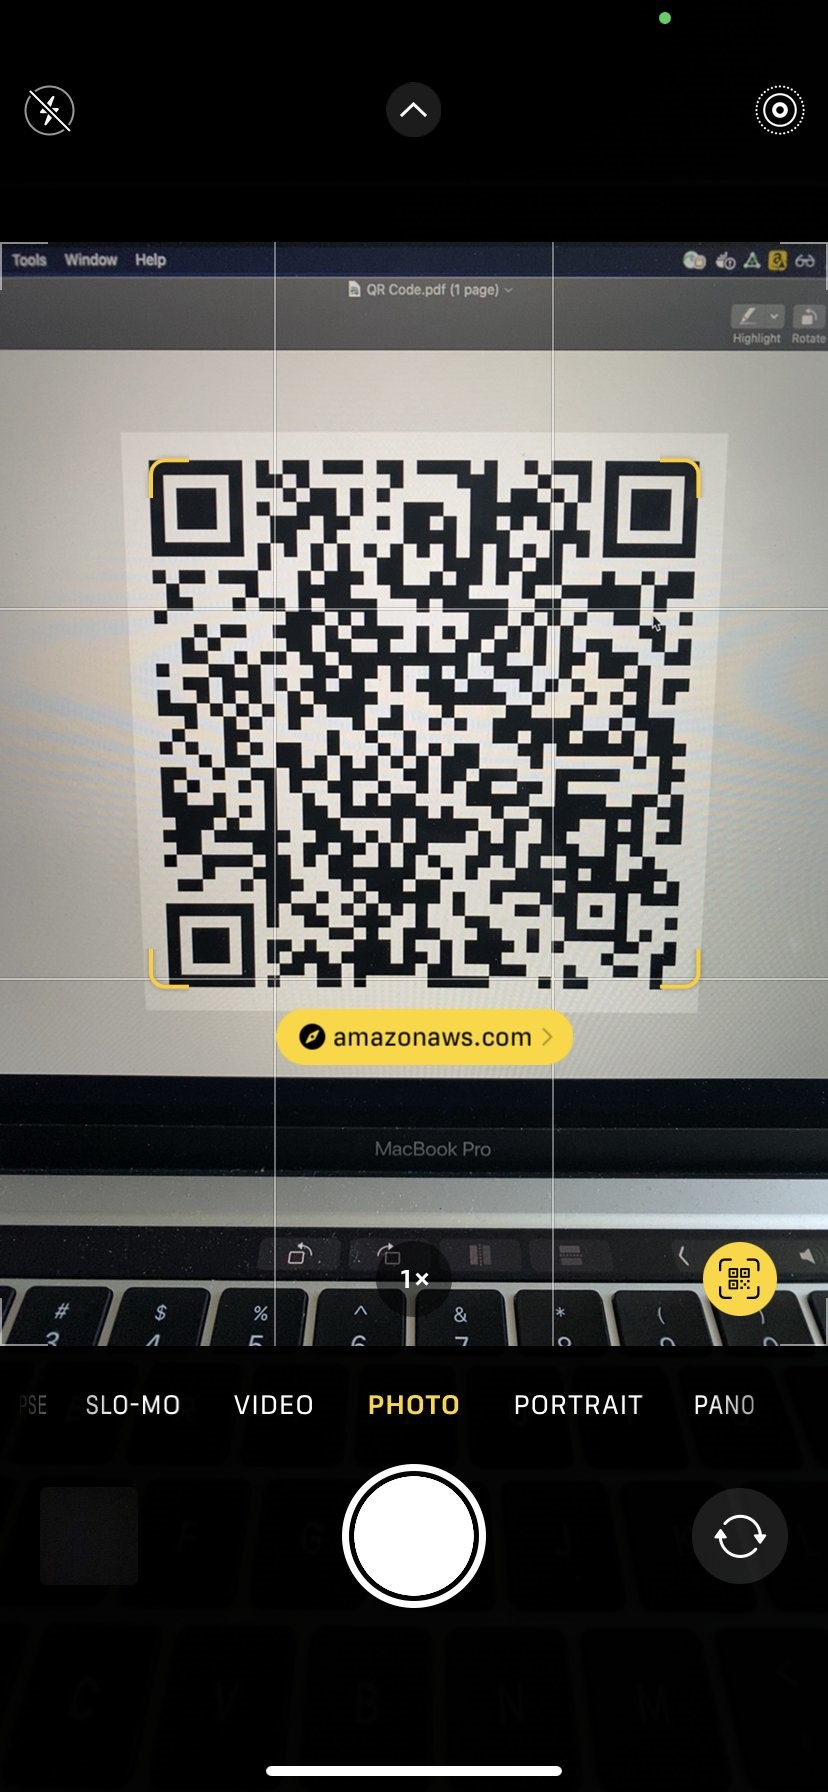
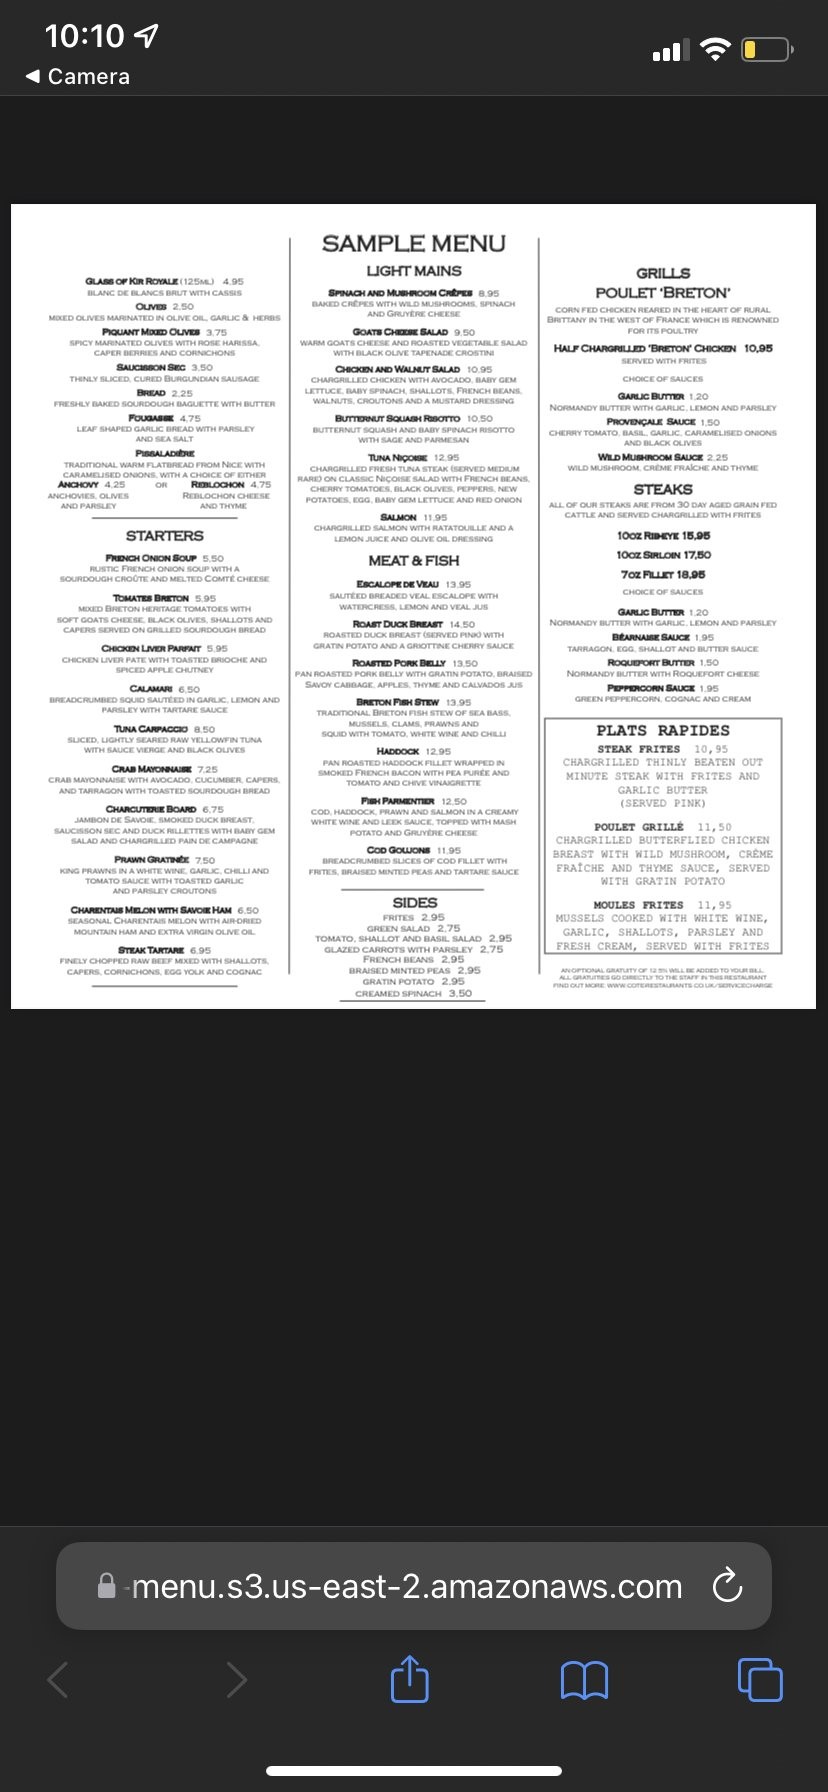
Once you tap on the link, it should show you your menu on your phone.
Conclusion
After completing these steps, you have an Amazon S3 bucket containing your restaurant menu with the proper permissions set up to allow others to view it through their devices. You should also have a QR code that was created using a link that brings you to the menu inside your Amazon S3 bucket. All you have left to do now is display this QR code wherever you’d like. You can print this QR code and display this on your tables using a table stand or menu holder, or you could even create stickers out of it—cost-effective and simple ways to reduce paper waste and printing costs.
Learn more about how to use AWS to help you reduce costs and improve the guest experience.