Front-End Web & Mobile
Setup sign-up and sign-in flows for your Flutter app in minutes with AWS Amplify
The AWS Amplify Flutter Authenticator is a drop in UI library that allows Flutter developers to add a customizable authentication and registration flow in minutes. AWS Amplify announced the general availability of the Flutter Authenticator as part of its v0.1.0 release, we wanted to show how easy it is to get it setup, allowing you to focus on building the core features of your app. To see a live demo of the Flutter Authenticator visit our UI documentation site.
Below are examples of the experience you get with the Amplify Flutter Authenticator out of the box!

The Amplify Flutter Authenticator allows you to do the following:
- Create an authentication/registration connected experience out of the box.
- Use social providers for login/registration such as Amazon, Google, Facebook, and Sign in with Apple.
- Customize the theming and styling.
- Customize validations of form inputs.
- Setup internationalization if needed.
- Fully customize the UI of the Sign in/Sign up forms.
- Provide configurations to configure auth-guard for specific routes.
Pre-requisites
- Follow this guide to install and setup the latest version of the Amplify CLI.
- Create a new flutter application using
flutter create authenticatorblogpostapp - For iOS:
- Navigate to the
ios/Podfileand uncommon the second line, and set the platform to at least 11.0
- Navigate to the
- For Android:
- Navigate to
android/app/build.gradleand change theminSdkVersionto at least21
- Navigate to
Setting up the Amplify Backend
In order to use Flutter Authenticator, you need to initialize and setup an Amplify project in your application folder.
- Navigate to the root folder of your Flutter app and run
amplify initin your terminal. Select the name for your project. The CLI will infer that name from the name of your application folder, but you can change it to whatever makes the most sense to you. Then, Choose the default configuration after setting the name. - I prefer using the
aws profilewhen selecting the Authentication method in the CLI, your profile would be setup if you followed the 1st pre-requisite step in this post. - Add authentication features to your app by using the command
amplify add auth.- Note: You can select the option of ‘Default configuration with Social Provider` to add Social providers such as Amazon, Google, Sign in with Apple, and Facebook. You can follow this guide for setting up social providers.
? Do you want to use the default authentication and security configuration
? `Default configuration`
? How do you want users to be able to sign in
? `Username`
? Do you want to configure advanced settings
? `No, I am done.`- After the CLI is done configuring your resources locally, you can use the command
amplify pushto configure your resources in the cloud.
Getting Started with the Flutter Authenticator
To setup the Amplify Authenticator UI library in your app, you can follow the below 3 steps:
- Add the Authenticator as a dependency in your project in the
pubspec.yamlin the root of your Flutter project folder.
dependencies:
  amplify_flutter: ^0.5.0
  amplify_auth_cognito: ^0.5.0
amplify_authenticator: ^0.1.0- Add the Amplify libraries as dependencies to the top of your
lib/main.dartfile.
import 'package:amplify_auth_cognito/amplify_auth_cognito.dart';
import 'package:amplify_authenticator/amplify_authenticator.dart';
import 'package:amplify_flutter/amplify_flutter.dart';
import 'package:flutter/material.dart';

import 'amplifyconfiguration.dart';- Navigate to your
lib/main.dartfile, and add the Amplify configuration for the Auth category for Amplify, and wrap yourMaterialAppin anAuthenticatorwidget and set theMaterialApp’sbuilderparameter toAuthenticator.builder(). - Your
main.dartfile should now look like this.
import 'package:amplify_auth_cognito/amplify_auth_cognito.dart';
import 'package:amplify_authenticator/amplify_authenticator.dart';
import 'package:amplify_flutter/amplify_flutter.dart';
import 'package:flutter/material.dart';

import 'amplifyconfiguration.dart';

void main() {
  runApp(const MyApp());
}

class MyApp extends StatefulWidget {
  const MyApp({Key? key}) : super(key: key);

  @override
  State<MyApp> createState() => _MyAppState();
}

class _MyAppState extends State<MyApp> {
  @override
  void initState() {
    super.initState();
    _configureAmplify();
  }

  void _configureAmplify() async {
    try {
      await Amplify.addPlugin(AmplifyAuthCognito());
      await Amplify.configure(amplifyconfig);
      print('Successfully configured');
    } on Exception catch (e) {
      print('Error configuring Amplify: $e');
    }
  }

  @override
  Widget build(BuildContext context) {
    return Authenticator(
      child: MaterialApp(
        builder: Authenticator.builder(),
        home: const Scaffold(
          body: Center(
            child: Text('You are logged in!'),
          ),
        ),
      ),
    );
  }
}
The Authenticator will listen for when your app is configured, and then show you the login/sign up forms. If a user is already logged in, they will be redirected to the widget configured in the child of the Authenticator widget. Once the user signs out, the Authenticator will automatically route the user to the Authenticator Sign in/Sign up forms.
Theming/Styling Amplify Flutter Authenticator
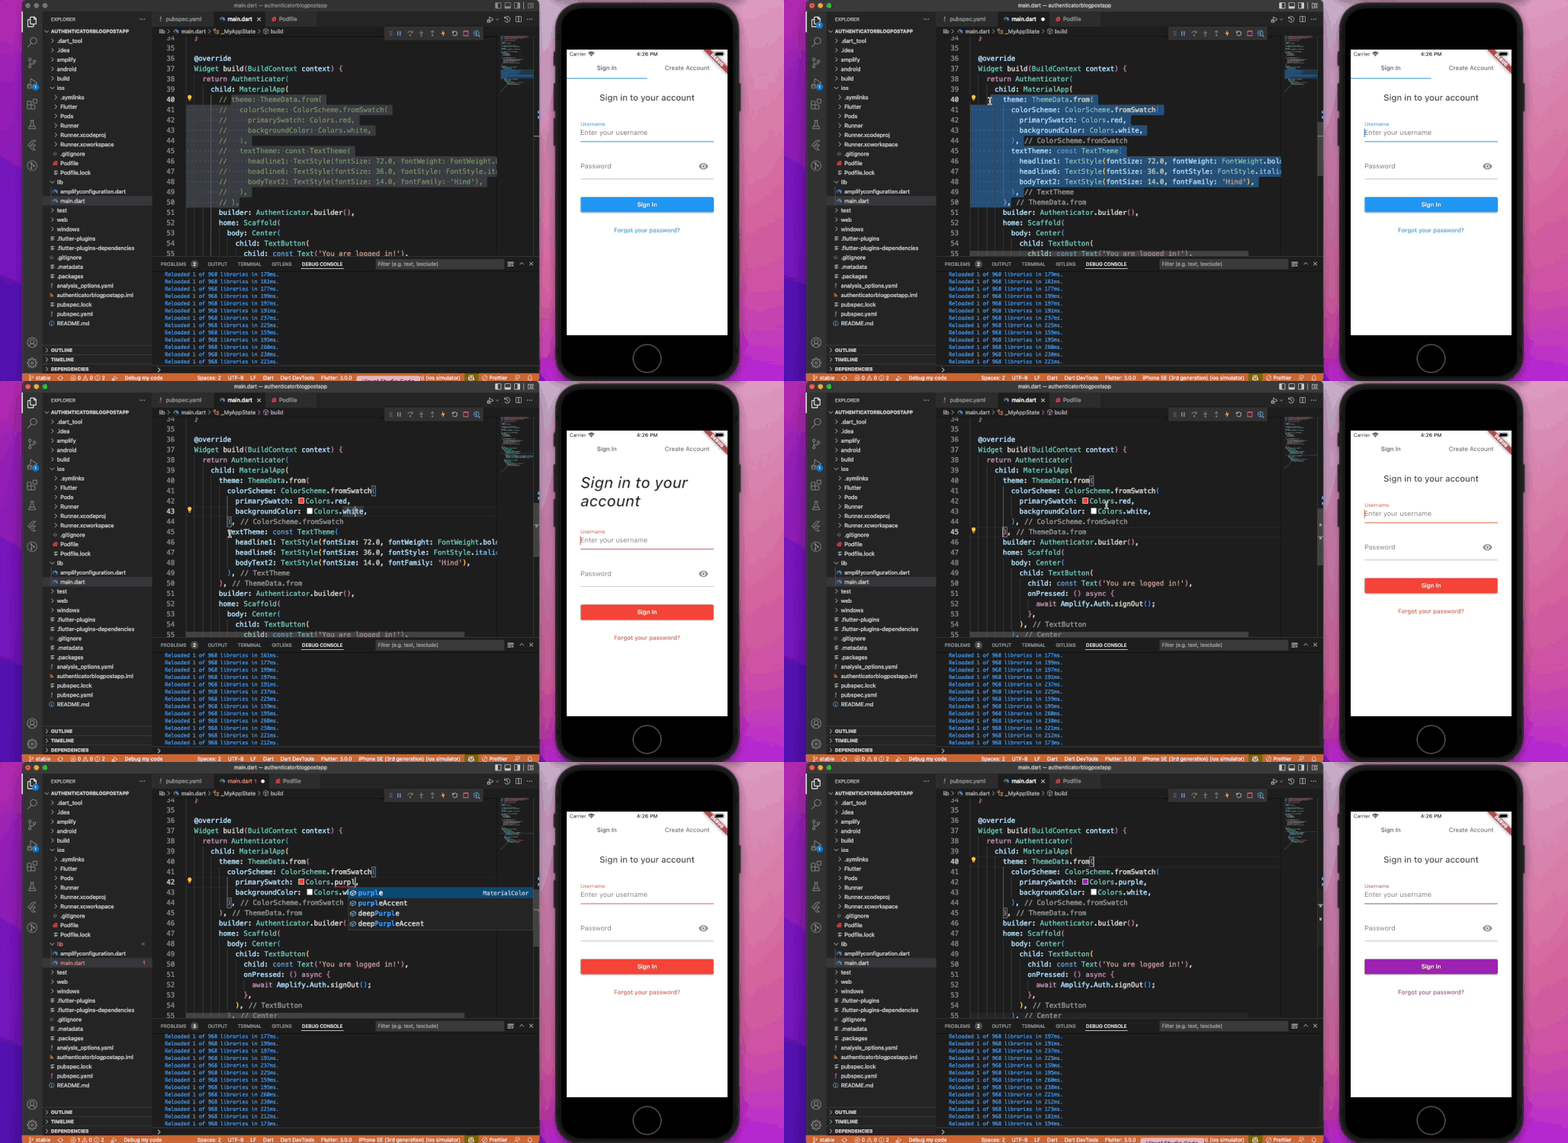
The Amplify Flutter Authenticator UI library is built using material widgets, which allows it to inherit the theme and style using the theme object inside of the MaterialApp widget. The Authenticator can also inherit the default theme, dark theme, or the theme setup from the user’s system preferences.
@override
Widget build(BuildContext context) {
  return Authenticator(
    child: MaterialApp(
      // set the default theme
      theme: ThemeData.from(
        colorScheme: ColorScheme.fromSwatch(
          primarySwatch: Colors.red,
          backgroundColor: Colors.white,
        ),
      ).copyWith(
        indicatorColor: Colors.red,
      ),
      // set the dark theme (optional)
      darkTheme: ThemeData.from(
        colorScheme: ColorScheme.fromSwatch(
          primarySwatch: Colors.red,
          backgroundColor: Colors.black,
          brightness: Brightness.dark,
        ),
      ),
      // set the theme mode to respond to the user's system preferences (optional)
      themeMode: ThemeMode.system,
      builder: Authenticator.builder(),
      home: const Scaffold(
        body: Center(
          child: Text('You are logged in!'),
        ),
      ),
    ),
  );
}
In Conclusion
That is all you needed to setup Authenticator! You now have a Flutter application that is ready for you to use with a full Sign in/Sign up flow.
To learn more about Amplify Flutter, visit our getting started documentation. You can also follow our Github repo for updates on new features, and join our discord server to stay in touch with our community!
