Front-End Web & Mobile
Generate human-readable seed data with Amplify Studio
This guide will teach you to build a blog page filled with fake blog posts using the AWS Amplify Admin UI’s new data improvements. We’ve added richer seed data generation using Faker, as well as the ability to download your data as a CSV. This makes development easier, thereby enabling you to create realistic demos, and handle data as you would with Amazon DynamoDB.
AWS Amplify is the fastest and easiest way to build cloud-powered mobile and web apps on AWS. Amplify comprises a set of tools and services that enables front-end web and mobile developers to leverage the power of AWS services to build innovative and feature-rich applications. Launched at re:Invent 2020, the AWS Amplify Admin UI is an externally hosted console that allows frontend teams to visually create an app backend and manage their app content and users. Data management enables developers to visually browse app data, and content editors to update the app content post-release.
Quickstart! Deploy your app in one click
Deploy the full-stack sample below that will give you a starter Chakra UI project with a Listings backend. The code is already setup with Amplify DataStore, our client library for accessing and manipulating data in real-time.
.
.
Once the app is deployed, you should see a successful build pipeline. Select the amplifyapp URL to visit the deployed site.
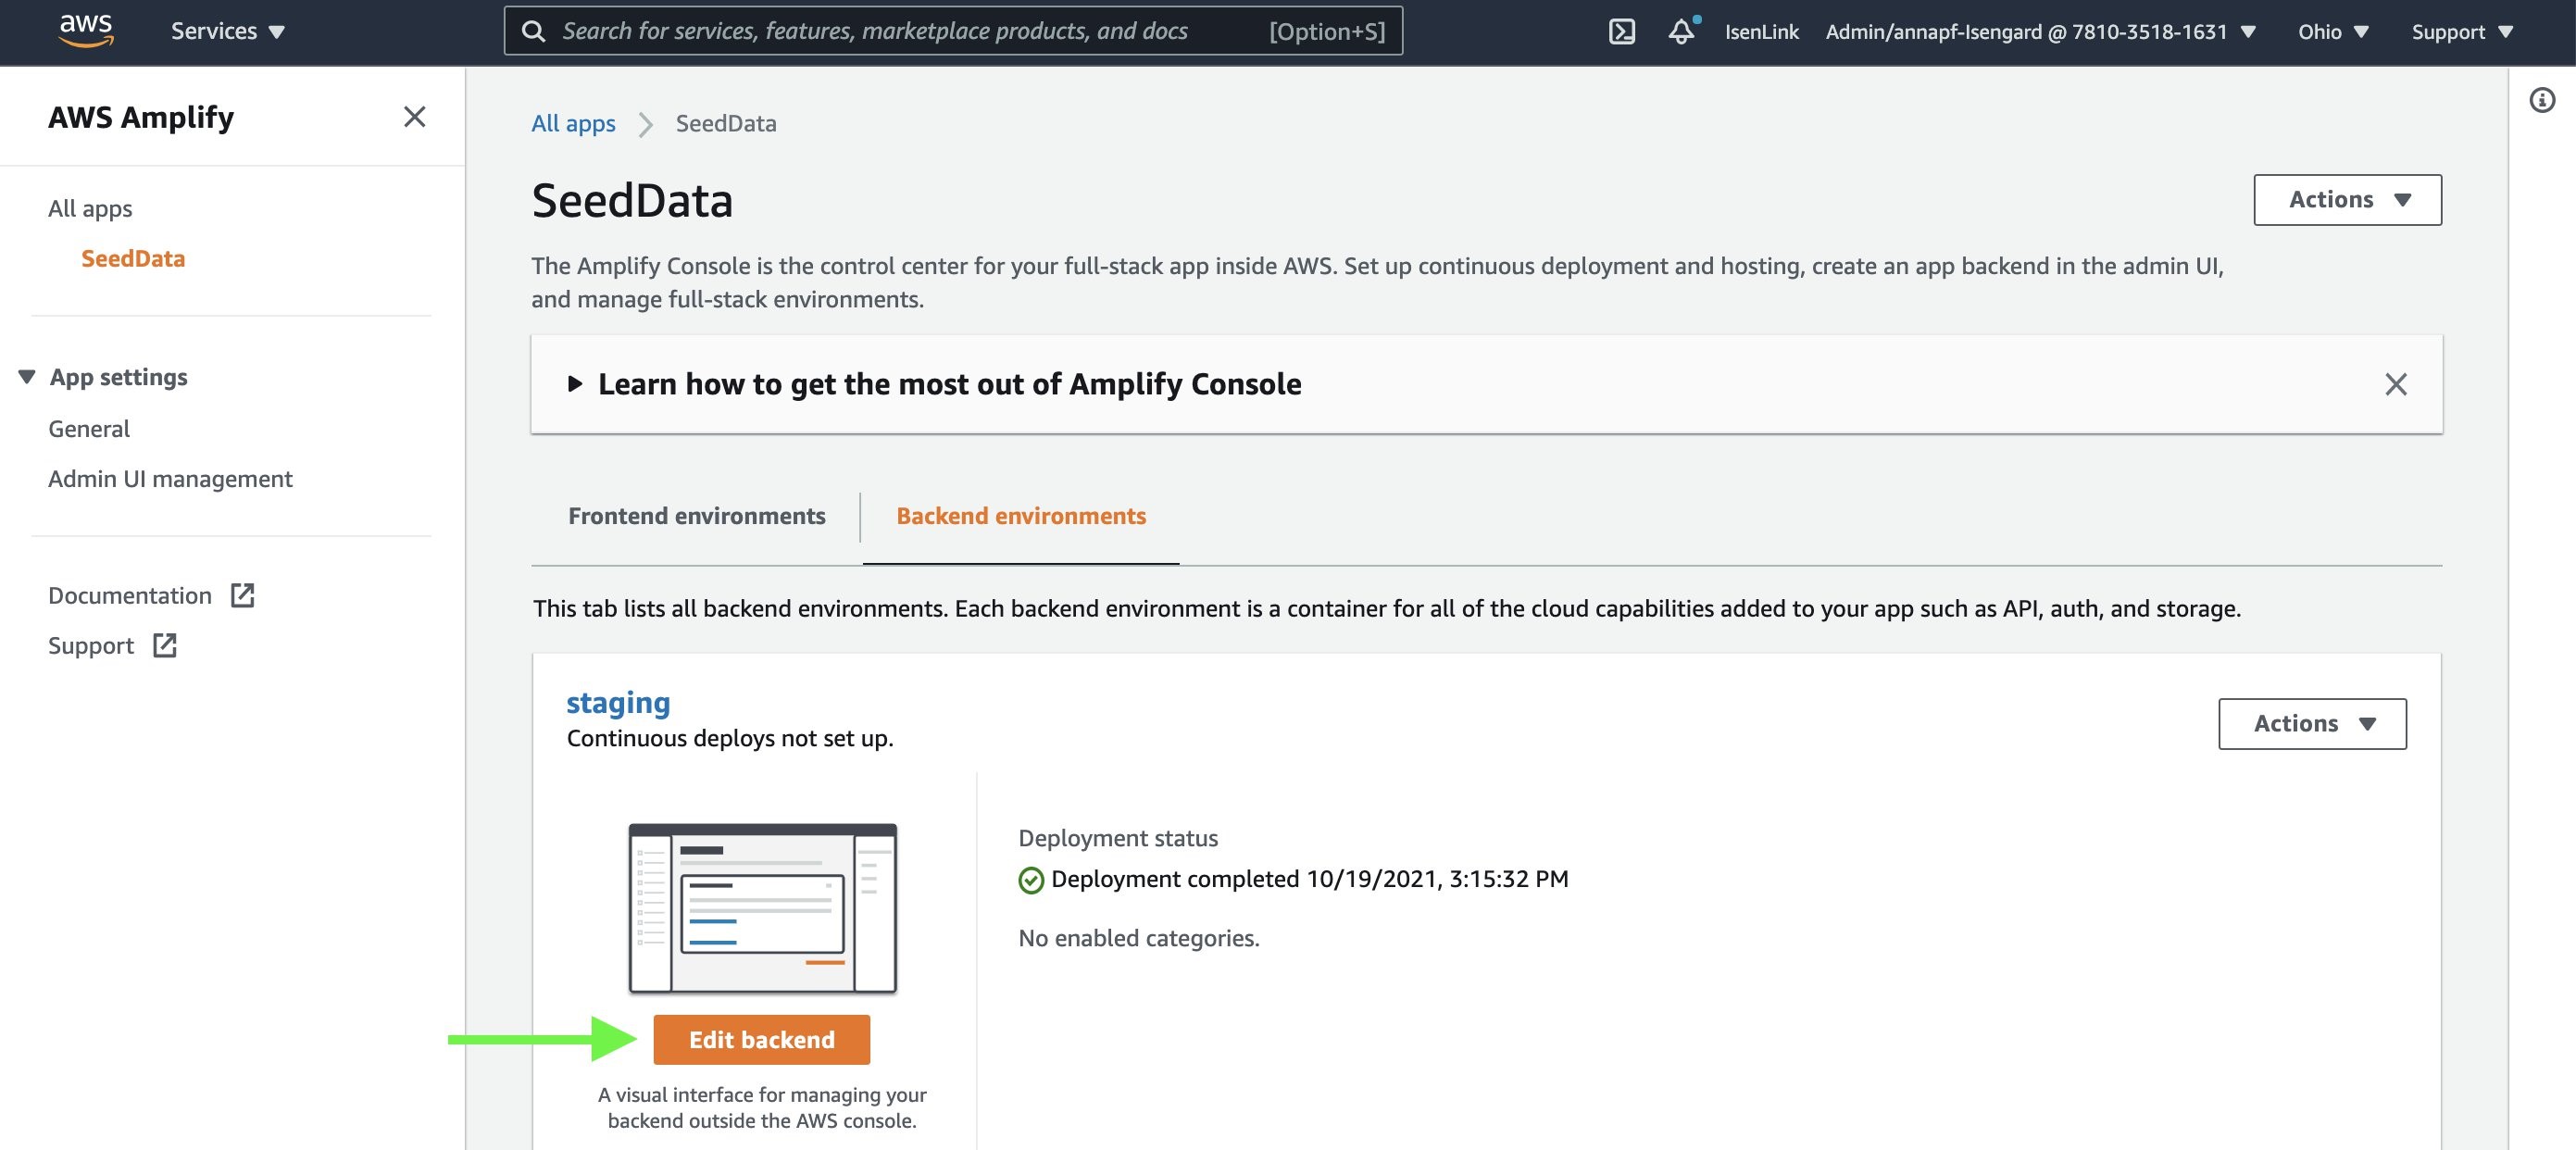
Now let’s populate the backend with some data. From the Amplify Console, select Backend environment, and select Edit backend. This will open the Admin UI in a new window.
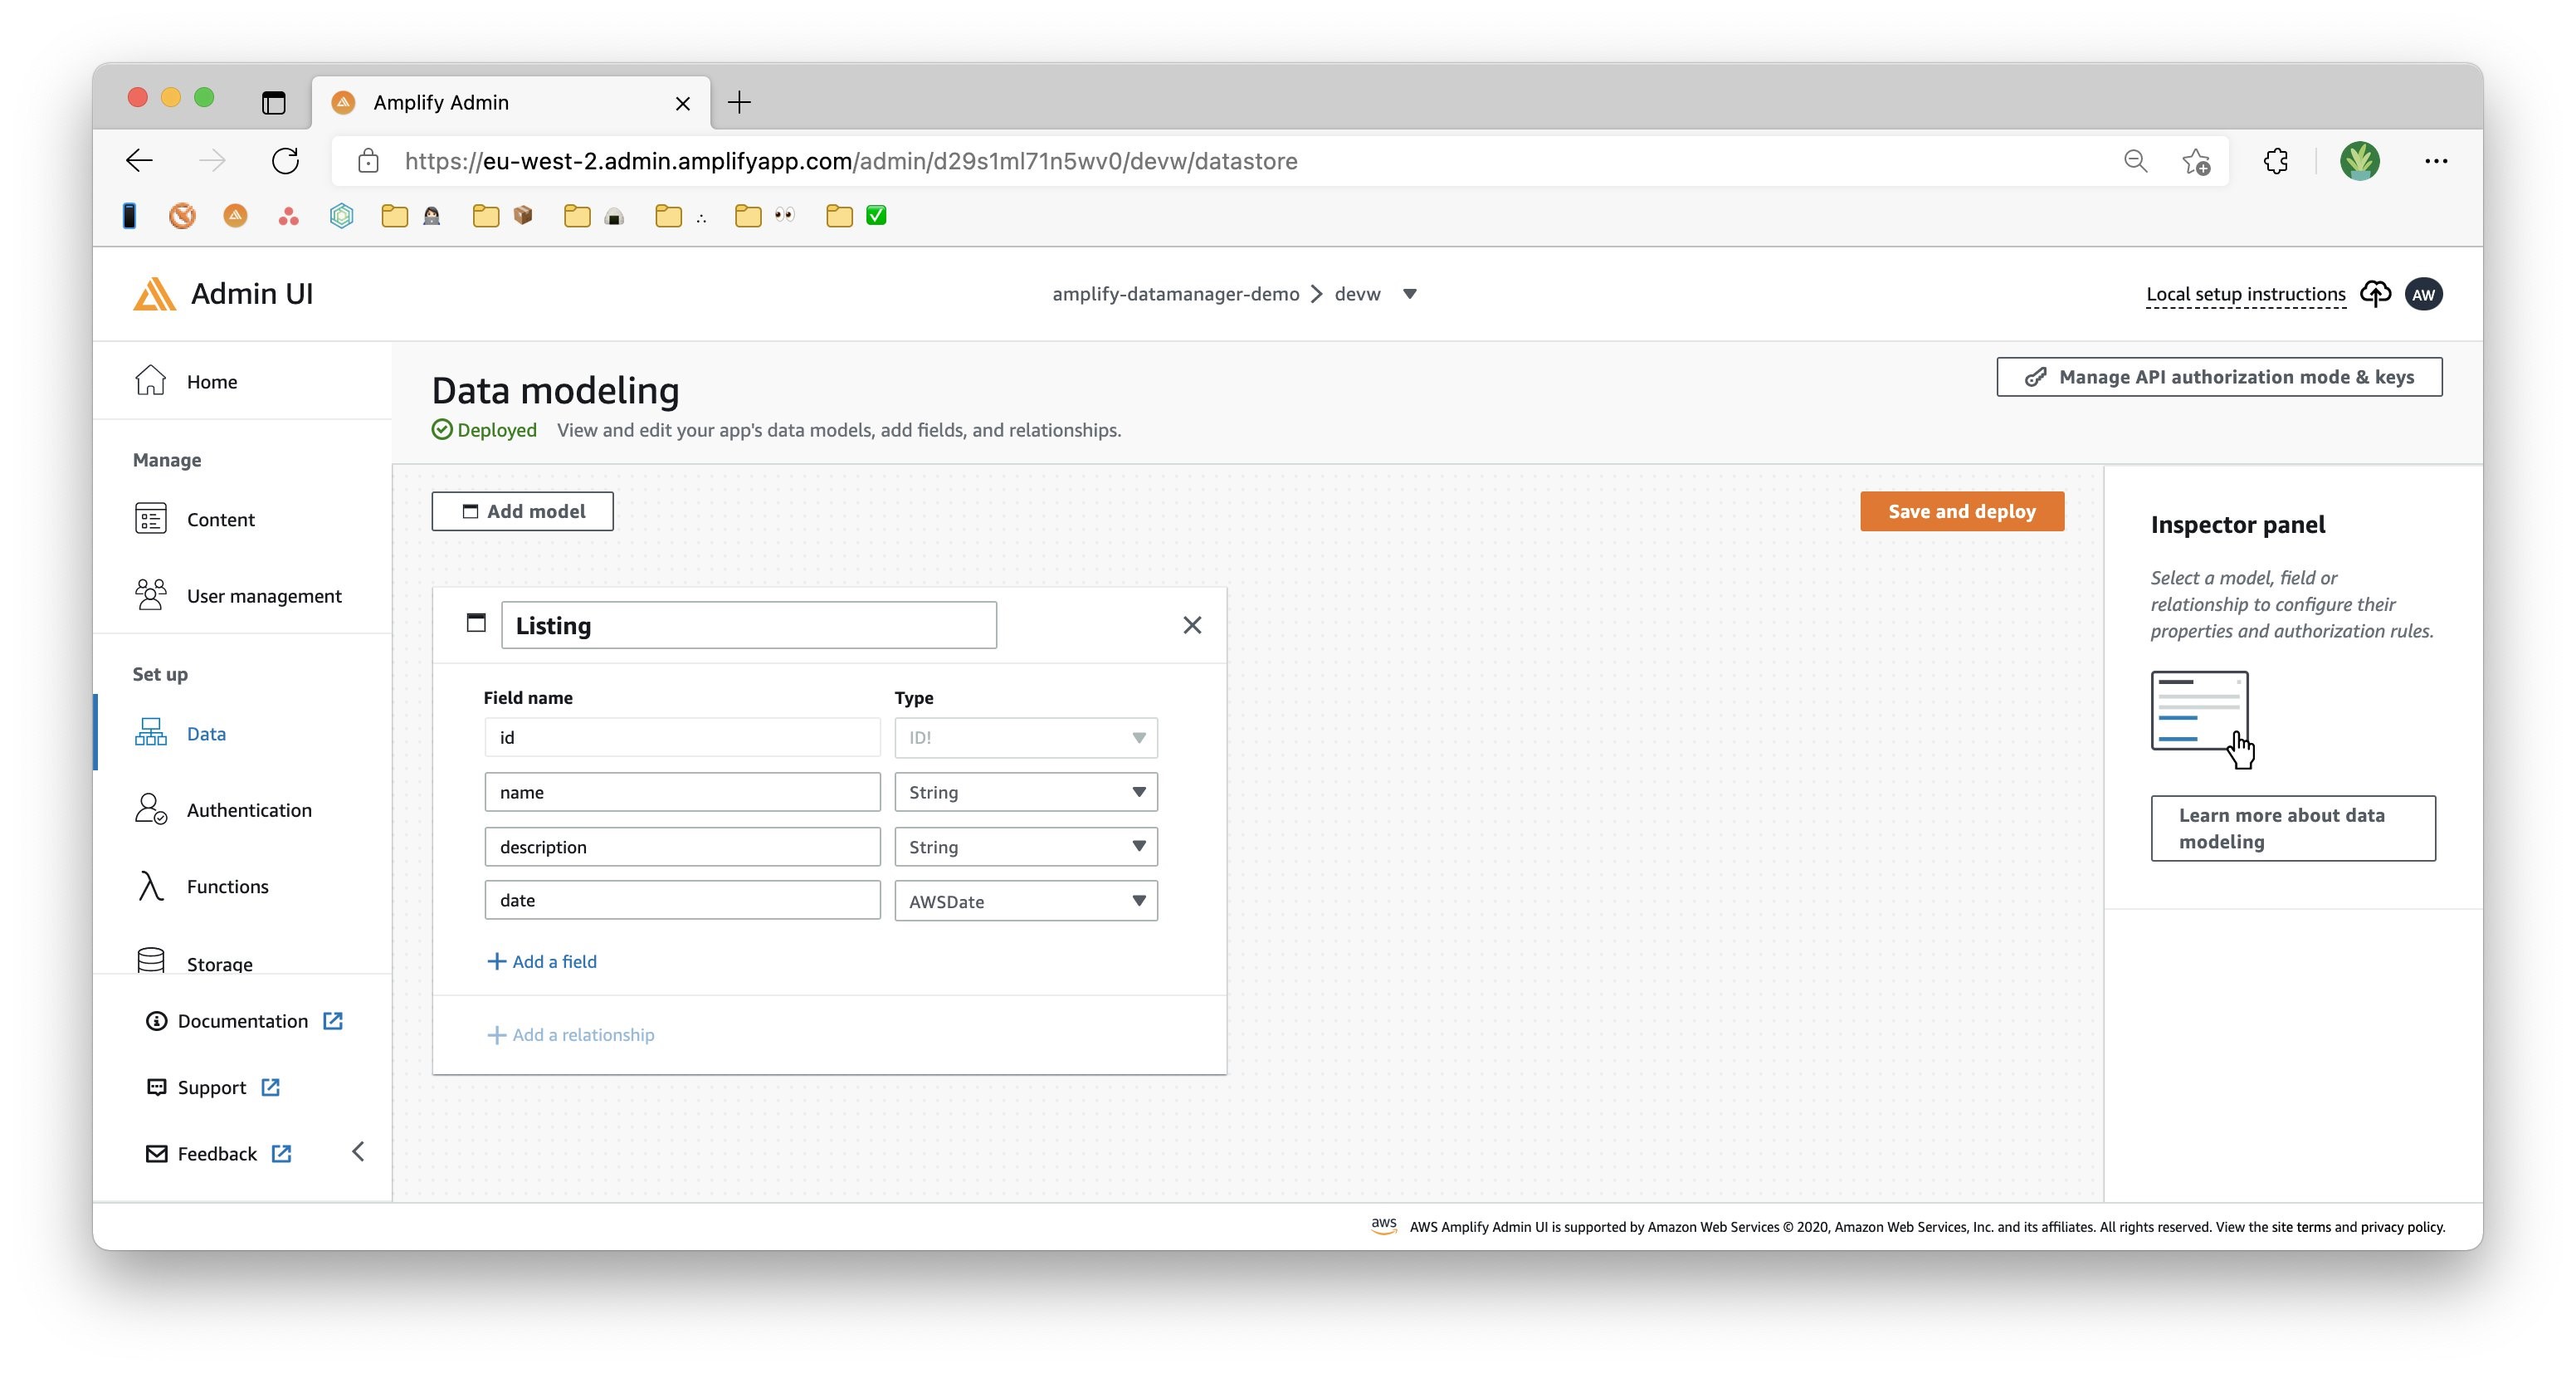
First, navigate to the Data tab to ensure that your data model is deployed as shown below.
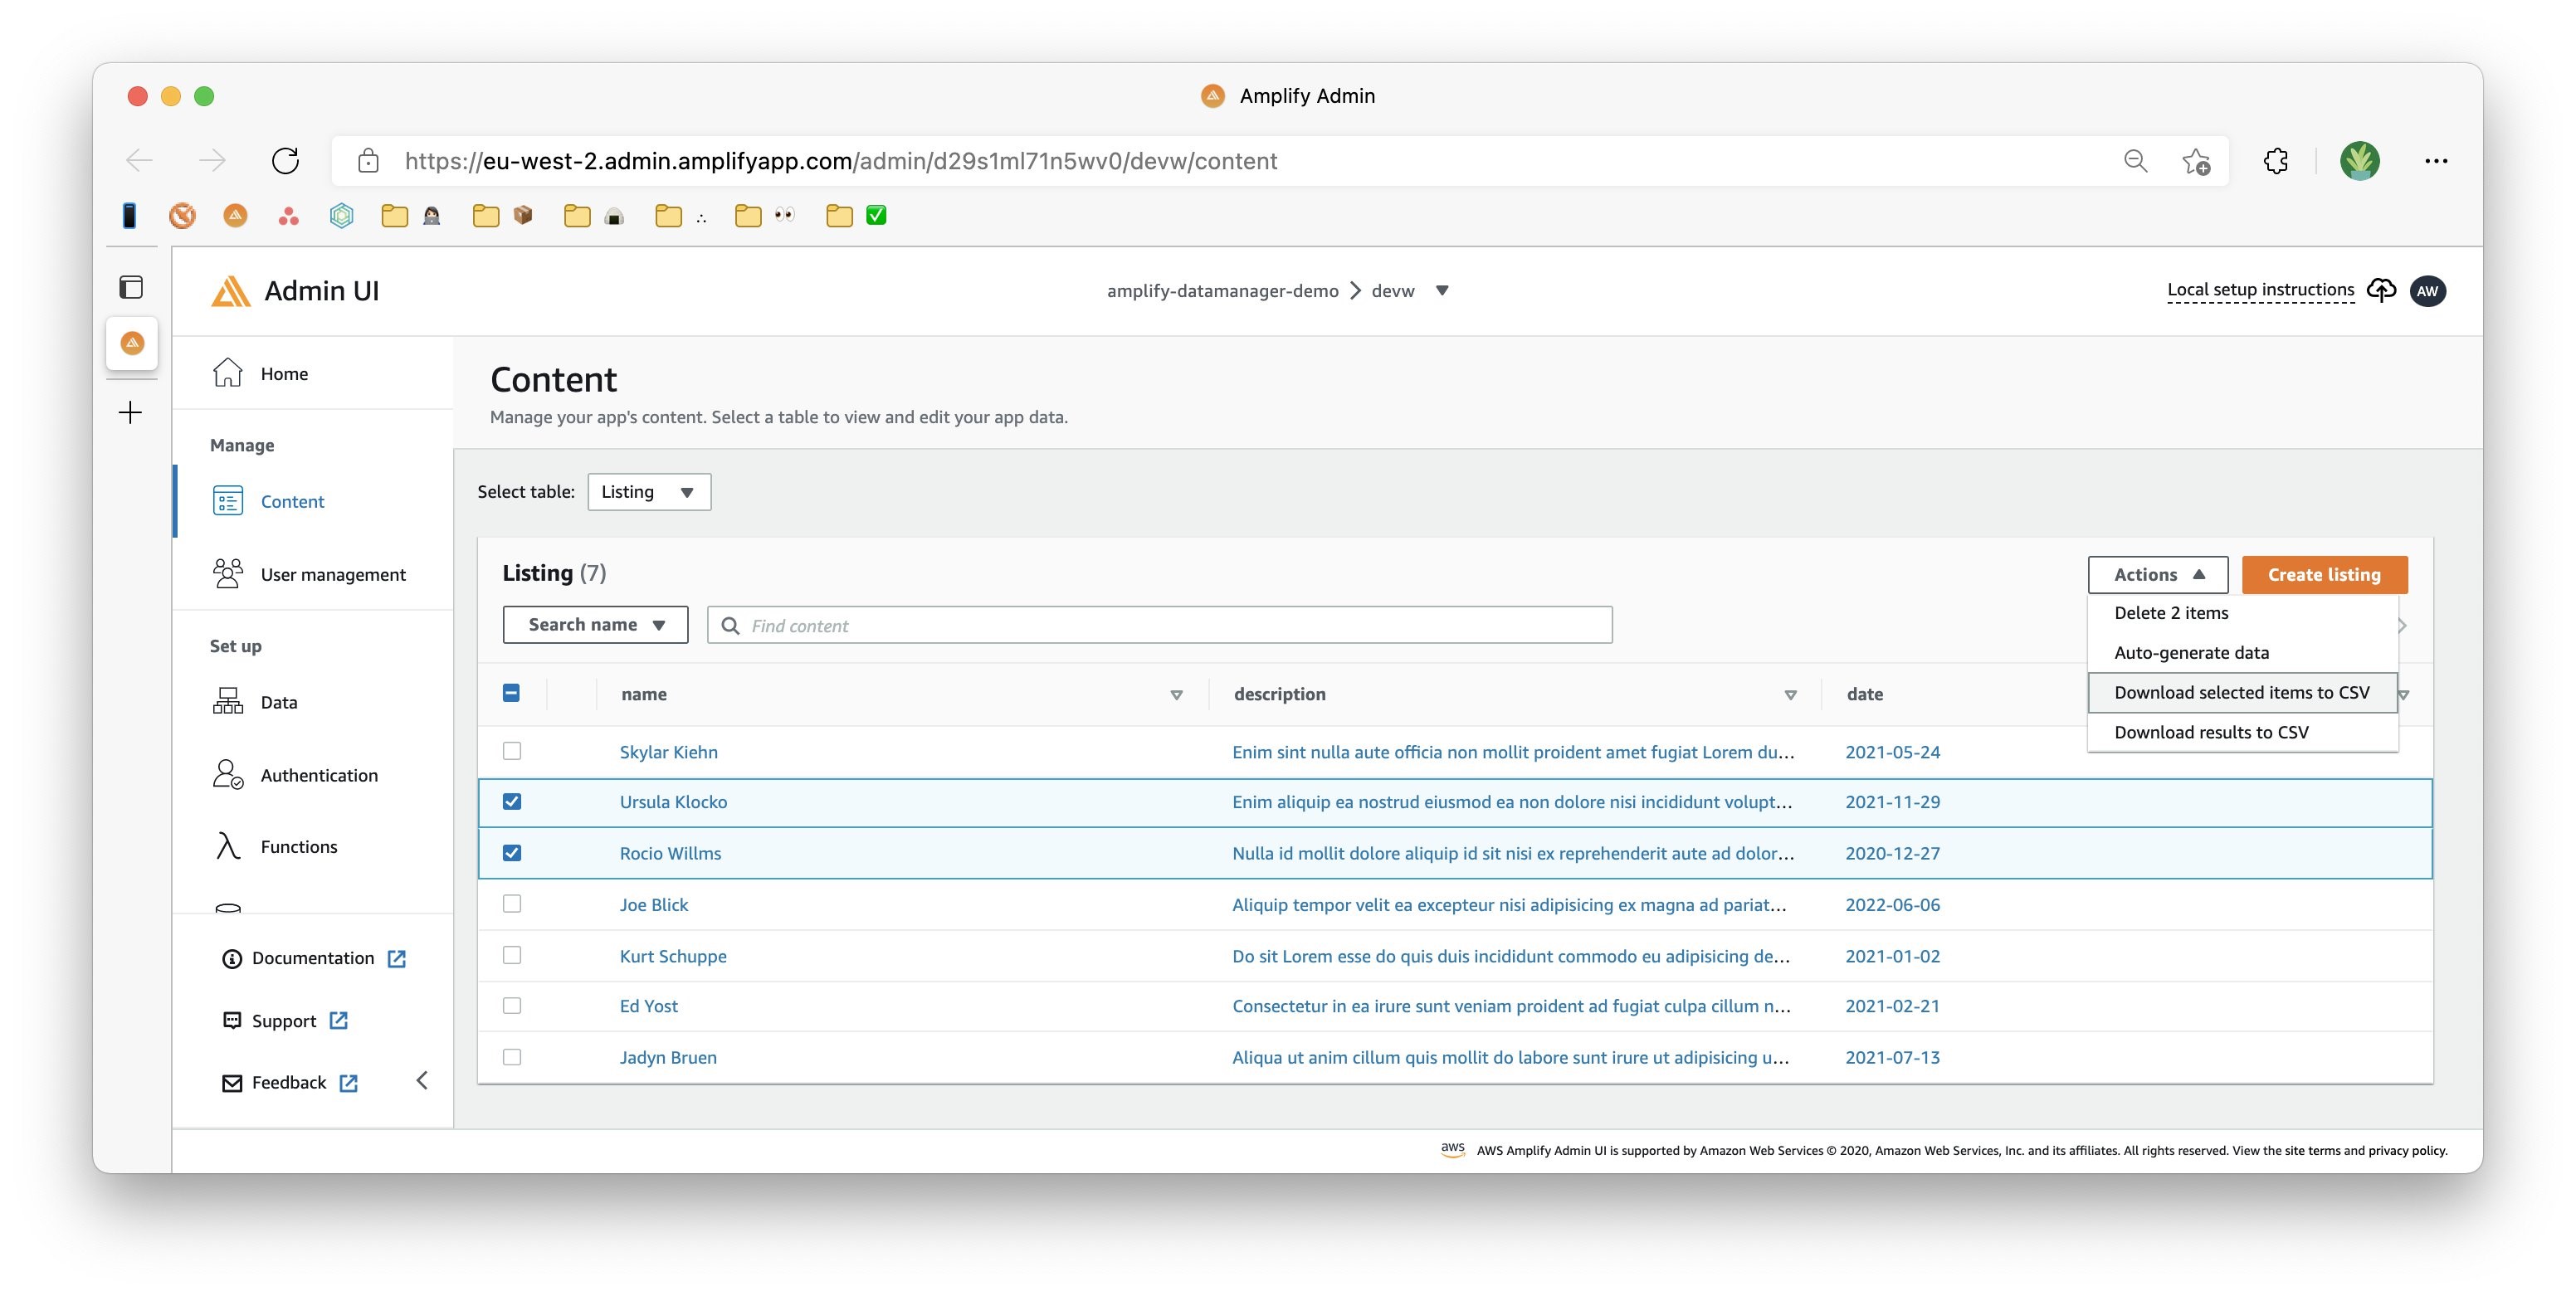
Next, navigate to the Content tab to view your data content. The Content view lets you access and manipulate the data in your app backend.
Let’s start generating some seed data! Select either the button in the middle of the table, or go to Actions, then Auto-generate data. This will open a dialog box where you can specify the number of rows and content type that you’d like to populate your fields with. For this blog, we followed the following configurations:
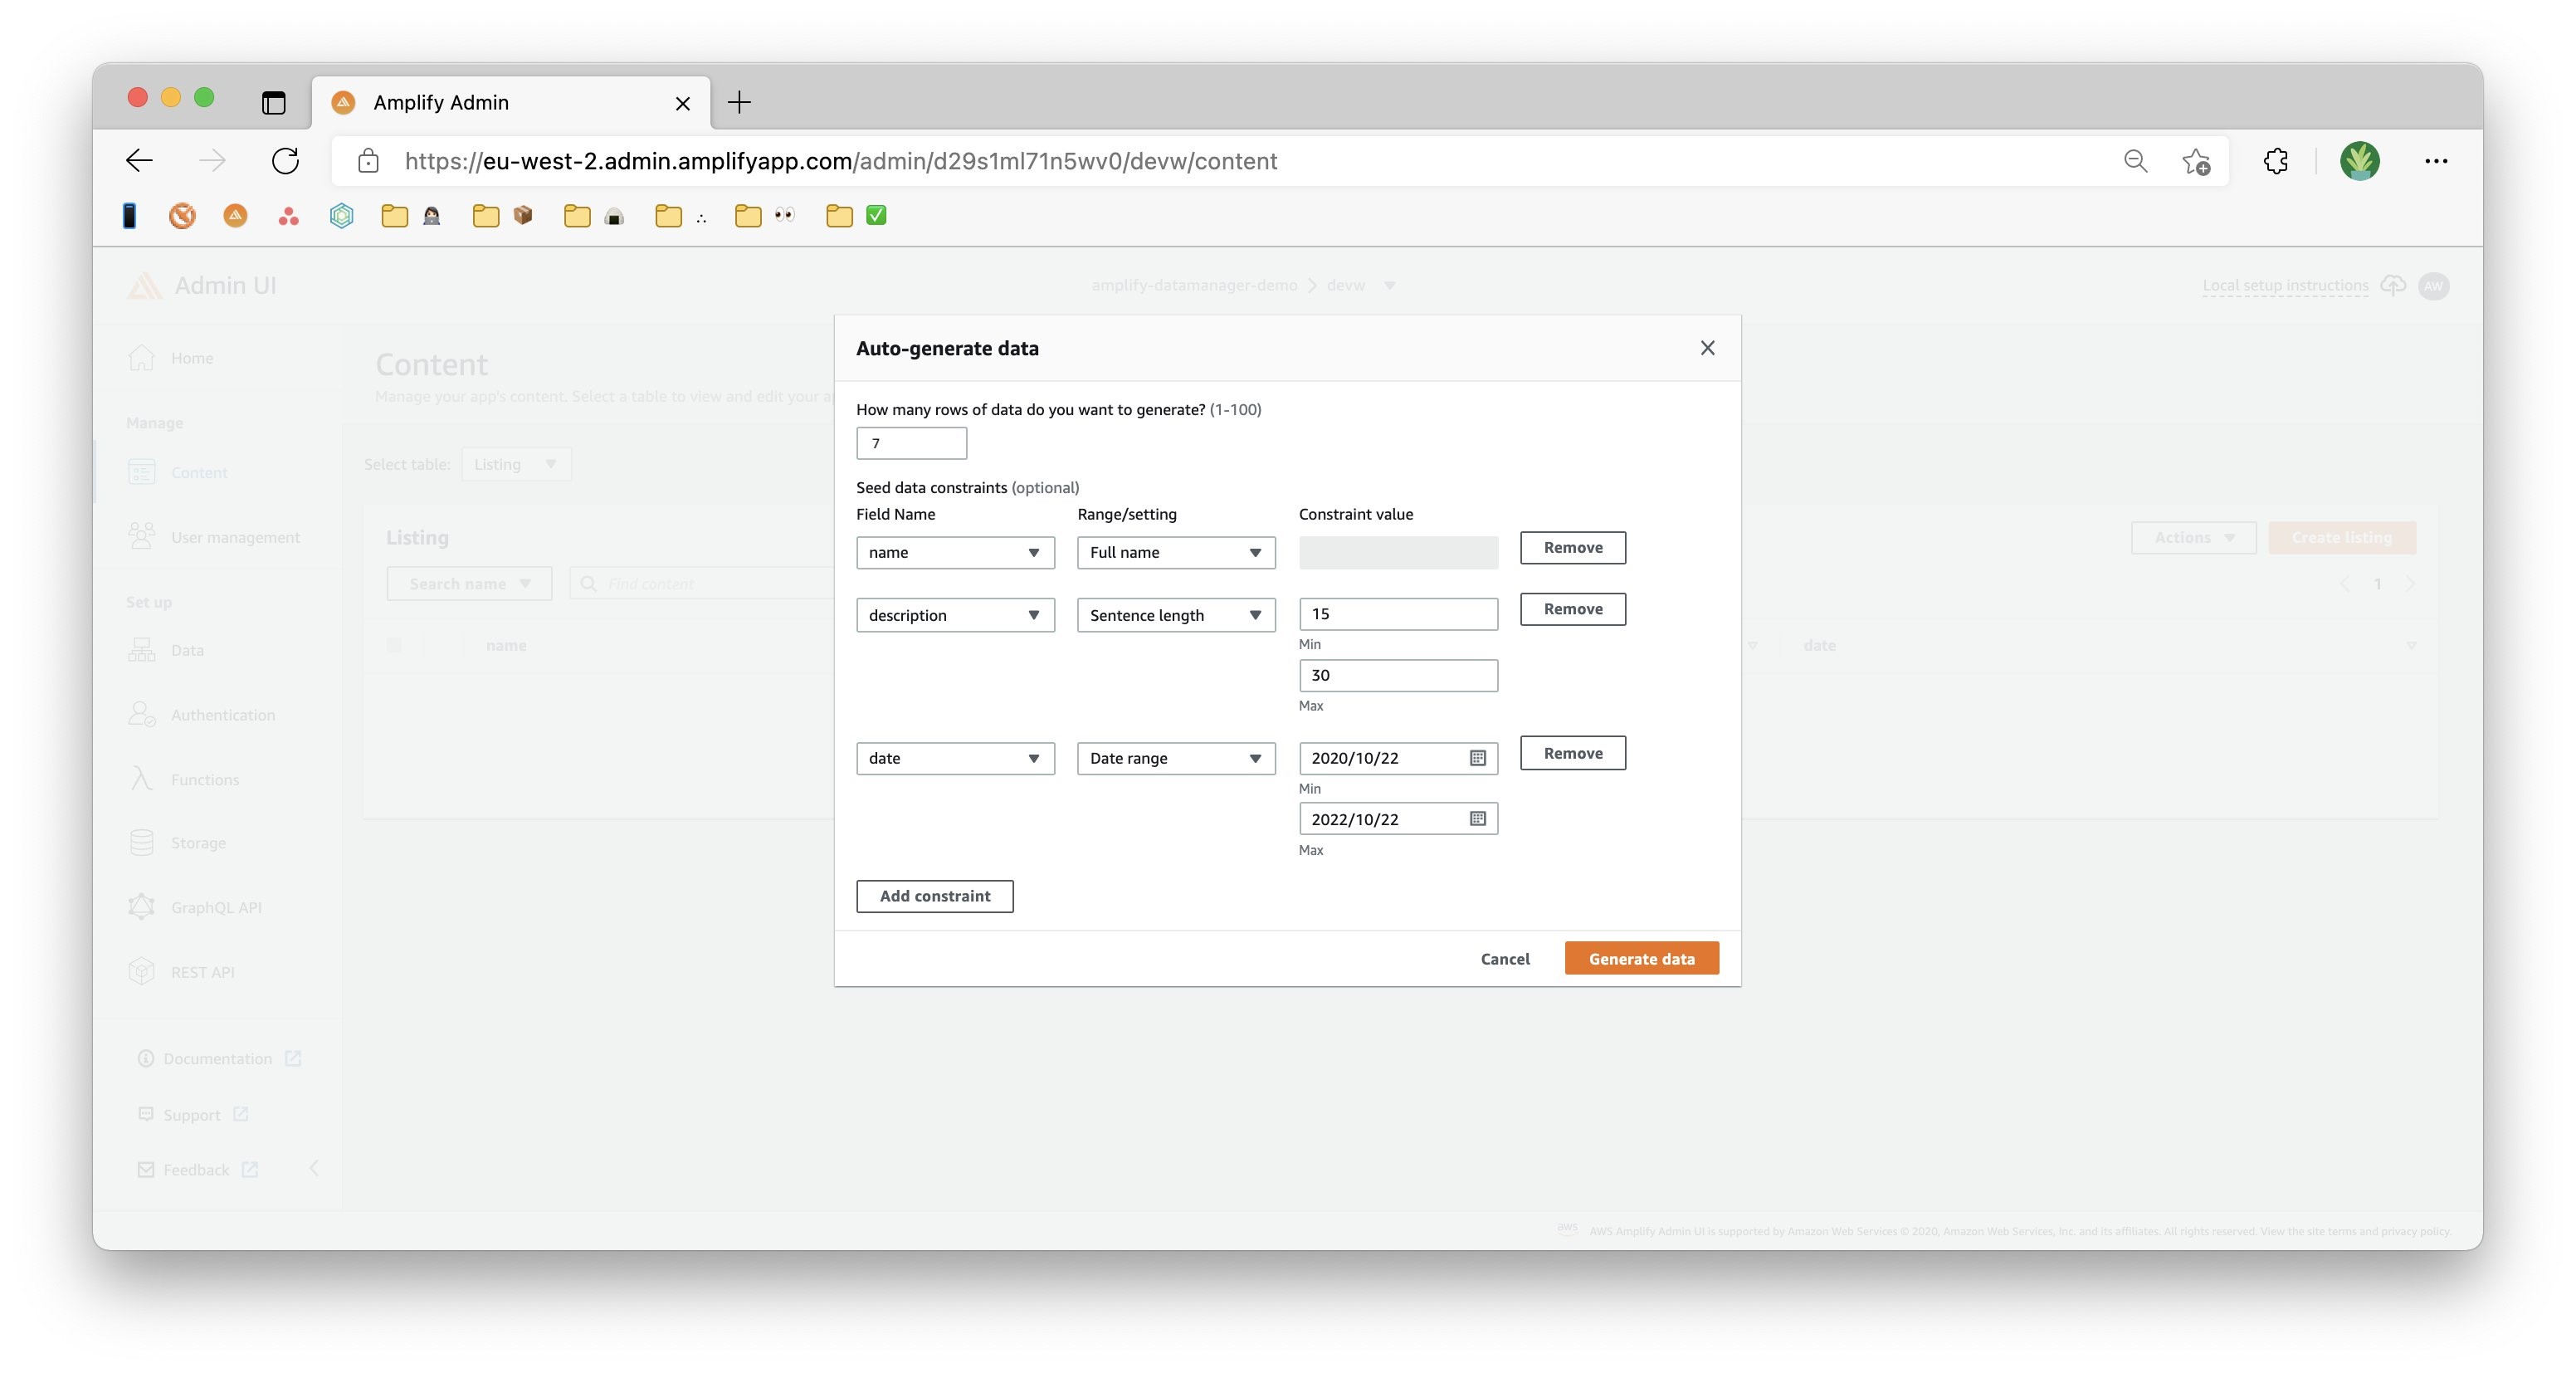
We will generate seven rows of data. The “name” field will utilize the full name, the “content” field will utilize the paragraph length, and the “date” field will utilize the date range. Select Generate data to populate your content table. You should see both your Admin UI and your Amplify app show results in real-time.
Now that you have generated some data, try downloading it. This can be done by selecting the Actions dropdown, and then choosing to either download all of the rows of data, or only your selected data.
? Success!
Congratulations! You’ve now got a fully functioning Amplify project up and running with a working data backend! Your site is filled with fake posts and fake authors, making the whole thing look more official and robust for testing. And all you had to do was click a few buttons!
If you’re looking for more information, review our documentation. If you have any feedback or enhancement requests, feel free to create an issue in the GitHub repository.
Clean up
Now that you have finished this walkthrough, we recommend that you delete your Amplify app if you aren’t going to use it anymore. This ensures that your resources won’t be abused in the event that someone gains access to your project’s credentials.
To delete all of the local Amplify associated files and the Amplify project in the backend, go to your Amplify console, select the app you want to delete, and expand the dropdown in the top right to delete your app.

This action cannot be undone. Once the project is deleted, you cannot recover it and will have to reconfigure the categories and the project configuration files if you need to use the project again.
Next steps
Try AWS Amplify today! With the service Generally Available in 17 Regions, we are excited to see what you will build.
To learn more about how to utilize the Admin UI to build apps, visit our documentation page. We’ve also published some videos and guides covering how to get started, as well as more advanced topics:
- Introducing the AWS Amplify Admin UI: Create an Application Backend in Clicks
- Build a Serverless Subscription Site with Stripe
- Add Maps to your App in 3 Steps with AWS Amplify Geo powered by Amazon Location Service
We look forward to seeing what you develop with Amplify! Make sure to tag @AWSAmplify on twitter to share what you build and follow me for more updates.