AWS Cloud Operations Blog
Enable secure and compliant Amazon AppStream 2.0 with self-service by using AWS Service Catalog
AWS provides several choices to deploy applications and desktops to users. Amazon AppStream 2.0 is a fully managed non-persistent application and desktop streaming service. You centrally manage your desktop applications on AppStream 2.0 and securely deliver them to any computer. You can easily scale to any number of users across the globe without acquiring, provisioning, and operating hardware or infrastructure.
Some organizations need help with deploying new AppStream fleets quickly and provide a way for their users to have a self-service process in place. Many of the higher education customers we talk to want to deploy new fleets for different courses, hackathons, or educational lab environments. Institutions also want to allow different academic groups on campus to deploy their own fleets on demand in a way that is compliant, consistent, and secure.
With AWS Service Catalog, you can automate creating fleets, deploying stacks, adding and managing user pool users, launching image builders, and creating directory configurations alongside your other AWS resources.
AWS Service Catalog allows organizations to create and centrally manage catalogs of approved IT services for use on AWS. These IT services can include everything from desktop and application streaming, virtual machine images, servers, software, databases to complete multi-tier application architectures. It helps in setting up consistent governance meeting security and compliance requirements while enabling self-service for users to deploy services they need quickly.
AppStream 2.0 also helps global organizations in hi-tech manufacturing, academic medical centers (AMC), life sciences in addition to federally funded research and development centers (FFRDC) as many types of applications work well as streaming applications. These include CAD, CAM, CAE, 3D modeling, simulation, games, medical imaging, life sciences applications, video, and photo-editing software. These applications benefit most from streaming because the application runs on the vast computational resources of AWS, interaction with the application is enabled using low-powered devices, and negligible change in application performance.
In this blog post, we will show you how to deploy Amazon AppStream 2.0 using AWS Service Catalog and enforce compliance and cost tracking by using the TagOptions library. The following diagram summarizes end user interactions for a higher education or research institution using AWS Service Catalog.

Figure 1 – Architecture Diagram
The overall process an organization has to follow to set up an Amazon AppStream 2.0 stack is:
- Increase quota limit– to make sure that the AWS account has raised the service default limits in order to launch the required services. This includes number of instances in a fleet for a particular streaming instance type. Raising quota limits can be done on the AWS Management Console under Services and then Quotas.
- Setup required networking – It is a best practice to set up a separate VPC, but you can use an established VPC if one is available. If you need help with launching a VPC, you can use the VPC wizard on the AWS Management Console or you could also use AWS Service Catalog to deploy the VPC.
- Create AppStream image – This step is done using the AppStream image builder and entails setting up the operating system and the applications that are required for the stack. An account may have multiple images available from which to choose in addition to distinct images for software requiring GPU or non-GPU hardware.
- Create fleet and stack – The creation of these resources can be automated with a reliable and repeatable process using AWS Service Catalog. We will implement this step in this blog post. We will also implement AWS Service Catalog’s TagOptions feature to show how to enforce compliance. Tags are important tools used by the organization for compliance, documentation, and spend tracking purposes.
- Setup stack authentication – After the fleet and stack have been created, the customer can configure their preferred way of authentication for the stack. Some institutions chose to use Security Assertion Markup Language 2.0 (SAML 2.0) based authentication, such as Shibboleth, Okta, OneLogin, Azure AD or AD FS. Other institutions prefer to integrate their Amazon AppStream 2.0 stacks with a Learning Management Systems (LMS) like Moodle. There is a blog post available if interested in that integration: Integrating Amazon AppStream 2.0 with your Learning Management System
The overall steps to setup up a solution using AWS Service Catalog can be broken down into 3 three major categories:
- Building a set of AppStream 2.0 images that can be used by the solution. The images must be created as a first step.
- Configure AWS (to set up an AppStream stack as an AWS Service Catalog product).
- Launch a stack and configure the authentication.
Getting started
To deploy this solution, ensure that you have completed the following prerequisites.
AWS prerequisites
- Set up an AWS Account with administrative access
- Create one or more Amazon AppStream 2.0 images with the desired applications.
Set up an AWS CloudFormation template
In this section, you will set up a CloudFormation template that deploys Amazon AppStream 2.0 on your behalf. You can learn more about this step in the AWS Service Catalog Administrators Guide.
- Open a text editor or your favorite code editor, copy the following text, and paste it into a new file.
-
- In the template, locate the following place holders and provide values from your AWS account:
- <subnet-XXXXXXX> – first private subnet
- <subnet-XXXXXXX> – second private subnet
- < image name 1> – AppStream image 1
- < image name 2> – AppStream image 2 (remove this line, if you only have one image).
- <sg-XXXXXXXXX> default security group id or preferred security group
- Save the file on your computer as deploy-appstream.template and note where you are saving it.
- In the template, locate the following place holders and provide values from your AWS account:
By providing one or more AppStream images, users will be able to select from a drop down box the image that contains the software they prefer when they deploy the stack.
Set up a new portfolio
To provide users with products, begin by creating a portfolio for those products. To create a portfolio, follow the detailed instructions in the AWS Service Catalog documentation.
On the AWS Service Catalog console – Create Portfolio page, use the following values for creating the portfolio:
-
- Portfolio name – AppStream 2.0 portfolio
- Description – portfolio for AppStream 2.0 products for desktop and application streaming
- Owner – IT (it@example.com)
Set up a new product
After you have created a portfolio, add a new product using detailed instructions in the AWS Service Catalog documentation.
On the AWS Service Catalog console – Upload New Product page, use the following values for creating the product:
-
- Product name – AppStream 2.0 stack
- Description – AppStream stack powered by Amazon AppStream 2.0
- Provided by – IT
- Vendor (optional) – Amazon Web Services
On the version details page, choose upload a template file, select choose file, locate the deploy-appstream.template file you saved when you set up the CloudFormation template, and then choose NEXT:
-
- Version title – 1.0.0
- Description – Initial Version
On the enter support details page, type the following and then choose NEXT:
-
- Email contact – ITSupport@example.com
- Support link – link to your IT team’s contact us or support page (for example,https://aws.amazon.com/contact-us/)
- Support description – contact IT department for further help
On the Review page, choose CREATE PRODUCT.
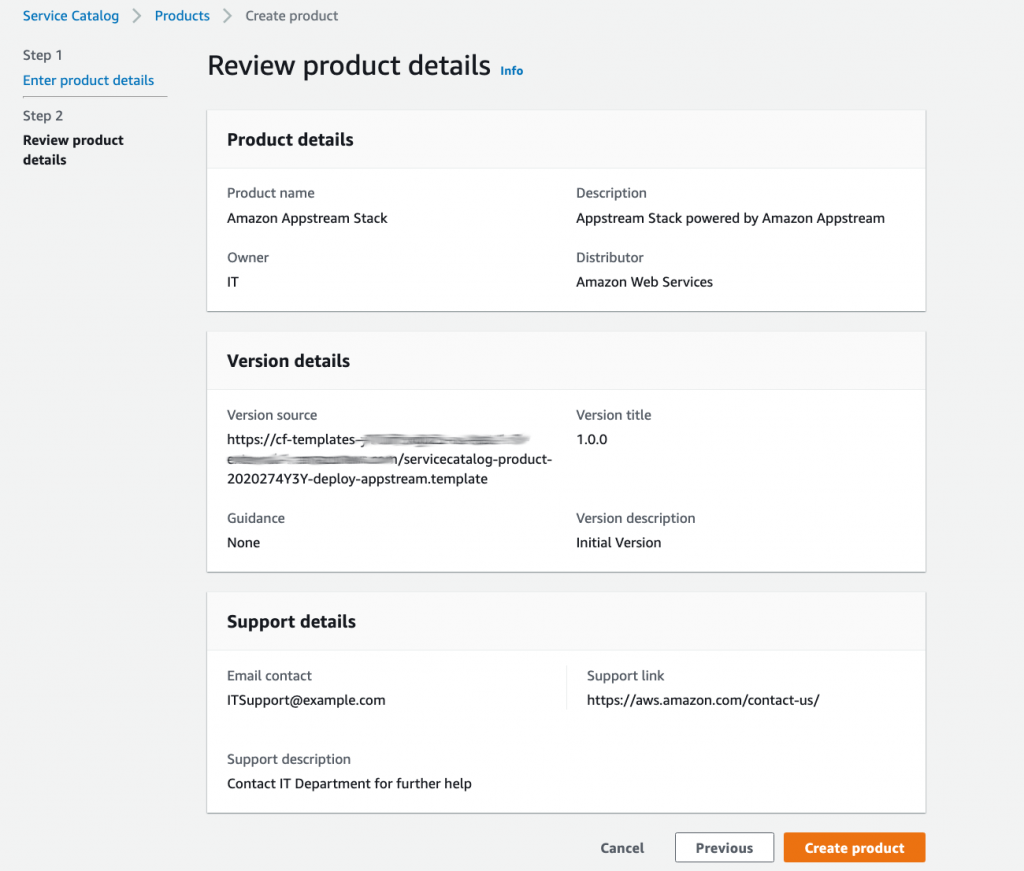
Figure 2 – Review Product Details
Enforce compliance via TagOptions library
To enforce spend tracking create a TagOptions library and associate it with the newly created product. On the AWS Service Catalog console – go to TagOptions Library page and create two new TagOptions.
- DepartmentID
- CostCenterID
We will provide made up values of 0001 for both TagOptions.

Figure 3 – TagOptions Library
Now that we have a TagOptions library, let’s associate the tags with our product. On the Administration Products page, click on the product named AppStream 2.0 stack. Then click on the tab named “TagOptions”. Check both boxes next to CostCenterID and DepartmentID, and under actions select associate TagOption. These tags will be automatically associated with our AppStream 2.0 resources when deployed, enforcing the organization’s compliance rules.
Allow User, Group, or Role Permissions to Provision AppStream 2.0 Products
After you have created a portfolio and product using the preceding instructions, you must add an IAM group, an IAM role, or an IAM user to the Portfolio. This will let your selected end users launch and provision the Amazon AppStream 2.0 stack themselves.
On the Administration Portfolios page, click on portfolio named End-User-Compute. Then click on the tab named “groups, roles, and users” and click the button “Add groups, roles, users”. Select using the check boxes the appropriate principals to give permissions to launch the product.
Validate
You are now ready to validate that the new product appears, and the user can order a product through AWS Service Catalog.
Log in as the user you assigned the End-User-Portfolio and visit the AWS Service Catalog page. Select Amazon Appstream Stack and click on Launch Product.
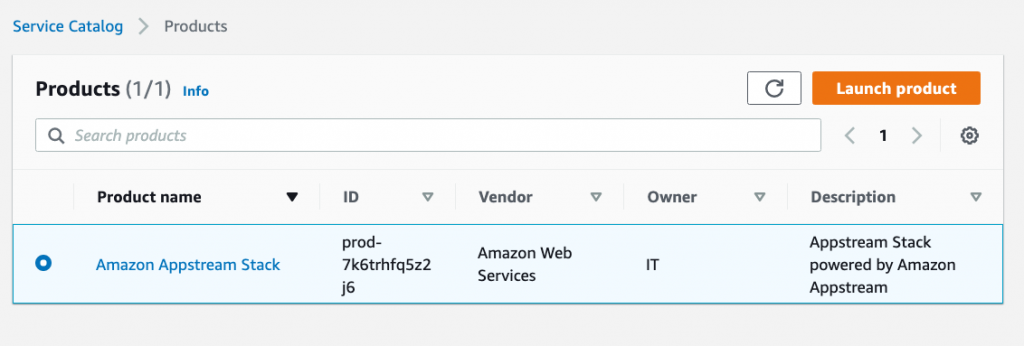
Figure 4 – Service Catalog Products
Select an Image, change “EnterNameHere” to a Stack name that is descriptive. You will see that the enforced tags were added to the deployment and optionally you may add additional tags and click on Launch Product.

Figure 5 – Manage Tags
Wait for the status of the provisioned product to change from IN_PROGRESS to SUCCEEDED. You can verify on the AppStream 2.0 service page that the stack has launched successfully, and it is ready to integrate with your LMS or your SAML 2.0 authentication system.

Figure 6 – AppStream Stacks
You can now log in to one of your fleet instances and test the application. On the stack detail page, on the AWS Management Console, you can create a streaming URL to test your stack. You do so by clicking on Actions, then Create Streaming URL. Use the word test as the user name. Copy and paste the URL into your browser to log in to the stack. You’ll see the application catalog, click on one app to open it.

Figure 7 – AppStream Applications
Conclusion
In this post, we covered how you can use AWS Service Catalog to create a fully automated, secure, and compliant application-streaming stack, through AWS Service Catalog, while offering self-service. This allows your institution to use AWS Service Catalog for compliance and for provisioning and tracking AWS resources.
Centralized cloud management teams can use this approach to curate their battle-tested, best practice based software-infrastructure blueprints, and offer them across the enterprise. Enabling simple, self-service adoption of corporate standards as AWS Service Catalog products.