AWS Cloud Operations Blog
Scaling GitHub usage with AWS
Introduction
Customers that migrate on-premises enterprise applications to AWS often look for guidance on how to migrate GitHub to AWS. Customers find it challenging to scale as they are constrained by on premises GitHub infrastructure. Organisations that run Github on AWS can get up and running quickly. GitHub on AWS enables teams to collaborate efficiently resulting in faster deployment cycles and improved code quality. Operating GitHub on AWS is also cost efficient as IT organisations benefit from the elasticity offered by AWS. This post will focus on key design considerations and step by step instructions on how to migrate an on-premises GitHub Enterprise Server to AWS.
GitHub Enterprise Server (GHES) is a self-hosted platform for software development within your enterprise. Some customers prefer self-hosted environments as it allows complete control over infrastructure and data. GitHub distributes GitHub Enterprise Server as a self-contained virtual appliance. After you provision a virtual machine and install the appliance, the instance runs a Linux operating system with a custom application stack.
Solution Overview
Follow these steps to migrate GitHub Enterprise Server to AWS.
- Identify your current GitHub Enterprise Server Environment.
- Create a backup of GitHub Enterprise Server data on AWS.
- Set up a new primary GitHub Enterprise Server on AWS and restore GitHub Enterprise Server data from the backup taken in previous step.
Once the restore is complete, your new instance of GitHub Enterprise Server is ready for use.
Prerequisites
- An AWS Account.
- A Valid GitHub Enterprise License.
- A machine to take a backup of the GitHub data.
Steps
1. Create a GitHub Enterprise Server instance to migrate
If you have an existing GitHub Enterprise Server instance to migrate, skip the following section and move to step 2 to create a backup.
Optionally, take the following steps to create a source GHES instance in AWS to follow along with this post.
For the ease of understanding, the GHES instance is hosted on Amazon Elastic Compute Cloud (Amazon EC2). This new instance will represent the on-premises GitHub Enterprise server (GHES) that needs to be migrated to AWS.
- Sign up for a GitHub Trial License which you will need later in the step.
- Open AWS CloudFormation from the AWS Management Console.
- Select create stack with new resources.
- Specify the CloudFormation template https://github-enterprise.s3.amazonaws.com/cloudformation/trial-1695420257.template
- You will find the template URL on the GitHub Trial License download page. The template has the following GitHub Enterprise Server trial configurations.
- The type of Amazon EC2 instance to launch.
- The size of the attached Amazon Elastic Block Store (Amazon EBS) volumes.
- The name of an existing Amazon EC2 keypair to enable SSH access to the instances.
- Mappings of the AWS Region and the GitHub provided Amazon Machine Image (AMI) for GitHub Enterprise Server.
- The template creates the AWS resources in the default VPC.
- Provide the parameters for the size of the attached Amazon EBS volumes and Amazon EC2 instance type.
- Review the configuration and submit the stack creation request.
- You will find the URL to access GitHub in the output tab of the CloudFormation stack after it is completed.
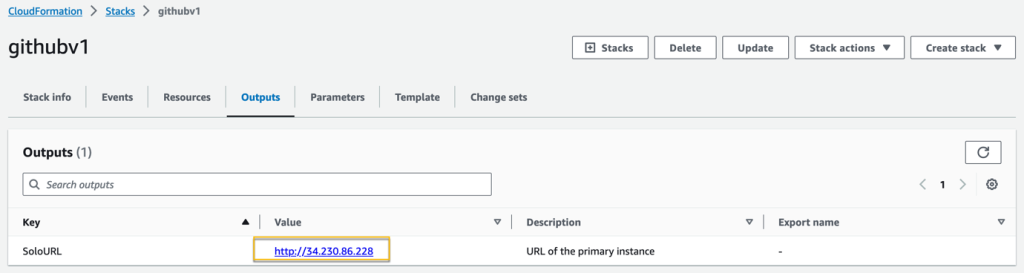
Output tab of the CloudFormation stack with the GHES URL
- Follow the installing GitHub Enterprise Server on AWS doc to complete the setup process.
In this post, the GHES has an IP address of 34.230.86.228. The repositories (Backend- Engineering, Front-End Engineering, and Platform-Engineering) from the current GitHub instance will be migrated to the new GitHub Enterprise Server.
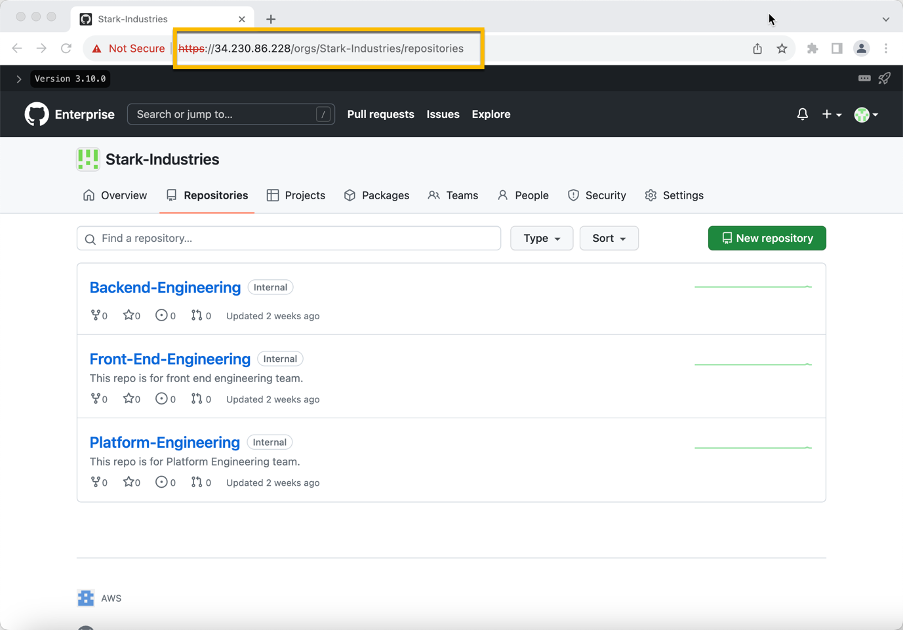
GitHub Repositories present on the current GHES instance.
Most customers will have a routable fully qualified domain name instead of an IP address. You can see it under Hostname in the settings menu when logged in as an administrator. As a best practice, the DNS names resolve to private IPs, but in this example, we are using a public IP for ease of testing the migration steps.
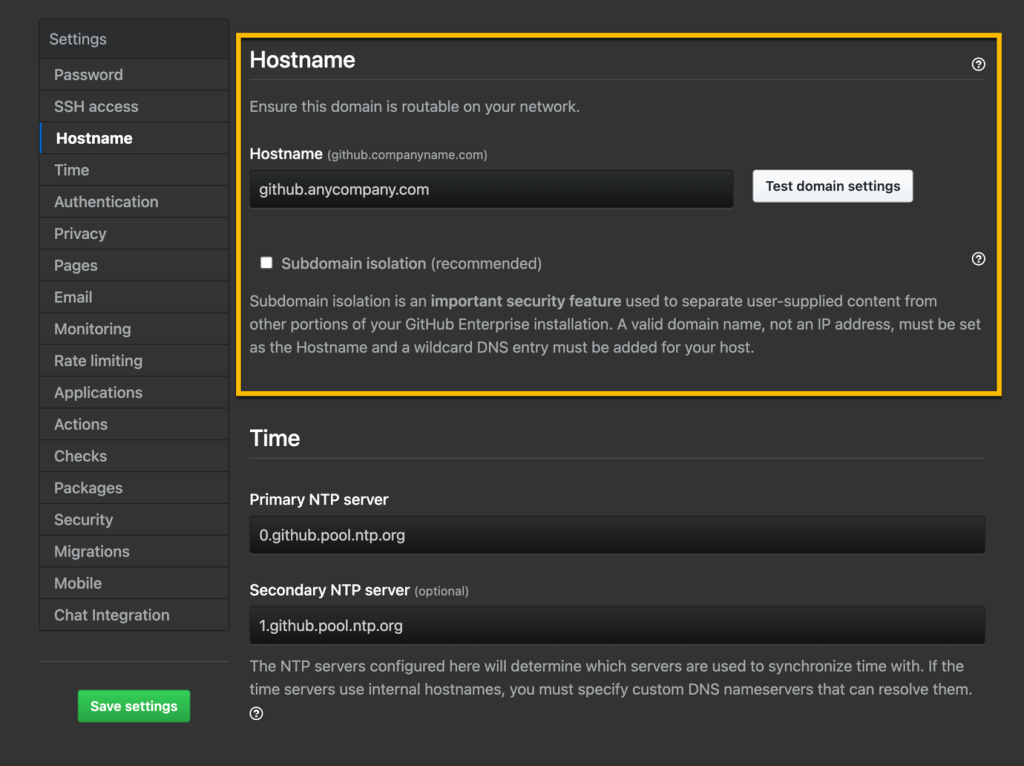
GHES Hostname settings in the administrator console.
2. Create a backup for GitHub Enterprise Server data on AWS.
In this step, we will create a backup of the on-premises GitHub data on AWS in an Amazon EC2 instance. These steps are documented in the official GitHub documentation.
- Begin by creating an Amazon EC2 instance with the same or larger storage size than the existing GHES instance. The storage size should be enough to back up the amount of data present on the current GHES.
- Create a key pair during the process which is used to connect to the backup machine. Alternatively, you can use any on premises machine which can connect to your existing GHES instance via SSH.
- Connect to the backup machine using its key pair and generate an SSH key with the following command: ssh-keygen -t rsa -C “backupmachine@aws.com”. Alternatively, you can use an existing SSH key instead of generating a new one.
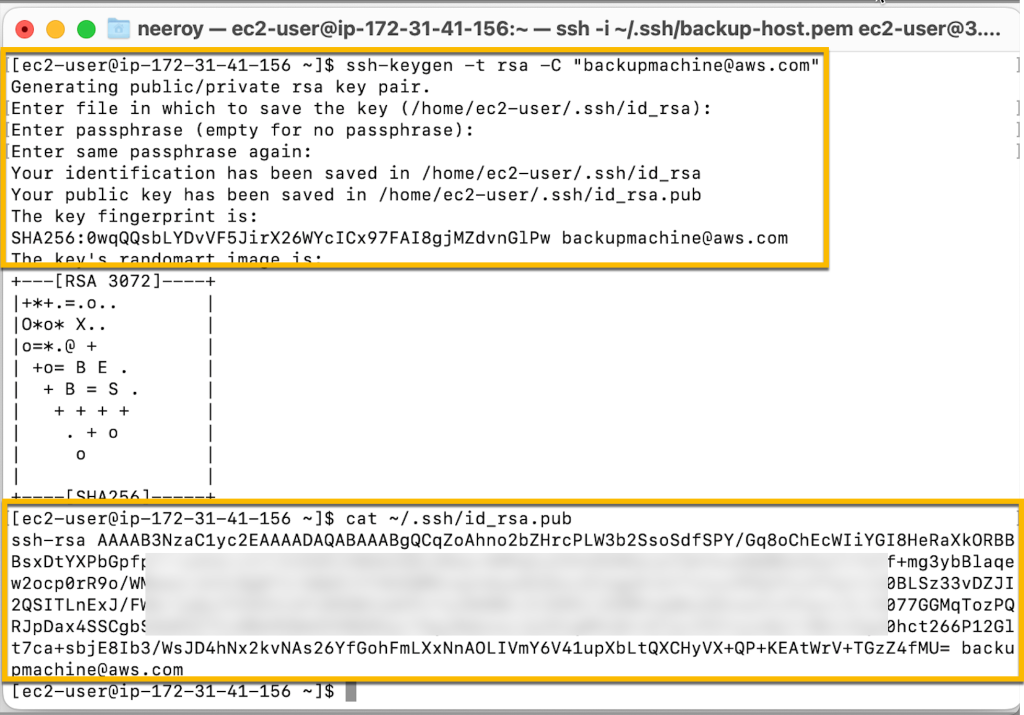
Generate an SSH key on the backup machine.
- Copy the SSH key from the backup machine.
- Log in to your current GHES instance as an administrator and select the Settings page.
- Select Password, and add the SSH key that was generated on the backup machine in the Add new SSH key section and save settings.

SSH access settings on the GHES instance.
GitHub Enterprise Server Backup Utilities is used to perform the backup and later restore the backup to a new primary GHES instance using the same utilities.
- Download the latest release of GitHub backup utilities on the backup machine.
- Edit the backup.config file located under /backup-utils to point GHE_HOSTNAME to your current GitHub Enterprise Server instance.
GHE_HOSTNAME = 34.230.86.22 where 34.230.86.22 is IP of your current GHES instance.
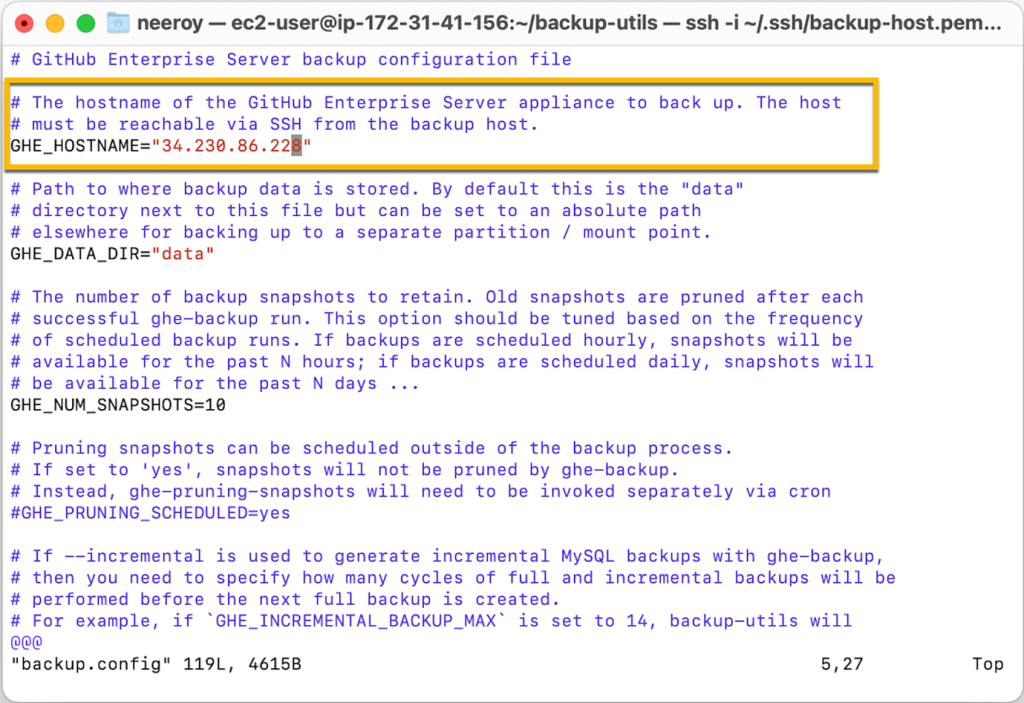
Backup.Config file with the GHE_HOSTNAME pointing to the current GHES instance
- Run bin/ghe-hostcheck to perform a connectivity check from the backup machine to your current GHES instance. It should return a message that the connection was OK.

Performing a connectivity check to current instance.
- Start a backup of the current GHES data on the backup machine by running bin/ghe-backup
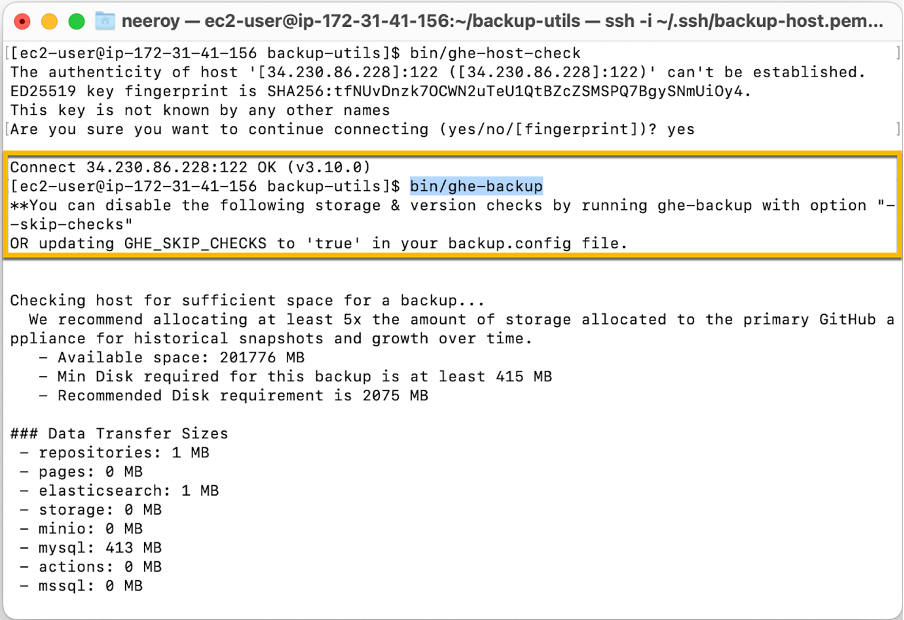
Initiate the backup.
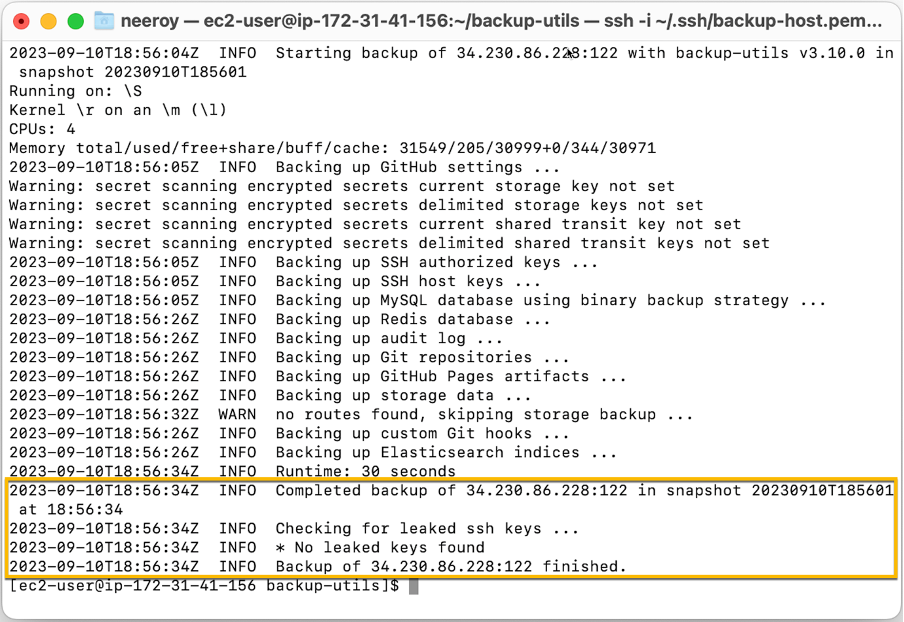
The backup completed without errors.
3. Set up a new primary GitHub Enterprise Server Instance on AWS.
Now that the backup is finished, we will move on to the step of creating a new GHES instance and restoring the data.
- Follow the installation steps to create a new primary GitHub Enterprise Server instance in a region that is different from the region of our backup machine.
- Access the new primary GitHub Enterprise Server instance using the IP address mentioned in the Output tab of the CloudFormation stack.
- Upload a valid license file and set an administrator password. Then select Migrate as we are moving GitHub data from your existing setup.
- You will be prompted to supply the SSH key of your backup machine. Update the SSH key and select save. The following screen is presented outlining the restore status.

New GHES primary instance after selecting Migrate.
- On the existing GHES instance, log in as an administrator. In the settings tab, turn on Maintenance Mode. You will notice that there are no active processes now and a number 0 next to the processes on the screen.
- Connect to the backup machine and take another backup by running bin/ghe-backup. This ensures that we do not miss any additional GitHub activity since our last backup.
- Perform a restore by running the following command.
bin/ghe-restore 18.117.160.78 where 18.117.160.78 is the IP of your new primary GHES instance.

Initiating the restore from the backup machine.
- On successful completion of the restore, connect to the primary GHES URL and select configure settings. You will notice that the hostname has the IP address of your existing GHES. This needs to be replaced by the IP of your new GHES. In our case, we replaced the IP from 34.230.86.228 to 18.117.160.78. Most enterprises will have fully qualified domain names in hostname settings, and during a migration the hostname will be carried over. This DNS name in the hostname settings will need to be changed to reflect the newly migrated GHES.
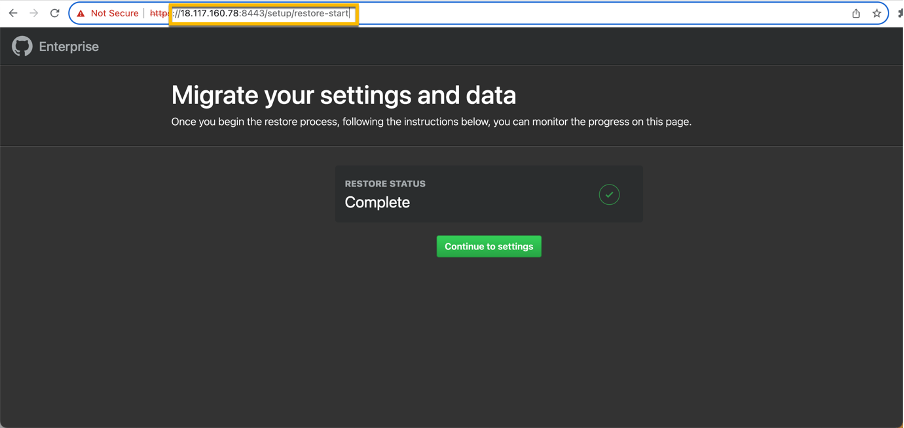
The new primary GHES instance displaying the restore status.
- You can now access the new primary GHES on 18.117.160.78. It will have all the GitHub repositories that were present on your current GHES instance.
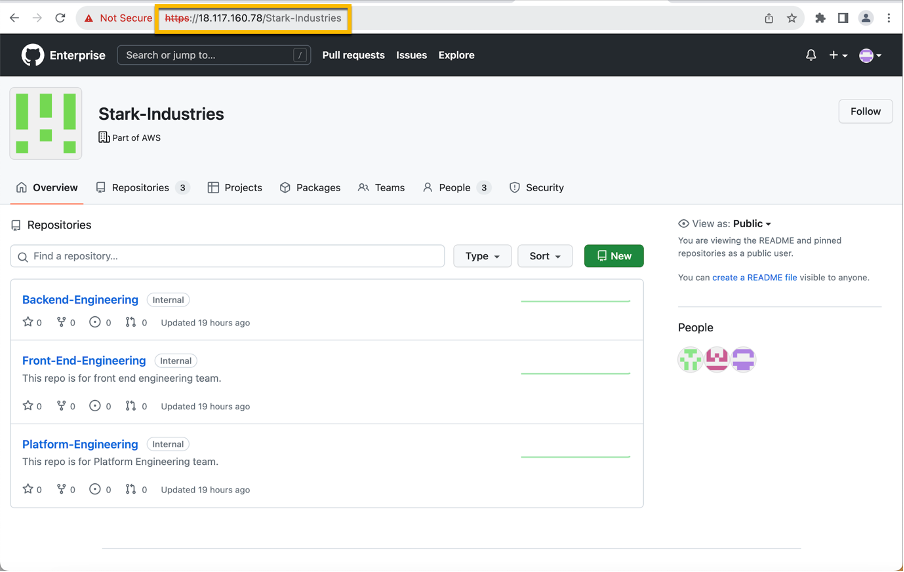
GitHub Repositories present on the new primary GHES instance after migration.
Clean up
Navigate to CloudFormation in the AWS console and select the stack that was used to create the GHES and select Delete. Alternatively, if you manually created a GHES environment for testing you can delete it now.
Conclusion
This blog post demonstrated how an existing GitHub Enterprise Server instance can be migrated to AWS. The migrated GitHub data included users, settings, git repositories and associated meta data. The process of backup and recovery was completed using two utilities, ghe-backup, and ghe-restore.
Migrating GitHub Enterprise Server to AWS is cost-effective and flexible, especially if you have fluctuating workloads or need to scale up quickly. This allows IT teams to focus on development work instead of infrastructure management.