AWS Compute Blog
Building, deploying, and operating containerized applications with AWS Fargate
This post was contributed by Jason Umiker, AWS Solutions Architect.
Whether it’s helping facilitate a journey to microservices or deploying existing tools more easily and repeatably, many customers are moving toward containerized infrastructure and workflows. AWS provides many of the services and mechanisms to help you with that.
In this post, I show you how to use Amazon ECS and AWS Fargate, as well as AWS CodeBuild and AWS CodePipeline, for an end-to-end CI/CD container solution.
What is Amazon ECS?
Amazon Elastic Container Service (ECS) helps schedule and orchestrate containers across a fleet of servers. It involves installing an agent on each container host that takes instructions from the ECS control plane and relays them to the local Docker image on each one. ECS makes this easy by providing an optimized Amazon Machine Image (AMI) that launches automatically using the ECS console or CLI and that you can use to launch container hosts yourself.
It is up to you to choose the appropriate instance types, sizes, and quantity for your cluster fleet. You should have the capacity to deploy and scale workloads as well as to spread them across enough failure domains for high availability. Features like Auto Scaling groups help with that.
Also, while AWS provides Amazon Linux and Windows AMIs pre-configured for ECS, you are responsible for ongoing maintenance of the OS, which includes patching and security. Items that require regular patching or updating in this model are the OS, Docker, the ECS agent, and of course the contents of the container images.
Two of the key ECS concepts are Tasks and Services. A task is one or more containers that are to be scheduled together by ECS. A service is like an Auto Scaling group for tasks. It defines the quantity of tasks to run across the cluster, where they should be running (for example, across multiple Availability Zones), automatically associates them with a load balancer, and horizontally scales based on metrics that you define like CPI or memory utilization.
What is Fargate?
AWS Fargate is a new compute engine for Amazon ECS that runs containers without requiring you to deploy or manage the underlying Amazon EC2 instances. With Fargate, you specify an image to deploy and the amount of CPU and memory it requires. Fargate handles the updating and securing of the underlying Linux OS, Docker daemon, and ECS agent as well as all the infrastructure capacity management and scaling.
How to use Fargate?
Fargate is exposed as a launch type for ECS. It uses an ECS task and service definition that is similar to the traditional EC2 launch mode, with a few minor differences. It is easy to move tasks and services back and forth between launch types. The differences include:
- Using the awsvpc network mode
- Specifying the CPU and memory requirements for the task in the definition
The best way to learn how to use Fargate is to walk through the process and see it in action.
Walkthrough: Deploying a service with Fargate in the console
At the time of publication, Fargate for ECS is available in the N. Virginia, Ohio, Oregon, and Ireland AWS regions. This walkthrough works in any AWS region where Fargate is available.
If you’d prefer to use a CloudFormation template, this one covers Steps 1-4. After launching this template you can skip ahead to Explore Running Service after Step 4.
Step 1 – Create an ECS cluster
An ECS cluster is a logical construct for running groups of containers known as tasks. Clusters can also be used to segregate different environments or teams from each other. In the traditional EC2 launch mode, there are specific EC2 instances associated with and managed by each ECS cluster, but this is transparent to the customer with Fargate.
- Open the ECS console and ensure that Fargate is available in the selected Region (for example, N. Virginia).
- Choose Clusters, Create Cluster.
- Choose Networking only, Next step.
- For Cluster name, enter “Fargate”. If you don’t already have a VPC to use, select the Create VPC check box and accept the defaults as well. Choose Create.
Step 2 – Create a task definition, CloudWatch log group, and task execution role
A task is a collection of one or more containers that is the smallest deployable unit of your application. A task definition is a JSON document that serves as the blueprint for ECS to know how to deploy and run your tasks.
The console makes it easier to create this definition by exposing all the parameters graphically. In addition, the console creates two dependencies:
- The Amazon CloudWatch log group to store the aggregated logs from the task
- The task execution IAM role that gives Fargate the permissions to run the task
- In the left navigation pane, choose Task Definitions, Create new task definition.
- Under Select launch type compatibility, choose FARGATE, Next step.
- For Task Definition Name, enter NGINX.
- If you had an IAM role for your task, you would enter it in Task Role but you don’t need one for this example.
- The Network Mode is automatically set to awsvpc for Fargate
- Under Task size, for Task memory, choose 0.5 GB. For Task CPU, enter 0.25.
- Choose Add container.
- For Container name, enter NGINX.
- For Image, put nginx:1.13.9-alpine.
- For Port mappings type 80 into Container port.
- Choose Add, Create.
Step 3 – Create an Application Load Balancer
Sending incoming traffic through a load balancer is often a key piece of making an application both scalable and highly available. It can balance the traffic between multiple tasks, as well as ensure that traffic is only sent to healthy tasks. You can have the service manage the addition or removal of tasks from an Application Load Balancer as they come and go but that must be specified when the service is created. It’s a dependency that you create first.
- Open the EC2 console.
- In the left navigation pane, choose Load Balancers, Create Load Balancer.
- Under Application Load Balancer, choose Create.
- For Name, put NGINX.
- Choose the appropriate VPC (10.0.0.0/16 if you let ECS create if for you).
- For Availability Zones, select both and choose Next: Configure Security Settings.
- Choose Next: Configure Security Groups.
- For Assign a security group, choose Create a new security group. Choose Next: Configure Routing.
- For Name, enter NGINX. For Target type, choose ip.
- Choose Next: Register Targets, Next: Review, Create.
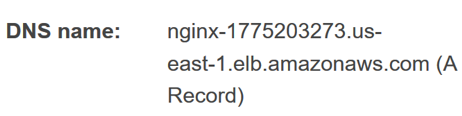
- Select the new load balancer and note its DNS name (this is the public address for the service).
Step 4 – Create an ECS service using Fargate
A service in ECS using Fargate serves a similar purpose to an Auto Scaling group in EC2. It ensures that the needed number of tasks are running both for scaling as well as spreading the tasks over multiple Availability Zones for high availability. A service creates and destroys tasks as part of its role and can optionally add or remove them from an Application Load Balancer as targets as it does so.
- Open the ECS console and ensure that that Fargate is available in the selected Region (for example, N. Virginia).
- In the left navigation pane, choose Task Definitions.
- Select the NGINX task definition that you created and choose Actions, Create Service.
- For Launch Type, select Fargate.
- For Service name, enter NGINX.
- For Number of tasks, enter 1.
- Choose Next step.
- Under Subnets, choose both of the options.

- For Load balancer type, choose Application Load Balancer. It should then default to the NGINX version that you created earlier.
- Choose Add to load balancer.
- For Target group name, choose NGINX.
- Under DNS records for service discovery, for TTL, enter 60.
- Click Next step, Next step, and Create Service.
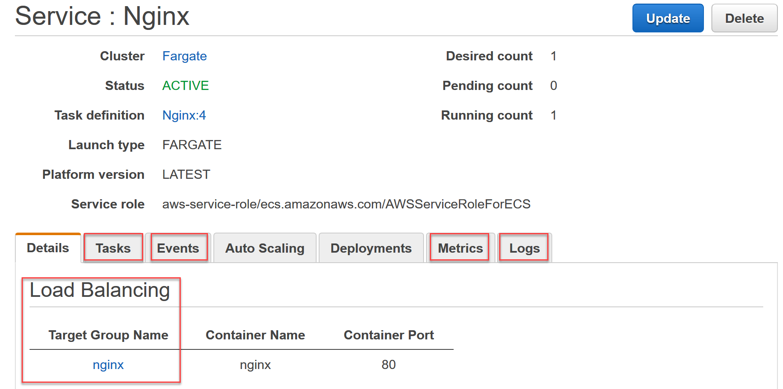
Explore the running service
At this point, you have a running NGINX service using Fargate. You can now explore what you have running and how it works. You can also ask it to scale up to two tasks across two Availability Zones in the console.
Go into the service and see details about the associated load balancer, tasks, events, metrics, and logs:
Scale the service from one task to multiple tasks:
- Choose Update.
- For Number of tasks, enter 2.
- Choose Next step, Next step, Next step then Update Service.
- Watch the event that is logged and the new additional task both appear.
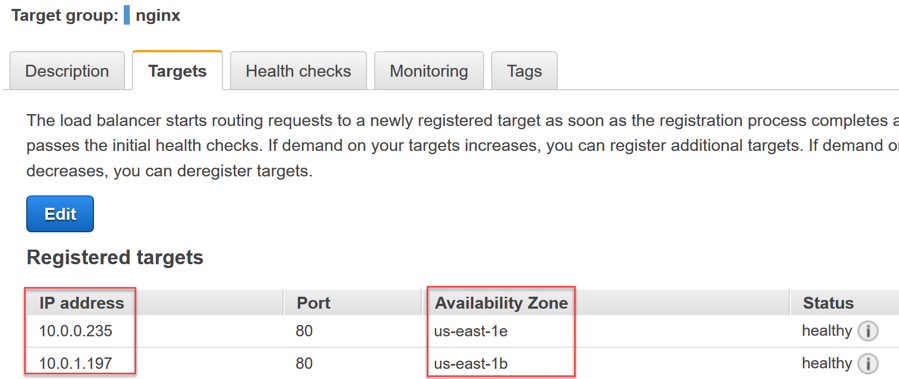
On the service Details tab, open the NGINX Target Group Name link and see the IP address registered targets spread across the two zones.
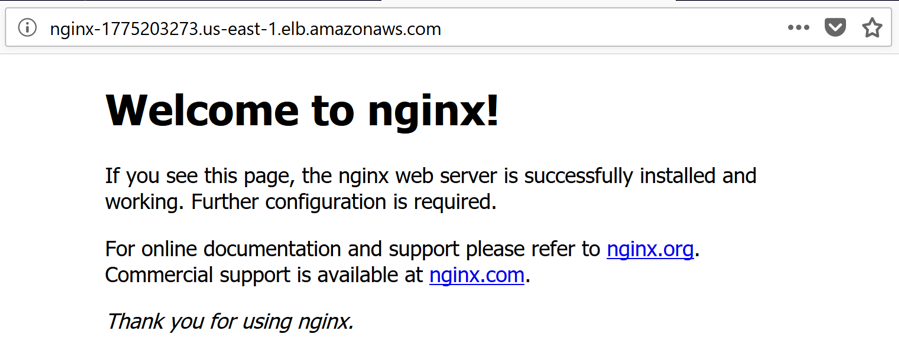
Go to the DNS name for the Application Load Balancer in your browser and see the default NGINX page. Get the value from the Load Balancers dashboard in the EC2 console.
Walkthrough: Adding a CI/CD pipeline to your service
Now, I’m going to show you how to set up a CI/CD pipeline around this service. It watches a GitHub repo for changes and rebuilds the container with CodeBuild based on the buildspec.yml file and Dockerfile in the repo. If that build is successful, it then updates your Fargate service to deploy the new image.
If you’d prefer to use a CloudFormation Template, this one covers the creation of the dependencies so that the console will pre-fill these (CodeBuild Project and IAM Roles) during the creation of the CodePipeline in the steps below.
Step 1 – Create an ECR repository for the rebuilt container image
An ECR repository is a place to store your container images in a secure and reliable manner. Scaling and self-healing of Fargate tasks requires these images to be always available to be pulled when required. This is an important part of a container platform.
- Open the ECS console and ensure that that Fargate is available in the selected Region (for example N. Virginia).
- In the left navigation pane, under Amazon ECR, choose Repositories, Get started.
- For Repository name, put NGINX and choose Next step.
Step 2 – Fork the nginx-codebuild example into your own GitHub account
I have created an example project that takes the Dockerfile and config files for the official NGINX Docker Hub image and adds a buildspec.yml file to tell CodeBuild how to build the container and push it to your new ECR registry on completion. You can fork it into your own GitHub account for this CI/CD demo.
- Go to https://github.com/jasonumiker/nginx-codebuild.
- In the upper right corner, choose Fork.
Step 3 – Create the pipeline and associated IAM roles
You have two complementary AWS services for building a CI/CD pipeline for your containers. CodeBuild executes the build jobs and CodePipeline kicks off those builds when it notices that the source GitHub or CodeCommit repo changes. If successful, CodePipeline then deploys the new container image to Fargate.
The CodePipeline console can create the associated CodeBuild project, in addition to other dependencies such as the required IAM roles.
- Open the CodePipeline console and ensure that that Fargate is available in the selected Region (for example, N. Virginia).
- Choose Get started.
- For Pipeline name, enter NGINX and choose Next step.
- For Source provider, choose GitHub.
- Choose Connect to GitHub and log in.
- For Repository, choose your forked nginx-codebuild repo. For Branch, enter master. Choose Next step.
- For Build provider, enter AWS CodeBuild.
- Select Create a new build project.
- For Project name, enter NGINX.
- For Operating system, choose Ubuntu. For Runtime, choose Docker. For Version, select the latest version.
- Expand Advanced and set the following environment variables:
- AWS_ACCOUNT_ID with a value of the account number
- IMAGE_REPO_NAME with a value of NGINX (or whatever ECR name that you used)
- Choose Save build project, Next step.
- For Deployment provider, choose Amazon ECS.
- For Cluster name, enter Fargate.
- For Service name, choose NGINX.
- For Image filename, enter images.json.
- Choose Next step.
- Choose Create role, Allow, Next step, and then choose Create pipeline.
- Open the IAM console and ensure that that Fargate is available in the selected Region (for example, N. Virginia).
- In the left navigation pane, choose Roles.
- Choose the code-build-nginx-service-role that was just created and choose Attach policy.
- For Policy type, choose AmazonEC2ContainerRegistryPowerUser and choose Attach policy.
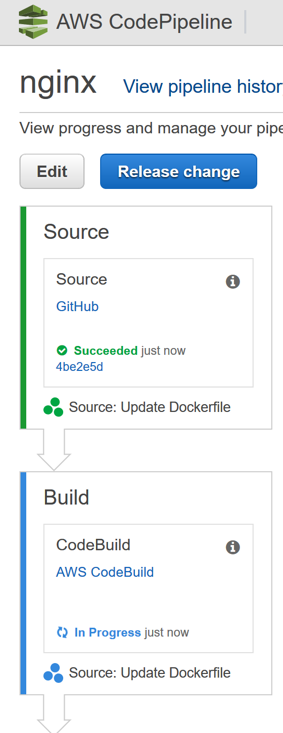
Step 4 – Start the pipeline
You now have CodePipeline watching the GitHub repo for changes. It kicks off a CodeBuild build job on a change and, if the build is successful, creates a new deployment of the Fargate service with the new image.
Make a change to the source repo (even just adding a new dummy file) and then commit it and push it to master on your GitHub fork. This automatically kicks off the pipeline to build and deploy the change.
Conclusion
As you’ve seen, Fargate is fast and easy to set up, integrates well with the rest of the AWS platform, and saves you from much of the heavy lifting of running containers reliably at scale.
While it is useful to go through creating things in the console to understand them better we suggest automating them with infrastructure-as-code patterns via things like our CloudFormation to ensure that they are repeatable, and any changes can be managed. There are some example templates to help you get started in this post.
In addition, adding things like unit and integration testing, blue/green and/or manual approval gates into CodePipeline are often a good idea before deploying patterns like this to production in many organizations. Some additional examples to look at next include: