AWS News Blog
Tag: AWS re:Invent

re:Invent 2020 Liveblog: Andy Jassy Keynote
Jeff Barr‘s liveblog of Andy Jassy’s re:Invent keynote on Dec. 1, 2020 has ended, but you can read all about the event – from Jeff’s perspective – below. Be sure to follow along with all the top re:Invent announcements here, and we’ll also use this space to keep you posted about other re:Invent liveblogs as […]

New – AWS Well-Architected Tool – Review Workloads Against Best Practices
Back in 2015 we launched the AWS Well-Architected Framework and I asked Are You Well-Architected? The framework includes five pillars that encapsulate a set of core strategies and best practices for architecting systems in the cloud: Operational Excellence – Running and managing systems to deliver business value. Security – Protecting information and systems. Reliability – […]
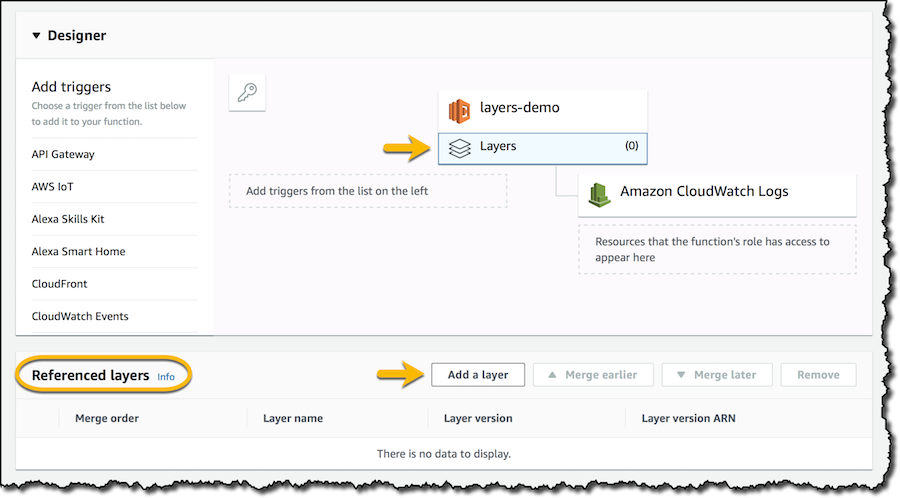
New for AWS Lambda – Use Any Programming Language and Share Common Components
I remember the excitement when AWS Lambda was announced in 2014! Four years on, customers are using Lambda functions for many different use cases. For example, iRobot is using AWS Lambda to provide compute services for their Roomba robotic vacuum cleaners, Fannie Mae to run Monte Carlo simulations for millions of mortgages, Bustle to serve billions of requests for their digital content. Today, […]

New – Compute, Database, Messaging, Analytics, and Machine Learning Integration for AWS Step Functions
AWS Step Functions is a fully managed workflow service for application developers. You can think & work at a high level, connecting and coordinating activities in a reliable and repeatable way, while keeping your business logic separate from your workflow logic. After you design and test your workflows (which we call state machines), you can […]
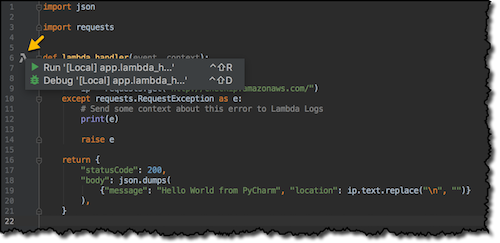
New – AWS Toolkits for PyCharm, IntelliJ (Preview), and Visual Studio Code (Preview)
Software developers have their own preferred tools. Some use powerful editors, others Integrated Development Environments (IDEs) that are tailored for specific languages and platforms. In 2014 I created my first AWS Lambda function using the editor in the Lambda console. Now, you can choose from a rich set of tools to build and deploy serverless applications. […]

AWS Cloud Map: Easily create and maintain custom maps of your applications
Companies are increasingly building their applications as microservices (many separate services that each do a single job). Microservices often allow companies to iterate and deploy more quickly. Many of these microservice-based modern applications are built using various types of cloud resources and deployed on dynamically changing infrastructure. Previously you had to use configuration files to […]

New – Hibernate Your EC2 Instances
As you know, you can easily build highly scalable AWS applications that launch fresh EC2 instances on an as-needed basis. While the instances can be up and running in a matter of seconds, booting the operating system and the application can take considerable time. Also, caches and other memory-centric application components can take some time […]

New AWS License Manager – Manage Software Licenses and Enforce Licensing Rules
When you make use of commercial, licensed software in the AWS Cloud using a BYOL (Bring Your Own License) strategy, you need to make sure that you stay within the provisions of the license, while also avoiding expensive over-provisioning. This can be a challenge when it is so easy to launch instances on demand whenever […]