Containers
How to build your containers for ARM and save with Graviton and Spot instances on Amazon ECS
Amazon Elastic Container Service (Amazon ECS) is a fully managed container orchestration service that enables you to deploy, manage, and scale containerized applications. For the underlying compute capacity of an Amazon ECS cluster, customers can choose between different types and sizes of Amazon Elastic Compute Cloud (Amazon EC2) instances. For many years, machines based on the x86 architecture have been used to run container workloads. Nowadays, Arm is finding wide adoption. And for good reason: AWS Graviton2 processors are custom built by AWS using 64-bit Arm Neoverse cores and are more cost effective than comparable x86-based instances. You can use a variety of EC2 instance types which are Arm-based in your ECS cluster.
Amazon EC2 Spot Instances let you take advantage of unused EC2 capacity in the AWS cloud and are available at a discount compared to on-demand prices. Containers are often stateless and fault-tolerant, and could therefore be a great fit for Spot instances.
In this post, you will learn how easy it can be to build an existing Docker Container Image for both x86, for local testing, and arm64, to deploy into an Amazon ECS cluster. With a few additional tweaks we will also enable usage of Amazon EC2 Spot instances, to further optimize cost efficiency of your ECS cluster.
Prerequisites
These instructions can be followed in a Unix environment like macOS or Linux. You need:
- An installed and configured AWS CLI. Learn how to install or upgrade your AWS CLI in our documentation
- The Docker Desktop app.
Build a multi-architecture Docker image
Let’s start by creating a simple Dockerfile that uses the official NodeJS image (note how it’s tagged with support for x86 and ARM 64) in its size-optimized alpine flavor. On your local machine (or Cloud9 IDE), create an empty directory with a Dockerfile inside, similar to the following example:
FROM node:14-alpine
WORKDIR /usr/src/app
COPY package*.json app.js ./
RUN npm install
EXPOSE 3000
CMD ["node", "app.js"]
In the same directory, next to the file, create a file named app.js.
const express = require('express')
const app = express()

app.get('/', (req, res) => res.send("Let's run a multi-architecture container!"))
app.listen(3000, () => console.log('Server ready'))
Then, create a file called package.json
{
  "name": "multiarch-container",
  "version": "1.0.0",
  "description": "",
  "main": "app.js",
  "scripts": {
    "test": "echo \"Error: no test specified\" && exit 1"
  },
  "keywords": [],
  "author": "",
  "license": "ISC",
  "dependencies": {
    "express": "^4.17.1"
  }
}
This creates a container and runs an Express web server, responding on port 3000 with a simple HTML page.
Build and push to Amazon ECR
Next, we want to build a Docker image from this single Dockerfile that will work for both ARM and x86 EC2 instances. Then, we’ll push it to Amazon Elastic Container Registry (Amazon ECR). To build a multi-architecture image, we use the Docker Buildx CLI plugin that is included with Docker Desktop.
First, we need to authenticate the Docker CLI to your default registry. That way, the Docker command can push and pull images to and from Amazon ECR.
aws ecr get-login-password --region eu-central-1 | docker login --username AWS —password-stdin 413430011442.dkr.ecr.eu-central-1.amazonaws.com
Create an Amazon ECR repository for your container image:
aws ecr create-repository \
--repository-name node-webserver \
--image-scanning-configuration scanOnPush=true \
--region eu-central-1
Then, we point the buildx build command towards your Amazon ECR repository, define the processor architectures you want to build images, and push to ECR.
docker buildx build -t "413430011442.dkr.ecr.eu-central-1.amazonaws.com/node-webserver:latest" --platform linux/amd64,linux/arm64 --push .Take note of the image URL 413430011442.dkr.ecr.eu-central-1.amazonaws.com/node-webserver:latest` that you just used. This is how we will reference the image in our ECS task definition later.
Inspect the image and see how it was built for amd64 and arm64:
docker buildx imagetools inspect 413430011442.dkr.ecr.eu-central-1.amazonaws.com/node-webserver:latestIf you want to run this container image locally, you can do so with the following command. Note how we don’t have to choose an architecture. Docker will understand what kind of machine you are running this command on and choose appropriately:
docker run -p 3000:3000 413430011442.dkr.ecr.eu-central-1.amazonaws.com/ramlop-repo:latestThis means that if you run the preceding command on your Mac or Windows machine on x86, the x86 version will run. Similarly, if you work on an M1 Mac based on arm64, the arm64 version will be used.
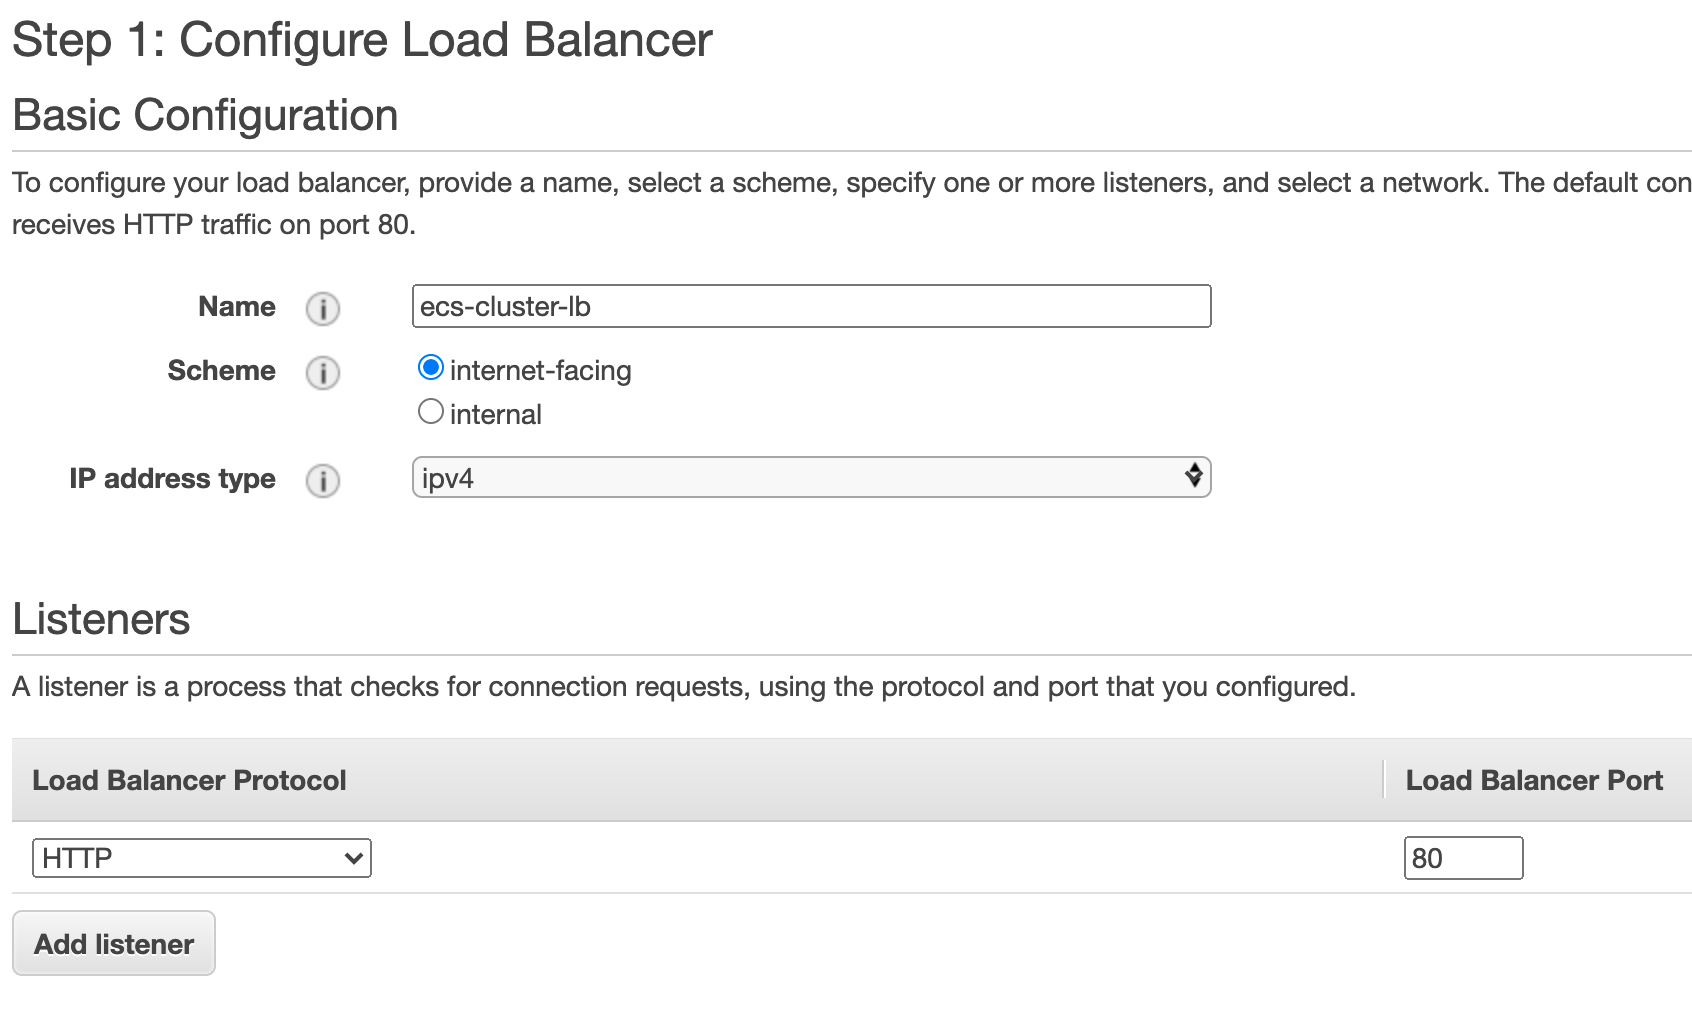
- Navigate to EC2 – Load Balancer within the AWS Management Console
- Select Create Load Balancer
- Select Application Load Balancer
- Name your load balancer ‘ecs-cluster-lb’, select internet-facing, and select three Availability Zones for your VPC.
- Under Listeners, use port 80 and path
/ - On the next page, select New target group, name it
webserver-target-group, and don’t select any targets. The ECS control plane will take care of that.

Create an ECS cluster
In this step, the ECS cluster wizard will help us to create an ECS cluster and preconfigure a few components such as IAM roles and an Auto Scaling group.
- Navigate to Amazon ECS in the console and select Create Cluster
- Select the EC2 Linux + Networking template and continue.
- Set a cluster name, such as
graviton-cluster. - Under Security group, select Create a new security group with port 80 open.
- Leave all other values on default and finish the wizard.

Creating Auto Scaling groups for On-Demand and Spot instances
Now, we will create two separate Auto Scaling groups, one for On-Demand and one for Spot instances. Then, we can then adjust the ratio between On-Demand and Spot instances in the cluster with an ECS capacity provider strategy.
Navigate to EC2 Auto Scaling group in the console. Remember to complete the following steps twice: once for On-Demand instances and once for Spot instances:
- Click Create an Auto Scaling group.
- Name it
asg-on-demandandasg-spot. - Select the previously created launch template
MyLaunchTemplateForGravitonand select Next - For your On-Demand Auto Scaling group, select 100% on-demand. For your Spot Auto Scaling group, select 100% Spot.
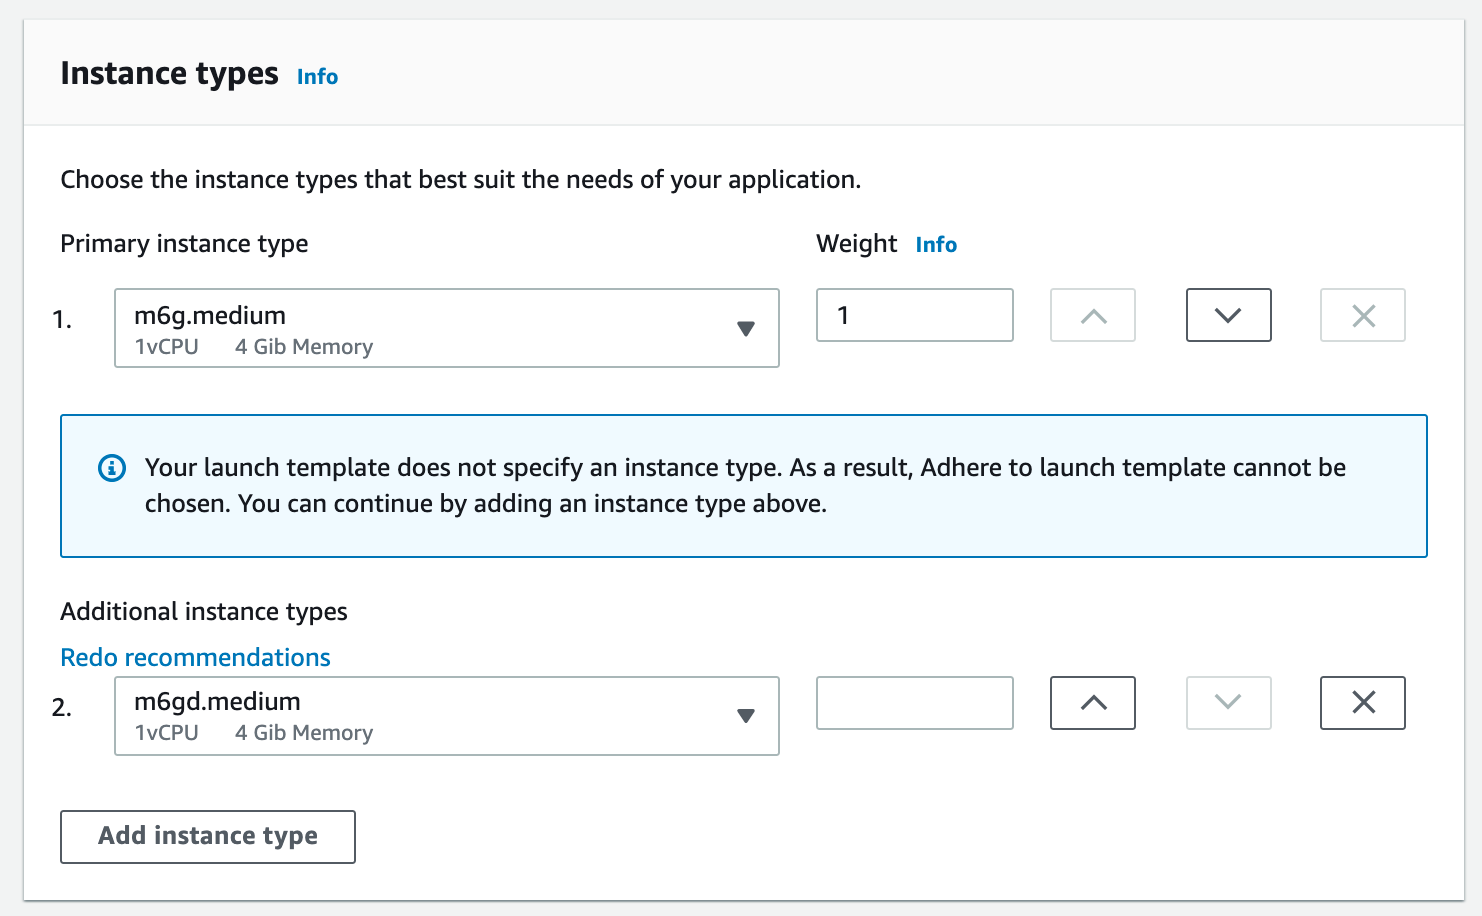
- Check Prioritize instance types.
- Next, we chose the type(s) of instances to launch. Remember that the availability of Spot instances per size and family is dynamic. Therefore, your chances of receiving Spot Instance increases if you define additional instance types. In this example, we chose m6g.medium, a general-purpose Graviton2 instance type, as the Primary instance type. Additionally, we allow m6gd.medium (instances with local NVMe-based SSD’s), which the Auto Scaling Group can fall back to if no m6g.medium Spot instances are available. This instance type priority is honored on a best effort basis because we previously checked “Prioritize instance types”. It can also make sense to use older instance generations to fall back to.
- Ideally, select three subnets in three Availability Zones and select Next.
- Select No load balancer and then select Next
- Chose
Desired capacity: 0andMaximum capacity: 10. The ECS capacity provider will adjust the desired capacity later, but the maximum capacity will limit the number of instances each capacity provider is able to register. - Select Enable instance scale-in protection and select Next through to the end.
Create Amazon ECS capacity providers
Based on the type and number of tasks in your ECS cluster, we want to benefit from automatic scaling. When creating an Amazon ECS capacity provider with managed scaling enabled, Amazon ECS manages the scale-in and scale-out actions of the Auto Scaling group.
We will create two separate capacity providers:
- Managing On-Demand base capacity, which has a fixed price and doesn’t fluctuate in capacity.
- Managing additional Spot capacity, which we will only use up until the On-Demand price and capacity can fluctuate.
Remember to execute the following steps twice:
- Navigate to your ECS cluster by going to Amazon ECS in the console and selecting
graviton-cluster. - On the Capacity Provider tab, select Create Capacity Provider.
- Select the previously created Auto Scaling Groups
asg-on-demandorasg-spot. - Make sure Managed Scaling Enabled is selected. This will create the target tracking scaling policy in the Auto Scaling group.
- Finally, set Target Capacity to 100%. This means your EC2 container instances will be fully utilized based on the requested CPU and memory parameters in their task definition.
Requesting Spot instances for fault tolerant applications
By using Graviton instances, you already benefit from a great price-performance ratio. If your application is fault tolerant, meaning it can handle sudden scale-in and scale-out automatically, you can improve the cost efficiency of your ECS cluster further.
For this purpose, we will replace the launch configuration that the ECS cluster wizard created for us with a Launch Template that does not define any instance types.
- Navigate to EC2 Launch Configuration in the console.
- Select the launch configuration that was automatically created. It should start with
EC2ContainerService-. (Tip: You can navigate to AWS CloudFormation in the console, where you will see the stack that the ECS cluster wizard created. On itsResourcestab, you will find the exact name of the resources that were created for you.) - We will replace this launch configuration with a launch template, but first take note of both the Security Group and AMI ID for later use.
Next, we create a launch template:
- Navigate to EC2 launch template in the console.
- Select Create Launch Template.
- Name it
MyLaunchTemplateForGraviton. - Under AMI, select “Specify a custom value” and paste the AMI ID from previous steps.
- Select the same VPC that your cluster is in.
- Under Security Group, paste the security group from previous steps.
- Open Advanced Details and set the IAM instance profile to be
ecsInstanceRole(if this role wasn’t previously created, review this tutorial). - At the bottom of the page, set the User Data script to the following value:
#!/bin/bash
cat <<'EOF' >> /etc/ecs/ecs.config
ECS_CLUSTER=<YOUR-CLUSTER_NAME>
ECS_ENABLE_SPOT_INSTANCE_DRAINING=true
EOF
This User Data script allows the instance to register itself with your ECS cluster and handle Spot instance termination gracefully.
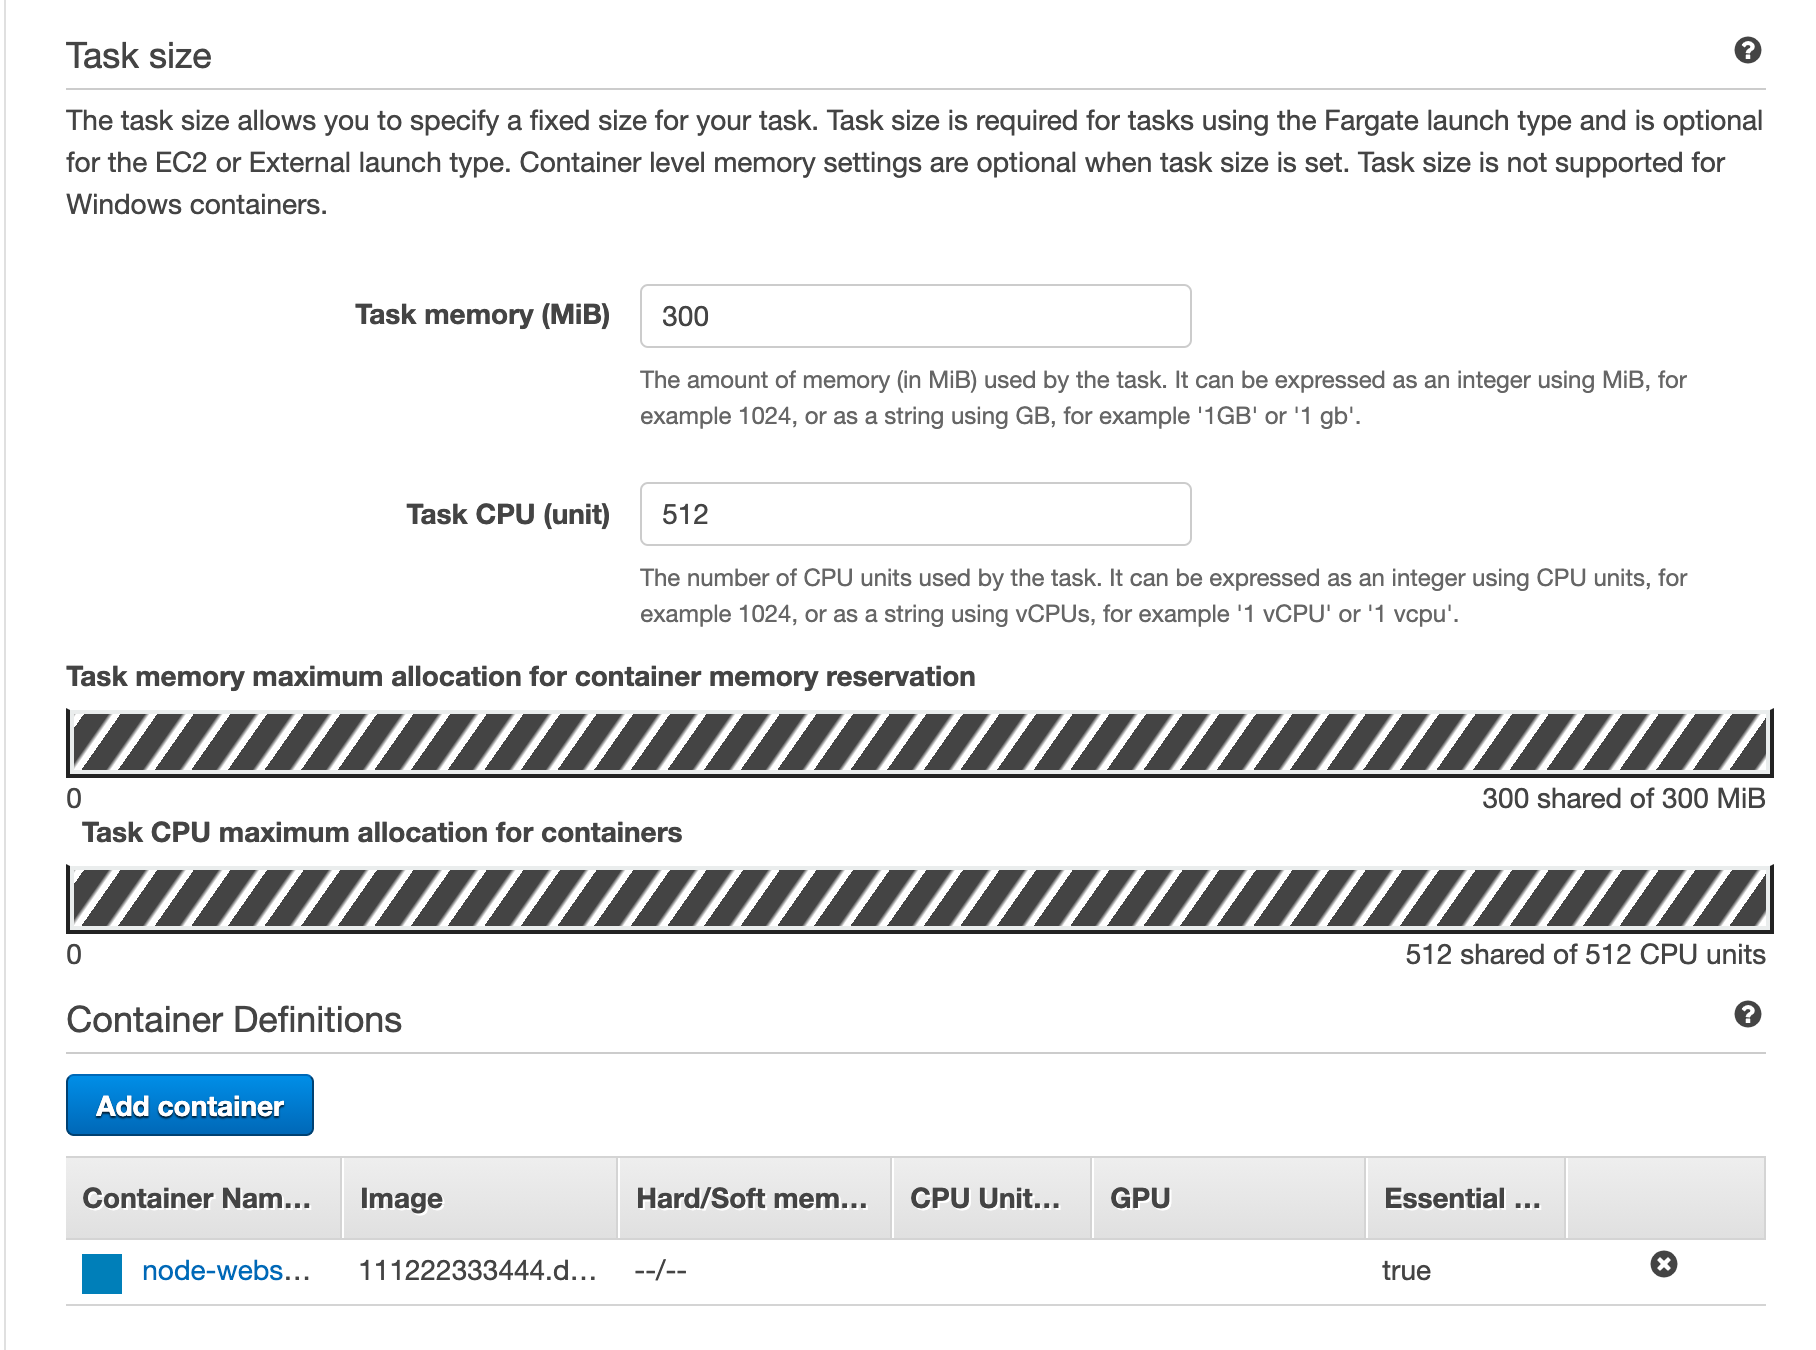
Create a task definition
Now let’s define our NodeJS web server as an ECS task.
- Navigate to ECS in the console. Select Task Definitions and Create new Task Definition.
- Select EC2 and name it
MyNodeWebserver. - For the Task Execution Role, select
ecsTaskExecutionRole. - Select Add Container, choose a name, and enter the Image URL that we used to push the image
- Enter ‘500’ as a hard limit for memory. For an in-depth explanation of container and task CPU and memory limits, read this blog post.
- Under Port Mappings, set ’80’ as your host port and ‘3000’ as your container port. Remember that in our
Dockerfilewe exposed port 3000.


Start node-webserver as an Amazon ECS service
Next, we want to start an Amazon ECS service that uses a load balancer. The underlying Graviton instances will be managed by the two capacity providers we previously created.
- Navigate to your ECS cluster and select Update Cluster.
- Set the capacity provider that you previously created as your default capacity provider strategy.
- Select Done.
- Back on the cluster page, click Create Service.
- Select the task definition name you just created, like
MyNodeWebserver, and give your service a name. - Capacity provider strategy is where we define a mix of On-Demand and Spot instances. Choose both of the previously created capacity providers and define the ratio between On-Demand and Spot instances. In this example, we use a strategy that fulfills our expected baseline traffic of 10 tasks with the on-demand capacity provider. Capacity beyond the defined base of 10 will be fulfilled with the Spot capacity provider (to learn how capacity providers work, visit our documentation). More tasks on Spot can result in additional savings, but if your workload requires high availability and you are not comfortable with interruptions, start with a ratio that works for you.
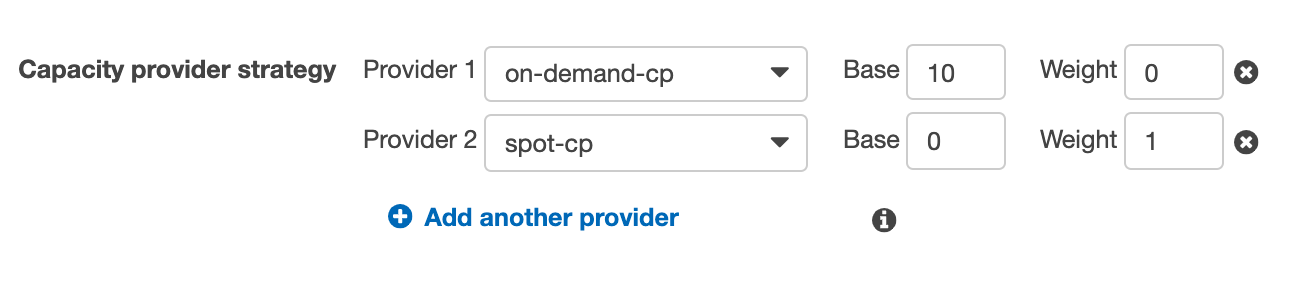
- The Number of tasks setting allows you to control how many of your web servers will launch into this cluster. We will chose 13 for this example, as we’re expecting the on-demand capacity provider to launch 10 tasks and the Spot capacity provider to launch three tasks.
- On the next page, select Application Load Balancer and select the one we previously created from the dropdown.
- Select
ecsServiceRolefor Service IAM role. - Under ‘Container to load balance’, click Add to load balancer and create a listener for port 80 and a new target group for the default path pattern
/.

- On the next page, select ‘Do not adjust the service’s desired count’.
- Select Create.
See Auto Scaling on Graviton with Spot instances in action
Finally, we want to observe how Amazon ECS manages the scaling of this service autonomously, while following the parameters we have set earlier in our capacity provider strategy.
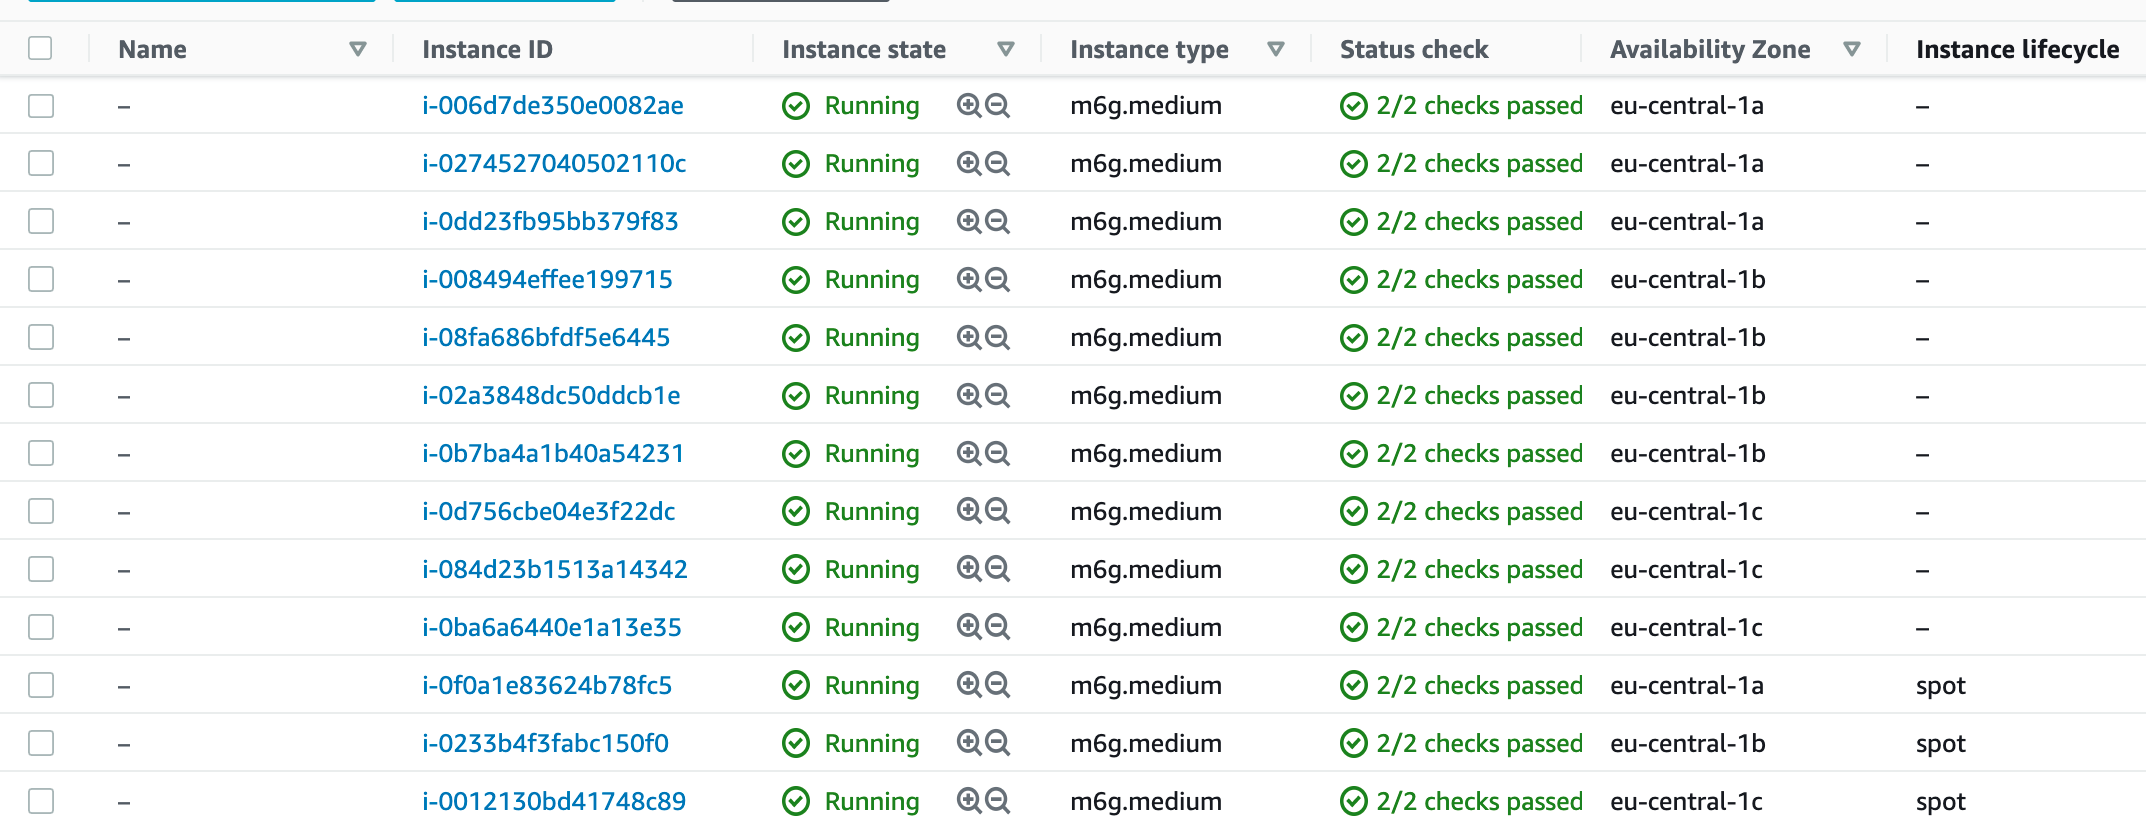
In the service definition, we defined 13 replicas of our task. Shortly after launching the service, we should expect to see 13 instances. This is because we are using a strict mapping between host and container ports. (You can improve this behavior by using Dynamic Port mappings). When we look at the ECS Instances tab, we can see all the instances distributed across Availability Zones in eu-central-1.

To see our web server in action, we need to get the DNS name from the EC2 Load Balancer page and visit it through a web browser:
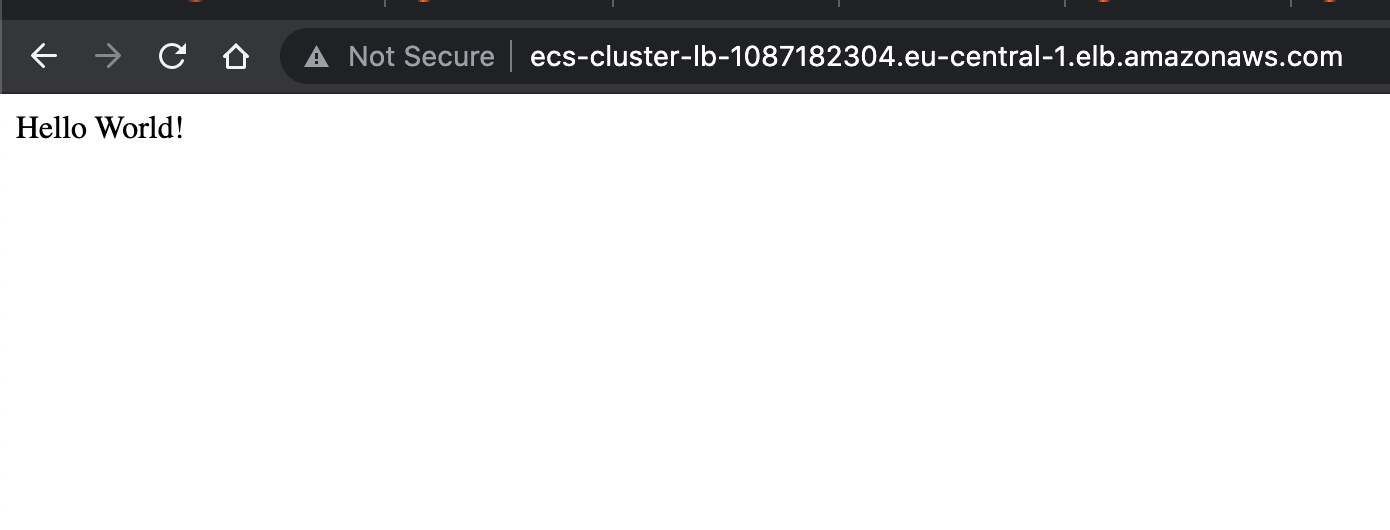
When we visit the EC2 Instances page and filter for only this cluster, we can see how we got exactly what we asked for in the Auto Scaling group configuration: 10 on-demand base capacity instances and three Spot instances summing up to 13 task replicas.
Cleaning up resources
To avoid ongoing charges for resources, you should delete the resources created as a part of this setup.
- Navigate to the Amazon ECS console and select the cluster
graviton-cluster - On the Services tab, select the
MyNodeWebservertask and select Delete. This will also release all EC2 capacity attached to the service. - On the same page, select Delete Cluster and confirm it.
- Then navigate to the EC2 console and select on Auto Scaling Groups
- Delete both Auto Scaling Groups we previously created: Select
asg-spotand select Delete - Do the same for
asg-on-demand.This will also terminate all EC2 instances in the groups. - Navigate to the Amazon ECR console and select the
node-webserverregistry we created. Choosing Delete will remove the repository and all container images in it.
Where to go from here?
In this blog post, we have walked through how to build a multi-architecture Docker container image for x86 and arm64. We deployed the image to Amazon ECR, created an Amazon ECS cluster, and configured two capacity providers to mix On-Demand and Spot instances of different Graviton instance types to achieve great cost efficiency.
If you want to experiment further, you could change the number of desired tasks, observe how your capacity changes, and learn how Amazon ECS uses Target Tracking Scaling Policies.
Lastly, if you want to learn more about monitoring, deployment strategies and networking in ECS, check out the Amazon ECS Workshop.