AWS Developer Tools Blog
Multi-App Support with Custom Domains for .NET and AWS Elastic Beanstalk
AWS Elastic Beanstalk is a powerful, fully managed environment for deploying, hosting, and scaling web applications developed in a variety of languages and frameworks, including .NET. AWS Elastic Beanstalk has long supported the ability to deploy multiple .NET and .NET Core applications into a single environment by using a deployment manifest file and building a deployment bundle. You can find more about multiple application support in the AWS Toolkit for Visual Studio user guide. Once the deployment is successful the applications are hosted as IIS Applications under the Default Web Site and are accessible via their IIS application paths.
For example, assume two .NET web applications have been deployed to an AWS Elastic Beanstalk environment. A DNS CNAME record, multi-app-demo.com, has been created for this environment. One of the applications has been deployed to the IIS path /admin, and the other has been deployed to the IIS path /customer. The applications are accessible from http://multi-app-demo.com/admin and http://multi-app-demo.com/customer respectively.
This setup works well for a lot of workloads, but what if the applications need to be accessible via subdomains like http://admin.multi-app-demo.com and http://customer.multi-app-demo.com, or totally separate domain names like http://admin-portal.com and http://customer-portal.com? This is not possible using the default multi-app deployment configuration. Instead we need to build a fully customized deployment. As you’ll discover in this blog post, it is not difficult to do.
Prerequisites
To follow along with this blog post you will need an AWS Elastic Beanstalk environment, a Visual Studio solution with two or more ASP.NET or ASP.NET Core web applications, and a domain name you can use. Details on provisioning an AWS Elastic Beanstalk environment can be found in the documentation. Domain names can be provisioned and managed from Amazon Route 53. For the purpose of this blog post I have created a solution with three ASP.NET MVC Web applications:

If you would like to test the PowerShell scripts locally, you will also need PowerShell version 3.0 or later installed on your local machine. The latest version of PowerShell can be found here.
Solution Overview
In order to implement custom domains for your web applications you will take advantage of AWS Elastic Beanstalk Custom Deployments. Once complete, your web applications will be deployed to their own IIS Sites in AWS Elastic Beanstalk rather than being deployed as applications under the Default Web Site. Bindings will also be configured for each IIS Site as part of the deployment. To achieve this outcome the following steps are required:
- Create a deployment manifest file.
- Create the custom deployment PowerShell scripts.
- Create the deployment bundle.
- Create the DNS records.
Create a deployment manifest file
The first step is to create a deployment manifest file. A deployment manifest file is simply a set of instructions that tells AWS Elastic Beanstalk how a deployment bundle should be installed. The deployment manifest file must be named aws-windows-deployment-manifest.json. The manifest file contains an entry for each application that will deployed to the AWS Elastic Beanstalk Environment. Each entry will reference three PowerShell scripts that contain instructions for installing, uninstalling, and restarting each application (more on these in the next step). My deployment manifest file looks like this:
{
  "manifestVersion": 1,
  "deployments": {

    "custom": [
      {
        "name": "customer",
        "scripts": {
          "install": {
            "file": "installcustomer.ps1"
          },
          "restart": {
            "file": "restart.ps1"
          },
          "uninstall": {
            "file": "uninstallcustomer.ps1"
          }
        }
      },
      {
        "name": "finance",
        "scripts": {
          "install": {
            "file": "installfinance.ps1"
          },
          "restart": {
            "file": "restart.ps1"
          },
          "uninstall": {
            "file": "uninstallfinance.ps1"
          }
        }
      },
      {
        "name": "admin",
        "scripts": {
          "install": {
            "file": "installadmin.ps1"
          },
          "restart": {
            "file": "restart.ps1"
          },
          "uninstall": {
            "file": "uninstalladmin.ps1"
          }
        }
      },
      {
        "name": "healthcheck",
        "scripts": {
          "install": {
            "file": "installhealthcheck.ps1"
          },
          "restart": {
            "file": "restart.ps1"
          },
          "uninstall": {
            "file": "uninstallhealthcheck.ps1"
          }
        }
      }
    ]
  }
}
The health check application is a single index.html file that is copied to the default web site in IIS. This is required to ensure health checks work as expected in a load-balanced AWS Elastic Beanstalk environment. For the purpose of this blog post my health check application is just a simple html page, however there is scope to make this a full heath check application that tests things like database connectivity and microservices statuses.
Create the PowerShell scripts
AWS Elastic Beanstalk custom deployments require three PowerShell scripts: an install script, an uninstall script, and a restart script. The install script describes how the application will be installed into the AWS Elastic Beanstalk environment; the uninstall script describes how the application will be removed from the AWS Elastic Beanstalk environment and how resources can be cleaned up; and the restart script describes what to do when the RestartAppServer API is called. I have created separate install and uninstall scripts for each application, however I have reused the restart script for all four applications.
Each application install script starts by copying the application files from the application’s folder in the deployment package (more on this in the next step) to a subfolder in the default IIS folder (C:\inetpub). They then create a new IIS Site and binding for the web application. The health check install script simply copies an index.html file to the default web site.
installadmin.ps1
Copy-Item -Path "C:\staging\admin" -Destination "C:\inetpub" -Recurse -Force

New-IISSite -Name "Admin" -BindingInformation "*:80:admin.multi-app-demo.com" -PhysicalPath "C:\inetpub\admin" -Force
installcustomer.ps1
Copy-Item -Path "C:\staging\customer" -Destination "C:\inetpub" -Recurse -Force

New-IISSite -Name "Customer" -BindingInformation "*:80:customer.multi-app-demo.com" -PhysicalPath "C:\inetpub\customer" -Force
installfinance.ps1
Copy-Item -Path "C:\staging\finance" -Destination "C:\inetpub" -Recurse -Force

New-IISSite -Name "Finance" -BindingInformation "*:80:finance.multi-app-demo.com" -PhysicalPath "C:\inetpub\finance" -Force
installhealthcheck.ps1
Copy-Item -Path "C:\staging\index.html" -Destination "C:\inetpub\wwwroot\index.html" -ForceEach application uninstall script starts by deleting the IIS Site. They then delete the application files from the default IIS folder. The health check uninstall script simply removes the index.html file from the default web site.
uninstalladmin.ps1
Remove-IISSite -Name "Admin" -Confirm:$False

rm -r "c:\inetpub\adminapp" -Force
uninstallcustomer.ps1
Remove-IISSite -Name "Customer" -Confirm:$False

rm -r "c:\inetpub\customerapp" -Force
uninstallfinance.ps1
Remove-IISSite -Name "Finance" -Confirm:$False

rm -r "c:\inetpub\financeapp" -Force
uninstallhealthcheck.ps1
rm "c:\inetpub\wwwroot\index.html" -ForceThe restart script simply restarts IIS.
restart.ps1
iisreset /timeout:1Create the deployment bundle
At this point you have everything you need in terms of application files, deployment manifests, and deployment scripts; it is time to package it up so it can be sent to the AWS Elastic Beanstalk environment. I am going to perform these steps manually, however this process lends itself well to automation and can be easily incorporated into a CI/CD pipeline. If you would like more information on how to build a CI/CD pipeline in AWS check out this blog post.
The deployment bundle is just a zip file that contains the deployment manifest file, the PowerShell scripts, and the web application files. Start by creating a new folder that can stage the files for your deployment bundle. I created a folder called C:\multiappdemostaging.
Copy the deployment manifest file, the health check file (index.html) and all of the PowerShell script files into the staging folder.

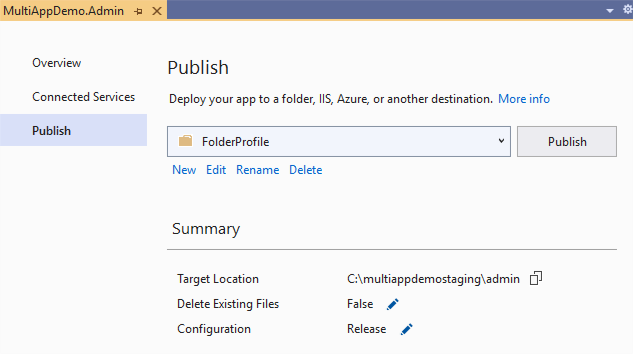
Now you need to publish each of your web applications to the staging folder. In Visual Studio right-click each project and select Publish…. Select Folder as the publishing target. For each application specify an appropriate subfolder under your staging folder as the target. IMPORTANT: This name of this subfolder must match the name of the source subfolder in your install scripts. For example, I have specified C:\staging\admin as the path in my admin install script, so I need to specify C:\multiappstaging\admin as the target for my admin web application.

The previous step creates the publish profile, however it does not actually publish the application. You need to click the Publish button.
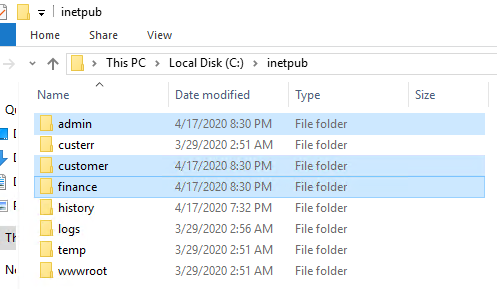
Repeat these steps for the other applications in your solution. Once you are done your staging folder should look something like this:

Using Visual Studio to manually publish the applications is fine for demonstration purposes, but at some point you will want to automate the process. You can achieve the same outcome from the command line by using the following:
msbuild.exe [path.to]\[project].csproj /p:TargetFrameworkVersion=v[x.x.x] /p:Configuration=Release /t:WebPublish /p:WebPublishMethod=FileSystem /p:DeleteExistingFiles=True /p:publishUrl=C:\multiappdemostaging\[appfolder]\For example, my code is stored locally in C:\Git\MultiAppDemo and my applications each target .NET 4.7.2, so my Admin application publish command looks like this:
msbuild.exe C:\git\MultiAppDemo\MultiAppDemo.Admin\MultiAppDemo.Admin.csproj /p:TargetFrameworkVersion=v4.7.2 /p:Configuration=Release /t:WebPublish /p:WebPublishMethod=FileSystem /p:DeleteExistingFiles=True /p:publishUrl=C:\multiappdemostaging\admin\The final step is to send everything in the staging folder to a zip file. The zip file can be named anything you like; I named mine package.zip.

You are now ready to deploy your applications to AWS Elastic Beanstalk. Log into the AWS Elastic Beanstalk management console and upload your zipped deployment bundle. After a few minutes you should see an event on your dashboard with the message: “Environment update completed successfully.”

If you log onto an EC2 instance using RDP or AWS Systems Manager Session Manager in your environment then you should see the applications have been copied to their respective sub folders under the default IIS folder:
They have been set up as IIS Sites:

And each site has been bound to its own subdomain (the screenshot below shows the Admin website binding, there are corresponding bindings for the Customer and Finance websites that are not shown):

Create the DNS records
Now you need to create a DNS CNAME record for each of your web applications. You can use any DNS management service you like to do this. I have used Amazon Route 53. Each CNAME record is going to point to your AWS Elastic Beanstalk environment’s URL:

That’s it, you’re done! At this point you should be able to navigate to each of your web applications via the sub domains you just created.
Clean Up
When you are ready, be sure to delete the AWS Elastic Beanstalk application you created for this blog. You can delete an AWS Elastic Beanstalk application from the AWS Management Console by navigating to the AWS Elastic Beanstalk service, selecting “Applications” from the menu on the left, selecting the application to be deleted, then selecting “Delete Application” from the Actions menu.
Conclusion
AWS Elastic Beanstalk is a great environment to host your ASP.NET and ASP.NET Core web applications. It is very simple to get up and running, but it also offers a lot of flexibility and customization. This blog ran through a series of manual steps to configure a multi-app AWS Elastic Beanstalk environment with custom domain names, however as mentioned above the process lends itself well to automation. If you would like more information on building a CI/CD pipeline in AWS, check out this blog post.