AWS DevOps & Developer Productivity Blog
Running GitHub Actions in a private Subnet with AWS CodeBuild
Note: Customers no longer need to manage their own GitHub runners, you can now use AWS CodeBuild for managed GitHub Actions self-hosted runners, which provides ephemeral and scalable runner environment with strong security boundaries and low start up latency. With AWS CodeBuild, you don’t need to maintain your own infrastructure or build scaling logic, as they are entirely managed by CodeBuild. To get started, simply create a webhook to automatically trigger GitHub Actions jobs in CodeBuild.
Last week the Developer Tools team announced that AWS CodeBuild now supports GitHub Actions. AWS CodeBuild is a fully managed continuous integration service that allows you to build and test code. CodeBuild builds are defined as a collection of build commands and related settings, in YAML format, called a BuildSpec. You can now define GitHub Actions steps directly in the BuildSpec and run them alongside CodeBuild commands. In this post, I will use the Liquibase GitHub Action to deploy changes to an Amazon Aurora database in a private subnet.
Background
The GitHub Marketplace includes a large catalog of actions developed by third-parties and the open-source community. At the time of writing, there are nearly 20,000 actions available in the marketplace. Using an action from the marketplace can save you time and effort that would be spent scripting the installation and configuration of various tools required in the build process.
While I love GitHub actions, I often want to run my build in AWS. For example, I might want to access a resource in a private VPC or simply reduce the latency between the build service and my resources. I could accomplish this by hosting a GitHub Action Runner on Amazon Elastic Compute Cloud (Amazon EC2). However, hosting a GitHub Action runner requires additional effort to configure and maintain the environment that hosts the runner.
AWS CodeBuild is a fully managed continuous integration service. CodeBuild does not require ongoing maintenance and it can access resources in a private subnet. You can now use GitHub Actions in AWS CodeBuild. This feature provides the simplified configuration and management of CodeBuild with the rich marketplace of GitHub Actions. In the following section, I will explain how to configure CodeBuild to run a GitHub Action.
Walkthrough
In this walkthrough, I will configure AWS CodeBuild to use the Liquibase GitHub Action to deploy changelogs to a PostgreSQL database hosted on Amazon Aurora in a private subnet. As shown in the following image, AWS CodeBuild will be configured to run in a private subnet along with my Aurora instance. First, CodeBuild will download the GitHub action using a NAT Gateway to access the internet. Second, CodeBuild will apply the changelog to the Aurora instance in the private subnet.

I already have a GitHub repository with the Liquibase configuration properties and changelogs shown in the following image. Liquibase configuration is not the focus of this blog post, but you can read more in Getting Started with Liquibase. My source also includes the buildspec.yaml file which I will explain later in this post.

To create my build project, I open CodeBuild in the AWS Console and select Create build project. Then I provide a name and optional description for the build. My project is named liquibase-blog-post.
If you are note already connected to GitHub, you can connect using a personal access token as shown in the following image.

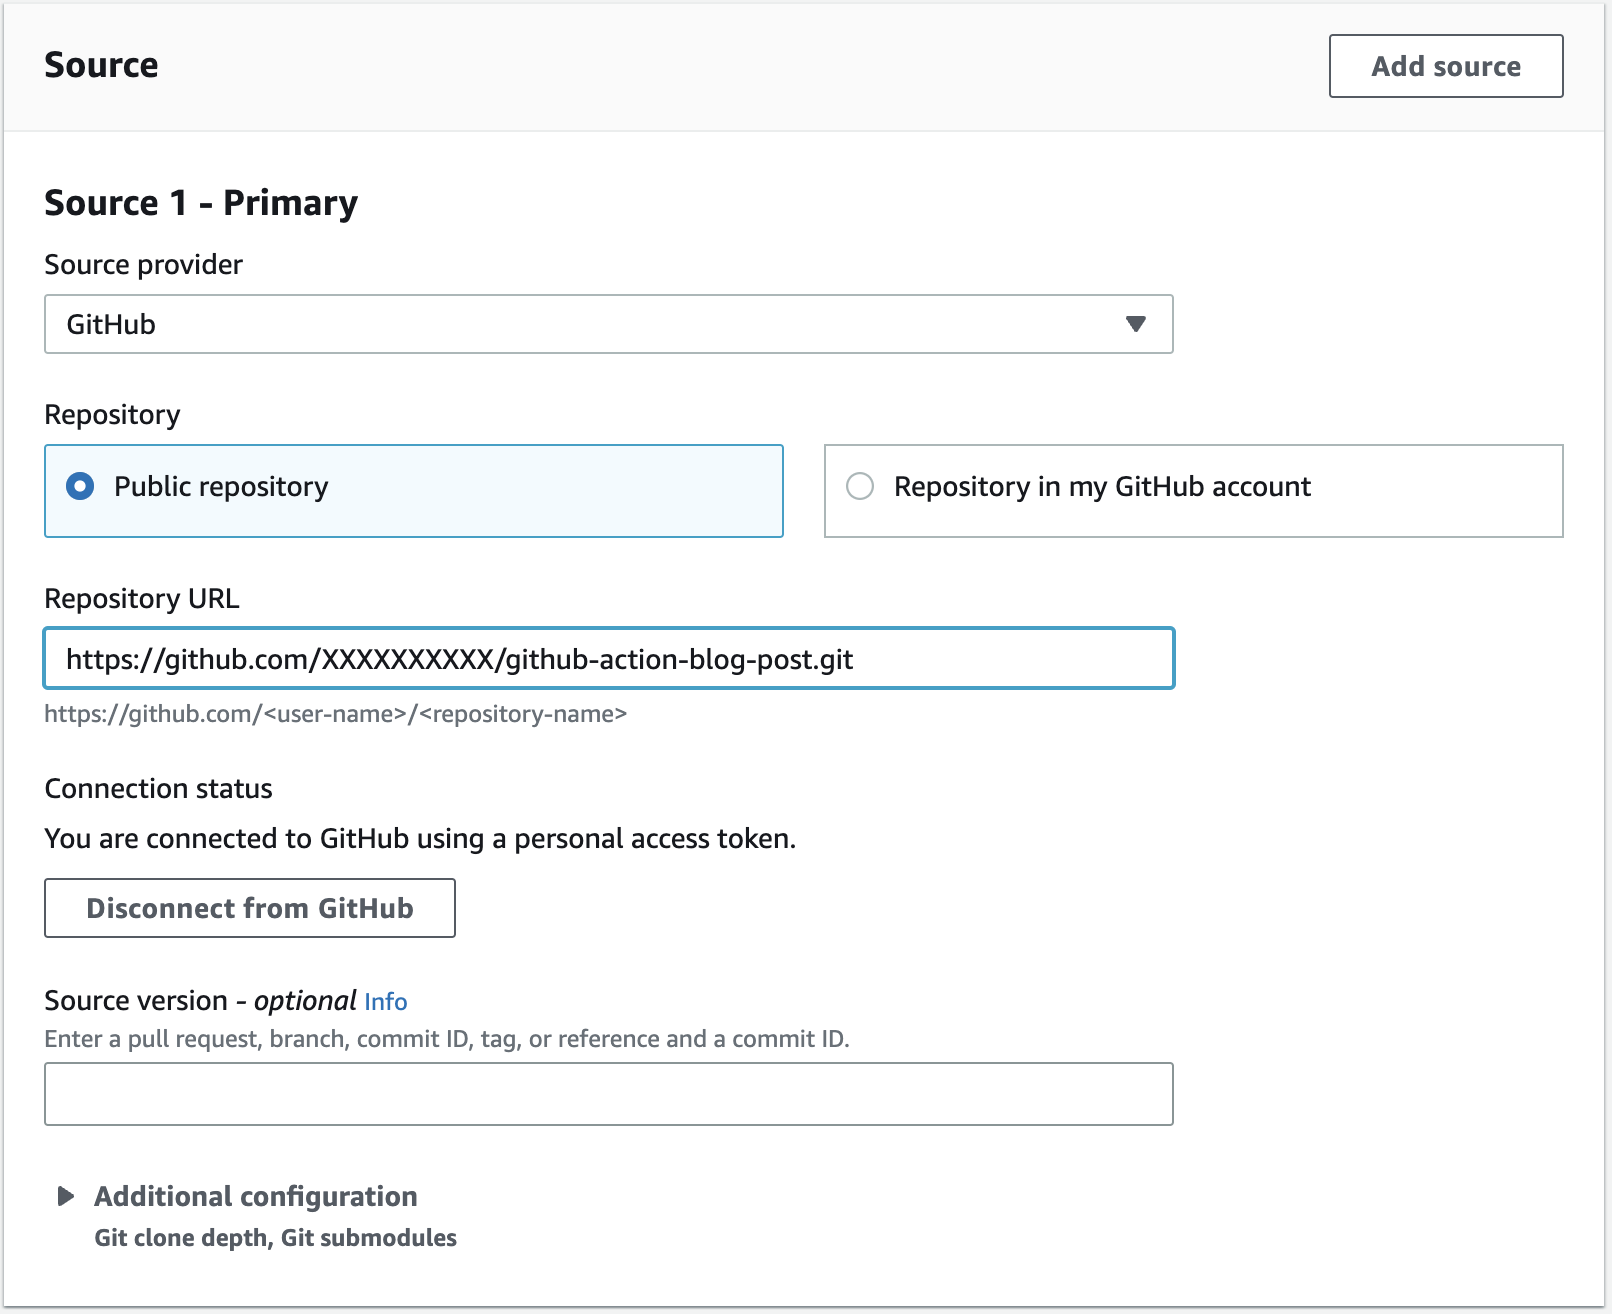
Once I have successfully connected to GitHub, I can paste the URL to my repository as shown in the following image.
I configure my build environment to use the standard build environment on Amazon Linux 2. GitHub actions are built using either JavaScript or a Docker container. If the action uses a Docker container, you must enable the Privileged flag. The Liquibase image is using a Docker container, therefore, I check the box to enabled privileged mode.

For the VPC configuration, I select the VPC and private subnet where my Aurora instance is hosted and then click Validate VPC Settings to ensure my configuration is correct.

My Buildspec file is included I the source. Therefore, I select Use a buildspec file and enter the path to the buildspec file in the repository.

My buildspec.yaml file includes the following content. Notice that the pre_build phase incudes a series of commands. Commands have always been supported in CodeBuild and include a series of command line commands to run. In this case, I am simply logging a few environment variables for later debugging.
version: 0.2
phases:
  pre_build:
    commands:
      - echo $AWS_DEFAULT_REGION
      - echo $URL
  build:
    steps:
      - uses: liquibase-github-actions/update@v4.21.1
        with:
          changelogFile: changelog-root.xml
          url: ${{ env.URL }}
          username: postgres
          password: ${{ $env.PASSWORD }}
          headless: true
Also notice that the build phase incudes a series of steps. Steps are new, and are used to run GitHub Actions. Each build phase supports either a list of commands, or a list of steps, but not both. In this example, I am specifying the Liquibase Update Action (liquibase-github-actions/update) with a few configuration parameters. You can see a full list of parameters in the Liquibase Update Action repository on GitHub.
I want to call your attention to the environment variables used in my buildspec.yml. Note that I pass the URL and PASSWORD for my database as environment variables. This allows me easily change these values from one environment to another. I have configured these environment variables in the CodeBuild project definition as shown in the following image. The URL is configured as Plaintext and the PASSWORD is configured as Secrets Manager. Running the GitHub Action in CodeBuild has the added advantage that I easily access secrets stored in AWS Secrets Manager and configuration data stored in AWS Systems Manager Parameter Store.

It is also important to note that the syntax used to access environment variables in the buildspec.yaml is different when using a GitHub Action. GitHub Actions access environment variables using the environment context. Therefore, in the pre_build phase, I am using CodeBuild syntax, in the format $NAME. However, the in the build phase, I am using GitHub syntax, in the format ${{ env:NAME}}.
With the configuration complete, I select Create build project and then manually start a build to test the configuration. In the following example you can see the logs from the Liquibase update. Notice that two changesets have been successfully applied to the database.
####################################################
##   _     _             _ _                      ##
##  | |   (_)           (_) |                     ##
##  | |    _  __ _ _   _ _| |__   __ _ ___  ___   ##
##  | |   | |/ _` | | | | | '_ \ / _` / __|/ _ \  ##
##  | |___| | (_| | |_| | | |_) | (_| \__ \  __/  ##
##  \_____/_|\__, |\__,_|_|_.__/ \__,_|___/\___|  ##
##              | |                               ##
##              |_|                               ##
##                                                ##
##  Get documentation at docs.liquibase.com       ##
##  Get certified courses at learn.liquibase.com  ##
##  Free schema change activity reports at        ##
##      https://hub.liquibase.com                 ##
##                                                ##
####################################################
Starting Liquibase at 18:33:23 (version 4.21.1 #9070)
Liquibase Version: 4.21.1
Liquibase Open Source 4.21.1 by Liquibase
Running Changeset: changelogs/changelog-1.0.0.xml::1::BobR
Running Changeset: changelogs/changelog-1.0.1.xml::2::BobR

UPDATE SUMMARY
Run: 2
Previously run: 0
Filtered out: 0
-------------------------------
Total change sets: 2

Liquibase: Update has been successful.
Liquibase command 'update' was executed successfully.

Phase complete: BUILD State: SUCCEEDED
Phase context status code: Message:
Entering phase POST_BUILD
If I connect to the Aurora database and describe the tables you can see that Liquibase has created the actor table (as defined in the Liquibase Quick Start) along with the Liquibase audit tables databasechangelog and databasechangeloglock. Everything is working just as I expected, and I did not have to install and configure Liquibase!
mydatabase=> \dt
List of relations
Schema  |         Name          | Type  |  Owner
--------+-----------------------+-------+----------
public  | actor                 | table | postgres
public  | databasechangelog     | table | postgres
public  | databasechangeloglock | table | postgres
(3 rows)
In this example, I showed you how to update an Aurora database in a private subnet using a the Liquibase GitHub Action running in CodeBuild. GitHub Actions provide a rich catalog of preconfigured actions simplifying the configuration. CodeBuild provides a managed service that simplifies the configuration and maintenance of my build environment. Used together I can get the best features of both CodeBuild and GitHub Actions.
Cleanup
In this walkthrough I showed you how to create a CodeBuild project. If you no longer need the project, you can simply delete it in the console. If you created other resources, for example an Aurora database, that were not explained in this post, you should delete those as well.
Conclusion
The GitHub Marketplace includes a catalog of nearly 20,000 actions developed by third-parties and the open-source community. AWS CodeBuild is a fully managed continuous integration service that integrates tightly with other AWS services. In this post I used the GitHub Action for Liquibase to deploy an update to a database in a private subnet. I am excited to see what you will do with support for GitHub Actions in CodeBuild. You can read more about this exciting new feature in GitHub Action runner in AWS CodeBuild.