.NET on AWS Blog
Easily Migrate .NET Web Apps to AWS with Elastic Beanstalk, Part 2
Introduction
AWS Elastic Beanstalk simplifies migration to AWS. In Part 1, I covered Elastic Beanstalk’s value in migrating .NET web applications to AWS and different ways to deploy. Here in Part 2, I’ll give you a step-by-step walkthrough of deploying a .NET Framework application to Elastic Beanstalk from Visual Studio.
Walkthrough: Deploy a .NET Framework web site from Visual Studio
In this walkthrough, you’ll create a sample .NET Framework web application. You’ll deploy the app to AWS Elastic Beanstalk from Visual Studio, initially to a single-instance development environment. Then, you’ll deploy to a load-balanced production environment.
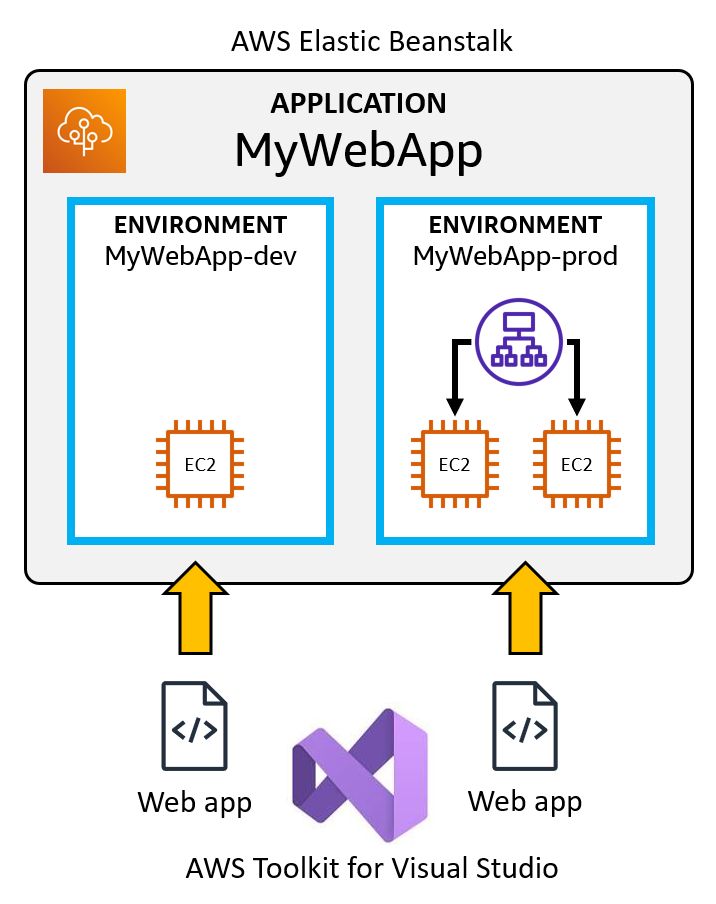
Figure 1: Deployment diagram
Prerequisites
To complete this walkthrough, you’ll need the following set up on your development machine. You can find a step-by-step guide at Get started with .NET development on AWS. If you already have these tools installed, upgrade to the latest version.
- Microsoft Visual Studio 2022 (any edition) with .NET Framework 4.8.1 components installed.
- An AWS account with a default profile configured
- The AWS Toolkit for Visual Studio, configured for your AWS account
Step 1: Create an ASP.NET web project
In this step, you’ll create a sample web application.
- Launch Visual Studio.
- Create a new project:
- Select Create a new project.
- Search for and select project template ASP.NET Web Application (.NET Framework). Choose Next.
- Name the project MyWebApp and choose a folder location.
- Select Framework version .NET Framework 4.8.1 (Figure 2).
- Choose Create.
- On the Create a new ASPNET Web Application dialog, select MVC.
- Choose Create.
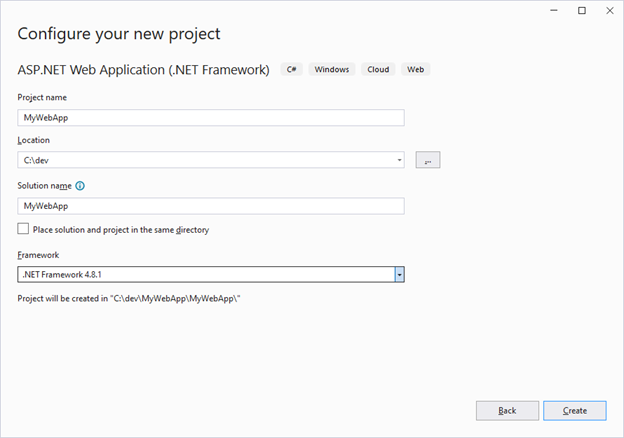
Figure 2: Creating web application in Visual Studio
- Test the project by pressing F5 or selecting Debug > Start Debugging from the menu. A simple website should launch in a browser as shown in Figure 3.
- Stop the project from running.
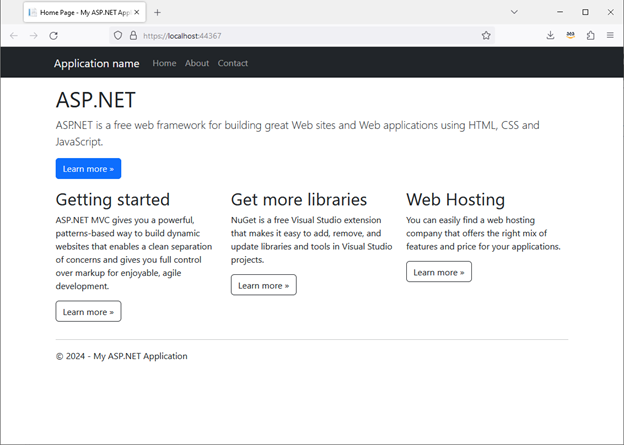
Figure 3: Local test of .NET Framework web application
Step 2: Deploy website to Elastic Beanstalk
In this step, you’ll deploy the website to AWS Elastic Beanstalk using the AWS Toolkit for Visual Studio.
- In Visual Studio, open the AWS Explorer window. Select a nearby AWS region you wish to deploy to.
- From the Solution Explorer, right-click the project name and choose Publish to AWS Elastic Beanstalk.
- Complete the publish wizard as follows:
- Select Create a new application environment and choose Next.
- Application name: MyWebApp
- Environment name: MyWebApp-dev or similar.
Choose Check availability to ensure the URL is available. If it isn’t, change the environment name and try again.

Figure 4: Configuring application and environment name
-
- Choose Next.
- For Container type, select 64-bit Windows Server 2022 v2.14.0 running IIS 10.0, which includes the .NET Framework version 4.8.1 we are targeting (you can check runtime versions at .NET on Windows Server).
- Review the remaining Amazon EC2 Launch Configuration information for instance type, and key pair. We’ll stick with these defaults, including Single instance environment since this is merely a development environment.
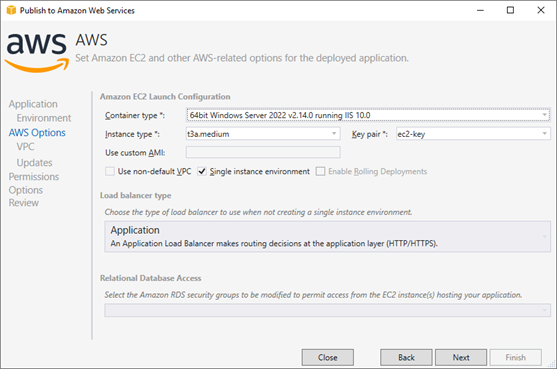
Figure 5: Selecting Windows Server version
-
- Choose Next.
- Review the default permissions and choose Next.
- Review application options and choose Finish.
- Choose Deploy.
- Wait while deployment happens, which will take a few minutes. A tab will open allowing you to watch the deployment progress and subsequent environment set up by Elastic Beanstalk.
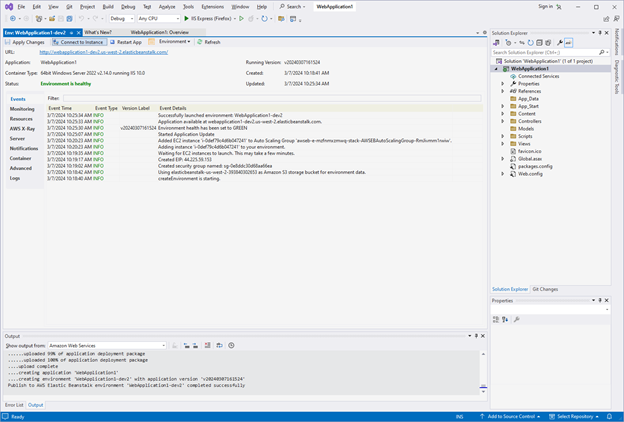
Figure 6: Deployment to Elastic Beanstalk
- When the Status displayed on the tab reads Environment is healthy, deployment and provisioning are complete.
- Go to the AWS Explorer window in Visual Studio and expand AWS Elastic Beanstalk. The MyWebApp application and MyWebApp-dev environment are now visible.
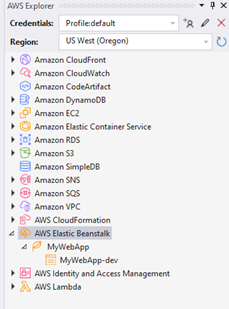
Figure 7: Elastic Beanstalk resources in AWS Explorer view
- On the deployment status tab, note the URL listed at the top left. Visit it to view the deployed website.
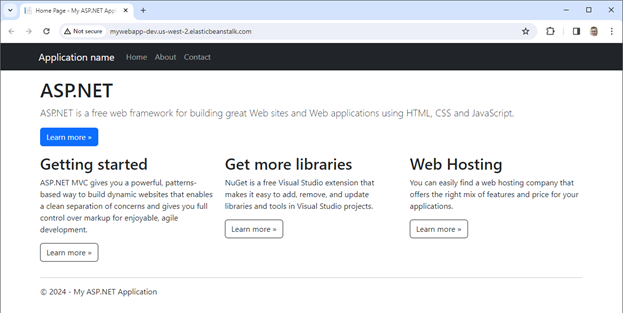
Figure 8: Website running on AWS
If the page comes up, you’ve successfully migrated a simple ASP.NET MVC application to AWS Elastic Beanstalk, without leaving Visual Studio. Congratulations!
Step 3: Deploy updated website to Elastic Beanstalk
In this step, you’ll change the website and deploy an update to the same environment created in Step 2.
- In Visual Studio, go to Solution Explorer and expand the Views/Home folder.
- Open Index.cshtml in the code editor.
- On line 7, add the text (version 2) to the <h1> element:
<h1 id=”title”>ASP.NET (version 2)</h1> - In Solution Explorer, right-click the project and select Publish to AWS Elastic Beanstalk.
- On the first wizard page, select Redeploy to an existing environment and select the MyWebApp-dev environment you published to in Step 2.
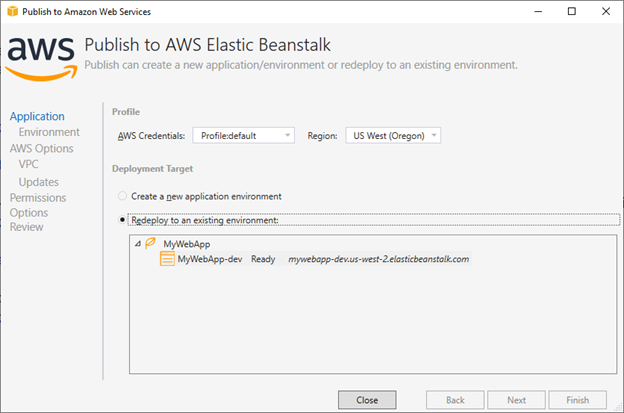
Figure 9: Redeploying from Visual Studio
- Complete the wizard, making no other changes, to start the deployment.
- Wait for deployment to complete with a status Environment is healthy, as you did in Step 2.
- Now browse or refresh the deployed web site. You should see your page change.
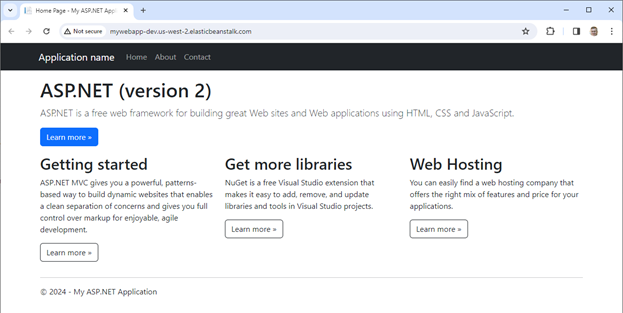
Figure 10: Website version 2 on AWS
Step 4: Create Production Environment
In this step, you’ll deploy to a production environment with a load balancer.
- In Visual Studio Solution Explorer, right-click the project and select Publish to AWS Elastic Beanstalk.
- Select Create a new application environment and choose Next.
- Set application name to MyWebApp and environment name to MyWebApp-prod.
- Choose Check availability. If the environment name is not available, modify it.
- Choose Next.
- For Container type, select 64-bit Windows Server 2022 v2.14.0 running IIS 10.0,
- Clear the Single instance environment check box. Note that it is now possible to choose a load balance type. We’ll stay with the default of Application Load Balancer.
- Optional: you can choose a more powerful Instance type for the production environment, but be aware of the added cost. I’m using t3a.large.
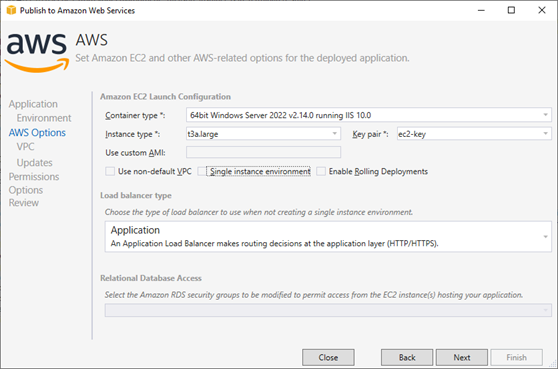
Figure 11: Deploying to a load-balanced production environment
- Complete the wizard.
- Wait for deployment to complete with status Environment is healthy.
- Notice that the AWS Explorer window’s Elastic Beanstalk section now lists two environments for application MyWebApp: MyWebApp-dev and MyWebApp-prod.
- Visit the production URL listed at the top of the deployment tab and confirm that it serves up the website.
Step 5: View Environments and EC2 Resources in the AWS Console
Up until now you’ve been working in Visual Studio. Now, view what’s been deployed in the AWS console.
- In a browser, go to the AWS console and sign in.
- At top right, select the same region you deployed to from Visual Studio.
- Navigate to Elastic Beanstalk and examine what you’ve deployed. On the Applications pane, the MyWebApp application is listed. On the Environments pane, you will find the MyWebApp-dev and MyWebApp-prod environments.
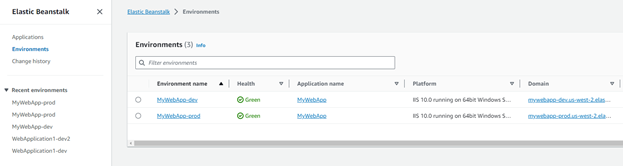
Figure 12: Viewing environments in the AWS console
- Now we’ll take a look at the underlying EC2 resources. Choose the MyWebApp-prod environment to see its detail page. Here you see details and IDs for the EC2 resources including Amazon Virtual Private Cloud (Amazon VPC), instance subnet, security groups, instance type, Amazon Machine Image (AMI), load balancer, and auto scaling configuration. You can also view these resources directly on the Amazon EC2 console. You didn’t have to provision and configure those resources yourself, but they’re available for inspection or modification.
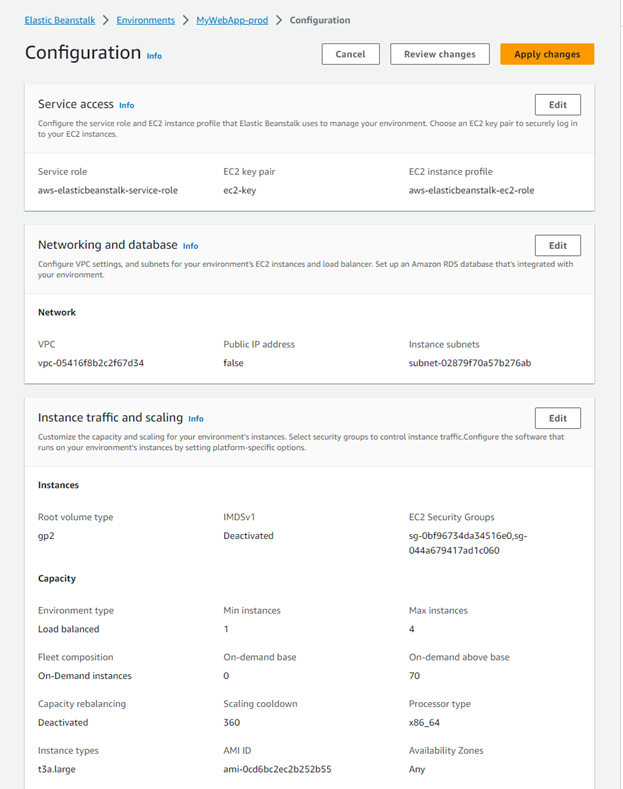
Figure 13: Viewing EC2 configuration in the AWS console
Step 6: Shut it down
When you’re done, terminate your Elastic Beanstalk application so that you don’t accrue unwanted charges. This will terminate all of its environments and delete their EC2 resources.
- In the AWS console, navigate to Elastic Beanstalk.
- In the Applications view, select the radio button for the MyWebApp application.
- Select Delete application from the Actions dropdown.
- Confirm the deletion.
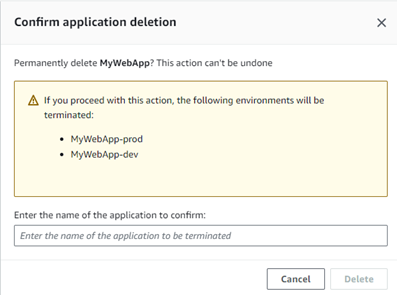
Figure 14: Application deletion in the AWS console
Conclusion
In this post, I gave a walkthrough of deploying an ASP.NET MVC web application to AWS Elastic Beanstalk using the AWS Toolkit for Visual Studio. I invite you to get familiar with AWS Elastic Beanstalk and evaluate it for your migration to AWS. To get started, install the AWS Toolkit for Visual Studio and refer to the AWS Elastic Beanstalk Documentation. If you’d like to deploy from a CI/CD pipeline, check out the workshop Set Up a Continuous Deployment Pipeline Using AWS CodePipeline for an example.