.NET on AWS Blog
Easily Migrate .NET Web Apps to AWS with Elastic Beanstalk, Part 1
Introduction
AWS provides a variety of compute services for hosting applications, starting with Amazon Elastic Compute Cloud (Amazon EC2), the foundation of AWS compute. On top of Amazon EC2 is a spectrum of managed services with different levels of abstraction, including container-based and serverless compute services.
Customers moving to AWS often choose to migrate their workloads to virtual machines on Amazon EC2 with minimal changes, known as lift-and-shift or rehosting. You might choose this path if you want to avoid application changes, or if you are familiar with virtual machines but not as comfortable with containers or serverless. However, working with Amazon EC2 is a self-managed experience that requires configuring and managing compute instances, load balancers, auto scaling groups, and other assets.
There is an alternative to the self-managed experience of Amazon EC2: AWS Elastic Beanstalk. Elastic Beanstalk is a managed service that deploys and scales web applications on Amazon EC2 without requiring a deep knowledge of AWS infrastructure. In this Part 1 post, I’ll summarize the additional functionality Elastic Beanstalk provides and explain the different ways you can migrate .NET web workloads to Elastic Beanstalk. In Part 2, I’ll share a step-by-step walkthrough of deploying a .NET Framework web project to Elastic Beanstalk from Visual Studio.
Amazon EC2 and AWS Elastic Beanstalk Comparison
Elastic Beanstalk adds benefits and functionality to the stand-alone EC2 experience without any downside, as shown in the following table. When you use Elastic Beanstalk, all of the created EC2 instances and other resources are fully visible and accessible in the EC2 console, so you retain full control. At a higher level, you can view and access your application and environments in the Elastic Beanstalk console, where you can choose from a rich collection of deployment types including all-at-once, rolling, immutable, traffic splitting, and blue-green. Elastic Beanstalk keeps your EC2 instances patched with operating system, security, and minor runtime updates. Both Windows and Linux instances are supported, so you can run both .NET Framework and cross-platform .NET. All of this added functionality comes at no extra cost: you only pay for your EC2 resources and any other AWS services you consume.
| Amazon EC2 | AWS Elastic Beanstalk | |
| Experience | Self-managed | Managed |
| Unit of compute | Virtual Machines | Virtual Machines |
| Operating systems | Windows or Linux | Windows or Linux |
| Application and environments | Visible and accessible in AWS Elastic Beanstalk console. | |
| Compute and network resources | Visible and accessible in Amazon EC2 console. | Visible and accessible in Amazon EC2 console. |
| Costs | Amazon EC2 usage and other AWS services consumed. | Amazon EC2 usage and other AWS services consumed.
No additional cost for Elastic Beanstalk. |
| Health Monitoring | EC2 instance level | Environment level |
| Patching | Your responsibility | OS, security, and minor runtime patches applied automatically. |
| Deployment | Your responsibility | Choose from all-at-once, rolling, immutable, traffic splitting, or blue-green deployment policies. |
| Responsibilities | AWS shared responsibility model | AWS shared responsibility model
Shared responsibility model for Elastic Beanstalk platform maintenance |
Elastic Beanstalk also gives you a non-disruptive way to modernize .NET applications. You can start by migrating your older .NET Framework applications to Windows on AWS and later port them to run on Linux, without having to change your compute service. When you are ready to move from virtual machines to containers or serverless compute, it’s straightforward to transition to other AWS Compute services.
Migrate to AWS Elastic Beanstalk
You can deploy to Elastic Beanstalk from the AWS console, from Visual Studio, from the command line, or from PowerShell. I’ll give you a high-level tour of each experience.
You’ll need to understand source bundles in order to work with Elastic Beanstalk. A source bundle is a .zip or .war file containing your application. As the following table shows, some deployment methods create a source bundle for you automatically, and others require you to create it. If you need to create an application source bundle yourself, refer to the detailed instructions at Create an application source bundle.
| Deploy from | Source Bundle |
| AWS console | you create |
| AWS Toolkit for VS – Publish to Elastic Beanstalk | automatically created |
| AWS Toolkit for VS – Publish to AWS | automatically created |
| AWS Deploy Tool for .NET CLI | automatically created |
| Elastic Beanstalk CLI | you create |
| AWS Tools for PowerShell | create with command |
| Windows Web Application Migration Assistant (WWAMA) | automatically created |
Deploying from the AWS Console
In the Elastic Beanstalk AWS console, you work with applications and environments. You create an application as described in Managing and configuring Elastic Beanstalk applications. An application can contain multiple environments, such as staging and production. You create an environment as described in Creating an Elastic Beanstalk environment.
As you configure an environment, give it a meaningful name such as dev or test. On the Platform panel, select .NET on Windows Server for .NET Framework applications, or .NET Core on Linux for modern cross-platform .NET.
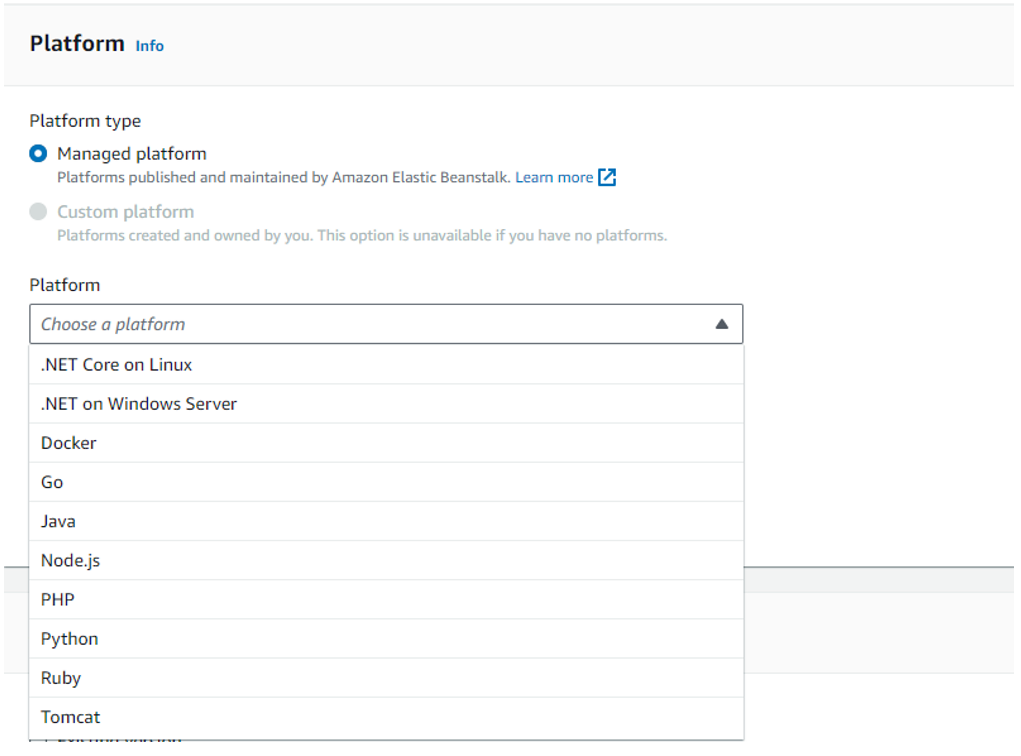
Figure 1: Creating an environment in the AWS console
On the Application code panel, upload your source bundle (application). You can choose to upload a file from your development machine or from Amazon Simple Storage Service (Amazon S3).
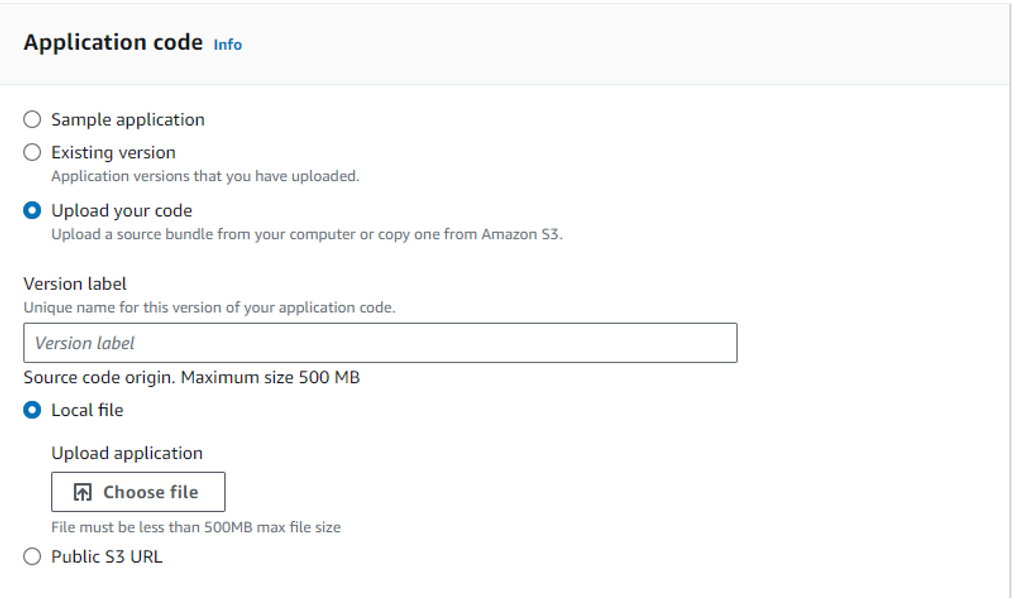
Figure 2: uploading application code in the AWS console
Deploy from Visual Studio
The AWS Toolkit for Visual Studio allows you to deploy both traditional .NET Framework and modern .NET applications to Elastic Beanstalk from Visual Studio.
For .NET Framework applications, right-click your project in Solution Explorer and select Publish to AWS Elastic Beanstalk. The wizard will guide you through selecting a Windows Server edition, EC2 instance type, and whether to deploy a single-instance or load-balanced environment.
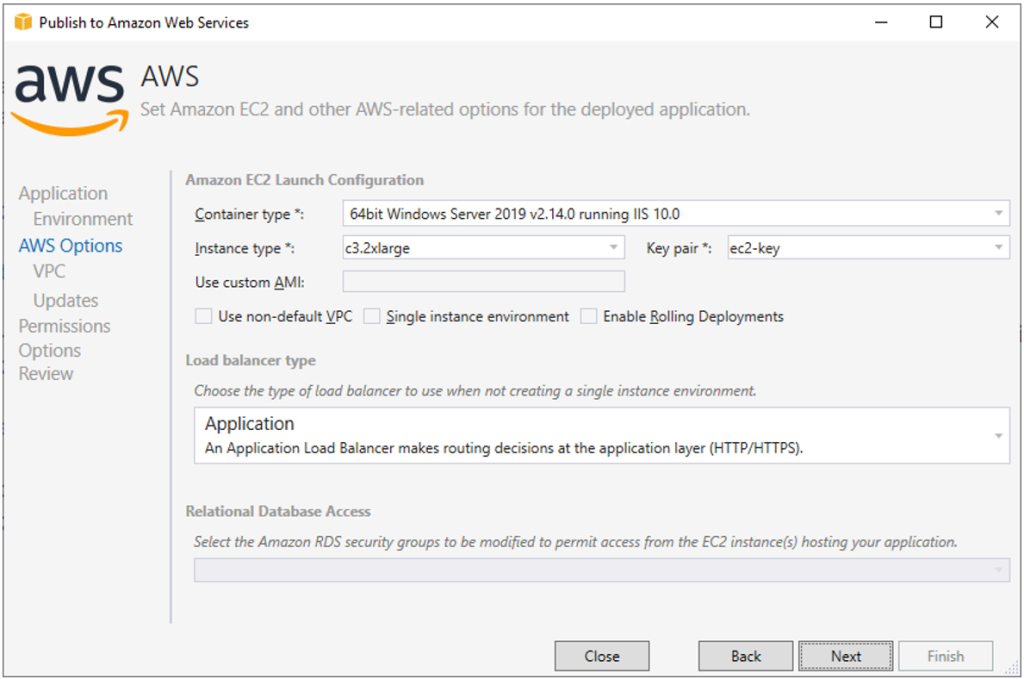
Figure 3: Deploying an ASP.NET (.NET Framework) web application from Visual Studio
For .NET Core applications, right-click your project in Solution Explorer and select Publish to AWS. The wizard will present suitable AWS targets based on your project type, including Elastic Beanstalk on Linux and Elastic Beanstalk on Windows.
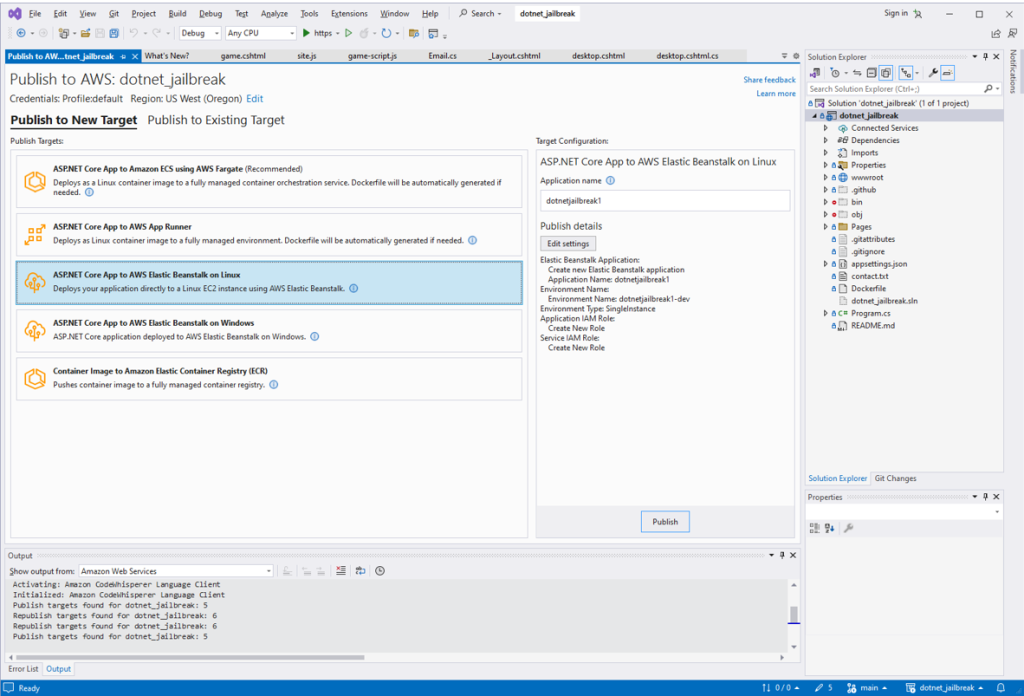
Figure 4: Deploying an ASP.NET Core web application from Visual Studio
From the Command Line
You can also easily deploy .NET applications by using one of the command line tools AWS provides: the AWS Deploy Tool for .NET CLI, the Elastic Beanstalk CLI, or the AWS CLI.
AWS Deploy Tool for .NET CLI
The AWS Deploy Tool for .NET CLI extends the familiar dotnet command with actions for deploying to AWS. It provides the same Publish to AWS functionality described in the previous section. You can deploy to AWS with a simple dotnet aws deploy command for a guided experience in choosing an AWS target for your workload, including Elastic Beanstalk for Windows or Linux.
dotnet aws deploy
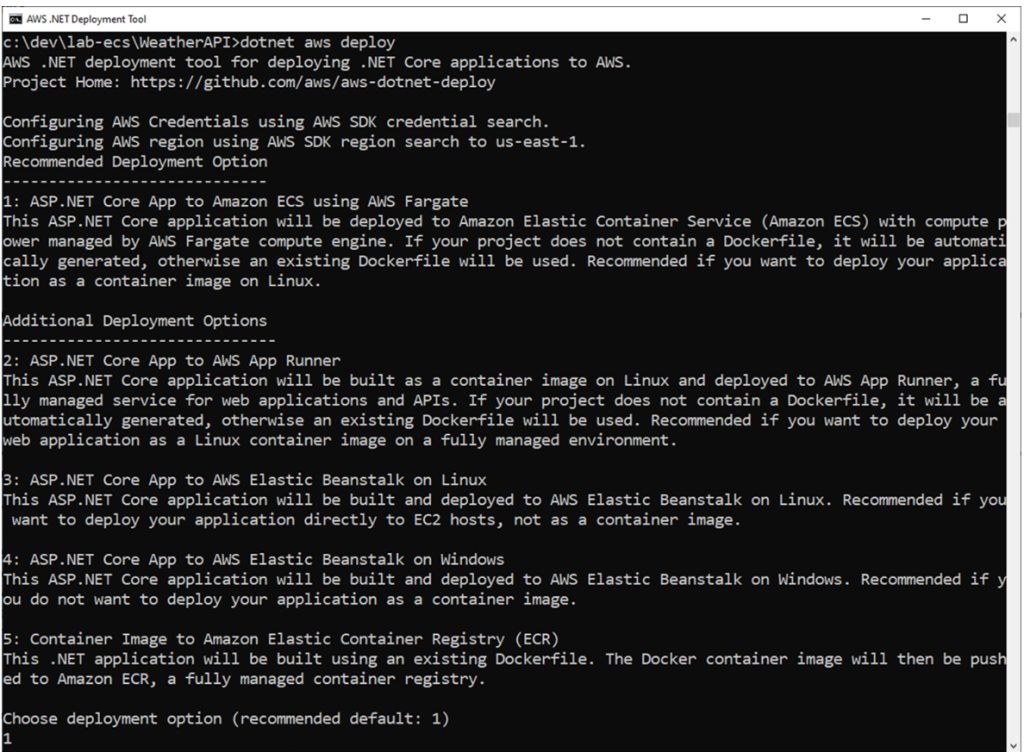
Figure 5: Deploying with the dotnet aws deploy command
EB CLI
The Elastic Beanstalk command line interface (EB CLI) is a command line interface for AWS Elastic Beanstalk that provides interactive commands that simplify creating, updating and monitoring environments from a local repository. You can use the EB CLI as part of your everyday development and testing cycle as an alternative to the Elastic Beanstalk AWS console.
When you run eb deploy, the EB CLI bundles up the contents of your project directory and deploys it to your environment.
AWS CLI
You can also work with Elastic Beanstalk from the AWS CLI, which gives you direct access to the Elastic Beanstalk API. The AWS CLI is useful for scripting, but you’ll likely find it simpler to use the EB CLI where fewer commands are needed.
From PowerShell
You can manage applications, environments, and deploy code from PowerShell. AWS Tools for PowerShell has an AWS.Tools.ElasticBeanstalk module with cmdlets for managing AWS Elastic Beanstalk. You can use the New-EBApplicationVersion command to create a source bundle, and the Update-EBEnvironment command to deploy it to an environment.
# create new app version
$verLabel = [System.DateTime]::Now.Ticks.ToString()
$newVerParams = @{
      ApplicationName       = 'MyWebApp'
      VersionLabel          = $verLabel
      SourceBundle_S3Bucket = 'mywebapp'
      SourceBundle_S3Key    = 'package.zip'
}
New-EBApplicationVersion @newVerParams

...

# deploy new version to the environment
Update-EBEnvironment -ApplicationName 'MyWebApp' -EnvironmentName 'Testing' `
-VersionLabel $verLabel -Force
Migrating IIS Web Sites with WWAMA
If you have an IIS website to migrate, you’ll want to fully capture its configuration. The Windows Web Application Migration Assistant (WWAMA) tool can migrate ASP.NET or ASP.NET Core applications from on-premises IIS Windows servers to Elastic Beanstalk. WWAMA is an interactive PowerShell utility. It can migrate an entire website and its configuration to Elastic Beanstalk with little or no changes to your application. To learn WWAMA, refer to the video Migrate a .NET web app to Elastic Beanstalk using the Windows Web Application Migration Assistant and the tutorial Migrate an ASP.NET Web Application to Elastic Beanstalk with the Windows Web Application Migration Assistant.
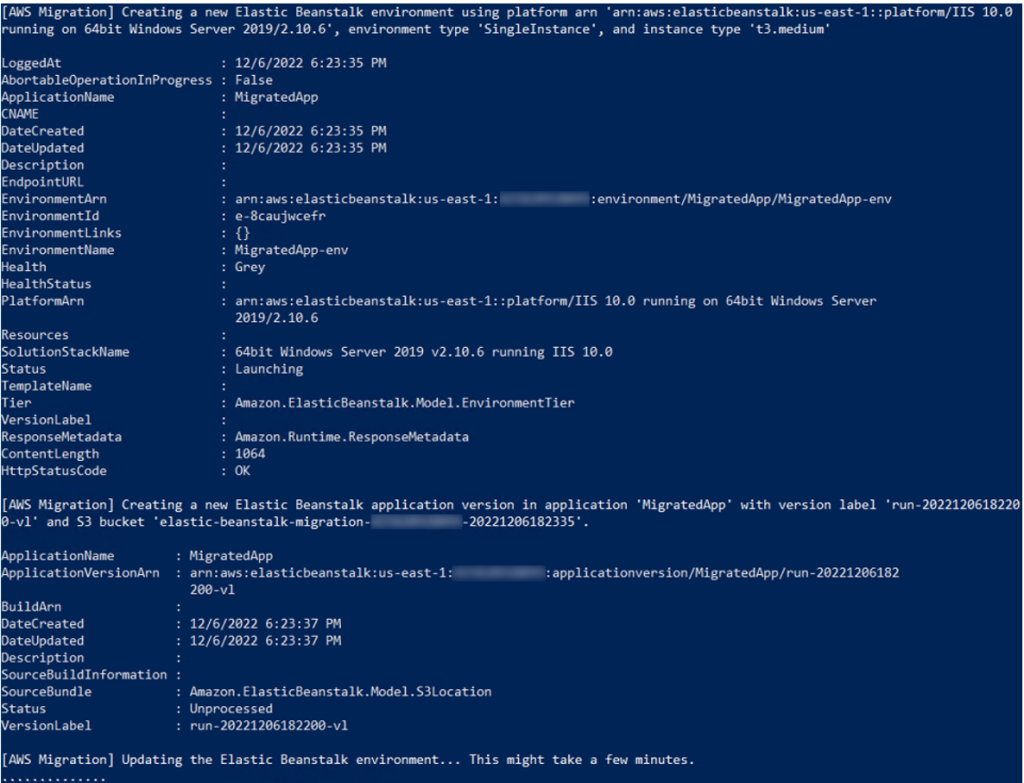
Figure 6: Migrating an ASP.NET web site to Elastic Beanstalk with the WWAMA tool
Conclusion
In this post, I explained how AWS Elastic Beanstalk simplifies migration of .NET web applications to AWS at no additional cost. I reviewed different ways to deploy to Elastic Beanstalk. The upcoming Part 2 post is a walkthrough for migrating a .NET Framework web application to Elastic Beanstalk from Visual Studio. I invite you to get familiar with AWS Elastic Beanstalk and evaluate it for your migration to AWS. For more information, refer to AWS Elastic Beanstalk Documentation.