AWS for Games Blog
How to optimize Amazon GameLift fleets using CloudWatch
Introduction
With the ever-growing popularity of multiplayer games, dedicated game servers are becoming increasingly important to give players a way to seamlessly play online. But correctly managing game servers to the unique needs of your game can be tricky, especially when you have infrastructure costs to consider, and a global player base that demands a millisecond low-latency experience as standard.
Every game has its own set of requirements, and it’s important to find the perfect balance between player wait time and infrastructure cost. By minimizing player wait times, server costs could burn a hole in your wallet; prioritize low costs, and players could be left drumming their fingers waiting to join a game server.
Amazon GameLift enables game developers to enhance multiplayer experiences by making it easy to deploy, operate, and scale cloud game servers. In this blog post, I’ll show you how you can use Amazon GameLift to find the optimal balance between player wait time and cost savings, without worrying about ongoing infrastructure management. I’ll outline an approach for tuning Amazon GameLift’s auto-scaling to grow and shrink fleets using a combination of target-tracking scaling rules and Amazon GameLift’s CloudWatch metrics.
Prerequisites
Before optimizing your game server deployment, there’s a number of things you’ll need to have done beforehand.
At a minimum, you’ll need to have integrated your game client and game server with Amazon GameLift, but you’ll also need some experience of deploying fleets of servers, even if you’ve only ever used single server fleets.
In addition, it’s good practice to use queues to place game sessions on servers, not only to improve availability, but also to record games placement metrics. This post will take advantage of some of those metrics, so you’ll also need to have setup a queue for your game.
Optimization during the game development cycle
Before we jump into server optimization, it’s worth considering where you are in the development cycle. In early production, you’re likely testing on a small scale, then running load tests as you move closer to launch. In an ideal world, scaling would be optimized during load testing. Once you know how your game performs under simulated or beta loads, tests can be run at launch volumes, optimizing fleets, and launching with everything pre-configured.
Every game developer knows, a game launch may not always go to plan. It’s very common to launch a game with just enough load testing to know how it could perform, but who’s to say simulated or beta players will behave just like live players at launch? AWS therefore recommends you launch fleets under manual control and configured to handle more than the forecasted player count. Once the launch has gone smoothly you can switch to auto-scaling, optimizing scaling as your game’s needs alter post-launch.
Scaling Amazon GameLift fleets
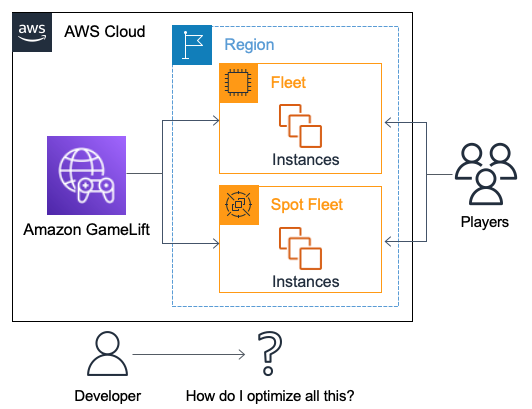
Amazon GameLift provides core capabilities to help you reach a global player base. Firstly, it provides fleets – scalable groups of servers running multiple game server instances in specific geographic regions. Running fleets in multiple regions provides players in different locations with access to low-latency servers. Secondly, Amazon GameLift provides queues, which are a session placement mechanism that helps match players with game servers.
Ensuring players don’t have long wait times for multiplayer matches is essential. To reduce wait time, fleets need available capacity to start new game sessions. However, over provisioning spare capacity increases costs, so it’s vital to optimize fleet capacity alongside player demand to keep things under control.
Amazon GameLift provides two different approaches for scaling Amazon GameLift hosting capacity. Firstly, manual scaling allows a fleet’s instance count to be controlled by setting the desired instance count. While manual scaling can be ideal for test scenarios, it doesn’t dynamically scale to meet an ever-changing number of concurrent users. The second approach uses auto-scaling, which automatically scales the size of a fleet based on desired attributes. Auto-scaling can be configured using target-tracking, which scales based on the availability of free game server sessions; and rule-based, which scales based on user-configurable rules. AWS recommends target-tracking as it’s simple to understand, use, and configure correctly. Since target-tracking works in the majority of cases, it’s the approach I use in this article.
Target-tracking scales a fleet up and down to maintain a consistent percentage of available game sessions. The available sessions act as a buffer, ensuring new players can quickly join new matches. The most important consideration is choosing the right value for the % available game sessions metric. Choosing a value that’s too high means a fleet runs with additional unused capacity, increasing running costs. Choosing a value that’s too low means players joining new matches will have to wait for additional servers to spin-up.
Setting the right value for your game depends on a number of factors including the number of concurrent players, the number of players waiting to join matches, the length of your game sessions, and the time it takes for instances to come online. It’s advisable to launch a game with a slightly higher target value than will be used in the long term, although the actual value can vary significantly depending on the actual fleet size. Lower values–say 5-25%–will potentially work for large fleets of 100s servers, and higher values–say 25%-50%–often needed for small fleets containing 10s servers. The increased buffer size improves experience for players, allowing game telemetry to be built up before fleets are optimized for cost. Once enough telemetry data has built up, the buffer can be decreased by finding an optimal target value that reduces fleet costs without adversely affecting player wait time.
If you’re mathematically inclined, you might describe this as a classic optimization problem. Minimizing the ‘percent available game sessions’ metric so mean average player wait time is less than the acceptable player wait time. Like all good optimization problems, the easiest way to find an optimal value involves creating a baseline metric, then iteratively adjusting until an optimal value is reached.
One final caveat before I jump into the optimization process. Since it’s common to use multiple Amazon GameLift fleets, it’s possible to use different auto-scaling configurations for each. However, the interplay between queues, fleets, and player location can be highly complex, so I recommend to start by configuring all fleets with the same values, and only let your fleet configuration diversify if the need is clear.
Creating a baseline walkthrough
The first step to optimize your game servers is to create a scaling baseline.
To begin with, you need to choose a starting value for target-tracking’s available sessions metric. As mentioned earlier, target-tracking scales based on the percentage of free and available game sessions, and there’s a few ways you can settle on a starting value. If you’re optimizing post-production then you’ll have already launched with a value, so use that as your starting point. Otherwise, you can calculate the value from the number of additional sessions per minute needed when the fleet is at its minimum size.
E.g., if it takes 3 minutes to boot an instance and you need 5 sessions per minute during a scale-up event to avoid running out, then you need 15 free sessions available in the time it takes to boot an instance. If your anticipated minimum fleet size is for 100 sessions, you’d need 15% available sessions in reserve, which becomes your target-tracking value.
Finally, if you’re not sure what your minimum fleet size is likely to be, and are creating a baseline during production testing, a good rule of thumb is to start with a value of 50% if you’re anticipating a smaller fleet up-to 10 servers, or 25% for larger fleets.
Once you’ve chosen a starting value, you can configure your fleets as follows:
- Open the AWS Management Console, and searching for and selecting Amazon GameLift to open the Amazon GameLift Dashboard.
- In the Amazon GameLift Dashboard, select the fleet you want to optimize.
- As you’ll need to know your Fleet ID when configuring metrics later, make a note of it from the top of the page.
- Under the Scaling Limits section, ensure the Max value is set higher than the Min value.
- Under Auto-scaling policies enable the Maintain a buffer setting, and enter your starting value in the text box, clicking the tick to save the value.
Now you’ve set a starting value, you’ll need to track the fleet’s behavior for a period of time to collect some baseline metrics. You can create the baseline as follows:
- In the AWS Management Console, search for and select CloudWatch.
- Under Dashboards click the Create dashboard button, enter a suitable name for your dashboard, for example, MyGame-Scaling-dashboard, and click Create dashboard.
- Select the Line widget type and click Next.
- Select Metrics and click Configure.
- In the Search box, enter Amazon GameLift, and then select Fleet Metrics.
- Find the PercentAvailableGameSessions metric for your fleet, using the Fleet ID your noted earlier.
- Navigate back to all Amazon GameLift metrics, using All > Amazon GameLift and select Queue Metrics.
- Select the AverageWaitTime for your queue.
- Open the Graphed metrics tab, and for the PercentAvailableGameSessions metric, choose Minimum under the Statistic field.
- Click Create widget to add the metrics to your dashboard.
- Click Save dashboard to create the dashboard.
The tracking period for you baseline will be highly dependent on where you are in your game: during production scalability testing it might make sense to track for minutes or hours, but if the game is post-production the timeframe should be long enough to capture regular usage variations, which could be days or even weeks.
Once you’ve collected baseline metrics for a suitable timeframe, you can then run an optimization phase.
Optimizing available sessions walkthrough
The baseline gives you a good idea of how much scope there is to optimize your target-tracking by comparing the minimum value recorded for PercentAvailableGameSessions against your target-tracking value.
If the minimum is 0, then your target-tracking is probably too aggressive and your players are likely having to wait during fleet scaling events. You can confirm players are having to wait by checking the maximum value for AverageWaitTime, and if there’s a notable wait time then you’ll need to increase your target-tracking value and then create a new baseline.
If the minimum is close to 0–say1–5%–then you’re probably close to optimum scaling.
If the minimum is much higher, you can probably optimize it further, which you can do by reducing the target-tracking value by N% for all fleets and then creating a new baseline. N.B. Choosing a suitable value for N depends on the specific dynamics of your game, but a good value might be halfway between 5% and the baseline’s minimum value for PercentAvailableGameSessions.
It’s highly unlikely you’ll reach an optimal value after one round of optimization, so you should continue running cycles of baselines and optimization until you reach optimum scaling.
Continual operation
Since game traffic changes over time, it’s highly likely that the optimal scaling configuration will change over time as well. If there’s a new DLC, or a pre-planned event that’s likely to change player traffic, consider running another baseline and round of optimization after the event.
But you also need to keep observing Amazon GameLift metrics over the lifetime of the game, allowing fleet optimization whenever player traffic changes enough to change the scaling requirements.
The easiest way to monitor Amazon GameLift on an on-going basis is to create a CloudWatch Alarm that can send notifications if a metric goes outside a pre-defined range. The following process can help get you started:
- In the AWS Management Console, search for and select CloudWatch.
- Under Alarms click All Alarms, and then click Create alarm.
- Click Select metric and in the Search box enter Amazon GameLift, and then select Fleet Metrics.
- Find the PercentAvailableGameSessions metric for your fleet, using the Fleet ID your noted earlier, and click Select metric.
- Choose a value of Minimum for Statistic, and enter a Period of 1 minute.
- Select an alarm condition of Lower/Equal and set a threshold value to a small, non-zero number, such as 1.
- Click Next to choose the action that runs if the alarm fires. While actions are highly configurable, a good starting point is to create a new SNS topic, give it a suitable name–for example, Game-Scaling-Alarm–and enter an email address to receive the notifications.
- Once you’ve configured an action, click Next, enter a suitable name and description for the alarm, and click Next.
- Review the details for the alarm, and if you’re happy with them, finally click Create alarm.
Once you’ve created an alarm, it’ll trigger whenever the PercentAvailableGameSessions metric falls below the threshold, sending you an email, and allowing you to kick-off another round of baselining and optimization.
Summary
Keeping game server fleets tuned is an important part of managing operating costs while providing players with the multiplayer experience they expect. By using Amazon GameLift’s metrics you can ensure matchmaking is fast enough for players without running excess server capacity in your fleets of game servers.
In this post I described a process for creating a baseline for optimizing your Amazon GameLift fleet scaling rules. However, this is just a starting point for what you can accomplish with Amazon GameLift monitoring. There are a host of other metrics you can use to hone your LiveOps approach, and aside from just monitoring, you could also look at automating the optimization process to allow you to focus your attention on something that differentiates your game for your players.
While operating and scaling game servers can be tricky, I’ve hopefully shown that Amazon GameLift can help leverage the power of AWS to deliver the low waiting times your players demand, while running your fleets at just the right temperature.