AWS for M&E Blog
Build an Android App with a scrollable feed of live streams
As smartphones and mobile internet become more advanced, many apps have implemented media-rich experiences that connect content creators with end users. Sharing and consuming video is exceptionally popular among smartphone users, leading to the rise of interactive, social video.
While mobile video streaming is popular, it’s often difficult for app developers to create a great video experience, especially when live video is involved. It’s a daunting task to manage video ingest, processing, delivery, playback, and more across a wide range of devices and network conditions.
Amazon Interactive Video Service (Amazon IVS) helps solve this. Amazon IVS is designed to take care of the technical complexities of adding live video into your product. In this post, I show you how to use this service to quickly create an Android app with a modern, scrolling feed of videos. The end product is similar to some of the most popular and trending social media apps today.
Here’s what I cover in this post:
- How to set up an example Android app with a feed of live streams. (15 min)
- Modifications to the example to point to your own Amazon IVS live streams. (5 min)
Prerequisites
Before you set up the example app, you need the following tools:
- Android Studio, installed and up-to-date.
- An Android Virtual Device (AVD) Phone with API level 23 or later (Android 6.0). Learn more here: Run apps on the Android Emulator.
- Git installed and up-to-date.If you want to modify this example, you also need the following:
- An Amazon IVS channel that you can stream to. Follow the steps in Setting Up for Streaming with Amazon Interactive Video Service to learn how to stream to Amazon IVS.
The steps following describe the process on macOS, but they can also be completed on any operating system that supports the prerequisites.
Set up the example
To set up the example, you need the Amazon IVS Android Feed Demo code from GitHub. Follow these steps to clone the repository and run the app in the Android Emulator:
- Clone the Amazon IVS Android Feed Demo code from GitHub using your method of choice. The following steps describe how to do this using the Terminal app on MacOS.
a. Open the Terminal app.
b. Navigate to a directory where you want to store the app code. For example:cd ~/Developer.
c. Clone the demo code repository:git clone git@github.com:aws-samples/amazon-ivs-feed-android-demo.git.
- Launch Android Studio.
- Select Open an Existing Android Studio Project, navigate to the repository you cloned in step 1, and open it.

You now have the demo app open in Android Studio. Follow these next steps to run the app in the Android Emulator. - In the top-right corner of the app, click the list of available devices, and select an Android phone with API level 23 or later (Android 6.0 or later). This example uses the Pixel 3a with Android 10.0+ (Google Play). If you do not see any available Android devices, you must create and configure one. Learn more here: Run apps on the Android Emulator.
- Click the run button or press
Ctrl-Rto run the app.
- Wait for the Android Emulator to boot and launch the example app. This may take a few moments if this is the first time you are launching the virtual device.

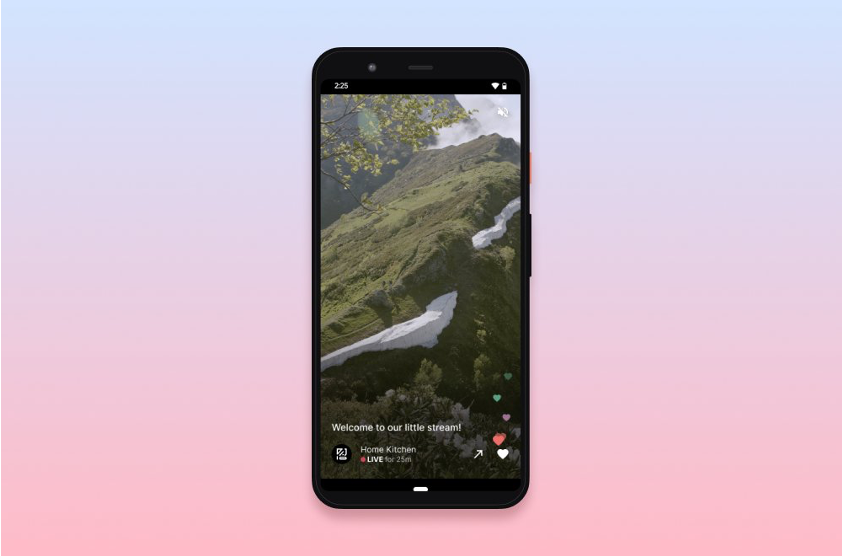
Congratulations! The app should now be running. Swipe up and down to scroll through the list of streams. There are three example streams included in the demo, showing both landscape and portrait-oriented videos.
Modify the example
While this example should not be run in a production environment, you can modify it to see how your own live streams might appear. In order to modify this example, you must be able to stream to your Amazon IVS channel. To do this, you can follow the instructions here: Setting Up for Streaming with Amazon Interactive Video Service.
Important note: Using your own stream creates and consumes AWS resources, which incur cost.
Using your own Amazon IVS live stream
Follow the following steps to replace the example video provided with your own Amazon IVS video stream. Although it is not required, you can close the Android Emulator before continuing if you find that it is slowing down your computer.
Once you create an Amazon IVS channel, follow these steps to use your own live video in place of the example streams:

- Open the Amazon IVS Console and navigate to the channel you would like to use.
- Copy the Playback URL for the channel. The URL should end in
.m3u8.
- In Android Studio,
open app/src/main/assets/streams.json. - Find the key
playbackUrlonline 8and paste the Playback URL you copied in step 2.
- Modify any of the other metadata as you like. Here is how they map to different elements in the UI.

- Save your changes (
File > Save All). - Press
Ctrl-Rto run the app.
The Android Emulator should reload the app and load the stream from your Amazon IVS channel. This may take a few moments.
To replace the other two videos in the feed, repeat the steps preceding, except change the playbackUrls on line 28 and line 48 to point to your own Amazon IVS streams. You can add or remove streams in the feed by adding or removing JSON objects from the streams array. For example, the following streams.json file displays two videos, instead of three.
{
"streams": [
{
"id": 25678201,
"stream": {
"channelArn": "arn:aws:ivs:us-west-
2:XXXXXXXXXXXX:channel/XXXXXXXXXXXX",
"health": "HEALTHY",
        "playbackUrl": "https://fcc3ddae59ed.us-west-

 2.playback.live-video.net/api/video/v1/us-west-2.893648527354.channel.DmumNckWFTqz.m3u8",
"startTime": "2020-06-17T23:17:53Z",
"state": "LIVE",
"viewerCount": 1
},
"metadata": {
"streamTitle": "This stream will appear first",
        "userAvatar":

 "https://assets.codepen.io/2960061/hedgehog.png",
"userName": "Harry Hedgehog",
"userColors": {
"primary": "#3E9963",
"secondary": "#FAFF00"
}
}
},
{
"id": 01977622,
"stream": {
        "channelArn": "arn:aws:ivs:us-west-

 2:XXXXXXXXXXXX:channel/XXXXXXXXXXXX",
"health": "HEALTHY",
        "playbackUrl":

 "https://usher.ttvnw.net/api/lvs/hls/lvs.lvs-client-

 example.9ee3f80d-c1e4-49a7-8dd4-288208f18509.m3u8",
"startTime": "2020-06-17T22:10:51Z",
"state": "LIVE",
"viewerCount": 1
},
"metadata": {
"streamTitle": "This stream will appear second",
        "userAvatar":

 "https://assets.codepen.io/2960061/giraffe.png",
"userName": "Gene Giraffe",
"userColors": {
"primary": "#545B60",
"secondary": "#FFFFFF"
}
}
}
]
}
Food for thought
If you found this to be a compelling example of a product you’d like to build, here are some things to consider.
- Build a serverless web application that fetches data from Amazon IVS and serves the info currently stored in the
streams.jsonfile over an API. Some information, like theplaybackUrl,startTimeandviewerCountare also available via the Amazon IVS ListStreams API. - Use Timed Metadata or Amazon API Gateway WebSockets to show viewers when someone presses the ❤️ button.
- Add social features like live chat or a follow button and a way for your users to start broadcasting in the app. Here’s an example of what that might look like:

More about Amazon IVS
Amazon IVS Amazon Interactive Video Service (Amazon IVS) is a managed live streaming solution that is quick and easy to set up, and ideal for creating interactive video experiences. Simply send your live streams to Amazon IVS and the service does everything you need to make low-latency live video available to any viewer around the world, letting you focus on building interactive experiences alongside the live video. Learn more.