AWS Amplify is a set of tools and services that enables mobile and front-end web developers to build secure, scalable full-stack applications powered by AWS. Amplify recently released a new enhancement for the authentication category to allow Flutter developers to set up custom authentication challenges using Amazon Cognito AWS Lambda triggers. This guide shows how to set up a simple one-time password authentication flow.
Prerequisites
The following prerequisites are required to follow along with this post:
- Install and configure Amplify CLI
- A Flutter application targeting Flutter SDK >= 2.0.0 (stable version)
- An iOS configuration targeting at least iOS 11.0
- An Android configuration targeting at least Android API level 21 (Android 5.0) or above, and a Kotlin version of 1.5.31 or higher
- A working Amazon Simple Email Service (Amazon SES) resource
Amazon SES
Amazon SES is an email platform that lets you send and receive emails using your email addresses and domains. I’ll use it in this tutorial to send a one-time password to the user.
Follow these steps to setup Amazon SES:
1- Open the Amazon SES homepage on the AWS Management Console. Note the AWS region (e.g., us-west-1), as I’ll use it when implementing the logic for sending of the OTP. The Amazon SES homepage URL will look like this: https://us-east-1.console.aws.amazon.com/ses/home#/homepage
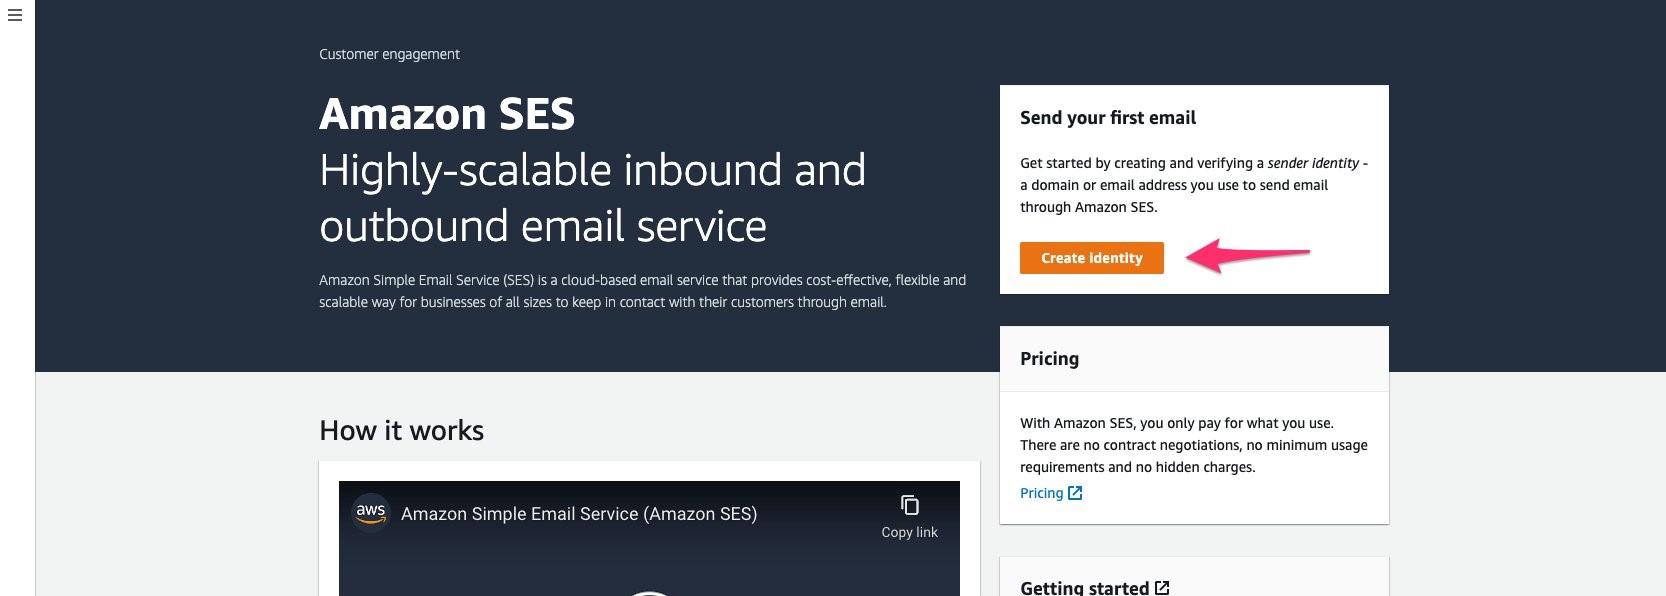
Figure 1. Open Amazon SES homepage and select Create Identity
2- To send emails, you must setup and verify a sender identity. This can be a domain or an email address. In this tutorial, I’ll use an email. On the Amazon SES homepage, select [Create Identity]. On the next screen, select [Email address] and submit an email that you can access in its inbox (e.g., your own email address), then select [Create Identity].
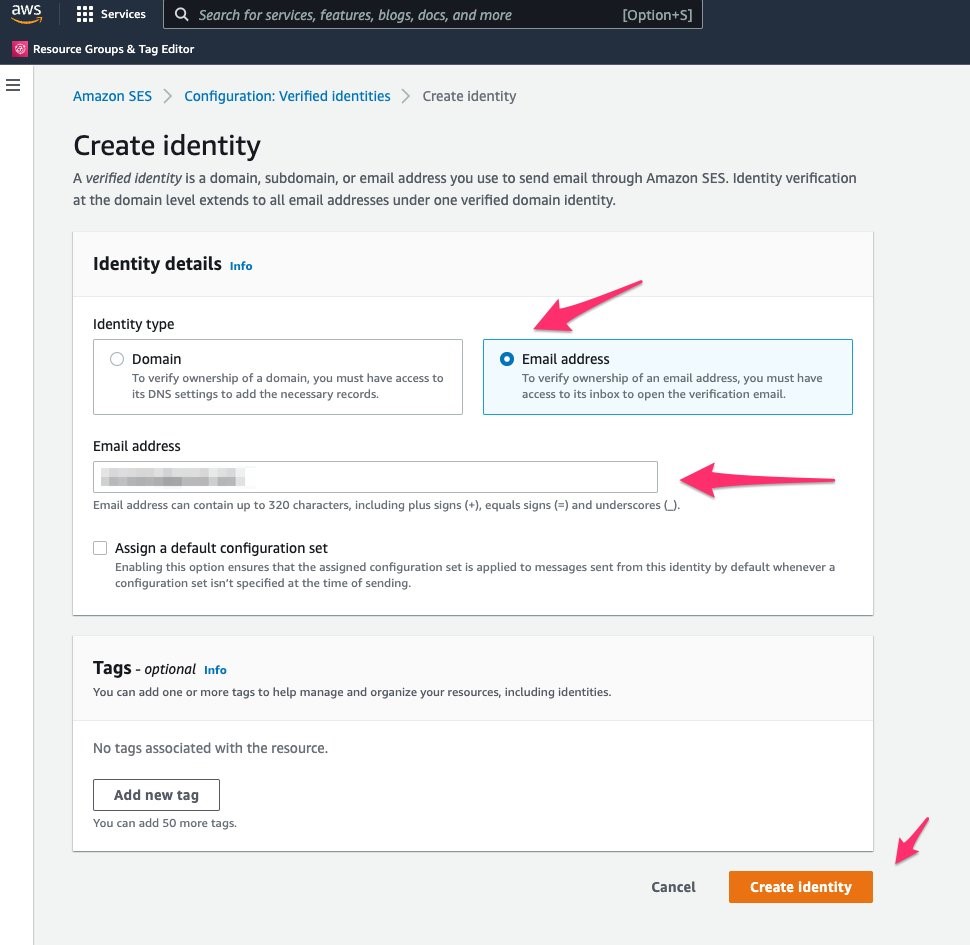
Figure2. On the Create identity screen, select Email address and then select Create Identity
3 – Amazon SES will create the identity, and its status will be unverified.
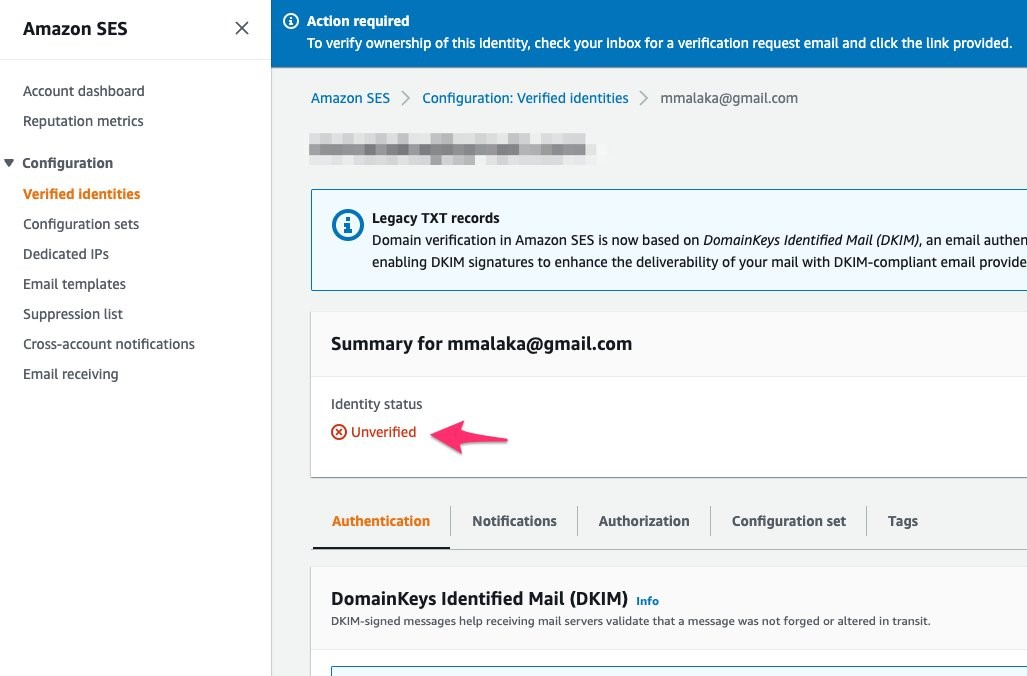
Figure 3. The identity status will be Unverified
4- You’ll get an email with a link to verify it.
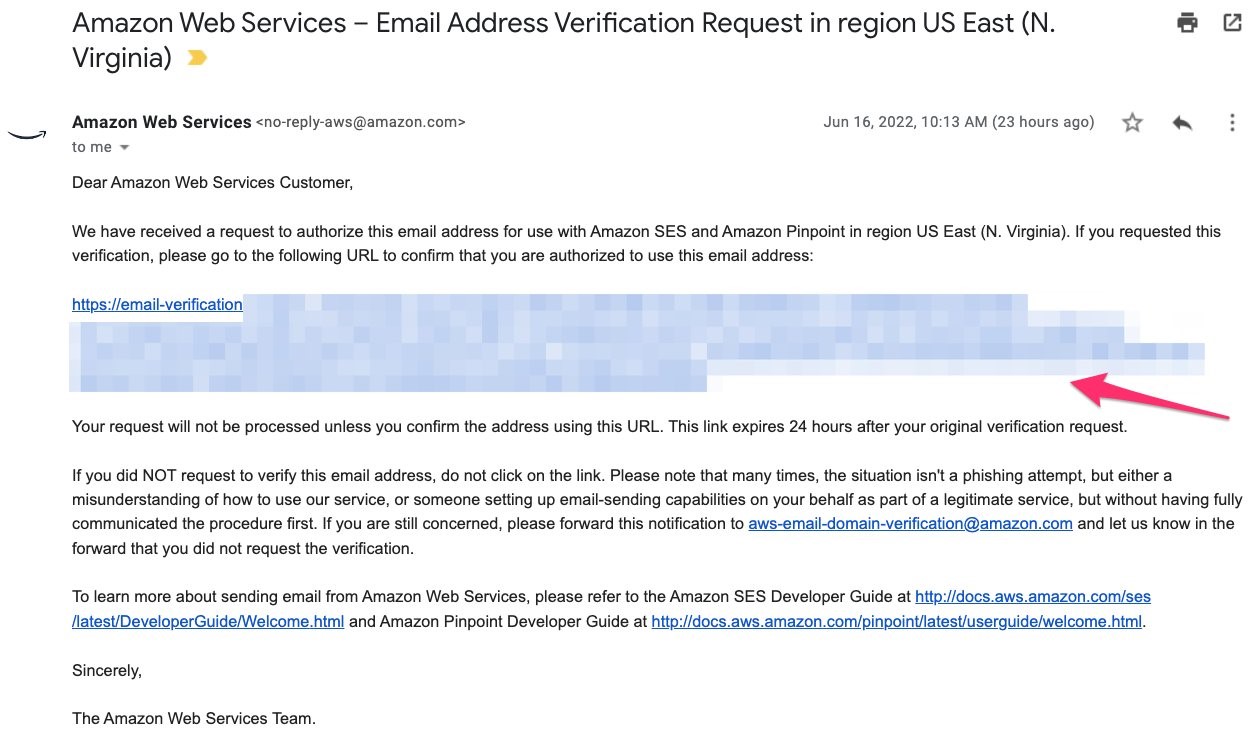
Figure 4. You’ll get an email with a link. Select it to verify the identity
5- Select the link, and Amazon SES will verify the email address. Now you’re ready to use it.
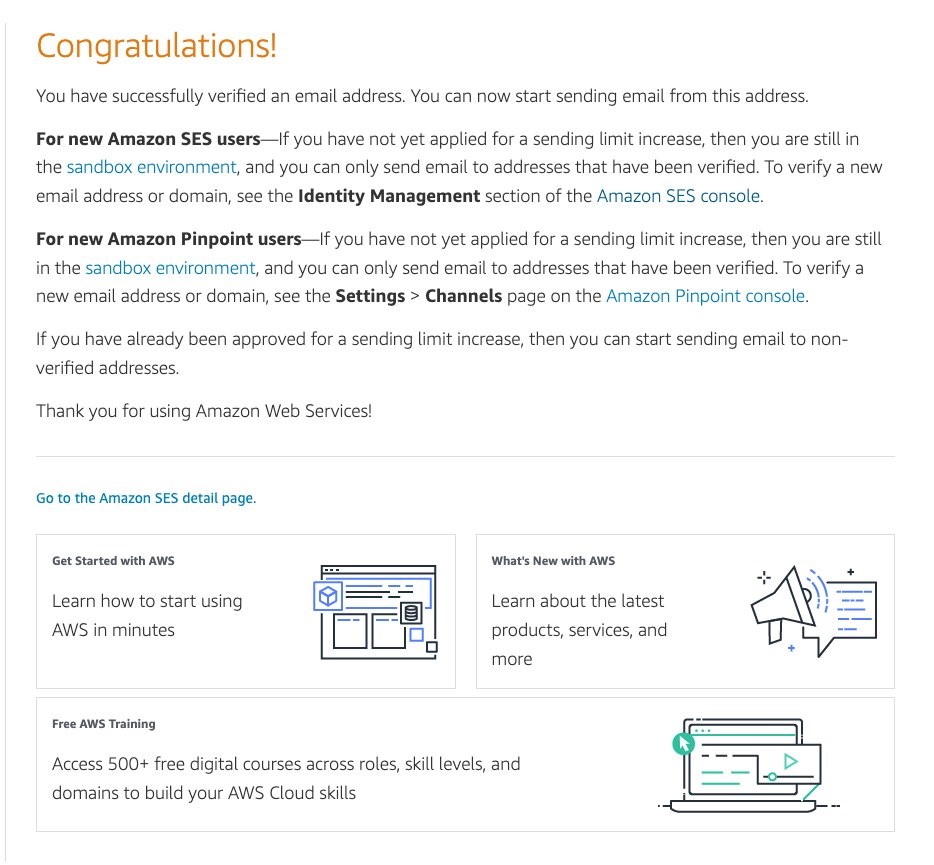
Figure 5. Amazon SES will display a congratulations screen to confirm verifying the identity
I’ll need the Amazon SES region and the Identity email address to implement the logic of sending of the OTP for the next steps. Therefore, make sure to note those details.
Amplify Project Setup
To connect your Flutter app to your AWS account, you must create an Amplify Project using the Amplify Console Afterward, you can pull your Amplify project locally to your development machine to start building the custom authentication flows.
1- On the Amplify console, select New app and then Build an app.
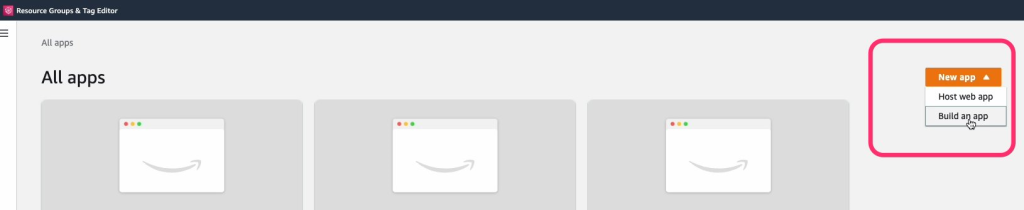
Figure 6. Select New app and then Build an app
2- Enter an App name, and then select Confirm deployment.
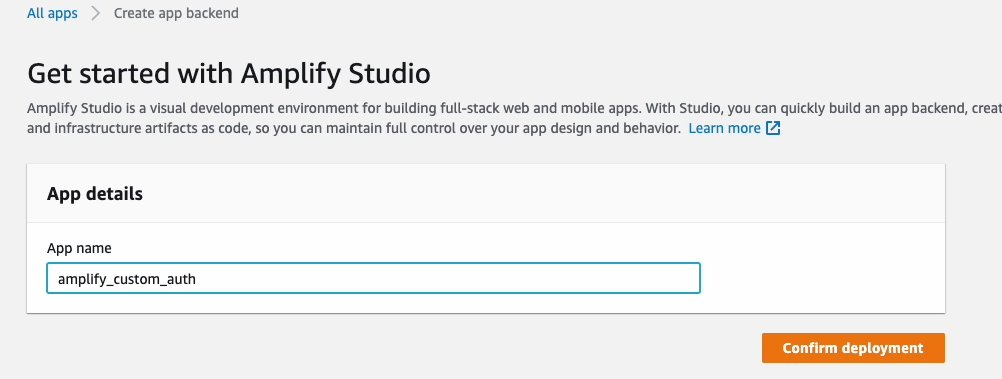
Figure 7. Enter a name for the App and then select Confirm deployment
3- The console will set up the Amplify studio and the backend environments for your App. Once ready, you can open the Amplify studio by selecting Launch Studio.

Figure 8. Select Launch Studio to open the Amplify Studio for your App
4- On Amplify Studio, copy the local setup command:

Figure 9. Select Local setup instructions and copy the setup command
5- Navigate to the root folder of your Flutter app and paste then run the local setup command. The command will pull the backend environment into your App.
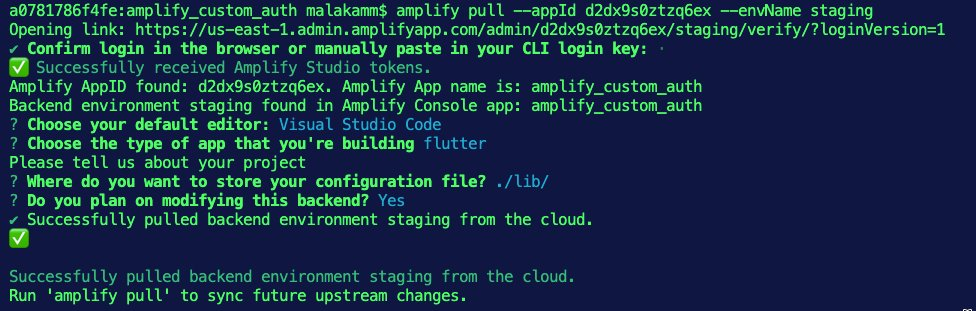
Figure 10. Run the setup command on the root folder of your Flutter app
6- The command will add a new folder named amplify which contains the amplify project and backend details. The command will also add a new dart file (amplifyconfiguration.dart). The App will use this file to know how to reach your provisioned backend resources at runtime. The following image shows the App folder structure on VSCode.
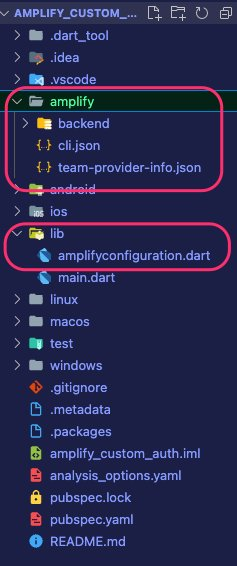
Figure 11. The folder structure on VS Code
Setting up the Custom Authentication flow
I’ll use the Amplify CLI to add the Authentication category to the Flutter App,
1- Navigate to the root folder of your Flutter app and run the amplify add auth command. Use the Manual Configuration option and make sure to set up the Lambda Triggers as shown in the following:
? Do you want to use the default authentication and security configuration? Manual configuration?
    `Select the authentication/authorization services that you want to use: User Sign-Up, Sign-In, connected with AWS IAM controls (Enables per-user Storage features for images or other content, Analytics, and more)`
? Please provide a friendly name for your resource that will be used to label this category in the project:
    `<hit enter to take default or enter a custom label>`
? Please enter a name for your identity pool.
    `<hit enter to take default or enter a custom name>`
? Allow unauthenticated logins? (Provides scoped down permissions that you can control via AWS IAM)
    `No`
? Do you want to enable 3rd party authentication providers in your identity pool?
    `No`
? Please provide a name for your user pool:
    `<hit enter to take default or enter a custom name>`
? How do you want users to be able to sign in?
    `Username`
? Do you want to add User Pool Groups?
    `No`
? Do you want to add an admin queries API?
    `No`
? Multifactor authentication (MFA) user login options:
    `OFF`
? Email based user registration/forgot password:
    `Enabled (Requires per-user email entry at registration)`
? Please specify an email verification subject:
    `Your verification code`
? Please specify an email verification message:
    `Your verification code is {####}`
? Do you want to override the default password policy for this User Pool?
    `No`
? What attributes are required for signing up?
    `Email`
? Specify the app''s refresh token expiration period (in days):
    `30`
? Do you want to specify the user attributes this app can read and write?
    `No`
? Do you want to enable any of the following capabilities?
    `NA`
? Do you want to use an OAuth flow?
    `No`
? Do you want to configure Lambda Triggers for Cognito?
    `Yes`
? Which triggers do you want to enable for Cognito?
    `Create Auth Challenge, Define Auth Challenge, Verify Auth Challenge Response`
? What functionality do you want to use for Create Auth Challenge?
    `Custom Auth Challenge Scaffolding (Creation)`
? What functionality do you want to use for Define Auth Challenge?
    `Custom Auth Challenge Scaffolding (Definition)`
? What functionality do you want to use for Verify Auth Challenge Response?
    `Custom Auth Challenge Scaffolding (Verification)`
? Do you want to edit your boilerplate-create-challenge function now?
    `No`
? Do you want to edit your boilerplate-define-challenge function now?
    `No`
? Do you want to edit your boilerplate-verify function now?
    `No`
2- You must add the logic of generating a secure random number and sending it to the user. For that, open the file [<your_flutter_project>/amplify/backend/function/CreateAuthChallenge/src/boilerplate-create-challenge.js] and copy the following code snippet. Make sure to use the Amazon SES region and Identity email that you created above.
var aws = require("aws-sdk");
var ses = new aws.SES({ region: "<SES_Region>" }); // This is you SES region
const digitGenerator = require('crypto-secure-random-digit');

function sendChallengeCode(emailAddress, secretCode) {
 var params = {
    Destination: {
      ToAddresses: [emailAddress],
    },
    Message: {
      Body: {
        Text: { Data: secretCode },
      },
       Subject: { Data: "Email Verification Code" },
    },
    Source: <SES_Identity_Email>, // This is you SES Identity Email
  };


  return ses.sendEmail(params).promise()
}


exports.handler = async function (event) {

    if (event.request.challengeName === 'CUSTOM_CHALLENGE') {

      // Generate a random code for the custom challenge
      const challengeCode = digitGenerator.randomDigits(6).join('');

      event.response.privateChallengeParameters = {};
      event.response.privateChallengeParameters.answer = challengeCode;

      event.response.publicChallengeParameters = {};
      event.response.publicChallengeParameters['fieldTitle'] = 'Enter the secert';
      event.response.publicChallengeParameters['fieldHint'] = 'Check your email';

   return  sendChallengeCode(event.request.userAttributes.email, challengeCode);

  }
};
3- Add the crypto-secure-random-digit as a dependency by updating the file [<your_flutter_project>/amplify/backend/function/<project_code>CreateAuthChallenge/src/package.json] as shown in the following:
{
  "name": "ampcusauth2022CreateAuthChallenge",
  "version": "2.0.0",
  "description": "Lambda function generated by Amplify",
  "main": "index.js",
  "license": "Apache-2.0",
  "dependencies": {
    "crypto-secure-random-digit": "^1.0.9"
  },
  "devDependencies": {
    "@types/aws-lambda": "^8.10.92"
  }
}
4- The CreateAuthChallenge function needs a policy allowing for the sending of emails. You can create the policy by adding the following code to the file [<your_flutter_project>/amplify/backend/function/<project_code>CreateAuthChallenge/custom-policies.json]
[
  {
    "Effect": "Allow",
    "Action": [
      "ses:SendEmail",
      "ses:SendRawEmail"
    ],
    "Resource": ["*"]
  }
]
5- Update the file [<your_flutter_project>/amplify/backend/function/<project_code>DefineAuthChallenge/src/boilerplate-define-challenge.js] as follows to bypass password authentication (Secure Remote Password validation – SRP) and enable the one-time password experience.
  exports.handler = async function(event) {
  if (event.request.session.length == 1 && event.request.session[0].challengeName == 'SRP_A') {
      event.response.issueTokens = false;
      event.response.failAuthentication = false;
      event.response.challengeName = 'CUSTOM_CHALLENGE';
  } else if (event.request.session.length == 2 && event.request.session[1].challengeName == 'CUSTOM_CHALLENGE' && event.request.session[1].challengeResult == true) {
      event.response.issueTokens = true;
      event.response.failAuthentication = false;
      event.response.challengeName = 'CUSTOM_CHALLENGE';
  } else {
      event.response.issueTokens = false;
      event.response.failAuthentication = true;
  }
}
The Amplify Auth library always starts with Secure Remote Password (SRP) validation. In the code above, I bypass the SRP validation and return CUSTOM_CHALLENGE in the first step. In the second step, if CUSTOM_CHALLENGE returns with challengeResult == true I recognize the custom auth challenge is successful, and then I tell Amazon Cognito to issue tokens. In the last else block, I tell Amazon Cognito to fail the authentication flow.
You can update the following code to enforce the Secure Remote Password (SRP) validation and require the user to submit a valid password.
exports.handler = async event => {
   if (event.request.session.length === 1 && event.request.session[0].challengeName === 'SRP_A') {
     event.response.issueTokens = false;
     event.response.failAuthentication = false;
     event.response.challengeName = 'PASSWORD_VERIFIER';
   } else if (
     event.request.session.length === 2 &&
     event.request.session[1].challengeName === 'PASSWORD_VERIFIER' &&
     event.request.session[1].challengeResult === true
   ) {
     event.response.issueTokens = false;
     event.response.failAuthentication = false;
     event.response.challengeName = 'CUSTOM_CHALLENGE';
   } else if (
     event.request.session.length === 3 &&
     event.request.session[2].challengeName === 'CUSTOM_CHALLENGE' &&
     event.request.session[2].challengeResult === true
   ) {
     event.response.issueTokens = true;
     event.response.failAuthentication = false;
   } else {
     event.response.issueTokens = false;
     event.response.failAuthentication = true;
   }

   return event;
 };
6- Next, I must update the file [<your_flutter_project>/amplify/backend/function/<project_code>VerifyAuthChallengeResponse/src/boilerplate-verify.js] as follows to verify if the response from the user to the custom challenge is valid or not.
function verifyAuthChallengeResponse(event) {
  if (event.request.privateChallengeParameters.answer === event.request.challengeAnswer) {
      event.response.answerCorrect = true;
  } else {
      event.response.answerCorrect = false;
  }
}

exports.handler = async (event) => {
  verifyAuthChallengeResponse(event);
}
7- Run the command amplify push to create the resources in the cloud.
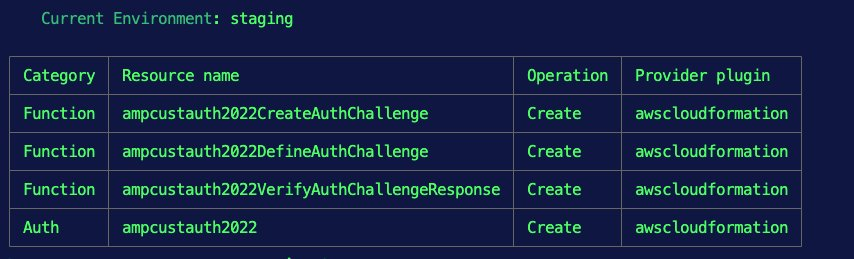
Figure 12. The list of the resources to get created in the cloud
8- Open the Amplify Studio by running the command amplify console and select Amplify Studio.

Figure 13. Run the command amplify console and select Amplify Studio
9- Check the Functions option, and you’ll notice the AWS Lambda function that I created using the CLI.
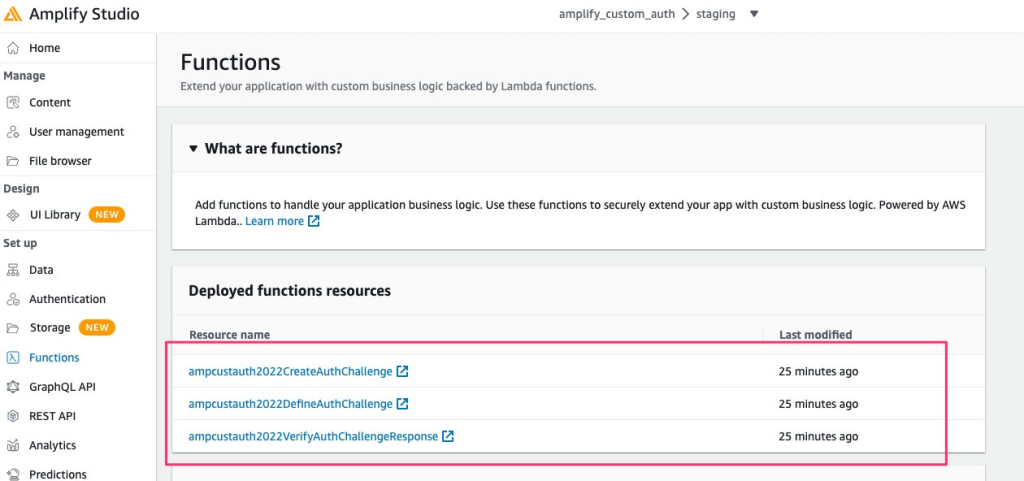
Figure 14. Note the lambda functions on Amplify Studio
Building the Flutter App
You can use the Amplify Authenticator library to quickly create an authentication flow for the sample App. You can customize it by introducing a widget for the one-time password sign-in and a widget for the custom challenge. Once the user signs in, the App will display the HomePage showing a button for the user to sign out. Follow these steps to create the sample App:
1- Add the Amplify dependencies to the pubspec.yaml:
dependencies:
  flutter:
    sdk: flutter
  amplify_flutter: ^0.5.1
  amplify_auth_cognito: ^0.5.1
  amplify_authenticator: ^0.1.2
2- Update the main.dart file to the following:
import 'package:amplify_auth_cognito/amplify_auth_cognito.dart';
import 'package:amplify_auth_custom/pages/home_page.dart';
import 'package:amplify_authenticator/amplify_authenticator.dart';
import 'package:amplify_flutter/amplify_flutter.dart';
import 'package:flutter/material.dart';

import 'amplifyconfiguration.dart';

import 'widgets/custom_confirm_signIn_view.dart';
import 'widgets/custom_signIn_view.dart';

void main() {
  runApp(const MyApp());
}

class MyApp extends StatefulWidget {
  const MyApp({Key? key}) : super(key: key);

  @override
  State<MyApp> createState() => _MyAppState();
}

class _MyAppState extends State<MyApp> {
  bool _amplifyConfigured = false;

  @override
  void initState() {
    super.initState();
    _configureAmplify();
  }

  @override
  Widget build(BuildContext context) {
    return Authenticator(
      authenticatorBuilder: (context, state) {
        switch (state.currentStep) {
          case AuthenticatorStep.signIn:
            return CustomSignInView(state: state);
          case AuthenticatorStep.confirmSignInCustomAuth:
            return CustomConfirmSignInView(state: state);
          default:
            // returning null will default to the prebuilt authenticator for
            // all steps other than signIn and signUp
            return null;
        }
      },
      child: MaterialApp(
        debugShowCheckedModeBanner: false,
        builder: Authenticator.builder(),
        home: buildApp(context),
      ),
    );
  }

  void _configureAmplify() async {
    try {
      await Amplify.addPlugin(AmplifyAuthCognito());
      await Amplify.configure(amplifyconfig);
      setState(() {
        _amplifyConfigured = true;
      });
    } on AmplifyAlreadyConfiguredException {
      ScaffoldMessenger.of(context).showSnackBar(const SnackBar(
        backgroundColor: Colors.red,
        content: Text(
          'Tried to reconfigure Amplify; '
          'this can occur when your app restarts on Android.',
        ),
      ));
    }
  }

  Widget buildApp(BuildContext context) {
    return _amplifyConfigured
        ? const HomePage()
        : const Scaffold(
            body: Center(
              child: CircularProgressIndicator(),
            ),
          );
  }
}
Note the logic of configuring Amplify for the Auth category:
....

bool _amplifyConfigured = false;

....

 @override
  void initState() {
    super.initState();
    _configureAmplify();
  }

  void _configureAmplify() async {
    try {
      await Amplify.addPlugin(AmplifyAuthCognito());
      await Amplify.configure(amplifyconfig);
      setState(() {
        _amplifyConfigured = true;
      });
    } on AmplifyAlreadyConfiguredException {
      ScaffoldMessenger.of(context).showSnackBar(const SnackBar(
        backgroundColor: Colors.red,
        content: Text(
          'Tried to reconfigure Amplify; '
          'this can occur when your app restarts on Android.',
        ),
      ));
    }
  }

...
3- Wrap the MaterialApp in an Authenticator widget. Then use the authenticatorBuilder method to check for the authentication flow steps and determine what experience to present to the customer. For example, the App will display the customSignInView widget for the signIn step.
@override
  Widget build(BuildContext context) {
    return Authenticator(
      authenticatorBuilder: (context, state) {
        switch (state.currentStep) {
          case AuthenticatorStep.signIn:
            return CustomSignInView(state: state);
          case AuthenticatorStep.confirmSignInCustomAuth:
            return CustomConfirmSignInView(state: state);
          default:
            // returning null will default to the prebuilt authenticator for
            // all steps other than signIn and signUp
            return null;
        }
      },
      child: MaterialApp(
        debugShowCheckedModeBanner: false,
        builder: Authenticator.builder(),
        home: buildApp(context),
      ),
    );
  }
4- Introduce a custom_signIn_view.dart file to create the CustomSignInView stateless widget, as shown in the following, to present the one-time password sign-in experience where the user must submit their email address.
import 'package:amplify_authenticator/amplify_authenticator.dart';
import 'package:flutter/material.dart';

import 'navigate_to_signUp_button.dart';

class CustomSignInView extends StatelessWidget {
  const CustomSignInView({
    Key? key,
    required this.state,
  }) : super(key: key);

  final AuthenticatorState state;

  @override
  Widget build(BuildContext context) {
    return SafeArea(
      child: SingleChildScrollView(
        child: AuthenticatorForm(
          child: Padding(
            padding: const EdgeInsets.symmetric(horizontal: 16),
            child: Column(
              children: [
                Image.asset(
                  'images/amplify.png',
                  fit: BoxFit.cover,
                  width: 200,
                ),

                SignInFormField.username(),

                // Un-comment the line below for Secure Remote Password (SRP) experince
                //SignInFormField.password(),

                // prebuilt sign up button from amplify_authenticator package
                const SignInButton(),

                const SizedBox(height: 16),
                const Divider(),

                // custom button to take the user to sign in
                NavigateToSignUpButton(state: state),
              ],
            ),
          ),
        ),
      ),
    );
  }
}
5- The user can switch to the signup flow from the CustomSignInView widget using the NavigateToSignUpButton widget. For that, add the following navigate_to_signUp_button.dart file:
import 'package:amplify_authenticator/amplify_authenticator.dart';
import 'package:flutter/material.dart';

class NavigateToSignUpButton extends StatelessWidget {
  const NavigateToSignUpButton({
    Key? key,
    required this.state,
  }) : super(key: key);

  final AuthenticatorState state;

  @override
  Widget build(BuildContext context) {
    return Row(
      mainAxisAlignment: MainAxisAlignment.center,
      children: [
        const Text('Don\'t have an account?'),
        TextButton(
          onPressed: () => state.changeStep(
            AuthenticatorStep.signUp,
          ),
          child: const Text('Sign Up'),
        ),
      ],
    );
  }
}
6- Create the CustomConfirmSignInView stateless widget by adding the custom_confirm_signIn_view.dart as follows. This widget will use the CreateAuthChallenge trigger to display the Auth Challenge to the user, where they will be required to submit the random code that is emailed to them.
import 'package:amplify_authenticator/amplify_authenticator.dart';
import 'package:flutter/material.dart';

import 'navigate_to_signIn_button.dart';

class CustomConfirmSignInView extends StatelessWidget {
  const CustomConfirmSignInView({
    Key? key,
    required this.state,
  }) : super(key: key);

  final AuthenticatorState state;

  @override
  Widget build(BuildContext context) {
    return SafeArea(
      child: SingleChildScrollView(
        child: AuthenticatorForm(
          child: Padding(
            padding: const EdgeInsets.symmetric(horizontal: 16),
            child: Column(
              children: [
                Image.asset(
                  'images/amplify.png',
                  fit: BoxFit.cover,
                  width: 200,
                ),

                // custom challenge field
                // Field Title and Field Hint can be set within the Lambda Code.
                ConfirmSignInFormField.customChallenge(
                    title: state.publicChallengeParams['fieldTitle'],
                    hintText: state.publicChallengeParams['fieldHint']),

                // prebuilt sign up button from amplify_authenticator package
                const ConfirmSignInCustomButton(),
                const SizedBox(height: 16),
                const Divider(),

                // custom button to take the user to sign in
                NavigateToSignInButton(state: state),
              ],
            ),
          ),
        ),
      ),
    );
  }
}
7- The user can navigate back to the signIn view from the CustomConfirmSignInView widget using the NavigateToSignInButton widget. Create that by introducing the following navigate_to_signIn_button.dart file.
import 'package:amplify_authenticator/amplify_authenticator.dart';
import 'package:flutter/material.dart';

class NavigateToSignUpButton extends StatelessWidget {
  const NavigateToSignUpButton({
    Key? key,
    required this.state,
  }) : super(key: key);

  final AuthenticatorState state;

  @override
  Widget build(BuildContext context) {
    return Row(
      mainAxisAlignment: MainAxisAlignment.center,
      children: [
        const Text('Don\'t have an account?'),
        TextButton(
          onPressed: () => state.changeStep(
            AuthenticatorStep.signUp,
          ),
          child: const Text('Sign Up'),
        ),
      ],
    );
  }
}
8- The following homepage is where the signed in user can find a button to sign out:
import 'package:amplify_flutter/amplify_flutter.dart';
import 'package:flutter/material.dart';

class HomePage extends StatelessWidget {
  const HomePage({Key? key}) : super(key: key);

  @override
  Widget build(BuildContext context) {
    return Scaffold(
      appBar: AppBar(
        title: const Text('Home'),
      ),
      body: Center(
        child: Column(
          children: [
            const SizedBox(height: 20),
            ElevatedButton(
              onPressed: () async {
                try {
                  await Amplify.Auth.signOut();
                } on Exception catch (e) {
                  ScaffoldMessenger.of(context).showSnackBar(SnackBar(
                    backgroundColor: Colors.red,
                    content: Text(e.toString()),
                  ));
                }
              },
              child: const Text('Sign Out'),
            ),
          ],
        ),
      ),
    );
  }
}
Conclusion
That is all, I now have a Flutter application set up with a simple one-time password authentication flow using Amplify Flutter Authenticator, the Authentication category, and Amazon Cognito Lambda triggers. If you have any feedback, leave a GitHub issue or join our Discord Community!
Clean Up
Now that you’ve finished this walkthrough, You can delete the backend resources to avoid incurring unexpected costs using the command amplify delete
Author: