AWS Cloud Operations Blog
How to isolate signed-in users from guest users within Amazon CloudWatch RUM
Real user monitoring (RUM) helps web application owners monitor the performance of client-side applications running on end-user devices. For example, RUM can help application owners detect when end-users are experiencing slow page load speeds, application errors, network errors, or issues with the application’s user interface.
Amazon CloudWatch RUM is a managed RUM service which is integrated into the Amazon CloudWatch ecosystem. CloudWatch RUM collects data from your client-side application and exports this data to the following AWS observability services:
- Client-side metrics are exported to CloudWatch Metrics
- Client-side events are exported to CloudWatch RUM’s event storage
- Client-side logs are exported to CloudWatch Logs
- Client-side traces are exported to AWS X-Ray
Once your RUM data is in the CloudWatch ecosystem, you can use existing tools to monitor, analyze, and debug your client-side applications.
However, when ingesting data into your CloudWatch RUM app monitor, you must consider data authenticity. RUM data is “authentic” when an actual user of your application generates it and is otherwise “inauthentic.” For example, RUM data generated by bot users are inauthentic. In this post, I’ll demonstrate how to gain confidence that your RUM data is authentic by isolating data sent by signed-in users from data sent by guest users.
How CloudWatch RUM authorizes data
All clients that send data to your CloudWatch RUM “Add app monitor” must be authorized to do so. This gives you control over which users send data to your RUM “Add app monitor”. When you create a RUM “Add app monitor” using the CloudWatch RUM console, by default an Amazon Cognito identity pool is created that permits guest users to write data to the “Add app monitor”. The following screenshot shows this configuration in the CloudWatch RUM console.
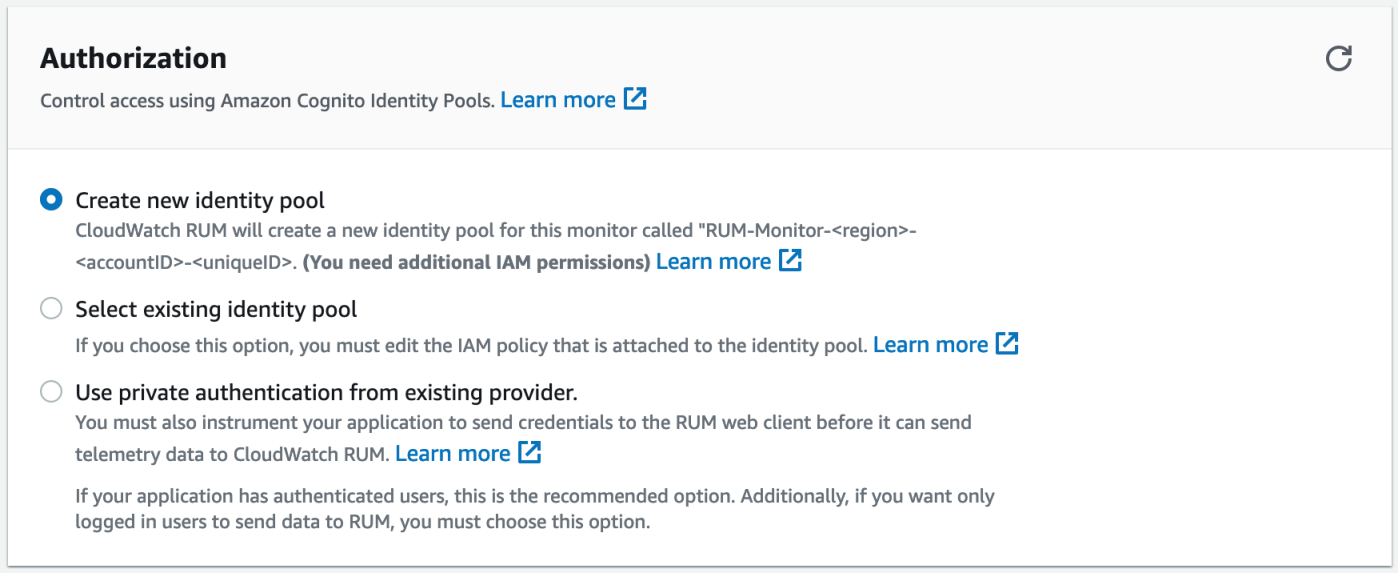
Figure 1: By default, when creating an app monitor, the CloudWatch RUM console creates a new Cognito identity pool.
With this configuration, when you onboard your application to CloudWatch RUM, you won’t need to configure authorization. The data will simply appear in your account. The following diagram shows the authorization flow for guest users. By default, the identity provider will be Amazon Cognito.
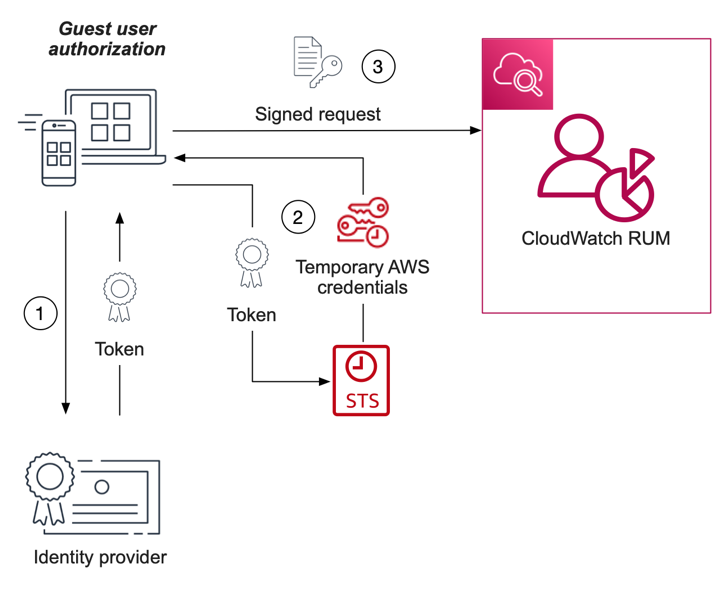
Figure 2: A component diagram showing guest-user authentication interactions.
This authorization flow performs the following steps:
- The application is given a token by the identity provider (without signing in to the application).
- The application provides the token to AWS Security Token Service (AWS STS) in exchange for temporary AWS credentials.
- The application signs the monitoring data using the AWS credentials and sends the data to the “Add app monitor”.
However, if your application has signed-in users, at some point, you may want to restrict the ability to write data to your “Add app monitor” to only those users who have signed in. The following diagram shows the authorization flow for signed-in users.
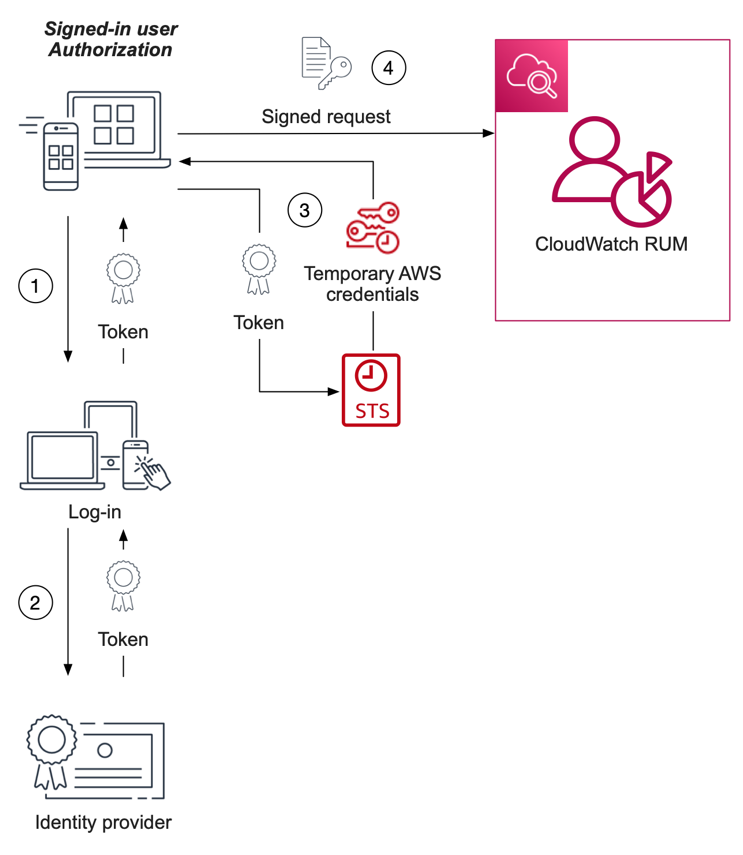
Figure 3: A component diagram showing signed-in-user authentication interactions.
This authorization flow performs the following steps:
- The user signs in to the application.
- The application is given a token by the identity provider.
- The application provides the token to AWS STS in exchange for temporary AWS credentials.
- The application signs the monitoring data using the AWS credentials and sends the data to the “Add app monitor”.
The key difference between the authorization flow for signed-in and guest users is that is that in the case of the signed-in user, the user must sign into the application before being given a token by the identity provider.
Gain confidence that RUM data is authentic
In general, monitoring data generated by client-side applications is untrusted because end-users have control over the application and can manipulate data before it’s sent to the monitoring provider. Since RUM operates exclusively in the client-side application space, both you and your RUM provider must take steps to mitigate the impact of RUM data which, maliciously or accidentally, wasn’t generated by a real user of the application. I will refer to this data as inauthentic. When you allow unauthenticated users to send data to your RUM provider, the risk of receiving inauthentic data increases because users can visit your website and send data to your RUM provider anonymously. This scenario is visualized below, where guest users and bad bots anonymously send RUM data to a CloudWatch RUM “Add app monitor”.

Figure 4: Unauthenticated app monitors have a larger attack surface
To add a layer of protection against this scenario, you can restrict the ability to send data to your RUM provider to a set of authorized users. For example, you can do this by accepting data only from users who have signed in to your application. This reduces the likelihood of receiving inauthentic data by reducing the attack surface (fewer users can send data to your RUM provider), and makes it easier to mitigate inauthentic data by blocking data from the specific users who are generating that data. This scenario is visualized below, where signed-in users and signed-in good bots send RUM data to a CloudWatch RUM “Add app monitor”.
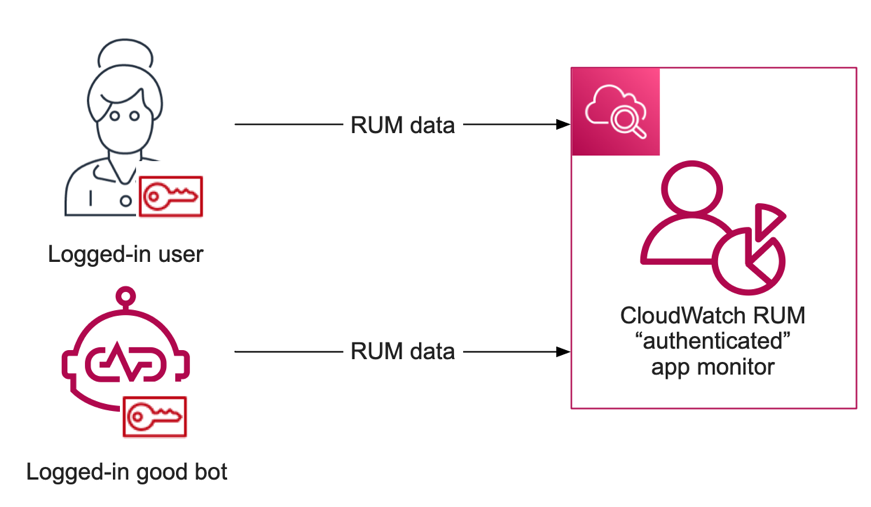
Figure 5: Authenticated users and good bots should send RUM data to a separate app monitor.
However, for many web applications, users may use the application in either a signed-in (authenticated) state, or a guest (unauthenticated) state. For example, sign-in pages represent a situation where users are in an an unauthenticated state. In such cases, the best practice is to isolate data sent by signed-in users from data sent by guest users. You can achieve this by using two separate app monitors: one “authenticated” “Add app monitor” for signed-in users, and one “unauthenticated” “Add app monitor” for guest users.
Step 1: Create separate app monitors for signed-in and guest users
I’ll use the Retail Demo Store (links to an external GitHub page) web application as a running example. The Retail Demo Store is an open-source sample web application provided by AWS. The Retail Demo Store allows both signed-in and guest users to add items to their cart, and check out. Users can switch between the signed-in state and the guest state at any time. As discussed above, the best practice is to isolate the RUM data sent by signed-in users from the RUM data sent by guest users, by using two RUM “app monitors”.
First, I open the CloudWatch RUM console to create two RUM app monitors: one for signed-in users and one for guest users. From the landing page, I select the “Add app monitor” button.
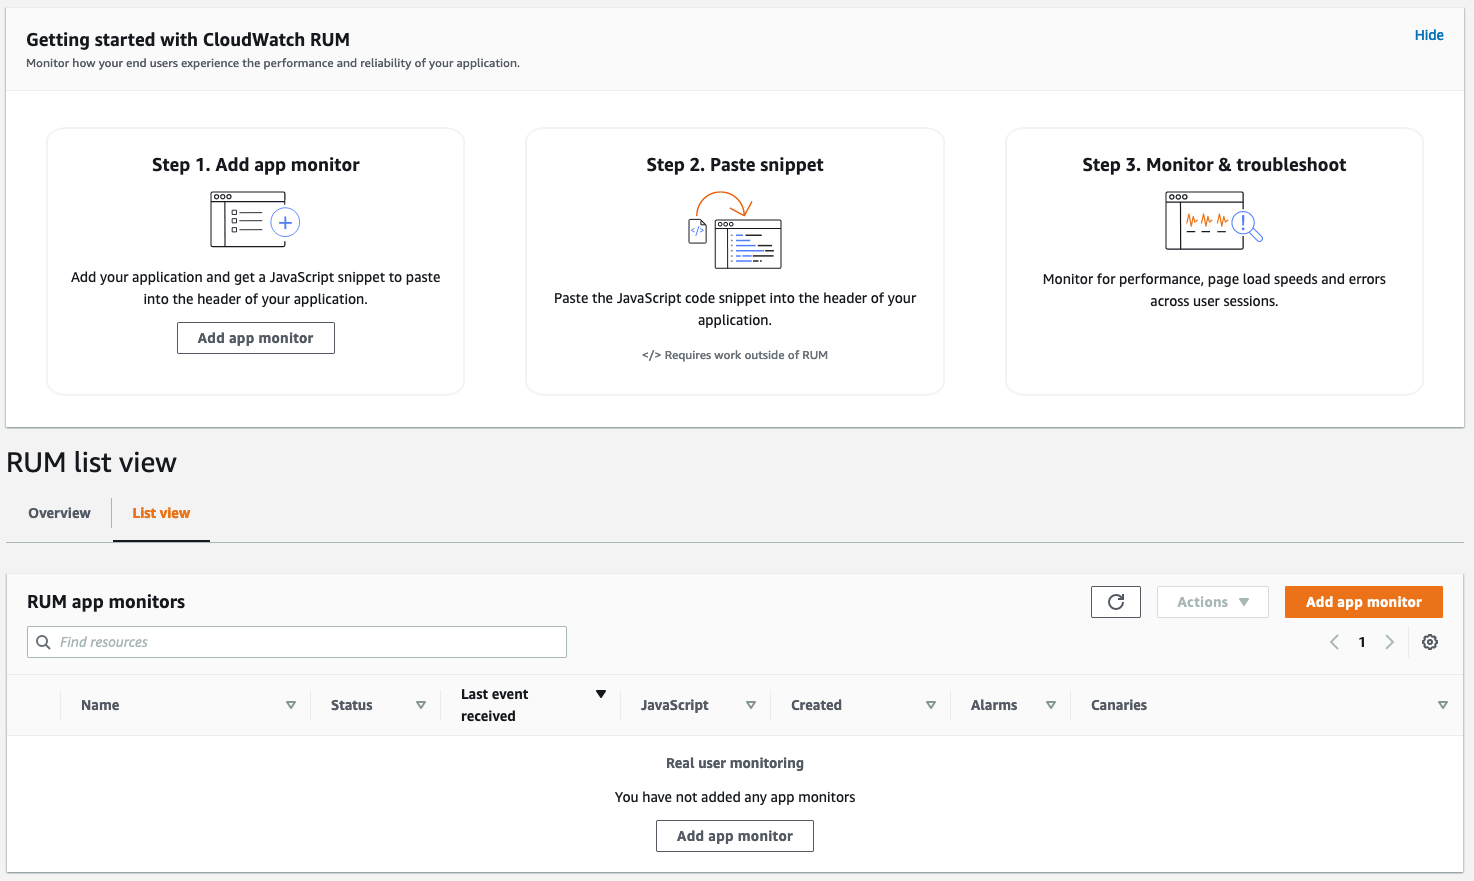
Figure 6: The landing page of the CloudWatch RUM console
Next, in the “app monitor” workflow, I name the first “app monitor” “RetailDemoStore_Unauthenticated”. I will use this “app monitor” for guest users.
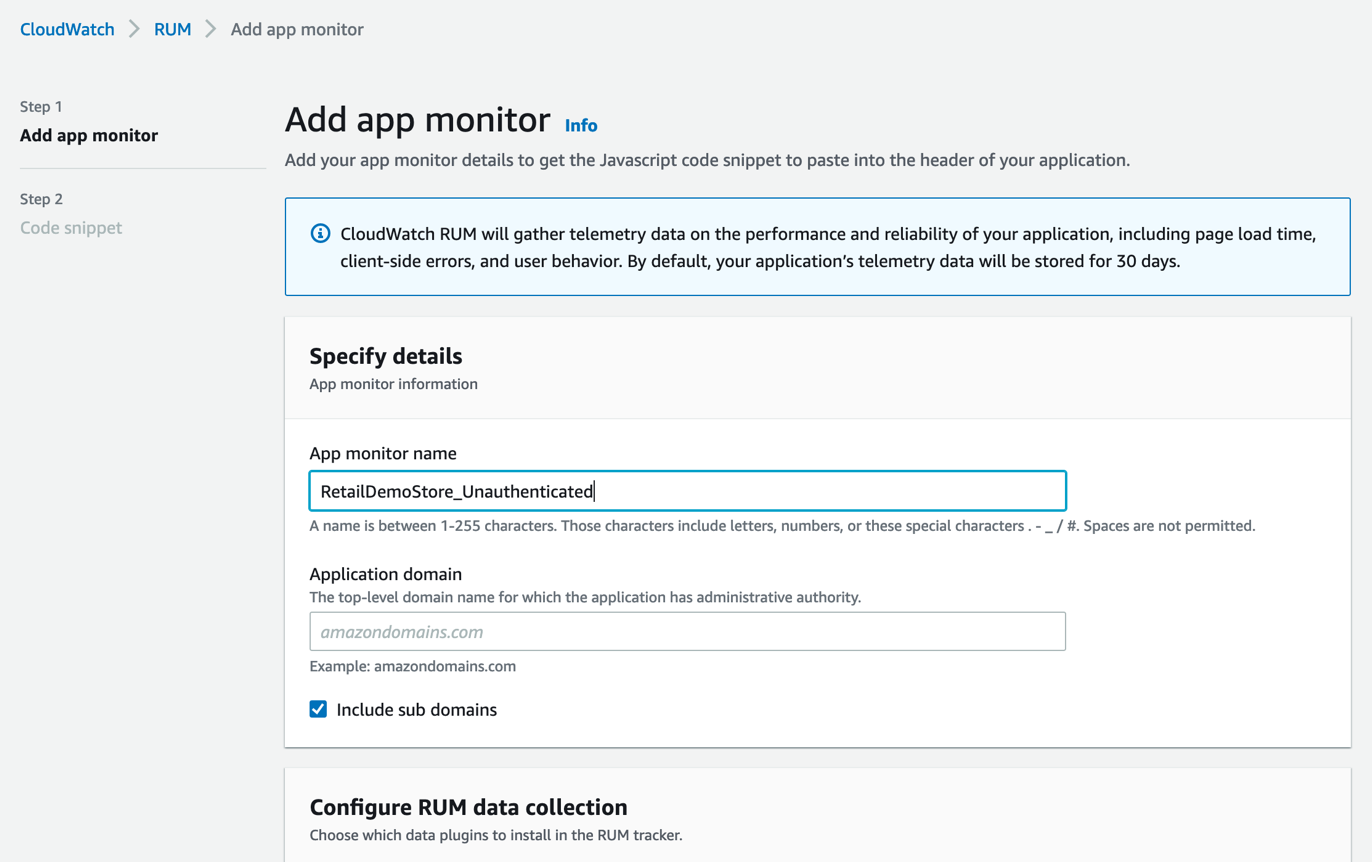
Figure 7: The “Add app monitor” workflow of the CloudWatch RUM console
The Retail Demo Store already has Cognito identities and corresponding AWS Identity and Access Management (IAM) roles for both guest users and signed-in users. I re-use these roles to authorize data sent to CloudWatch RUM. Since I’ll set up authorization later, in the Authorization pane, I select the option “Use private authentication from existing provider”.
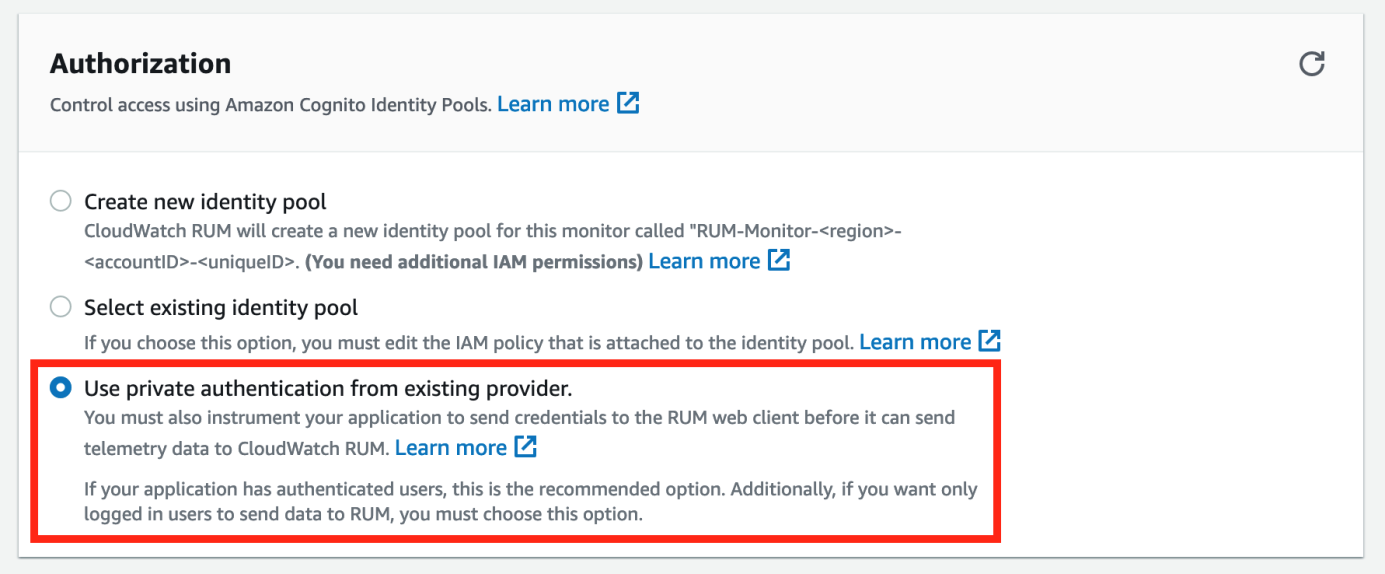
Figure 8: I select “Use private authentication from existing provider”
At the bottom of the “Add app monitor” workflow, I select “Add app monitor” and then at the bottom of the “Code snippet” workflow, I select Done.
Finally, I repeat this process to create a second app monitor named RetailDemoStore_Authenticated. I will use this app monitor for signed-in users.
And voila – I have the two RUM app monitors!
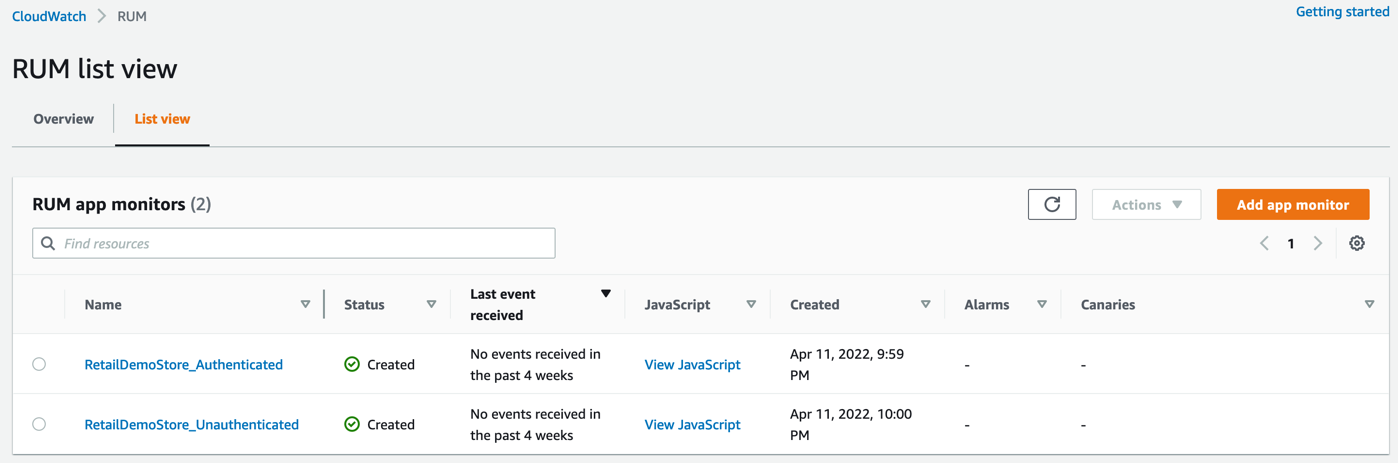
Figure 9: One app monitor for authenticated users and one app monitor for unauthenticated users
Step 2: Grant signed-in and guest user roles permission to send data to app monitors
Now I grant the relevant IAM roles permission to send data to the two app monitors created in Step 1. First, I update the role for authenticated users and open the IAM console and navigate to the authenticated user role. Then, I create an inline policy named “PutRumEvents” and define the policy with the following JSON:
Next, I update the role for unauthenticated users. Still in the IAM console, I navigate to the unauthenticated user role, create an inline policy named “PutRumEvents” and define the policy with the following JSON.
These IAM roles now have permission to write data to our app monitors. Signed-in users and guest users will now gain authorization to send data to CloudWatch RUM when they assume these roles through AWS STS.
Step 3: Instrument the web application to simultaneously send data to two app monitors
Now I am ready to instrument the Retail Demo Store to collect data using the CloudWatch RUM web client. First, I install the CloudWatch RUM web client in the Retail Demo Store from NPM.
Next, in the start-up script of the Retail Demo Store (`index.js`), I create configurations for my two app monitors.
Next, still in the start-up script, I create two instances of the CloudWatch RUM web client: one for the authenticated app monitor, and one for the unauthenticated app monitor. Both instances of the web client begin in the disabled state, which means that they won’t yet record data. If the current user is the guest user, the unauthenticated app monitor is enabled. If the current user is signed in, the authenticated app monitor is enabled. Because one of the web client instances is enabled immediately after instantiation, there’s no risk of losing monitoring data from initializing them in the disabled state.
Next, I add an event listener to detect when the user logs in or logs out.
Finally, I hook into the Vue.js router to record page views.
Signed-in and guest user journeys
Now that I have instrumented the application, I’ll try out the app monitors! I open my instance of the Retail Demo Store and navigate it as follows:
- From the welcome page, I select “Sign in”
- From the sign in page, I select “Sign in”
- From the home page, I select a product
- From the product page, I select “Add to cart” and “View cart”
- From the cart page, I select “Checkout” and “Place your order”
- From the home page, I select “Sign out”
Now I view the user journeys for this interaction. I open the CloudWatch RUM console, open the “RetailDemoStore_Unauthenticated” app monitor, and select the User journey tab. The following screenshot shows the user journey for the unauthenticated guest user session. The session pauses on the sign in page (/auth) after the user logs in and resumes on the index page (/) after the user logs out.
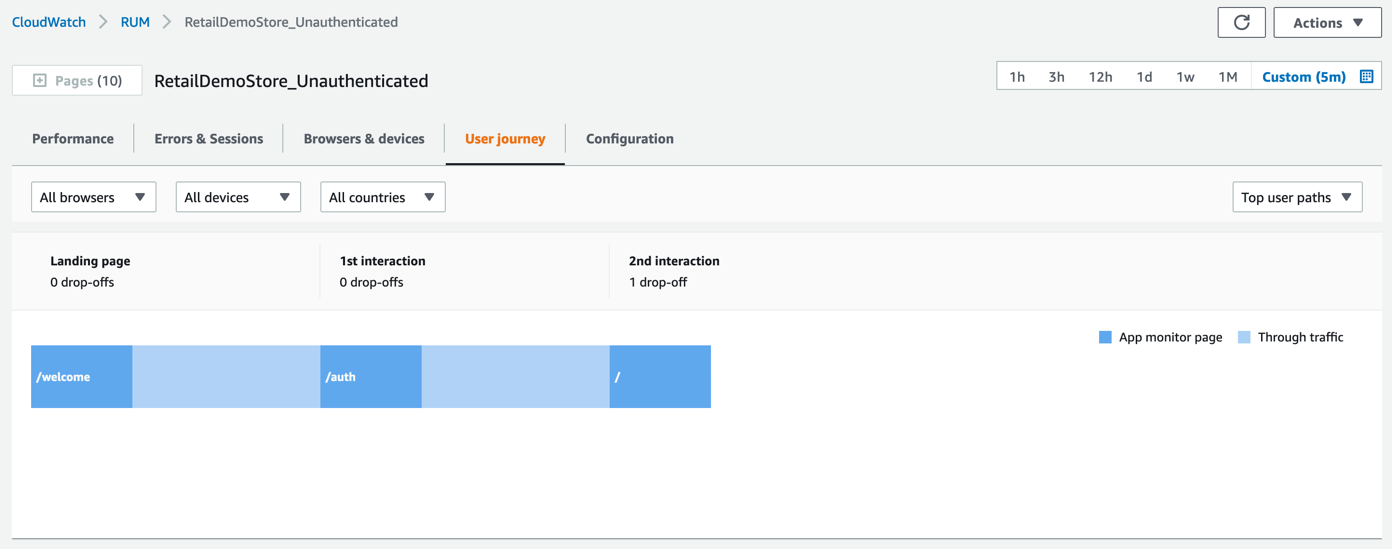
Figure 10: The user journey view for the unauthenticated app monitor
Next, I open the”RetailDemoStore_Authenticated” app monitor, and select the User journey tab. The following screenshot shows the user journey for the authenticated, signed-in user session. The session begins on the sign in page (/auth) after the user logs in, and ends on the index page (/), where the user logs out.
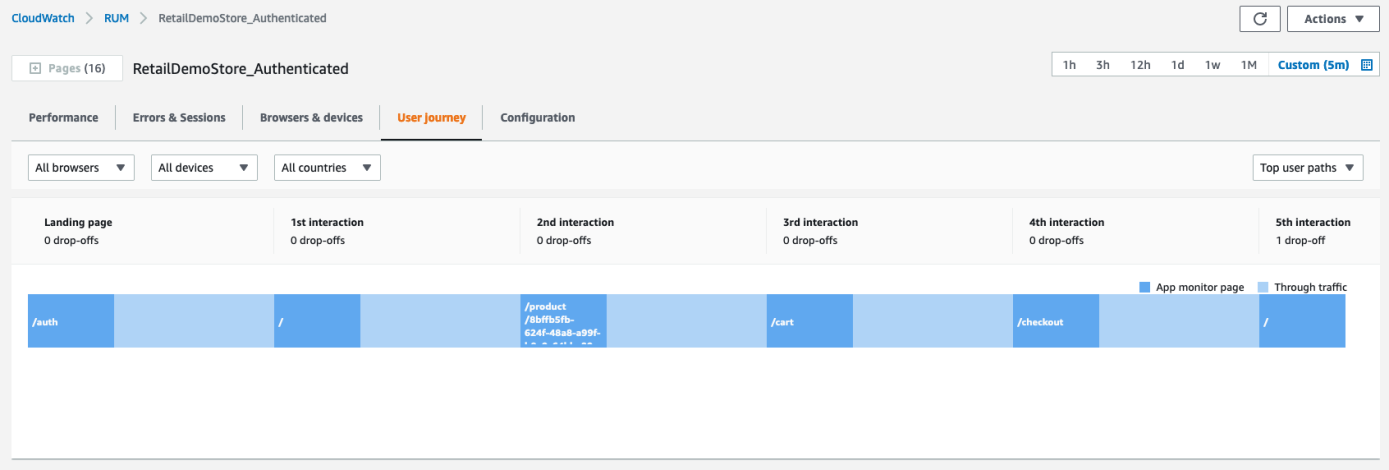
Figure 11: The user journey view for the authenticated app monitor
Conclusion
Because monitoring data generated by client-side applications is untrusted, you can gain confidence that your RUM data is authentic by isolating signed-in user traffic from guest user traffic. In this post, I demonstrated how to do this by instrumenting the Retail Demo Store application with two CloudWatch RUM app monitors: one for signed-in user traffic and one for guest user traffic. Authorization is one layer or protection that CloudWatch RUM provides to help you ingest client-side monitoring data into the CloudWatch ecosystem, including CloudWatch Metrics, CloudWatch RUM, CloudWatch Logs and AWS X-Ray. Using these observability services can help client-side application owners detect and resolve issues such as slow page load speeds, application errors, network errors, and issues with the application’s user interface.
Next steps
In this post, I instrumented the Retail Demo Store with CloudWatch RUM. However, your application may have unique requirements that differ from that of the Retail Demo Store. For example, your application may use an identity provider other than Amazon Cognito identity pools. While this demo can serve as a starting point, you can learn more about CloudWatch RUM configuration and authorization by reading:
- The CloudWatch RUM user documentation
- The CloudWatch RUM web client documentation
- The Amazon Cognito identity pools (federated identities) authentication flow
Authors: