AWS Cloud Operations Blog
Provision sandbox accounts with budget limits to reduce costs using AWS Control Tower
Many Amazon Web Services (AWS) customers struggle to keep cloud costs under control while allowing employees to innovate and develop their AWS skills. We talk to technology leaders every day who rank controlling cloud spend among their top concerns. Those same leaders don’t want to stifle innovation or restrict employee’s ability to learn AWS. Using shared development accounts for learning and experimentation can lead to uncontrolled costs since it is hard to track, and can also impact resources that will eventually be promoted to production workloads. In this post, we’ll use AWS native services to provision AWS sandbox accounts for employees to learn and experiment in with automated controls to limit monthly AWS costs per account.
The solution covered in this post uses Account Factory Customization (AFC), a feature of AWS Control Tower, to deploy sandbox accounts with configurable and automatically enforced monthly budgets. Your employees can grow their AWS skills and experiment without impacting path to production (dev/test) environments, while staying within your desired budget. We will define an AWS Budgets monthly budget with automated enforcement using AWS CloudFormation, create a blueprint as a product in AWS Service Catalog, deploy a sandbox account from AWS Control Tower Account Factory using the blueprint, and verify the sandbox account is working as expected.
Prerequisites
- You must have an AWS Control Tower managed landing zone set up and have access to the management account. For instructions see Getting started with AWS Control Tower. Have your Account Factory configured and understand how to use it.
- You need access to an AWS account where you can deploy products from AWS Service Catalog. We recommend using a separate account as your Service Catalog hub as shown in this blog post. We do not recommend the use of your AWS management account for this.
Solution design and architecture
This solution uses multiple AWS native services to deploy and automate governance of your sandbox accounts. For this use case, a sandbox account is an AWS account used for learning, experimentation, and other non-SDLC activities. A sandbox should not be connected to your organizations network or be used to develop workloads that will be deployed to production. The best practice is for your sandbox accounts to live in a separate Sandbox Organizational Unit (OU) in your landing zone.
You will learn how to enable employees to have a place to learn AWS and experiment with new ideas while staying within a monthly budget. To do this, the employees need to be automatically restricted from incurring additional costs in the AWS account once the budget limit is hit. The account must also reset at the beginning of each month to restore full access to the employee.
The AWS landing zone is managed using AWS Control Tower. An account will be provisioned through your Account Factory with your standard controls in place. An Account Factory Customization blueprint will be used to transform the account into a sandbox.
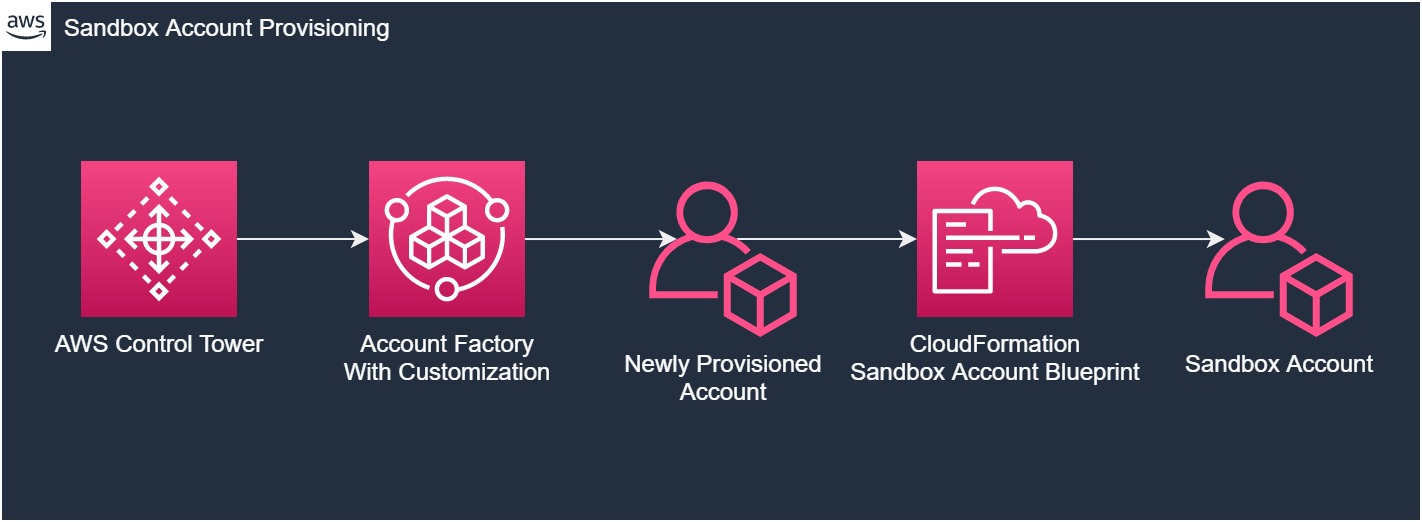
Figure 1 Sandbox account provisioning
Your sandbox account will have a SandboxDeveloper IAM role for the employee to assume when accessing the account. This role will have power user access with restrictions limiting the ability to change the AWS Budget and Lambda functions that govern the sandbox. The account will have AWS Budgets enabled and a configurable budget set with a default monthly limit of $100. The budget will publish warning notifications to an Amazon SNS topic when the account hits 50% and 80% of the limit(configurable percentages), and to a different topic when the limit is met. The warning notifications do not have subscribers by default so you can decide who or what receives these alerts. The limit met notification will have an AWS Lambda function subscribing to it that will change the SandboxDeveloper role access to read only so the employee can still access the account, but not create new resources.
Using a Lambda function to determine what actions are taken when the budget is met gives you a lot of flexibility. You could attach a custom policy to the role that allows for deletion of created resources or use the Lambda function to kick off a process to clean up the account and delete any resources already created. For this how to guide you are only changing the developer access to read only and back, but you can use custom IAM policies or update the Lambda functions to suit your needs. If you want to terminate account resources, you can add the desired function logic and delete resources with the AWS Cloud Control API or develop your own account reaper application to call from the Lambda function.
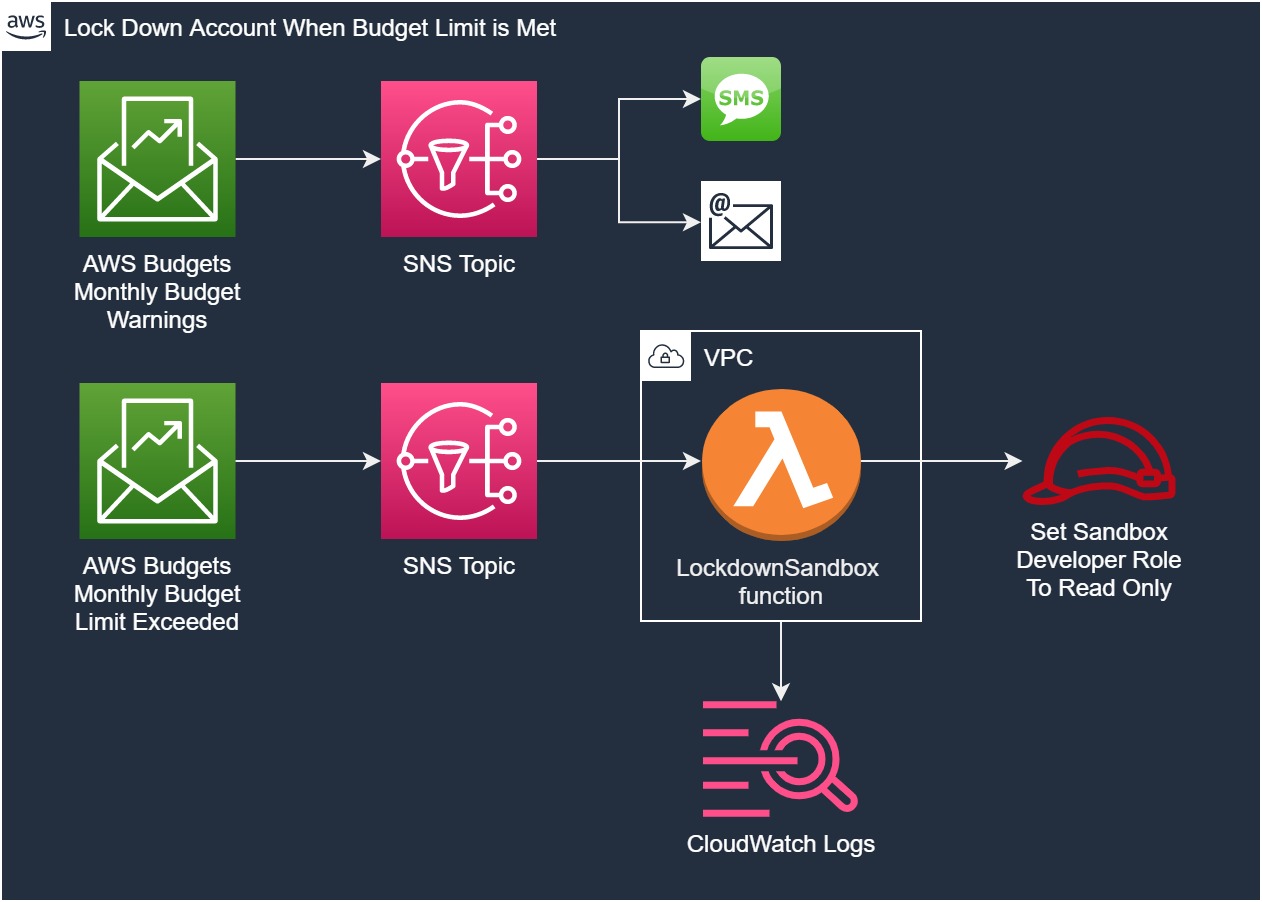
Figure 2 Architecture for sandbox account lockdown
The final component is a scheduled rule in Amazon EventBridge that runs at the beginning of each month and kicks off a Lambda function that resets the SandboxDeveloper role access to power user. The budget automatically restarts at $0 since it is set as monthly. An AWS Key Management Service (KMS) key is also created and used to encrypt logs, Lambda functions, and SNS messages.
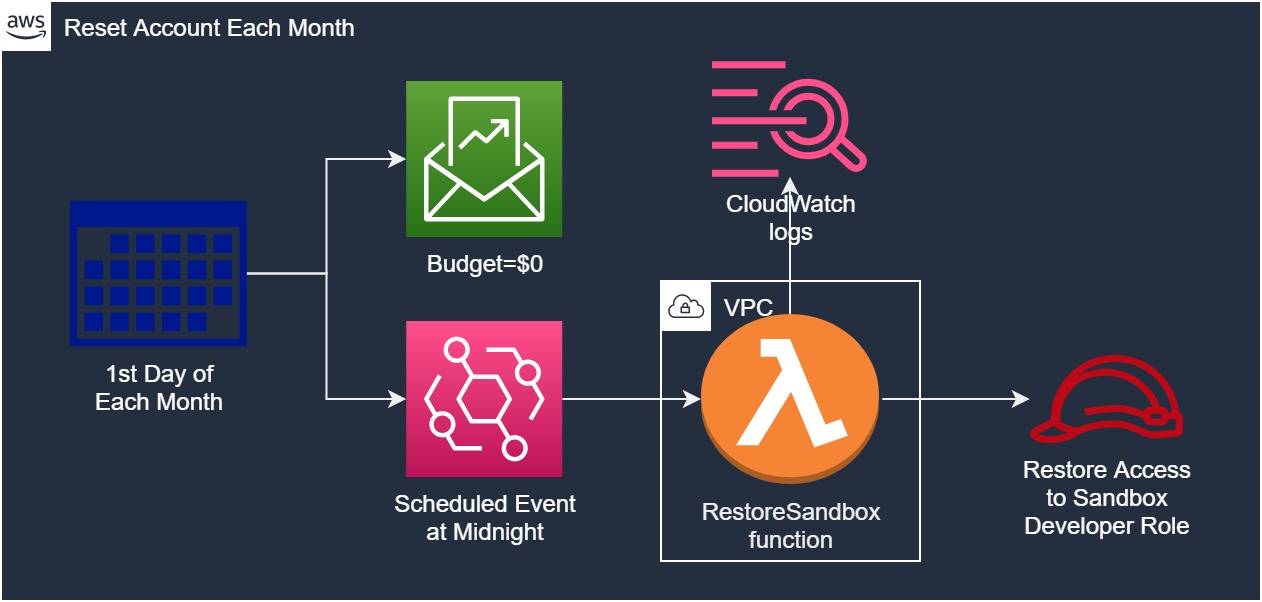
Figure 3 Architecture for monthly sandbox account reset
Walkthrough
- Federate or sign in to your AWS Control Tower management account as an AWS Control Tower administrator.
- Download this CloudFormation template from GitHub, named AWSSandbox.yaml. Take a few minutes to read through the template and see how the parameters and resources are defined.
- Go to IAM in the console. Create a new role named AWSControlTowerBluePrintAccess as documented in the user guide.
- Create the blueprint as a Service Catalog product using the CloudFormation template you downloaded.
- Go to Service Catalog and choose the Product list in the Administration menu.
- In the Product list, choose the Create product button then select Create product
- In the Product details section, set the Product name to “Sandbox Blueprint” and give it a description and owner.
- For the Version details section, make sure Use a template file is selected, then upload the AWSSandbox.yaml template.
- Skip the rest of the sections and choose the Create product button at the bottom of the page.
- Refresh your Product list and you should see Sandbox Blueprint listed.
- Go to the AWS Control Tower Account Factory in the management account and choose Create account.
- Fill in the Account details. Make sure to use a new email address for the account. Most public email providers allow for email+additionaltext@domain which will allow you to use your existing address. For example, if your email is myname@domain you can use myname+sandbox@domain. You will need to check internally if your organizations email allows for that. Otherwise you can use a separate email from the one used to create your management account. Set the Display name of the account to “MyNewSandbox”.
- For the Access configuration section, make sure to use the IAM Identity Center email and user name you use to federate into your other AWS Control Tower accounts. If you need a refresher on AWS Control Tower and Identity Center integration, check the AWS Control Tower User guide.
- For the Organizational unit, select the Sandbox OU or another OU you have created for use with this solution.
- Expand the Account factory customization section and fill in the details. Enter the account number of where your shared Service Catalog products are (your hub account or management account if that’s where you created the Sandbox Blueprint product) and choose Validate account. Select Sandbox Blueprint from the Select a product dropdown list.
- Once you load the blueprint, you will see a Blueprint parameters section. These are the parameters set up in the CloudFormation template. For the purposes of this exercise, please keep the default values for all parameters.
- For Deployment Regions select Home Region.
- Choose the Create account button at the bottom. Wait until the account is created and enrolled which can take up to 30 minutes.
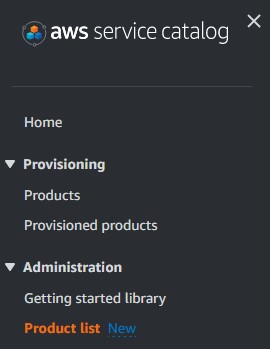
Figure 4 Service Catalog Product list on menu

Figure 5 Create a new product
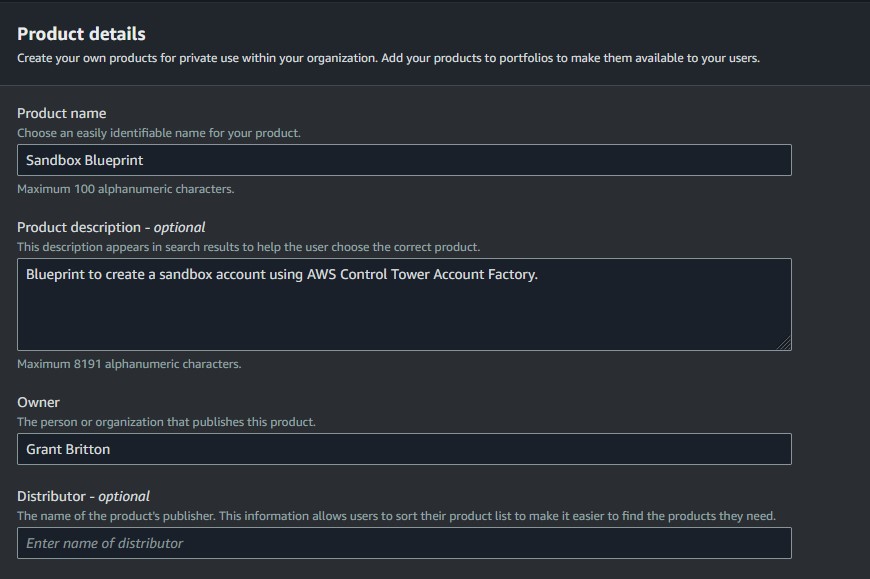
Figure 6 Blueprint product details in Service Catalog
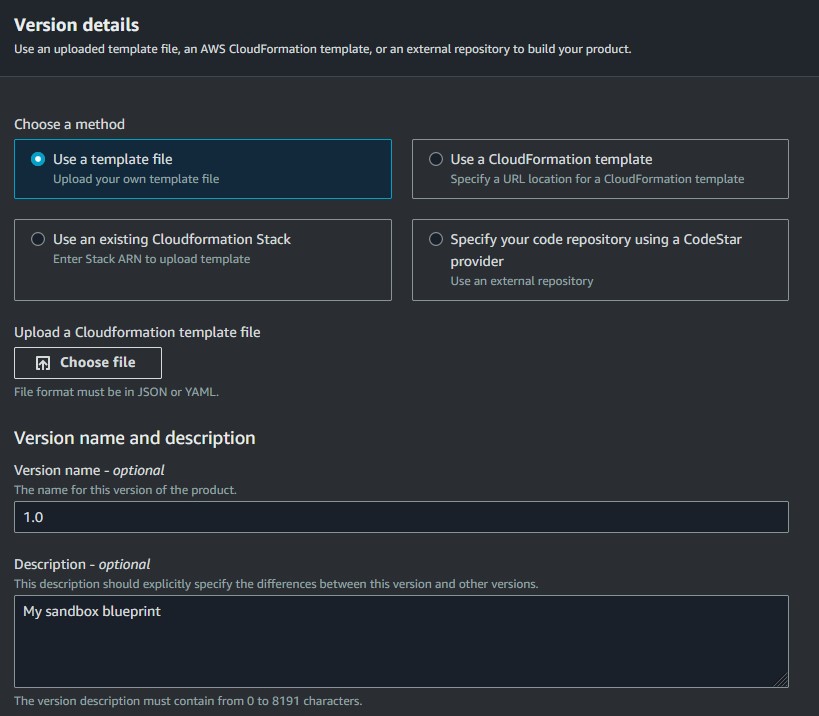
Figure 7 Uploading template for blueprint

Figure 8 Sandbox Blueprint in Service Catalog Product list

Figure 9 Account factory Create account button
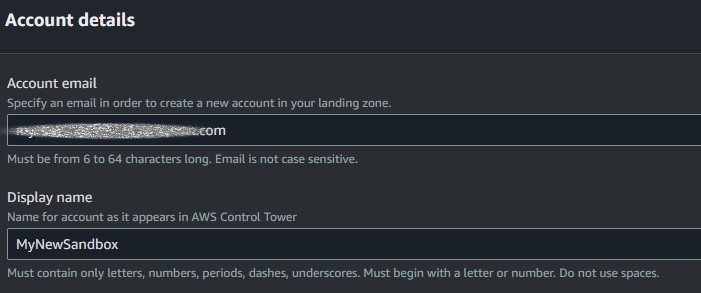
Figure 10 Sandbox account Account details
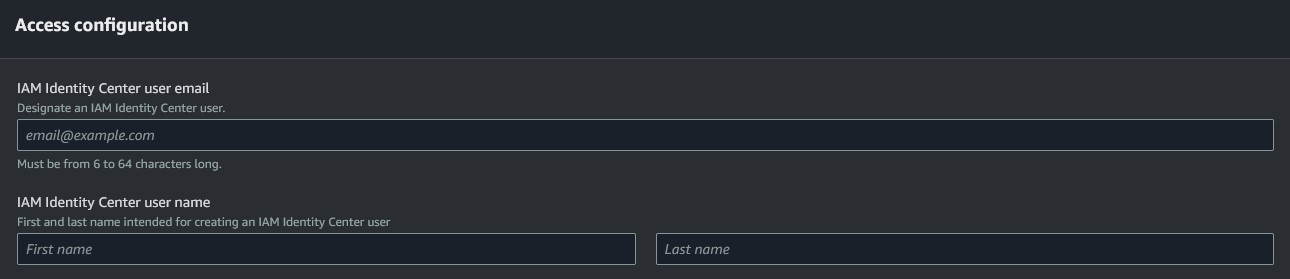
Figure 11 IAM Identity Center information for the new account

Figure 12 Select the Sandbox OU for your new account
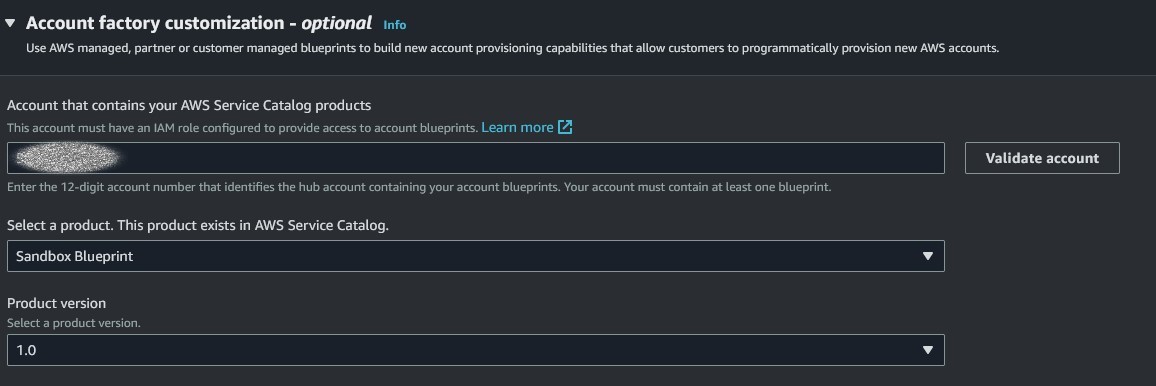
Figure 13 Enter the information for the Sandbox Blueprint you are using
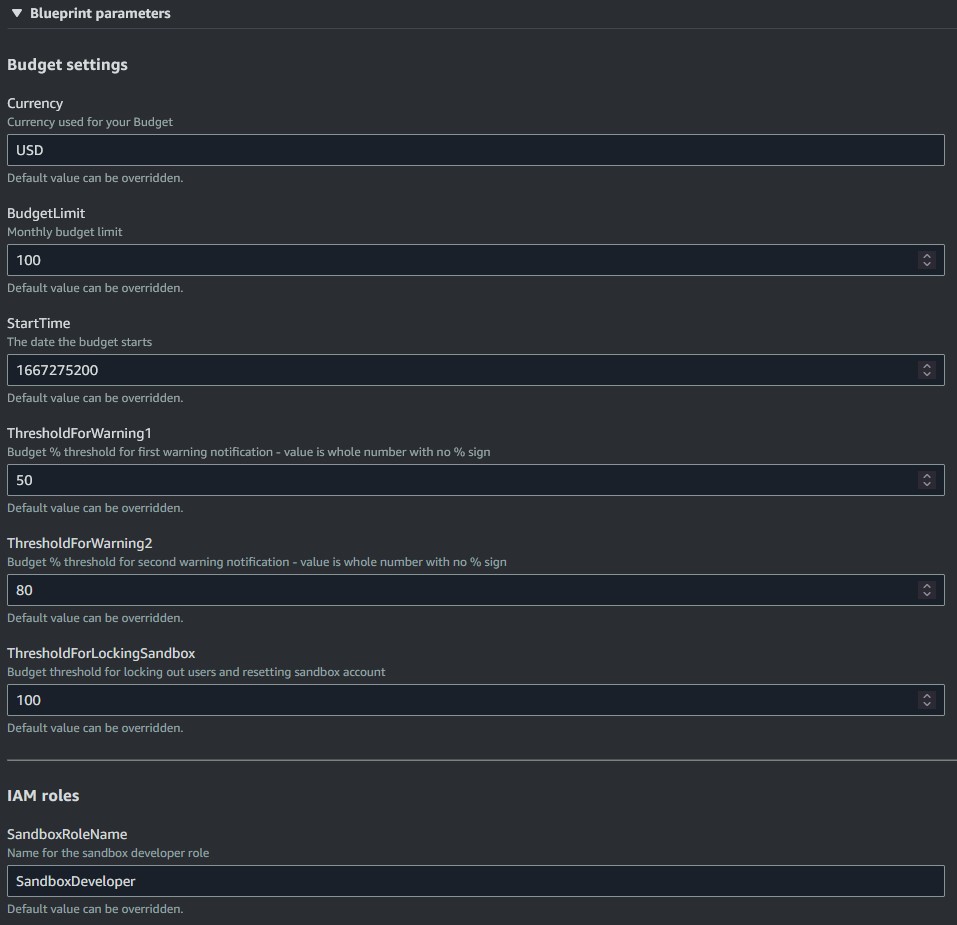
Figure 14 The list of parameters for the sandbox blueprint

Figure 15 Select the Home Region as your Deployment Region
Validation
Now it is time to verify the sandbox is set up correctly. Follow these instructions to validate so you do not need to wait until the budget limit is hit or until the monthly scheduled reset.
- Go to IAM and search for the SandboxDeveloper role. Verify that it has the PowerUserAccess and SandboxPowerUserRestrictions policies attached.
- Initiate the sandbox lockdown. Go to SNS, select the SandboxBudgetExceeded topic and choose the Publish message button.
- Set the Subject to “Test” and the Message body to “Testing sandbox lockdown”. Then choose the Publish message button at the bottom. This notification will kick off the LockdownSandbox Lambda function to set the SandboxDeveloper role to ReadOnlyAccess.
- Go to IAM and find the SandboxDeveloper role again. Check the details and instead of PowerUserAccess you will see that the ReadOnlyAccess policy is now attached to the role.
- For the last step you will run the RestoreSandbox Lambda function manually to verify that it sets the SandboxDeveloper role back to PowerUserAccess. Go to AWS Lambda and choose the RestoreSandbox function. Choose the orange Test button in the Code source section and select Configure test event.
- Name the event “Test” and keep it on the hello-world template. The sample parameters will be ignored. Choose Save.
- Choose the down arrow next to the Test button and confirm that your new Test event is selected.
- Choose the Test button to run the test and you will see the results in the following window. The message should say “SandboxDeveloper role access restored”.
- Go back to IAM again and verify the SandboxDeveloper role has the PowerUserAccess policy attached again. If so, the test was successful and you now have a functioning AWS sandbox account!
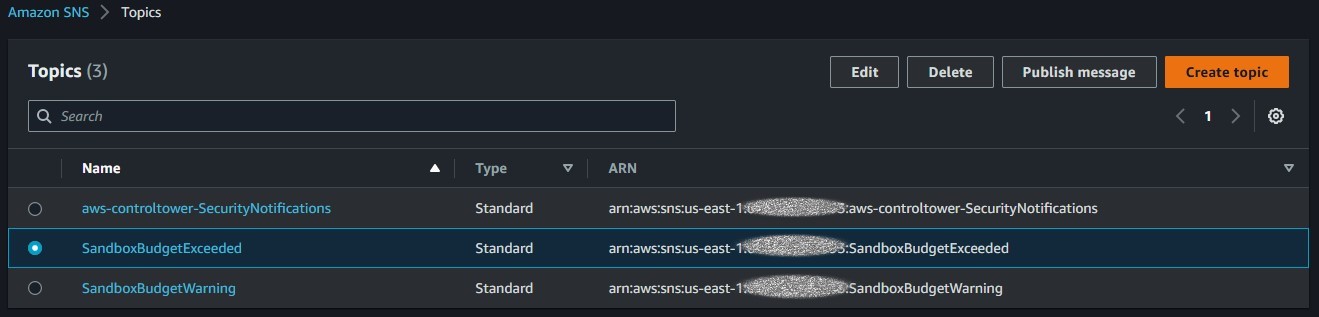
Figure 16 SandboxBudgetExceeded topic in the SNS list
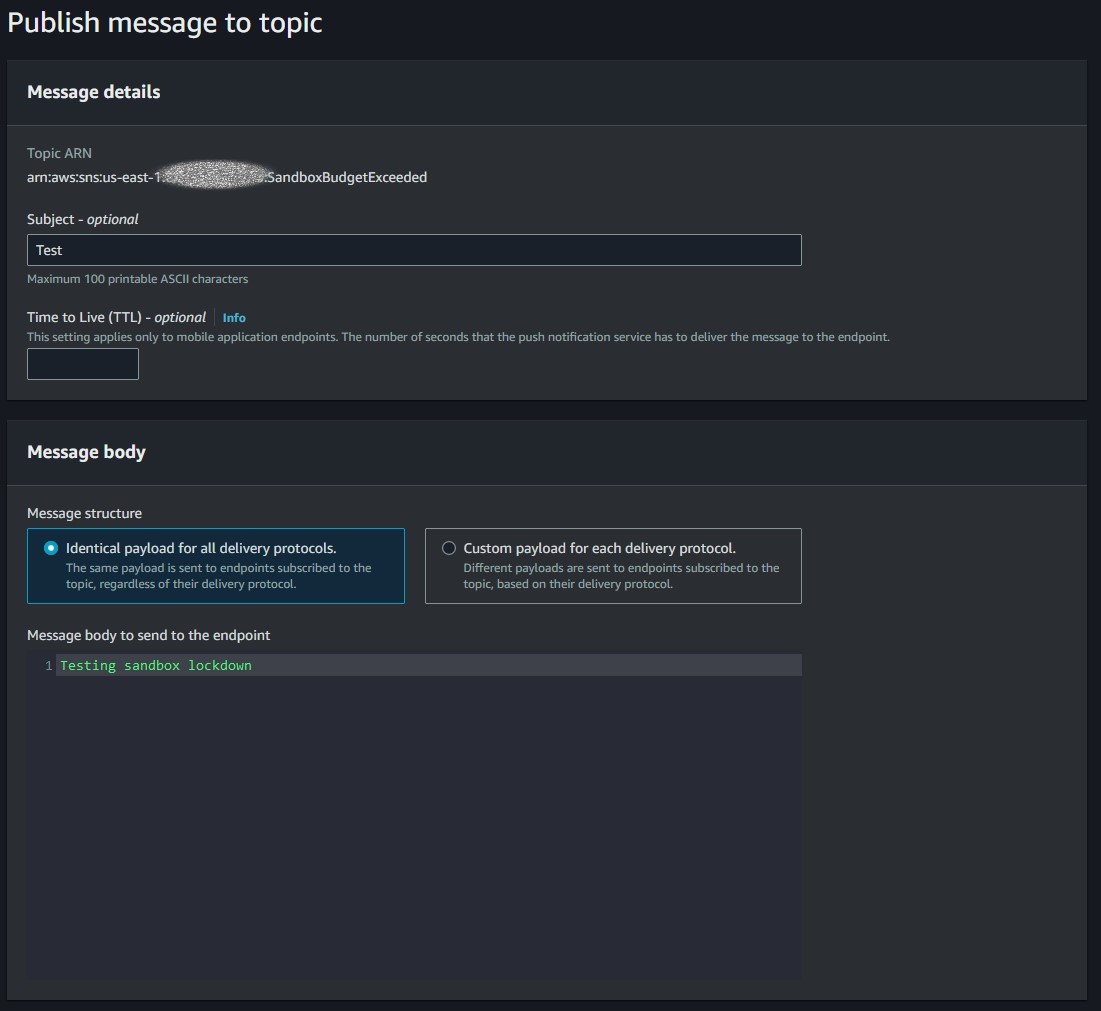
Figure 17 Publishing a message to the SandboxBudgetExceeded topic
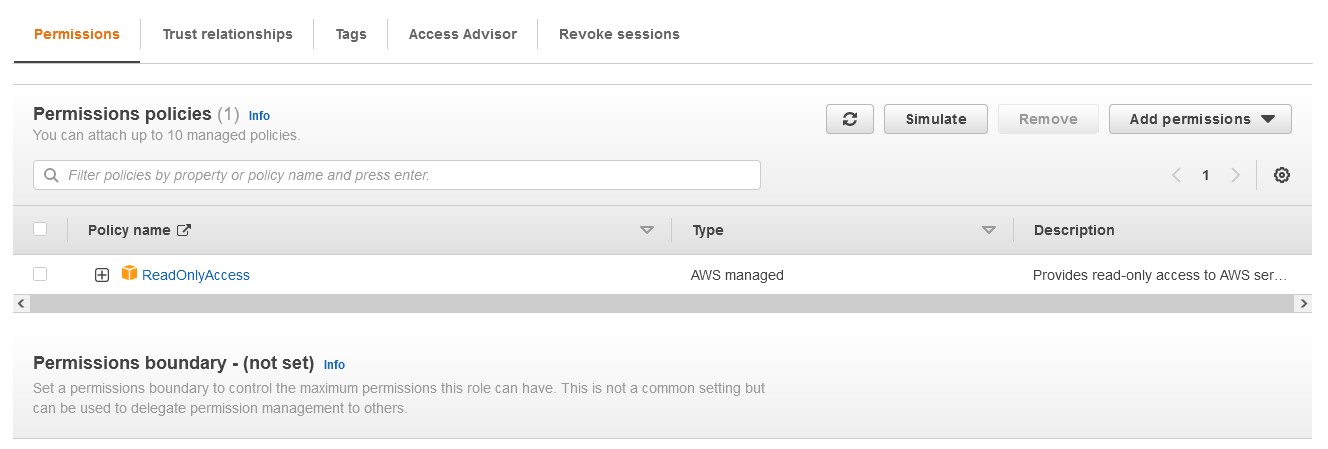
Figure 18 PowerUserAccess is removed and ReadOnlyAccess is attached to the SandboxDeveloper role

Figure 19 Test button for creating a new test event for a Lambda function
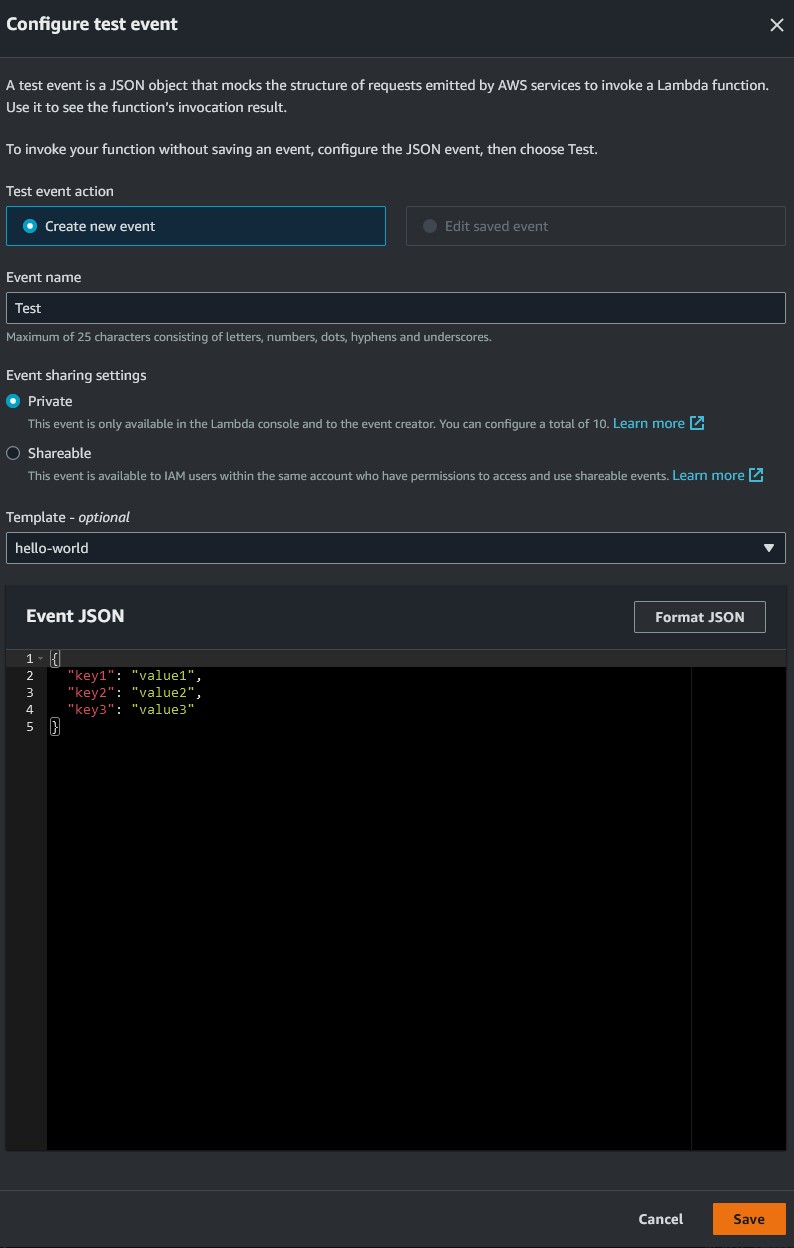
Figure 20 Configure your hello-world test event for the function
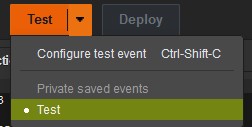
Figure 21 Make sure your new Test event is selected
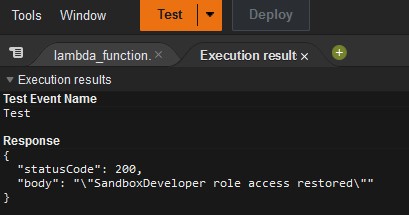
Figure 22 Run the test and look for the successful response
Clean up
- Federate or sign in to your AWS Control Tower management account as an AWS Control Tower administrator. Choose the MyNewSandbox account on your AWS Control Tower Dashboard. Once in the Account details, choose the Unmanage account button to remove it from AWS Control Tower.
- Go to AWS Organizations in the console.
- You will see MyNewSandbox under Root. On the Account details screen, choose the Close button on the top right to close this account.
- Go to Service Catalog and select Product list from the menu. Choose the Sandbox Blueprint product. Once in the Product details, select the Delete button. Confirm deletion and your blueprint is deleted.
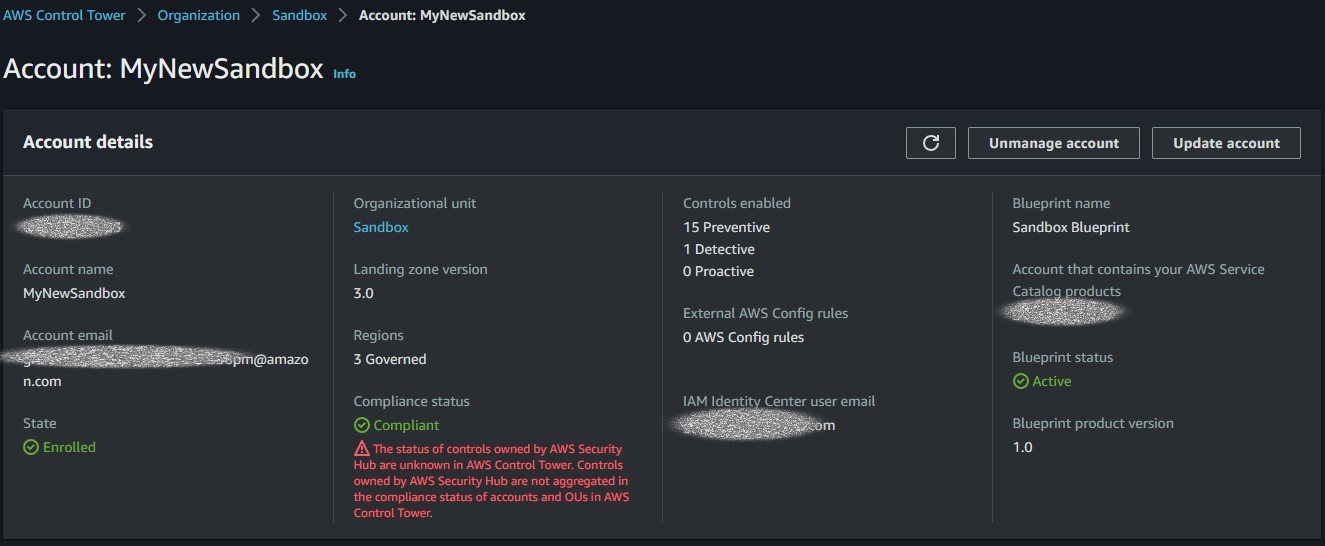
Figure 23 Details of the MyNewSandbox account in AWS Control Tower
It will take a few minutes to remove the account from AWS Control Tower. Once the account no longer shows in your enrolled accounts move to the next step.
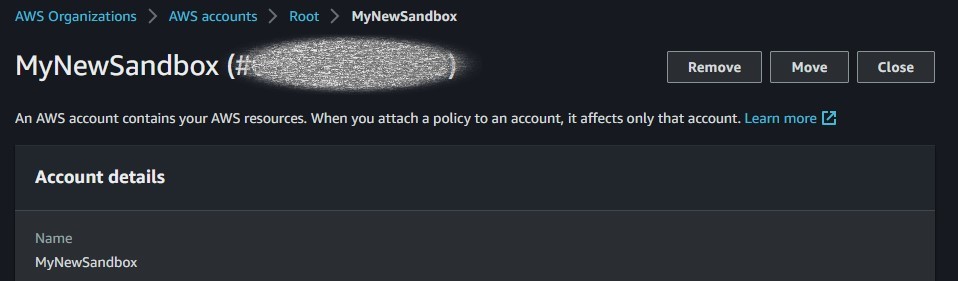
Figure 24 MyNewSandbox account details in AWS Organizations
You will get an email from AWS confirming that your MyNewSandbox account is closed.

Figure 25 Go here to delete the Sandbox Blueprint product from Service Catalog
Conclusion
It is important to give employees the ability to learn AWS and innovate in the cloud while also managing costs. AWS services and automation will help you achieve both goals. Through this post, we deployed managed AWS sandbox accounts with monthly budget limits through Account Factory Customization in AWS Control Tower. We learned how to use a CloudFormation template to create the services and resources to make a sandbox account, and how to deploy that blueprint to a new account using AWS Control Tower Account Factory. Finally, we validated the sandbox functionality without hitting the budget limit or waiting for the account to reset.
Next steps
If this solution meets the needs for your sandbox account requirement, edit the CloudFormation, Lambda functions, and other resources to your liking and try it in your AWS Control Tower managed landing zone. Now that you understand how Account Factory Customization works, think about other blueprints you could create to customize different AWS account needs for your organization.