AWS Open Source Blog
Unified Service Discovery with Amazon ECS and Kubernetes
Starting today, you can leverage unified service discovery for services managed by Amazon Elastic Container Service (Amazon ECS) and Kubernetes. We recently introduced ECS Service Discovery, which makes it easy for containerized services to discover and connect with each other by creating and managing a registry of service names using the Amazon Route 53 Auto Naming (Auto Naming) API. Service names are automatically mapped to a set of DNS records. This lets you refer to a service by name (such as backend.example.com) in your code and write DNS queries that resolve to the name to the service’s endpoint at runtime.
We wanted to let Kubernetes users take advantage of the Auto Naming API, too, so we extended support for the Auto Naming API to Kubernetes. This integration makes it easy to automatically replicate Kubernetes services and ingresses to the service registry that is managed by the Auto Naming API. Clients outside of the Kubernetes cluster now can easily resolve these service endpoints using a friendly service name. To enable this integration, we made a contribution to the External DNS, a Kubernetes incubator project.
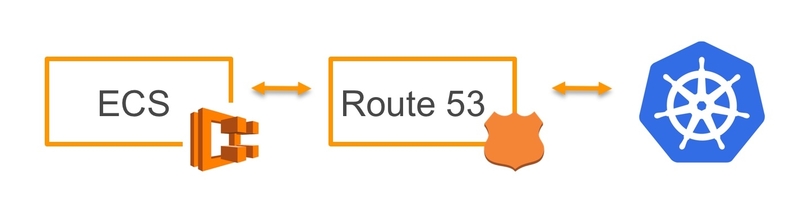
Now, services that run in Amazon ECS can discovery and connect with services running in Kubernetes by making simple DNS queries to Route 53.
What is Auto Naming?
The Auto Naming API is an alternative approach to managing DNS records and both Route 53 and third-party health checks. Auto Naming abstracts away technical details of the DNS protocol and provides a service registry that makes it easy to manage all of your service endpoints. You can discover your services by making simple DNS calls, and Auto Naming returns the locations of healthy endpoints.
The main APIs in Auto Naming are:
- CreatePublicDNSNamespace – creates a public Route 53 hosted zone that can be managed only programmatically, for example, using an AWS SDK or the Auto Naming APIs (The Route 53 console currently supports Auto Naming only for viewing hosted zones and records.)
- CreatePrivateDNSNamespace – creates a private Route 53 hosted zone, available within a VPC that you specify; the hosted zone can be managed only programmatically
- CreateService – creates a new service in the namespace; the service defines DNS and health checking settings
- RegisterInstance – registers a particular instance with the service, and creates corresponding DNS records and an optional health check
- DeregisterInstace – removes the instance registration, and deletes relevant DNS records and an optional health check
Learn more about the Auto Naming API in the Amazon Route 53 API Reference.
Let’s see how to start using Auto Naming with an application running in a Kubernetes cluster.
Step 1: Set IAM Permissions
To start using Kubernetes with Auto Naming, a user must have the permissions that are summarized in the ‘AmazonRoute53AutoNamingFullAccess’ managed IAM policy. In the following AWS CLI example, we create a new user named external-dns and grant the required permissions:
$ aws iam create-group --group-name external-dns

$ aws iam attach-group-policy --policy-arn arn:aws:iam::aws:policy/AmazonRoute53AutoNamingFullAccess --group-name external-dns

$ aws iam create-user --user-name external-dns

$ aws iam add-user-to-group --user-name external-dns --group-name external-dns
When deploying the External DNS connector on Amazon EKS, make sure to add the AmazonRoute53AutoNamingFullAccess managed policy to the worker node group IAM instance role.
For more information about the AWS CLI, see the AWS Command Line Interface User Guide.
Step 2: Set Up a Namespace
To start using service discovery, create a DNS namespace using the AWS CLI. A namespace is a logical group of services discoverable either publicly or from within a Virtual Private Cloud (VPC) of your choice. Alternatively, you can use an existing DNS namespace that you created using ECS Service Discovery.
Create a namespace:
$ aws servicediscovery create-private-dns-namespace --name "external-dns-test.internal" –vpc “your-vpc-id”Verify that the namespace is created or find an existing namespace:
$ aws servicediscovery list-namespacesStep 3: Deploy ExternalDNS
ExternalDNS synchronizes exposed Kubernetes Services and Ingresses with DNS providers, such as Route 53 . It allows you to control DNS records dynamically via Kubernetes resources.
Connect your kubectl client to the cluster that you want to test ExternalDNS with and set up the Service Account for ExternalDNS with the following YAML manifest ‘external-dns-serviceaccount.yaml’:
apiVersion: v1
kind: ServiceAccount
metadata:
  name: external-dns
  namespace: default
---
apiVersion: rbac.authorization.k8s.io/v1beta1
kind: ClusterRole
metadata:
  name: external-dns
rules:
- apiGroups: [""]
  resources: ["services"]
  verbs: ["get","watch","list"]
- apiGroups: [""]
  resources: ["pods"]
  verbs: ["get","watch","list"]
- apiGroups: ["extensions"]
  resources: ["ingresses"]
  verbs: ["get","watch","list"]
- apiGroups: [""]
  resources: ["nodes"]
  verbs: ["list"]
---
apiVersion: rbac.authorization.k8s.io/v1beta1
kind: ClusterRoleBinding
metadata:
  name: external-dns-viewer
roleRef:
  apiGroup: rbac.authorization.k8s.io
  kind: ClusterRole
  name: external-dns
subjects:
- kind: ServiceAccount
  name: external-dns
  namespace: default
Apply it to your Kubernetes cluster by running:
$ kubectl apply -f external-dns-serviceaccount.yamlThen apply the following YAML manifest file “external-dns-deployment.yaml” to deploy ExternalDNS.
apiVersion: extensions/v1beta1
kind: Deployment
metadata:
  name: external-dns
spec:
  strategy:
    type: Recreate
  template:
    metadata:
      labels:
        app: external-dns
    spec:
      serviceAccountName: external-dns
      containers:
      - name: external-dns
        image: registry.opensource.zalan.do/teapot/external-dns:latest
        args:
        - --source=service
        - --source=ingress
        - --domain-filter=external-dns-test.internal #search for a specific domain name
        - --provider=aws-sd #use AWS-SD provider
        - --aws-zone-type=private #search for private namespaces only
        - --txt-owner-id=%AWS_Account_ID% #add your AWS account ID as the owner
        env:
          - name: AWS_REGION
            value: us-east-1 #specify the AWS region
Apply the following manifest to deploy ExternalDNS:
$ kubectl apply -f external-dns-deployment.yamlNow, check how ExternalDNS works by deploying a sample service:
apiVersion: v1
kind: Service
metadata:
  name: nginx
  annotations:
    external-dns.alpha.kubernetes.io/hostname: nginx.external-dns-test.internal
spec:
  type: LoadBalancer
  ports:
  - port: 80
    name: http
    targetPort: 80
  selector:
    app: nginx
---
apiVersion: extensions/v1beta1
kind: Deployment
metadata:
  name: nginx
spec:
  template:
    metadata:
      labels:
        app: nginx
    spec:
      containers:
      - image: nginx
        name: nginx
        ports:
        - containerPort: 80
          name: http
Apply the following manifest to deploy the sample Nginx service:
$ kubectl apply -f nginx-deployment.yamlAfter one minute, confirm that a corresponding DNS record for your service was created in your hosted zone. You can use the Amazon Route53 console for that purpose. You can also connect directly to the nginx service by calling from your VPC:
nginx.external-dns-test.internalStart Using Kubernetes and Amazon ECS Together
Now, applications running in an Amazon ECS cluster and in a Kubernetes cluster can share the same namespace, such as example.com, and discover each other via DNS queries. All the new services created in either of the clusters will become available in the same namespace automatically so that you can seamlessly extend your application running in Amazon ECS by adding components, running in Kubernetes.
To get started, deploy the latest version of the ExternalDNS connector for your services running in Kubernetes along with ECS Service Discovery for your services running in Amazon ECS. For more information check out the documentation.