AWS Security Blog
How to migrate your on-premises domain to AWS Managed Microsoft AD using ADMT
February 2, 2024: We’ve updated this post to fix broken links and added a note on migrating passwords.
Customers often ask us how to migrate their on-premises Active Directory (AD) domain to AWS so they can be free of the operational management of their AD infrastructure. Frequently they are unsure how to make the migration simple. A common approach using the CSVDE utility doesn’t migrate attributes such as user passwords. This makes migration difficult and necessitates manual effort for a large part of the migration that can cause operational and security challenges when migrating to a new directory. So, what’s changed?
You can now use the Active Directory Migration Toolkit (ADMT) along with the Password Export Service (PES) to migrate your self-managed AD to AWS Directory Service for Microsoft Active Directory, also known as AWS Managed Microsoft AD. This enables you to migrate AD objects and encrypted passwords for your users more easily.
AWS Managed Microsoft AD is a managed service built on Microsoft Active Directory. AWS provides operational management of the domain controllers, and you use standard AD tools to administer users, groups, and computers. AWS Managed Microsoft AD enables you to take advantage of built-in Active Directory features, such as Group Policy, trusts, and single sign-on and helps make it simple to migrate AD-dependent workloads into the AWS Cloud. With AWS Managed Microsoft AD, you can join Amazon EC2 and Amazon RDS for SQL Server instances to a domain, and use AWS Enterprise IT applications, such as Amazon WorkSpaces, and AWS IAM Identity Center with Active Directory users and groups.
In this post, we will show you how to migrate your existing AD objects to AWS Managed Microsoft AD. The source of the objects can be your self-managed AD running on EC2, on-premises, co-located, or even another cloud provider. We will show how to use ADMT and PES to migrate objects including users (and their passwords), groups, and computers.
The post assumes you are familiar with AD and how to use the Remote Desktop Protocol client to sign and use EC2 Windows instances.
Background
In this post, we will migrate user and computer objects, as well as passwords, to a new AWS Managed Microsoft AD directory. The source will be an on-premises domain.
This example migration will be for a fairly simple use case. Large customers with complex source domains or forests may have more complex processes involved to map users, groups, and computers to the single OU structure of AWS Managed Microsoft AD. For example, you may want to migrate an OU at a time. Customers with single domain forests may be able to migrate in fewer steps. Similarly, the options you might select in ADMT will vary based on what you are trying to accomplish.
To perform the migration, we will use the Admin user account from the AWS Managed Microsoft AD. AWS creates the Admin user account and delegates administrative permissions to the account for an organizational unit (OU) in the AWS Managed Microsoft AD domain. This account has most of the permissions required to manage your domain, and all the permissions required to complete this migration.
In this example, we have a Source domain called source.local that’s running in a 10.0.0.0/16 network range, and we want to migrate users, groups, and computers to a destination domain in AWS Managed Microsoft AD called destination.local that’s running in a network range of 192.168.0.0/16.
To migrate users from source.local to destination.local, we need a migration computer that we join to the destination.local domain on which we will run ADMT. We also use this machine to perform administrative tasks on the AWS Managed Microsoft AD. As a prerequisite for ADMT, we must install Microsoft SQL Express 2019 on the migration computer. We also need an administrative account that has permissions in both the source and destination AD domains. To do this, we will use an AD trust and add the AWS Managed Microsoft AD admin account from destination.local to the source.local domain. Next we will install ADMT on the migration computer, and run PES on one of the source.local domain controllers. Finally, we will migrate the users and computers.
Note: If you migrate user passwords by using ADMT and PES, and if the supported Kerberos encryption type RC4_HMAC_MD5 is disabled on client computers, Kerberos authentication fails for the users until they reset their passwords. This occurs because of the design of the PES tool and the method that it uses to synchronize passwords. We recommend for the user to reset their password after migration.
For this example, we have a handful of users, groups, and computers, shown in the source domain in these screenshots, that we will migrate:
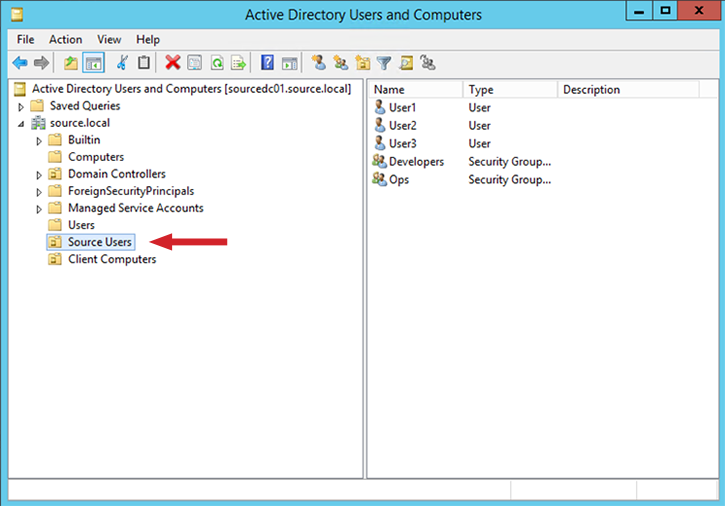
Figure 1: Example source users
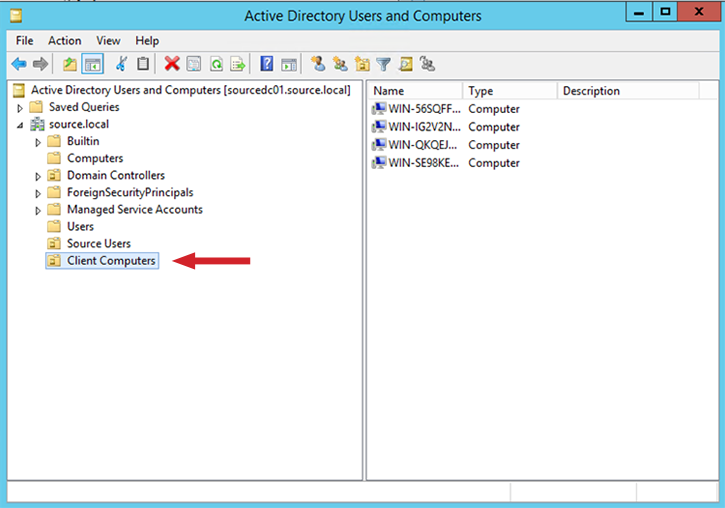
Figure 2: Example client computers
In the remainder of this post, we will show you how to do the migration in 5 main steps:
- Prepare the forests, migration computer, and administrative account.
- Install SQL Express and ADMT on the migration computer.
- Configure ADMT and PES.
- Migrate users and groups.
- Migrate computers.
Step 1: Prepare the forests, migration computer, and administrative account
To migrate users and passwords from the source domain to AWS Managed Microsoft AD, you must have a 2-way forest trust. The trust from the source domain to AWS Managed Microsoft AD enables you to add the admin account from the AWS Managed Microsoft AD to the source domain. This is necessary so you can grant the AWS Managed Microsoft AD Admin account permissions in your source AD directory so it can read the attributes to migrate. We’ve already created a two-way forest trust between these domains. You should do the same by following this guide. Once your trust has been created, it should show up in the AWS console as Verified.
The ADMT tool should be installed on a computer that isn’t the domain controller in the destination domain destination.local. For this, we will launch an EC2 instance in the same VPC as the domain controller and we will add it to the destination.local domain using the EC2 seamless domain join feature. This will act as the ADMT transfer machine.
- Launch a Microsoft Windows Server 2019 instance.
- Complete a domain join to the target domain destination.local. You can complete this manually, or alternatively you can use AWS Systems Manager to complete a seamless domain join as covered here.
- Sign into the instance using RDP and use Active Directory Users and Computers (ADUC) to add the AWS Managed Microsoft AD admin user from the destination.local domain to the source.local domain’s built-in administrators group (you will not be able to add the Admin user as a domain admin). For information on how to set up this instance to use ADUC, please see this documentation.

Figure 3: the “Administrator’s Properties” dialog box
Step 2: Install SQL Express and ADMT on the migration computer
Next, we need to install SQL Express and ADMT on the migration computer by following these steps.
- Install Microsoft SQL Express 2019 on the migration computer with a basic install.
- Download ADMT version 3.2 from Microsoft.
- Run the installer and, when setting the tool up, on the Database Selection page of the wizard, for Database (Server\Instance), type the local instance of Microsoft SQL Express we previously installed to work with ADMT.

Figure 4: Specify the “Database (Server\Instance)”
- On the Database Import page of the wizard, select No, do not import data from an existing database (Default).

Figure 5: The “Database Import” dialog box
- Complete the rest of the installation using all of the default options.
Step 3: Configure ADMT and PES
We’ll use PES to take care of encrypted password synchronization. Before we configure that, we need to create an encryption key that will be used during this process to encrypt the password migration.
- On the ADMT transfer machine, open an elevated Command Prompt and use the following format to create the encryption key.
Here’s an example:
Note: If you get an error stating that the command is not found, close and reopen Command Prompt to refresh the path locations to the ADMT executable, and then try again.
- Copy the outputted key file onto one of the source.local domain controllers.
- Download the Password Export Server on one of the source.local domain controllers.
- Start the install and, in the ADMT Password Migration DLL Setup window, browse to the encryption file you created in the previous step.
- When prompted, enter the password used in the ADMT encryption command.
- Run PES using the local system account. Note that this will prompt a restart of the domain controller you’re installing PES on.
- Once the domain controller has rebooted, open services.msc and start the Password Export Server Service, which is currently set to Manual. You might choose to set this to automatic if it’s likely your DC will be rebooted again before the end of your migration.

Figure 6: Start the Password Export Server Service
- You can now open the Active Directory Migration Tool: Control Panel > System and Security > Administrative Tools > Active Directory Migration Tool.
- Right-click Active Directory Migration Tool to see the migration options:

Figure 7: List of migration options
Step 4: Migrate users and groups
- In the Domain Selection page, select or type the Source and Target domains, and then select Next.
- On the User Selection page, select the users to migrate. You can use an include file if you have a large domain. Select Next.
- On the Organizational Unit Selection page, select the destination OU that you want to migrate your users across to, and then select Next. AWS Managed Microsoft AD gives you a managed OU where you can create your OU tree structure.
In this example, we will place them in Users OU:
- On the Password Options page, select Migrate passwords, and then select Next. This will contact PES running on the source domain controller.
- On the Account Transitions Page, decide how to handle the migration of user objects. In this example, we’re going to replicate the state from the source domain. Migrating SID history is beneficial when you’re doing long, staged migrations where users may need to access resources in the source and destination domain before migration is complete. At this time, AWS Managed Microsoft AD doesn’t support migrating user SIDs. We select Target same as source, and then select Next. Again, what you choose to do might be different.

Figure 8: The “Account Transition Options” dialog
- Now, let’s customize the transfer. The following screen shot shows the commonly selected options on the User Options page of the User Account Migration Wizard:

\Figure 9: Common user options
It’s likely that you’ll have more than one migration pass, so choosing how you handle existing objects is important. This will be a single run for us, but the default behavior is to not migrate if the object already exists (see the image of the Conflict Management page below). If you’re running multiple passes, you’ll will want to look at options that involve merging conflicting objects. The method you select will depend on your use case. If you don’t know where to start, read this article.

Figure 10: The “Conflict Management” dialog box
In our example, you can see that our 3 users, and any groups they were members of, have been migrated.

Figure 11: The “Migration Progress” window
We can verify this by checking that the users exist in our destination.local domain:

Figure 12: Checking the users exist in the destination.local domain
Step 5: Migrate computers
Now, we’ll move on to computer objects.
- Open the Active Directory Migration Tool: Control Panel > System and Security > Administrative Tools > Active Directory Migration Tool.
- Right-click Active Directory Migration Tool and select Computer Migration Wizard.
- Select the computers you want to migrate to the new domain. We’ll select four computers for migration.

Figure 13: Four computers that will be migrated
- On the Translate Objects page, select which access controls you want to reapply during the migration, and then select Next.

Figure 14: The “Translate Objects” dialog box
The migration process will show completed, but we need to make sure the entire process worked.
- To verify that the migration was successful, select Close, and the migration tool will open a new window that has a link to the migration log. Check the log file to see that it has started the process of migrating these four computers:
2017-08-11 04:09:01 The Active Directory Migration Tool Agent will be installed on WIN-56SQFFFJCR1.source.local
2017-08-11 04:09:01 The Active Directory Migration Tool Agent will be installed on WIN-IG2V2NAN1MU.source.local
2017-08-11 04:09:01 The Active Directory Migration Tool Agent will be installed on WIN-QKQEJHUEV27.source.local
2017-08-11 04:09:01 The Active Directory Migration Tool Agent will be installed on WIN-SE98KE4Q9CR.source.local
If the admin user doesn’t have access to the C$ or admin$ share on the computer in the source domain share, then then installation of the agent will fail as shown here:
2017-08-11 04:09:29 ERR2:7006 Failed to install agent on \\WIN-IG2V2NAN1MU.source.local, rc=5 Access is denied.
Once the agent is installed, it will perform a domain disjoin from source.local and perform a join to desintation.local. The log file will update when this has been successful:
2017-08-11 04:13:29 Post-check passed on the computer ‘WIN-SE98KE4Q9CR.source.local’. The new computer name is ‘WIN-SE98KE4Q9CR.destination.local’.
2017-08-11 04:13:29 Post-check passed on the computer ‘WIN-QKQEJHUEV27.source.local’. The new computer name is ‘WIN-QKQEJHUEV27.destination.local’.
2017-08-11 04:13:29 Post-check passed on the computer ‘WIN-56SQFFFJCR1.source.local’. The new computer name is ‘WIN-56SQFFFJCR1.destination.local’.
You can then view the new computer objects in the destination domain.
- Log in to one of the old source.local computers and, by looking at the computer’s System Properties, confirm that the computer is now a member of the new destination.local domain.

Figure 15: Confirm the computer is member of the destination.local domain
Summary
In this simple example we showed how to migrate users and their passwords, groups, and computer objects from an on premises deployment of Active Directory, to our fully AWS Managed Microsoft AD. We created a management instance on which we ran SQL Express and ADMT, we created a forest trust to grant permissions for an account to use ADMT to move users, we configured ADMT and the PES tool, and then stepped through the migration using ADMT.
The ADMT tool gives us a great way to migrate to our managed Microsoft AD service that allows powerful customization of the migration, and it does so in a more secure way through encrypted password synchronization. You may need to do additional investigation and planning if the complexity of your environment requires a different approach with some of these steps.
If you have feedback about this post, submit comments in the Comments section below. If you have questions about this post, start a new thread on the AWS Directory service forum or contact AWS Support.