AWS Partner Network (APN) Blog
CoreOS and Ticketmaster Bring AWS Application Load Balancer Support to Kubernetes
Editor’s note: The ALB Ingress Controller is an official AWS project as of November 2018. Instructions for use are covered in the Amazon EKS documentation.
By Brandon Chavis, Partner Solutions Architect at AWS
 Kubernetes continues to grow in popularity on the Amazon Web Services (AWS) platform, and as with any popular tool or service, customers tend to identify areas where Kubernetes and AWS services can be better integrated.
AWS Partner CoreOS, the self-driving infrastructure company, lives at the forefront of this space and has been working to improve the Kubernetes experience on AWS.
You can observe this innovation and thought leadership in CoreOS Tectonic, an enterprise Kubernetes distribution. Tectonic provides numerous AWS integrations that enable customers to take advantage of many built-in features of the AWS platform, like AWS KMS for key management, Amazon S3 for backing up important data, Auto Scaling, IAM, and more.
One popular AWS feature that has been conspicuously unavailable to Kubernetes until now is the Application Load Balancer. This load balancing option operates at layer 7, enabling features like host, and path-based routing, TLS termination, support for WebSockets, HTTP/2, IPV6, and AWS WAF (web application firewall) features.
In collaboration with Ticketmaster, CoreOS has developed an Ingress controller. This resource can create all necessary AWS resources that will enable customers to use Application Load Balancers to route traffic to different services running on their Kubernetes controller.
Quick Primer on Kubernetes Ingress
Kubernetes provides several ways of exposing your services to the Internet. One way is through a resource type called an Ingress, which is a set of rules and configuration for how traffic will be forwarded to your service.
Defining an Ingress resource by itself doesn’t do anything, however, and you’ll need an Ingress controller to actually create resources on behalf of your Ingress. An Ingress controller is an application that listens to the Kubernetes API for the creation of Ingresses, and then creates the necessary resources for exposing your service.
The ALB Ingress Controller is designed to create and manage all the necessary AWS components to expose your Ingress via an Application Load Balancer. This means that when you deploy a service and expose it via an Ingress, the ALB Ingress Controller does the heavy lifting of creating an Application Load Balancer, registering your service with the target group, and creating an Amazon Route 53 Alias record to point to your Application Load Balancer.
If you delete your service and its Ingress, the Ingress Controller will clean up all the associated resources. Let’s take a look at how this works.
ALB Ingress Controller Workflow
These creation steps are outlined in the Github repository, but I’ll paraphrase them here to prevent too much context switching.
Source: https://github.com/coreos/alb-ingress-controller
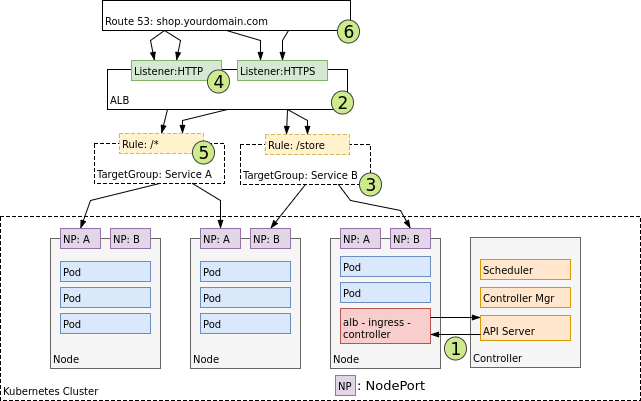
When an Ingress creation event from the API server is detected [1], the Ingress controller begins to create the necessary AWS resources. First, it creates the Application Load Balancer [2], and parses configuration for the load balancer from the Ingress YAML definition file.
Target groups [3] are also created, one per Kubernetes service that will use the load balancer. At [4], listeners are created, which expose the service on a specific port on the load balancer. Routing rules [5] are configured, which specify the correlation between URL paths and backend target groups.
Finally, Route 53 resource records [6] are created to represent the domain for your service.
Deploying Your Own ALB Ingress Controller
Let’s walk through a simple demo to set up our own ALB Ingress controller, spin up a sample backend service, and make sure we can actually hit our service through the load balancer at the route we configure.
First, you’ll need a Kubernetes cluster. For this demo, I’m using my Tectonic cluster, which I spun up using the Tectonic installer.
Tectonic installs with a sensible IAM policy applied to your Kubernetes controller instances, but the ALB Ingress Controller adds new requirements, since it now has to manage Route 53 on your behalf. You can find an example IAM policy here.
Since I was starting from the base Tectonic IAM role, I only needed to add the Route 53 section. My IAM policy now looks like this:
Because all Ingress controllers have a dependency on default-http-backend, we need to deploy that first.
We can do that quickly with the following:
Next, we can deploy the ALB Ingress Controller. The YAML file for deploying the controller is here.
We need to customize a few environment variables in the configuration before deploying, though, so clone it locally, and in your favorite editor, take a look at the following:
These may be fairly self-explanatory, but in case they aren’t:- Set the region in which you’d like your Application Load Balancer created (this will be the same region as your Kubernetes cluster), set the cluster name to something that makes sense (this will appear in AWS logging), and perhaps consider setting AWS_DEBUG to “true” in your early experimentation so you can look at pod logs for the controller and watch which AWS API calls are being made.
Once you’ve configured the YAML file for the controller, let’s apply it:
Now you have a living and breathing Ingress controller that is listening to the Kubernetes API and waiting to do your bidding. It is ready to create AWS resources when it detects that the appropriate Ingress resources have been created. Let’s move on and do just that.
Deploying a Demo Service and Ingress
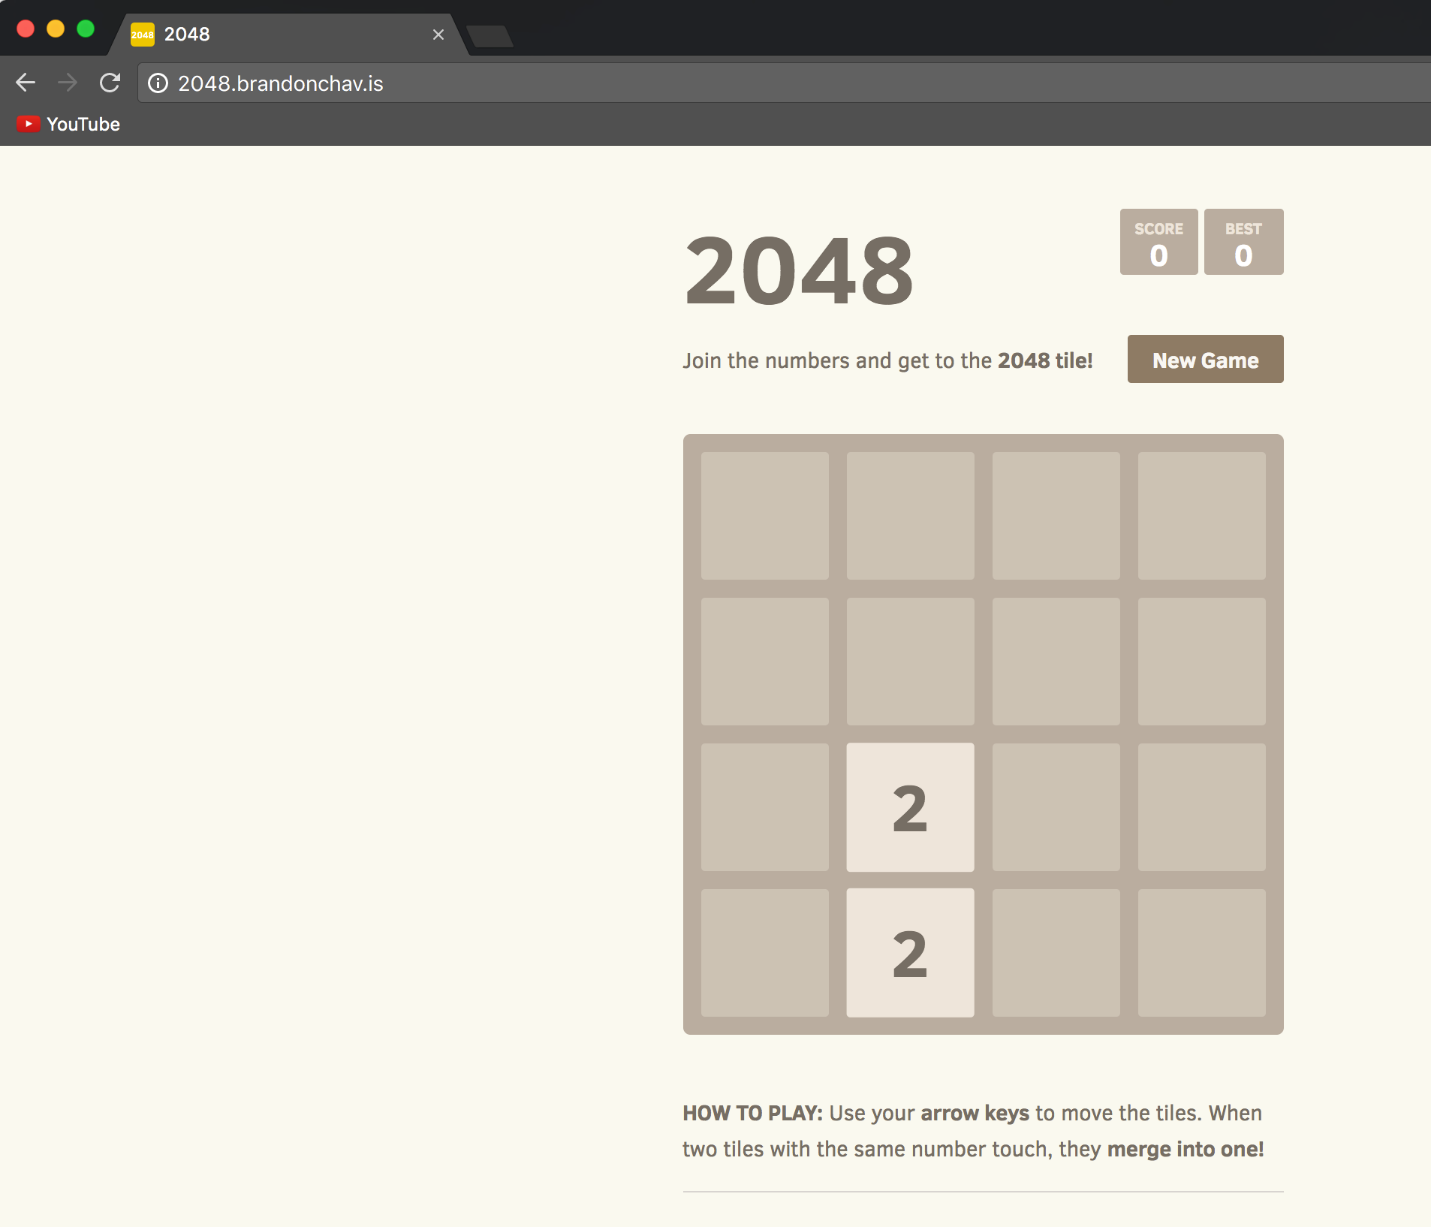
For this demo, we’ll use the 2048 game as our web service. We’ll use the same kubectl apply commands to apply the following resource definition .yaml files.
First we’ll create a namespace for these components to run within:
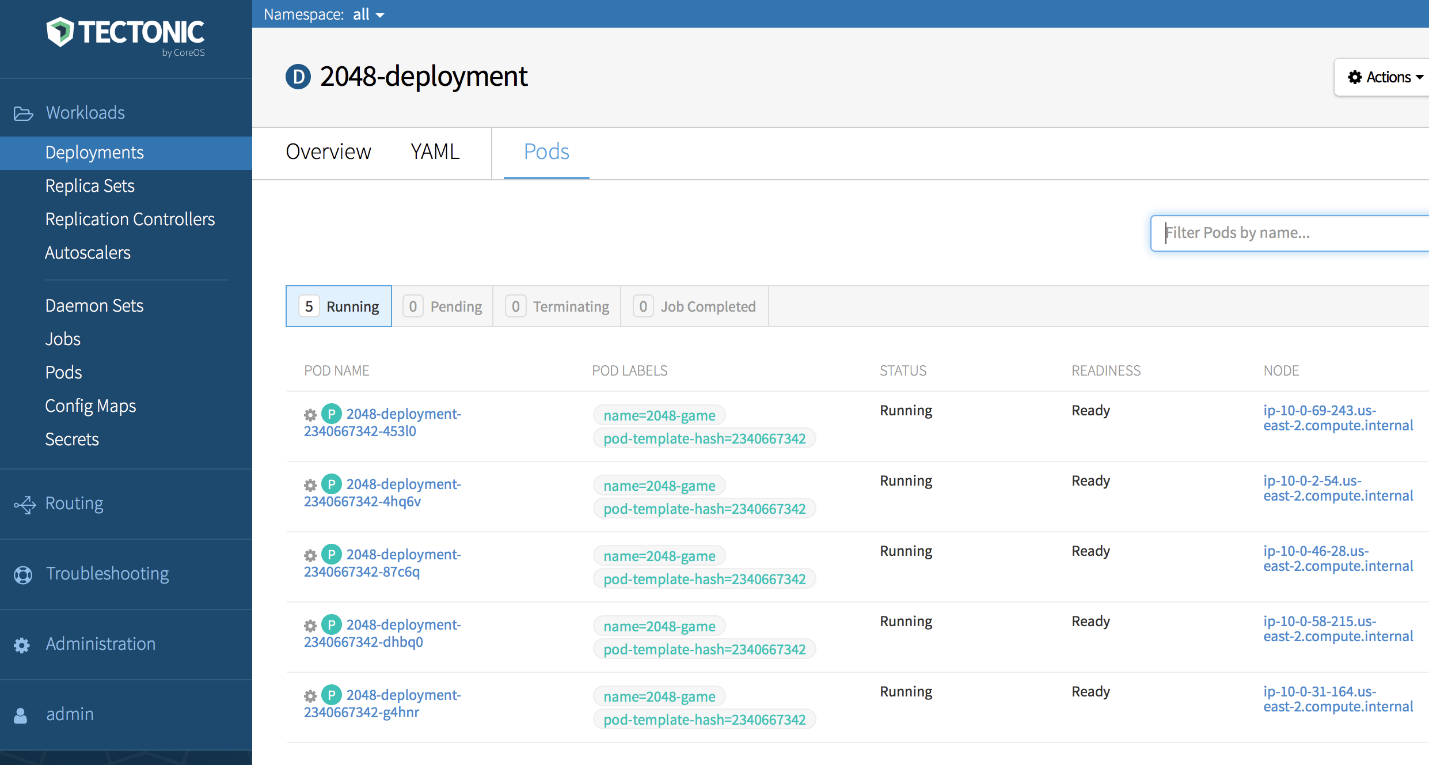
Next, we’ll create the deployment of our backend service. This will deploy the 2048 game application with five replicas across our cluster.
Using the Tectonic console, I can make sure I have my five replicas running:
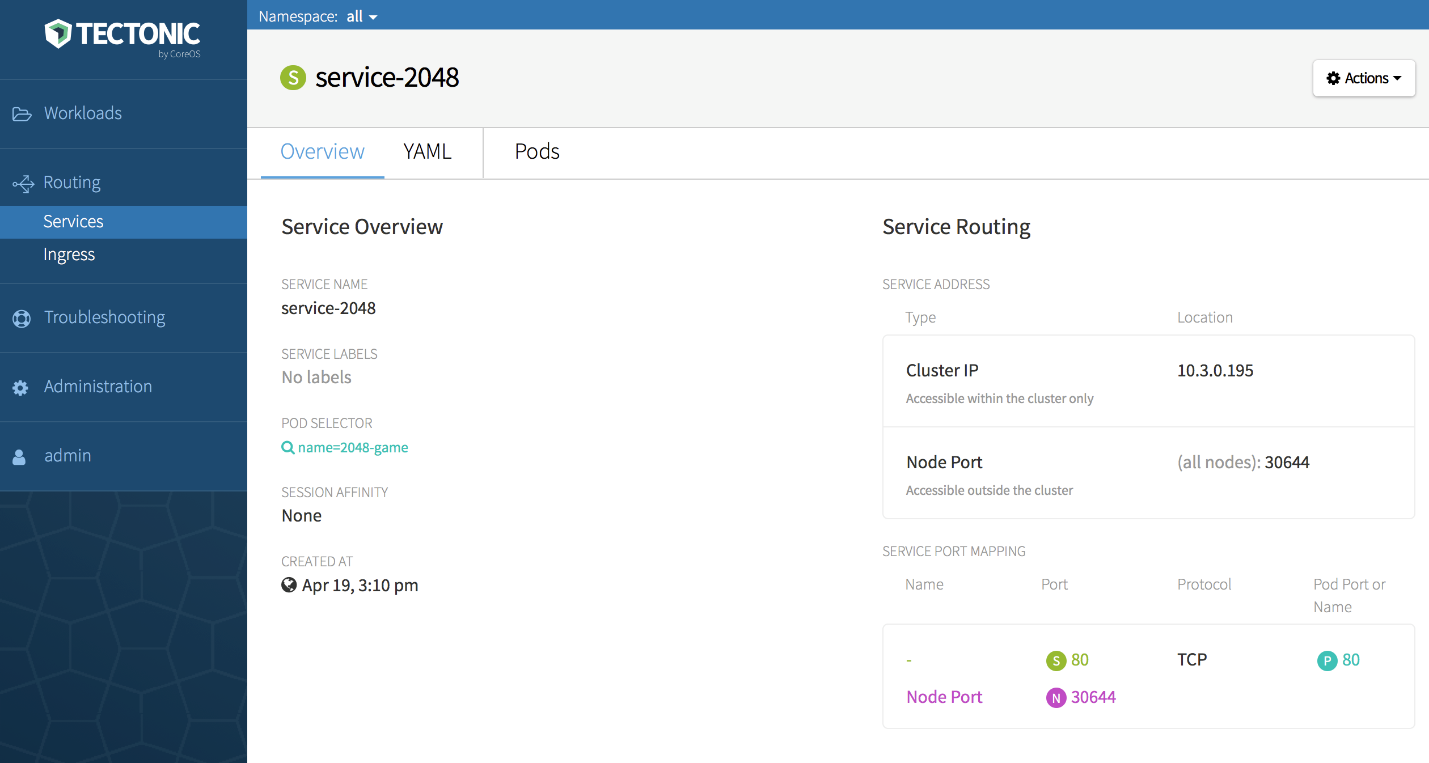
Now, let’s create a service, which determines how this particular set of pods should be exposed on their respective hosts. We’ll use the following service file:
Once that’s been deployed, I can again verify the configuration in the Tectonic console:
Next, we’ll specify our Ingress. This is the configuration that triggers the ALB Ingress Controller to create resources on our behalf, so we have to provide some information about how our Application Load Balancer should be set up.
Here, we need to specify the scheme we want for our load balancer (internal or Internet-facing), which subnets it should live in, the security group that should be applied to it, and the Route 53 subdomain we’d like it to create for us.
After we apply this configuration, the ALB Ingress Controller sets off to work. I can open up the Amazon EC2 console and take a look at the resources created.
Here’s my ALB:
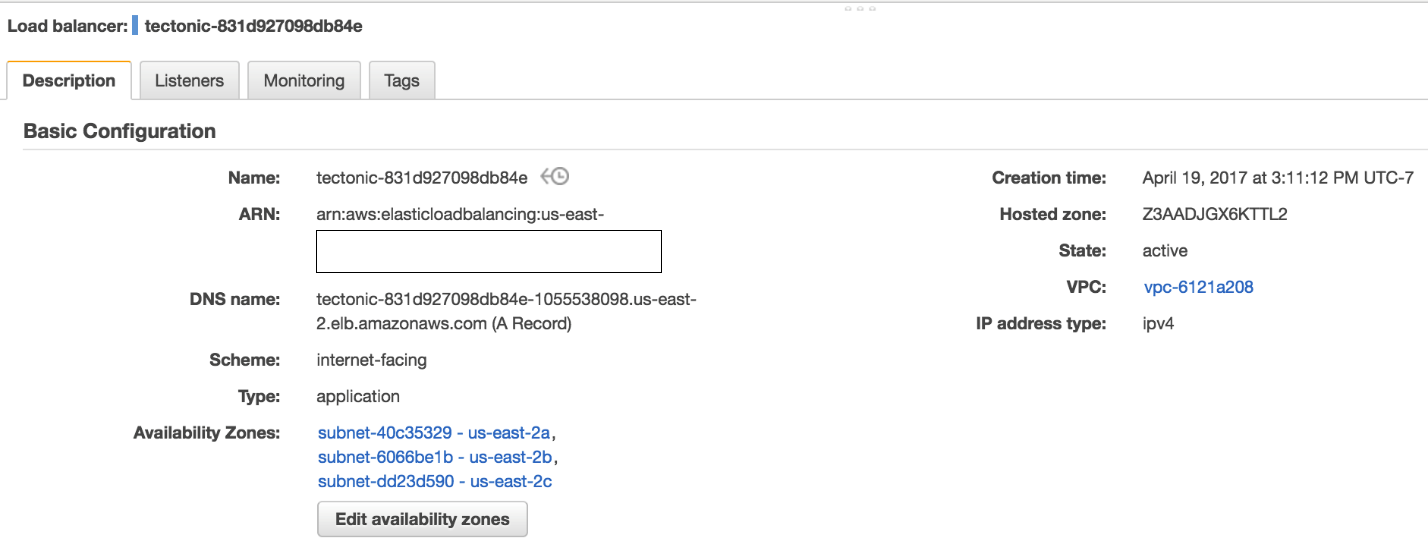
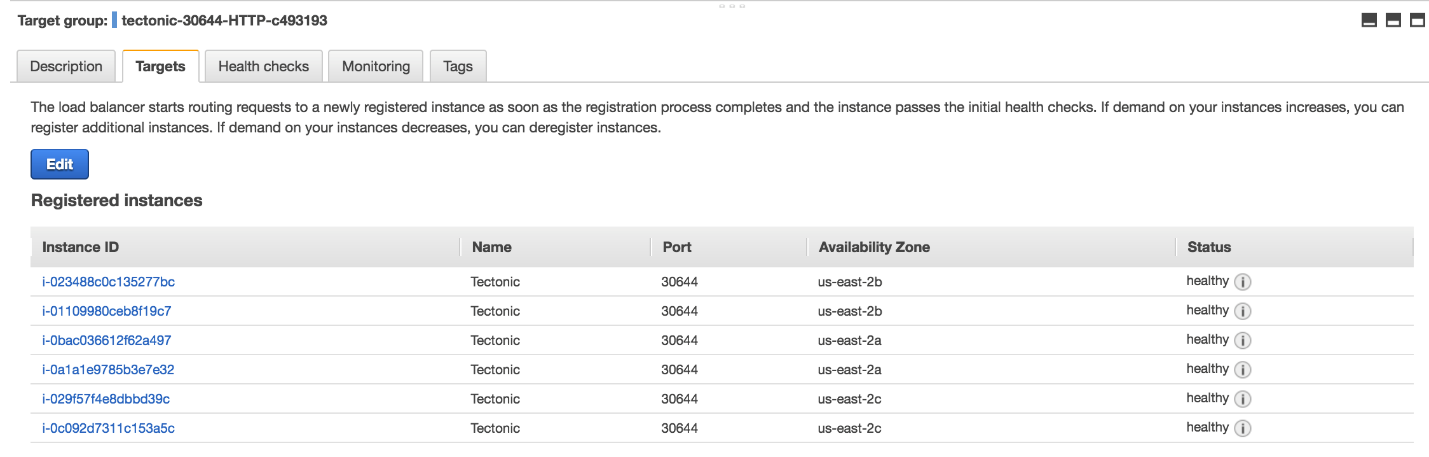
A target group has been created and associated with my Application Load Balancer, and my backend instances have been registered:
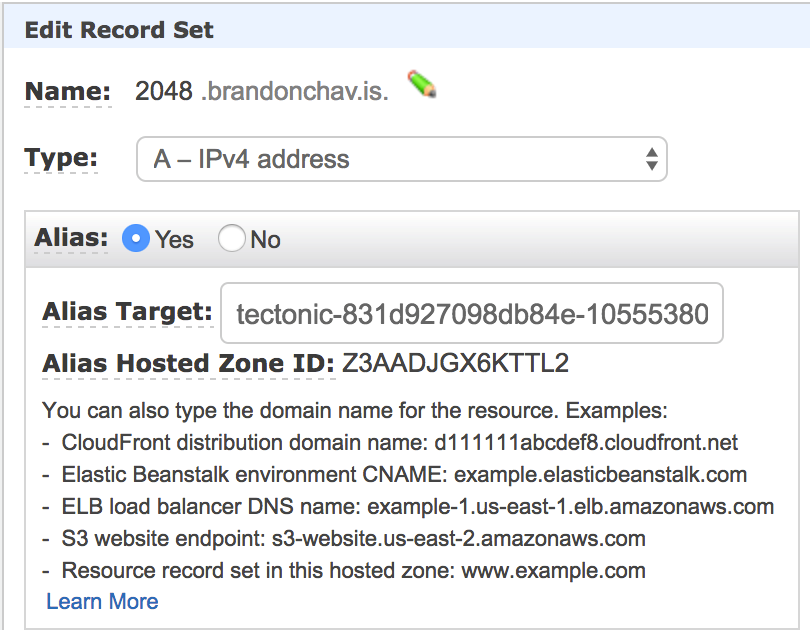
A resource record in Route 53 has been created and pointed to my Application Load Balancer:
Loading the URL in my browser resolves, as well:
Next Steps
Thanks for sticking with us this far! Go take a look at the ALB Ingress Controller from CoreOS today, and let us know how we can continue to work together to make your Kubernetes experience on AWS even better.
If you have any questions about this or any other aspect of Tectonic and/or Kubernetes on AWS, come hear me talk alongside CoreOS and Ticketmaster at CoreOS Fest, the Kubernetes and distributed systems conference happening May 31 and June 1 in San Francisco.