AWS Big Data Blog
Copy and mask PII between Amazon RDS databases using visual ETL jobs in AWS Glue Studio
Moving and transforming data between databases is a common need for many organizations. Duplicating data from a production database to a lower or lateral environment and masking personally identifiable information (PII) to comply with regulations enables development, testing, and reporting without impacting critical systems or exposing sensitive customer data. However, manually anonymizing cloned information can be taxing for security and database teams.
You can use AWS Glue Studio to set up data replication and mask PII with no coding required. AWS Glue Studio visual editor provides a low-code graphic environment to build, run, and monitor extract, transform, and load (ETL) scripts. Behind the scenes, AWS Glue handles underlying resource provisioning, job monitoring, and retries. There’s no infrastructure to manage, so you can focus on rapidly building compliant data flows between key systems.
In this post, I’ll walk you through how to copy data from one Amazon Relational Database Service (Amazon RDS) for PostgreSQL database to another, while scrubbing PII along the way using AWS Glue. You will learn how to prepare a multi-account environment to access the databases from AWS Glue, and how to model an ETL data flow that automatically masks PII as part of the transfer process, so that no sensitive information will be copied to the target database in its original form. By the end, you’ll be able to rapidly build data movement pipelines between data sources and targets, that can hide PII in order to protect individual identities, without needing to write code.
Solution overview
The following diagram illustrates the solution architecture:

The solution uses AWS Glue as an ETL engine to extract data from the source Amazon RDS database. Built-in data transformations then scrub columns containing PII using pre-defined masking functions. Finally, the AWS Glue ETL job inserts privacy-protected data into the target Amazon RDS database.
This solution employs multiple AWS accounts. Having multi-account environments is an AWS best practice to help isolate and manage your applications and data. The AWS Glue account shown in the diagram is a dedicated account that facilitates the creation and management of all necessary AWS Glue resources. This solution works across a broad array of connections that AWS Glue supports, so you can centralize the orchestration in one dedicated AWS account.
It is important to highlight the following notes about this solution:
- Following AWS best practices, the three AWS accounts discussed are part of an organization, but this is not mandatory for this solution to work.
- This solution is suitable for use cases that don’t require real-time replication and can run on a schedule or be initiated through events.
Walkthrough
To implement this solution, this guide walks you through the following steps:
- Enable connectivity from the AWS Glue account to the source and target accounts
- Create AWS Glue components for the ETL job
- Create and run the AWS Glue ETL job
- Verify results
Prerequisites
For this walkthrough, we’re using Amazon RDS for PostgreSQL 13.14-R1. Note that the solution will work with other versions and database engines that support the same JDBC driver versions as AWS Glue. See JDBC connections for further details.
To follow along with this post, you should have the following prerequisites:
- Three AWS accounts as follows:
- Source account: Hosts the source Amazon RDS for PostgreSQL database. The database contains a table with sensitive information and resides within a private subnet. For future reference, record the associated virtual private cloud (VPC) ID, security group, and private subnets associated to the Amazon RDS database.
- Target account: Contains the target Amazon RDS for PostgreSQL database, with the same table structure as the source table, initially empty. The database resides within a private subnet. Similarly, write down the associated VPC ID, security group ID and private subnets.
- AWS Glue account: This dedicated account holds a VPC, a private subnet, and a security group. As mentioned in the AWS Glue documentation, the security group includes a self-referencing inbound rule for
All TCPand TCP ports (0-65535) to allow AWS Glue to communicate with its components.
The following figure shows a self-referencing inbound rule needed on the AWS Glue account security group.

- Make sure the three VPC CIDRs do not overlap with each other, as shown in the following table:
| VPC | Private subnet | |
|---|---|---|
| Source account | 10.2.0.0/16 | 10.2.10.0/24 |
| AWS Glue account | 10.1.0.0/16 | 10.1.10.0/24 |
| Target account | 10.3.0.0/16 | 10.3.10.0/24 |
- The VPC network attributes
enableDnsHostnamesandenableDnsSupportare set to true on each VPC. For details, see Using DNS with your VPC. - An AWS Identity and Access Management (IAM) role is used for AWS Glue. For instructions, see Create IAM role for AWS Glue.
- A user on the AWS Glue account with access to the AWS Management Console and permissions for AWS Glue Studio. See Set up IAM permissions for AWS Glue Studio for instructions.
- An Amazon Simple Storage Service (Amazon S3) endpoint on the AWS Glue account. AWS Glue requires this endpoint to store the ETL script. During the S3 endpoint set up, make sure you associate the endpoint with the route table assigned to the private subnet on the AWS Glue account. For details on creating an S3 endpoint, see Amazon VPC Endpoints for Amazon S3.
The following diagram illustrates the environment with all prerequisites:

To streamline the process of setting up the prerequisites, you can follow the directions in the README file on this GitHub repository.
Database tables
For this example, both source and target databases contain a customer table with the exact same structure. The former is prepopulated with data as shown in the following figure:

The AWS Glue ETL job you will create focuses on masking sensitive information within specific columns. These are last_name, email, phone_number, ssn and notes.
If you want to use the same table structure and data, the SQL statements are provided in the GitHub repository.
Step 1 – Enable connectivity from the AWS Glue account to the source and target accounts
When creating an AWS Glue ETL job, provide the AWS IAM role, VPC ID, subnet ID, and security groups needed for AWS Glue to access the JDBC databases. See AWS Glue: How it works for further details.
In our example, the role, groups, and other information are in the dedicated AWS Glue account. However, for AWS Glue to connect to the databases, you need to enable access to source and target databases from your AWS Glue account’s subnet and security group.
To enable access, first you inter-connect the VPCs. This can be done using VPC peering or AWS Transit Gateway. For this example, we use VPC peering. Alternatively, you can use an S3 bucket as an intermediary storage location. See Setting up network access to data stores for further details.
Follow these steps:
- Peer AWS Glue account VPC with the database VPCs
- Update the route tables
- Update the database security groups
Peer AWS Glue account VPC with database VPCs
Complete the following steps in the AWS VPC console:
- On the AWS Glue account, create two VPC peering connections as described in Create VPC peering connection, one for the source account VPC, and one for the target account VPC.
- On the source account, accept the VPC peering request. For instructions, see Accept VPC peering connection
- On the target account, accept the VPC peering request as well.
- On the AWS Glue account, enable DNS Settings on each peering connection. This allows AWS Glue to resolve the private IP address of your databases. For instructions, follow Enable DNS resolution for VPC peering connection.
After completing the preceding steps, the list of peering connections on the AWS Glue account should look like the following figure:
 Note that source and target account VPCs are not peered together. Connectivity between the two accounts isn’t needed.
Update subnet route tables
This step will enable traffic from the AWS Glue account VPC to the VPC subnets associate to the databases in the source and target accounts.
Complete the following steps in the AWS VPC console:
- On the AWS Glue account’s route table, for each VPC peering connection, add one route to each private subnet associated to the database. These routes enable AWS Glue to establish a connection to the databases and limit traffic from the AWS Glue account to only the subnets associated to the databases.
- On the source account’s route table of the private subnets associated to the database, add one route for the VPC peering with the AWS Glue account. This route will allow traffic back to the AWS Glue account.
- Repeat step 2 on the target account’s route table.
For instructions on how to update route tables, see Work with route tables.
Update database security groups
This step is required to allow traffic from the AWS Glue account’s security group to the source and target security groups associated to the databases.
For instructions on how to update security groups, see Work with security groups.
Complete the following steps in the AWS VPC console:
- On the source account’s database security group, add an inbound rule with Type
PostgreSQLand Source, the AWS Glue account security group. - Repeat step 1 from the target account’s database security group.
The following diagram shows the environment with connectivity enabled from the AWS Glue account to the source and target accounts:
Step 2 – Create AWS Glue components for the ETL job
The next task is to create the AWS Glue components to synchronize the source and target database schemas with the AWS Glue Data Catalog.
Follow these steps:
- Create an AWS Glue Connection for each Amazon RDS database.
- Create AWS Glue Crawlers to populate the Data Catalog.
- Run the crawlers.
Create AWS Glue connections
Connections enable AWS Glue to access your databases. The main benefit of creating AWS Glue connections is that connections save time by not making you have to specify all connection details every time you create a job. You can then reuse connections when creating jobs in AWS Glue Studio without having to manually enter connection details each time. This makes the job creation process more consistent and faster.
Complete these steps on the AWS Glue account:
- On the AWS Glue console, choose the Data connections link on the navigation pane.
- Choose Create connection and follow the instructions in the Create connection wizard:
- In Choose data source, choose JDBC as data source.
- In Configure connection:
- For JDBC URL, enter the JDBC URL for the source database. For PostgreSQL, the syntax is:
You can find the
database-endpointon the Amazon RDS console on the source account. - Expand Network options. For VPC, Subnet and Security group, select the ones in the centralized AWS Glue account, as shown in the following figure:

- For JDBC URL, enter the JDBC URL for the source database. For PostgreSQL, the syntax is:
- In Set Properties, for Name enter
Source DB connection-Postgresql.
- Repeat steps 1 and 2 to create the connection to the target Amazon RDS database. Name the connection
Target DB connection-Postgresql.
Now you have two connections, one for each Amazon RDS database.
Create AWS Glue crawlers
AWS Glue crawlers allow you to automate data discovery and cataloging from data sources and targets. Crawlers explore data stores and auto-generate metadata to populate the Data Catalog, registering discovered tables in the Data Catalog. This helps you to discover and work with the data to build ETL jobs.
To create a crawler for each Amazon RDS database, complete the following steps on the AWS Glue account:
- On the AWS Glue console, choose Crawlers in the navigation pane.
- Choose Create crawler and follow the instructions in the Add crawler wizard:
- In Set crawler properties, for Name enter
Source PostgreSQL database crawler. - In Chose data sources and classifiers, choose Not yet.
- In Add data source, for Data source choose JDBC, as shown in the following figure:

- For Connection, choose
Source DB Connection - Postgresql. - For Include path, enter the path of your database including the schema. For our example, the path is
sourcedb/cx/%wheresourcedbis the name of the database, andcxthe schema with thecustomertable. - In Configure security settings, choose the AWS IAM service role created a part of the prerequisites.
- In Set output and scheduling, since we don’t have a database yet in the Data Catalog to store the source database metadata, choose Add database and create a database named
sourcedb-postgresql.
- In Set crawler properties, for Name enter
- Repeat steps 1 and 2 to create a crawler for the target database:
- In Set crawler properties, for Name enter
Target PostgreSQL database crawler. - In Add data source, for Connection, choose
Target DB Connection-Postgresql, and for Include path entertargetdb/cx/%. - In Add database, for Name enter
targetdb-postgresql.
- In Set crawler properties, for Name enter
Now you have two crawlers, one for each Amazon RDS database, as shown in the following figure: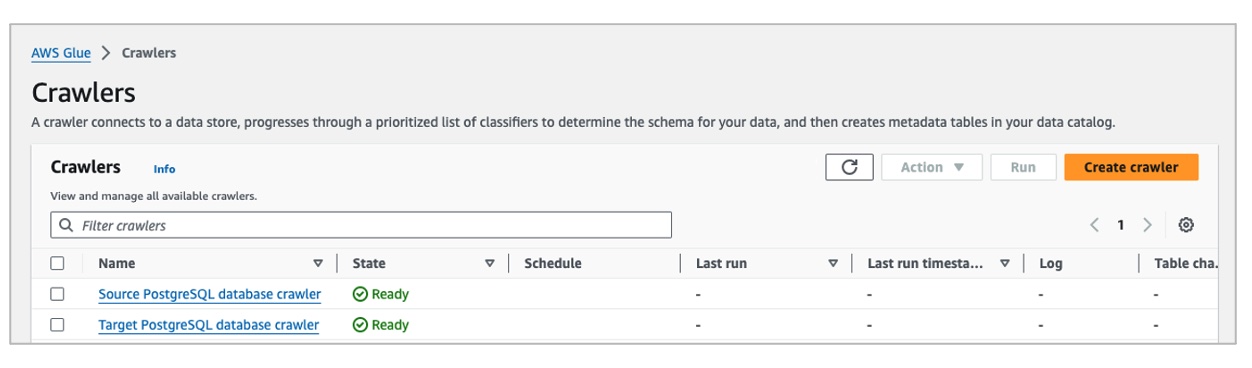
Run the crawlers
Next, run the crawlers. When you run a crawler, the crawler connects to the designated data store and automatically populates the Data Catalog with metadata table definitions (columns, data types, partitions, and so on). This saves time over manually defining schemas.
From the Crawlers list, select both Source PostgreSQL database crawler and Target PostgreSQL database crawler, and choose Run.
When finished, each crawler creates a table in the Data Catalog. These tables are the metadata representation of the customer tables.
You now have all the resources to start creating AWS Glue ETL jobs!
Step 3 – Create and run the AWS Glue ETL Job
The proposed ETL job runs four tasks:
- Source data extraction – Establishes a connection to the Amazon RDS source database and extracts the data to replicate.
- PII detection and scrubbing.
- Data transformation – Adjusts and removes unnecessary fields.
- Target data loading – Establishes a connection to the target Amazon RDS database and inserts data with masked PII.
Let’s jump into AWS Glue Studio to create the AWS Glue ETL job.
- Sign in to the AWS Glue console with your AWS Glue account.
- Choose ETL jobs in the navigation pane.
- Choose Visual ETL as shown in the following figure:

Task 1 – Source data extraction
Add a node to connect to the Amazon RDS source database:
- Choose AWS Glue Data Catalog from the Sources. This adds a data source node to the canvas.
- On the Data source properties panel, select
sourcedb-postgresqldatabase andsource_cx_customertable from the Data Catalog as shown in the following figure:

Task 2 – PII detection and scrubbing
To detect and mask PII, select Detect Sensitive Data node from the Transforms tab.
Let’s take a deeper look into the Transform options on the properties panel for the Detect Sensitive Data node:
- First, you can choose how you want the data to be scanned. You can select Find sensitive data in each row or Find columns that contain sensitive data as shown in the following figure. Choosing the former scans all rows for comprehensive PII identification, while the latter scans a sample for PII location at lower cost.

Selecting Find sensitive data in each row allows you to specify fine-grained action overrides. If you know your data, with fine-grained actions you can exclude certain columns from detection. You can also customize the entities to detect for every column in your dataset and skip entities that you know aren’t in specific columns. This allows your jobs to be more performant by eliminating unnecessary detection calls for those entities and perform actions unique to each column and entity combination.
In our example, we know our data and we want to apply fine-grained actions to specific columns, so let’s select Find sensitive data in each row. We’ll explore fine-grained actions further below.
- Next, you select the types of sensitive information to detect. Take some time to explore the three different options.
In our example, again because we know the data, let’s select Select specific patterns. For Selected patterns, choose Person’s name, Email Address, Credit Card, Social Security Number (SSN) and US Phone as shown in the following figure. Note that some patterns, such as SSNs, apply specifically to the United States and might not detect PII data for other countries. But there are available categories applicable to other countries, and you can also use regular expressions in AWS Glue Studio to create detection entities to help meet your needs.

- Next, select the level of detection sensitivity. Leave the default value (
High). - Next, choose the global action to take on detected entities. Select REDACT and enter
****as the Redaction Text. - Next, you can specify fine-grained actions (overrides). Overrides are optional, but in our example, we want to exclude certain columns from detection, scan certain PII entity types on specific columns only, and specify different redaction text settings for different entity types.
Choose Add to specify the fine-grained action for each entity as shown in the following figure:
Task 3 – Data transformation
When the Detect Sensitive Data node runs, it converts the id column to string type and it adds a column named DetectedEntities with PII detection metadata to the output. We don’t need to store such metadata information in the target table, and we need to convert the id column back to integer, so let’s add a Change Schema transform node to the ETL job, as shown in the following figure. This will make these changes for us.
Note: You must select the DetectedEntities Drop checkbox for the transform node to drop the added field.
Task 4 – Target data loading
The last task for the ETL job is to establish a connection to the target database and insert the data with PII masked:
- Choose AWS Glue Data Catalog from the Targets. This adds a data target node to the canvas.
- On the Data target properties panel, choose
targetdb-postgresqlandtarget_cx_customer, as shown in the following figure.

Save and run the ETL job
- From the Job details tab, for Name, enter
ETL - Replicate customer data. - For IAM Role, choose the AWS Glue role created as part of the prerequisites.
- Choose Save, then choose Run.
Monitor the job until it successfully finishes from Job run monitoring on the navigation pane.
Step 4 – Verify the results
Connect to the Amazon RDS target database and verify that the replicated rows contain the scrubbed PII data, confirming sensitive information was masked properly in transit between databases as shown in the following figure:
And that’s it! With AWS Glue Studio, you can create ETL jobs to copy data between databases and transform it along the way without any coding. Try other types of sensitive information for securing your sensitive data during replication. Also try adding and combining multiple and heterogenous data sources and targets.
Clean up
To clean up the resources created:
- Delete the AWS Glue ETL job, crawlers, Data Catalog databases, and connections.
- Delete the VPC peering connections.
- Delete the routes added to the route tables, and inbound rules added to the security groups on the three AWS accounts.
- On the AWS Glue account, delete associated Amazon S3 objects. These are in the S3 bucket with
aws-glue-assets-account_id-regionin its name, whereaccount-idis your AWS Glue account ID, andregionis the AWS Region you used. - Delete the Amazon RDS databases you created if you no longer need them. If you used the GitHub repository, then delete the AWS CloudFormation stacks.
Conclusion
In this post, you learned how to use AWS Glue Studio to build an ETL job that copies data from one Amazon RDS database to another and automatically detects PII data and masks the data in-flight, without writing code.
By using AWS Glue for database replication, organizations can eliminate manual processes to find hidden PII and bespoke scripting to transform it by building centralized, visible data sanitization pipelines. This improves security and compliance, and speeds time-to-market for test or analytics data provisioning.
About the Author
Monica Alcalde Angel is a Senior Solutions Architect in the Financial Services, Fintech team at AWS. She works with Blockchain and Crypto AWS customers, helping them accelerate their time to value when using AWS. She lives in New York City, and outside of work, she is passionate about traveling.