AWS Controllers for Kubernetes (ACK) was announced in August, 2020, and now supports 14 AWS service controllers as generally available with an additional 12 in preview. The vision behind this initiative was simple: allow Kubernetes users to use the Kubernetes API to manage the lifecycle of AWS resources such as Amazon Simple Storage Service (Amazon S3) buckets or Amazon Relational Database Service (Amazon RDS) DB instances. For example, you can define an S3 bucket as a custom resource, create this bucket as part of your application deployment, and delete it when your application is retired.
Amazon EMR on EKS is a deployment option for EMR that allows organizations to run Apache Spark on Amazon Elastic Kubernetes Service (Amazon EKS) clusters. With EMR on EKS, the Spark jobs run using the Amazon EMR runtime for Apache Spark. This increases the performance of your Spark jobs so that they run faster and cost less than open source Apache Spark. Also, you can run Amazon EMR-based Apache Spark applications with other types of applications on the same EKS cluster to improve resource utilization and simplify infrastructure management.
Today, we’re excited to announce the ACK controller for Amazon EMR on EKS is generally available. Customers have told us that they like the declarative way of managing Apache Spark applications on EKS clusters. With the ACK controller for EMR on EKS, you can now define and run Amazon EMR jobs directly using the Kubernetes API. This lets you manage EMR on EKS resources directly using Kubernetes-native tools such as kubectl.
The controller pattern has been widely adopted by the Kubernetes community to manage the lifecycle of resources. In fact, Kubernetes has built-in controllers for built-in resources like Jobs or Deployment. These controllers continuously ensure that the observed state of a resource matches the desired state of the resource stored in Kubernetes. For example, if you define a deployment that has NGINX using three replicas, the deployment controller continuously watches and tries to maintain three replicas of NGINX pods. Using the same pattern, the ACK controller for EMR on EKS installs two custom resource definitions (CRDs): VirtualCluster and JobRun. When you create EMR virtual clusters, the controller tracks these as Kubernetes custom resources and calls the EMR on EKS service API (also known as emr-containers) to create and manage these resources. If you want to get a deeper understanding of how ACK works with AWS service APIs, and learn how ACK generates Kubernetes resources like CRDs, see blog post.
If you need a simple getting started tutorial, refer to Run Spark jobs using the ACK EMR on EKS controller. Typically, customers who run Apache Spark jobs on EKS clusters use higher level abstraction such as Argo Workflows, Apache Airflow, or AWS Step Functions, and use workflow-based orchestration in order to run their extract, transform, and load (ETL) jobs. This gives you a consistent experience running jobs while defining job pipelines using Directed Acyclic Graphs (DAGs). DAGs allow you organize your job steps with dependencies and relationships to say how they should run. Argo Workflows is a container-native workflow engine for orchestrating parallel jobs on Kubernetes.
In this post, we show you how to use Argo Workflows with the ACK controller for EMR on EKS to run Apache Spark jobs on EKS clusters.
Solution overview
In the following diagram, we show Argo Workflows submitting a request to the Kubernetes API using its orchestration mechanism.

We’re using Argo to showcase the possibilities with workflow orchestration in this post, but you can also submit jobs directly using kubectl (the Kubernetes command line tool). When Argo Workflows submits these requests to the Kubernetes API, the ACK controller for EMR on EKS reconciles VirtualCluster custom resources by invoking the EMR on EKS APIs.
Let’s go through an exercise of creating custom resources using the ACK controller for EMR on EKS and Argo Workflows.
Prerequisites
Your environment needs the following tools installed:
Install the ACK controller for EMR on EKS
You can either create an EKS cluster or re-use an existing one. We refer to the instructions in Run Spark jobs using the ACK EMR on EKS controller to set up our environment. Complete the following steps:
- Install the EKS cluster.
- Create IAM Identity mapping.
- Install emrcontainers-controller.
- Configure IRSA for the EMR on EKS controller.
- Create an EMR job execution role and configure IRSA.
At this stage, you should have an EKS cluster with proper role-based access control (RBAC) permissions so that Amazon EMR can run its jobs. You should also have the ACK controller for EMR on EKS installed and the EMR job execution role with IAM Roles for Service Account (IRSA) configurations so that they have the correct permissions to call EMR APIs.
Please note, we’re skipping the step to create an EMR virtual cluster because we want to create a custom resource using Argo Workflows. If you created this resource using the getting started tutorial, you can either delete the virtual cluster or create new IAM identity mapping using a different namespace.
Let’s validate the annotation for the EMR on EKS controller service account before proceeding:
# validate annotation
kubectl get pods -n $ACK_SYSTEM_NAMESPACE
CONTROLLER_POD_NAME=$(kubectl get pods -n $ACK_SYSTEM_NAMESPACE --selector=app.kubernetes.io/name=emrcontainers-chart -o jsonpath='{.items..metadata.name}')
kubectl describe pod -n $ACK_SYSTEM_NAMESPACE $CONTROLLER_POD_NAME | grep "^\s*AWS_"
The following code shows the expected results:
AWS_REGION:                      us-west-2
AWS_ENDPOINT_URL:
AWS_ROLE_ARN:                    arn:aws:iam::012345678910:role/ack-emrcontainers-controller
AWS_WEB_IDENTITY_TOKEN_FILE:     /var/run/secrets/eks.amazonaws.com/serviceaccount/token (http://eks.amazonaws.com/serviceaccount/token)
Check the logs of the controller:
kubectl logs ${CONTROLLER_POD_NAME} -n ${ACK_SYSTEM_NAMESPACE}
The following code is the expected outcome:
2022-11-02T18:52:33.588Z    INFO    controller.virtualcluster    Starting Controller    {"reconciler group": "emrcontainers.services.k8s.aws", "reconciler kind": "VirtualCluster"}
2022-11-02T18:52:33.588Z    INFO    controller.virtualcluster    Starting EventSource    {"reconciler group": "emrcontainers.services.k8s.aws", "reconciler kind": "VirtualCluster", "source": "kind source: *v1alpha1.VirtualCluster"}
2022-11-02T18:52:33.589Z    INFO    controller.virtualcluster    Starting Controller    {"reconciler group": "emrcontainers.services.k8s.aws", "reconciler kind": "VirtualCluster"}
2022-11-02T18:52:33.589Z    INFO    controller.jobrun    Starting EventSource    {"reconciler group": "emrcontainers.services.k8s.aws", "reconciler kind": "JobRun", "source": "kind source: *v1alpha1.JobRun"}
2022-11-02T18:52:33.589Z    INFO    controller.jobrun    Starting Controller    {"reconciler group": "emrcontainers.services.k8s.aws", "reconciler kind": "JobRun"}
...
2022-11-02T18:52:33.689Z    INFO    controller.jobrun    Starting workers    {"reconciler group": "emrcontainers.services.k8s.aws", "reconciler kind": "JobRun", "worker count": 1}
2022-11-02T18:52:33.689Z    INFO    controller.virtualcluster    Starting workers    {"reconciler group": "emrcontainers.services.k8s.aws", "reconciler kind": "VirtualCluster", "worker count": 1}
Now we’re ready to install Argo Workflows and use workflow orchestration to create EMR on EKS virtual clusters and submit jobs.
Install Argo Workflows
The following steps are meant for quick installation with a proof of concept in mind. This is not meant for a production install. We recommend reviewing the Argo documentation, security guidelines, and other considerations for a production install.
We install the argo CLI first. We have provided instructions to install the argo CLI using brew, which is compatible with the Mac operating system. If you use Linux or another OS, refer to Quick Start for installation steps.
Let’s create a namespace and install Argo Workflows on your EMR on EKS cluster:
kubectl create namespace argo
kubectl apply -n argo -f https://github.com/argoproj/argo-workflows/releases/download/v3.4.3/install.yaml
You can access the Argo UI locally by port-forwarding the argo-server deployment:
kubectl -n argo port-forward deploy/argo-server 2746:2746
You can access the web UI at https://localhost:2746. You will get a notice that “Your connection is not private” because Argo is using a self-signed certificate. It’s okay to choose Advanced and then Proceed to localhost.
Please note, you get an Access Denied error because we haven’t configured permissions yet. Let’s set up RBAC so that Argo Workflows has permissions to communicate with the Kubernetes API. We give admin permissions to argo serviceaccount in the argo and emr-ns namespaces.
Open another terminal window and run these commands:
# setup rbac
kubectl create rolebinding default-admin --clusterrole=admin --serviceaccount=argo:default --namespace=argo
kubectl create rolebinding default-admin --clusterrole=admin --serviceaccount=argo:default --namespace=emr-ns

# extract bearer token to login into UI
SECRET=$(kubectl get sa default -n argo -o=jsonpath='{.secrets[0].name}')
ARGO_TOKEN="Bearer $(kubectl get secret $SECRET -n argo -o=jsonpath='{.data.token}' | base64 --decode)"
echo $ARGO_TOKEN
You now have a bearer token that we need to enter for client authentication.
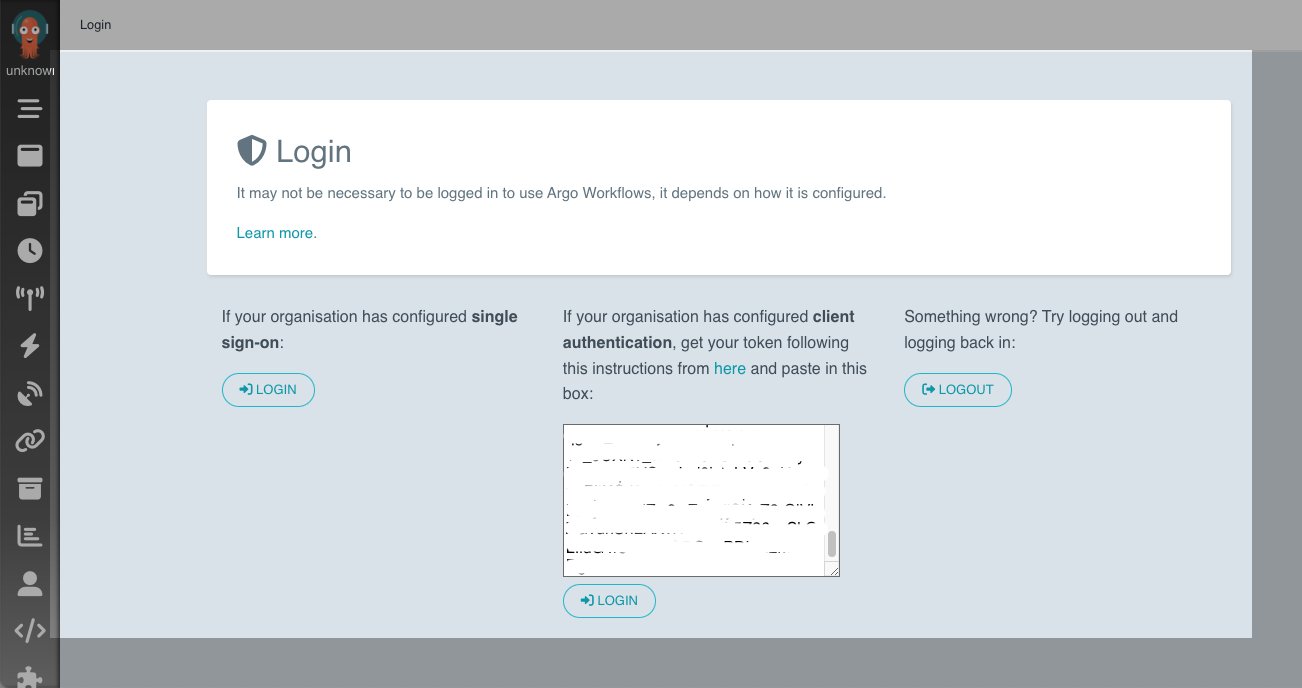
You can now navigate to the Workflows tab and change the namespace to emr-ns to see the workflows under this namespace.
Let’s set up RBAC permissions and create a workflow that creates an EMR on EKS virtual cluster:
cat << EOF > argo-emrcontainers-vc-role.yaml
apiVersion: rbac.authorization.k8s.io/v1
kind: ClusterRole
metadata:
  name: argo-emrcontainers-virtualcluster
rules:
  - apiGroups:
      - emrcontainers.services.k8s.aws
    resources:
      - virtualclusters
    verbs:
      - '*'
EOF

cat << EOF > argo-emrcontainers-jr-role.yaml
apiVersion: rbac.authorization.k8s.io/v1
kind: ClusterRole
metadata:
  name: argo-emrcontainers-jobrun
rules:
  - apiGroups:
      - emrcontainers.services.k8s.aws
    resources:
      - jobruns
    verbs:
      - '*'
EOF
Let’s create these roles and a role binding:
# create argo clusterrole with permissions to emrcontainers.services.k8s.aws
kubectl apply -f argo-emrcontainers-vc-role.yaml
kubectl apply -f argo-emrcontainers-jr-role.yaml

# Give permissions for argo to use emr-containers clusterrole
kubectl create rolebinding argo-emrcontainers-virtualcluster --clusterrole=argo-emrcontainers-virtualcluster --serviceaccount=emr-ns:default -n emr-ns
kubectl create rolebinding argo-emrcontainers-jobrun --clusterrole=argo-emrcontainers-jobrun --serviceaccount=emr-ns:default -n emr-ns
Let’s recap what we have done so far. We created an EMR on EKS cluster, installed the ACK controller for EMR on EKS using Helm, installed the Argo CLI, installed Argo Workflows, gained access to the Argo UI, and set up RBAC permissions for Argo. RBAC permissions are required so that the default service account in the Argo namespace can use VirtualCluster and JobRun custom resources via the emrcontainers.services.k8s.aws API.
It’s time to create the EMR virtual cluster. The environment variables used in the following code are from the getting started guide, but you can change these to meet your environment:
export EKS_CLUSTER_NAME=ack-emr-eks
export EMR_NAMESPACE=emr-ns

cat << EOF > argo-emr-virtualcluster.yaml
apiVersion: argoproj.io/v1alpha1
kind: Workflow
metadata:
  name: emr-virtualcluster
spec:
  arguments: {}
  entrypoint: emr-virtualcluster
  templates:
  - name: emr-virtualcluster
    resource:
      action: create
      manifest: |
        apiVersion: emrcontainers.services.k8s.aws/v1alpha1
        kind: VirtualCluster
        metadata:
          name: my-ack-vc
        spec:
          name: my-ack-vc
          containerProvider:
            id: ${EKS_CLUSTER_NAME}
            type_: EKS
            info:
              eksInfo:
                namespace: ${EMR_NAMESPACE}
EOF
Use the following command to create an Argo Workflow for virtual cluster creation:
kubectl apply -f argo-emr-virtualcluster.yaml -n emr-ns
argo list -n emr-ns
The following code is the expected result from the Argo CLI:
NAME                 STATUS      AGE   DURATION   PRIORITY   MESSAGE
emr-virtualcluster   Succeeded   12m   11s        0
Check the status of virtualcluster:
kubectl describe virtualcluster/my-ack-vc -n emr-ns
The following code is the expected result from the preceding command:
Name:         my-ack-vc
Namespace:    default
Labels:       <none>
Annotations:  <none>
API Version:  emrcontainers.services.k8s.aws/v1alpha1
Kind:         VirtualCluster
...
Status:
  Ack Resource Metadata:
    Arn:               arn:aws:emr-containers:us-west-2:012345678910:/virtualclusters/dxnqujbxexzri28ph1wspbxo0
    Owner Account ID:  012345678910
    Region:            us-west-2
  Conditions:
    Last Transition Time:  2022-11-03T15:34:10Z
    Message:               Resource synced successfully
    Reason:
    Status:                True
    Type:                  ACK.ResourceSynced
  Id:                      dxnqujbxexzri28ph1wspbxo0
Events:                    <none>
If you run into issues, you can check Argo logs using the following command or through the console:
argo logs emr-virtualcluster -n emr-ns
You can also check controller logs as mentioned in the troubleshooting guide.
Because we have an EMR virtual cluster ready to accept jobs, we can start working on the prerequisites for job submission.
Create an S3 bucket and Amazon CloudWatch Logs group that are needed for the job (see the following code). If you already created these resources from the getting started tutorial, you can skip this step.
export RANDOM_ID1=$(LC_ALL=C tr -dc a-z0-9 </dev/urandom | head -c 8)

aws logs create-log-group --log-group-name=/emr-on-eks-logs/$EKS_CLUSTER_NAME
aws s3 mb s3://$EKS_CLUSTER_NAME-$RANDOM_ID1
We use the New York Citi Bike dataset, which has rider demographics and trip data information. Run the following command to copy the dataset into your S3 bucket:
export S3BUCKET=$EKS_CLUSTER_NAME-$RANDOM_ID1
aws s3 sync s3://tripdata/ s3://${S3BUCKET}/citibike/csv/
Copy the sample Spark application code to your S3 bucket:
aws s3 cp s3://aws-blogs-artifacts-public/artifacts/BDB-2782/citibike-convert-csv-to-parquet.py s3://${S3BUCKET}/application/
aws s3 cp s3://aws-blogs-artifacts-public/artifacts/BDB-2782/citibike-ridership.py s3://${S3BUCKET}/application/
aws s3 cp s3://aws-blogs-artifacts-public/artifacts/BDB-2782/citibike-popular-stations.py s3://${S3BUCKET}/application/
aws s3 cp s3://aws-blogs-artifacts-public/artifacts/BDB-2782/citibike-trips-by-age.py s3://${S3BUCKET}/application/
Now, it’s time to run sample Spark job. Run the following to generate an Argo workflow submission template:
export RANDOM_ID2=$(LC_ALL=C tr -dc a-z0-9 </dev/urandom | head -c 8)

cat << EOF > argo-citibike-steps-jobrun.yaml
apiVersion: argoproj.io/v1alpha1
kind: Workflow
metadata:
  name: emr-citibike-${RANDOM_ID2}
spec:
  entrypoint: emr-citibike
  templates:
  - name: emr-citibike
    steps:
    - - name: emr-citibike-csv-parquet
        template: emr-citibike-csv-parquet
    - - name: emr-citibike-ridership
        template: emr-citibike-ridership
      - name: emr-citibike-popular-stations
        template: emr-citibike-popular-stations
      - name: emr-citibike-trips-by-age
        template: emr-citibike-trips-by-age

  # This is parent job that converts csv data to parquet
  - name: emr-citibike-csv-parquet
    resource:
      action: create
      successCondition: status.state == COMPLETED
      failureCondition: status.state == FAILED
      manifest: |
        apiVersion: emrcontainers.services.k8s.aws/v1alpha1
        kind: JobRun
        metadata:
          name: my-ack-jobrun-csv-parquet-${RANDOM_ID2}
        spec:
          name: my-ack-jobrun-csv-parquet-${RANDOM_ID2}
          virtualClusterRef:
            from:
              name: my-ack-vc
          executionRoleARN: "${ACK_JOB_EXECUTION_ROLE_ARN}"
          releaseLabel: "emr-6.7.0-latest"
          jobDriver:
            sparkSubmitJobDriver:
              entryPoint: "s3://${S3BUCKET}/application/citibike-convert-csv-to-parquet.py"
              entryPointArguments: [${S3BUCKET}]
              sparkSubmitParameters: "--conf spark.executor.instances=2 --conf spark.executor.memory=1G --conf spark.executor.cores=1 --conf spark.driver.cores=1 --conf spark.sql.shuffle.partitions=60 --conf spark.dynamicAllocation.enabled=false"
          configurationOverrides: |
            ApplicationConfiguration: null
            MonitoringConfiguration:
              CloudWatchMonitoringConfiguration:
                LogGroupName: /emr-on-eks-logs/${EKS_CLUSTER_NAME}
                LogStreamNamePrefix: citibike
              S3MonitoringConfiguration:
                LogUri: s3://${S3BUCKET}/logs

  # This is a child job which runs after csv-parquet jobs is complete
  - name: emr-citibike-ridership
    resource:
      action: create
      manifest: |
        apiVersion: emrcontainers.services.k8s.aws/v1alpha1
        kind: JobRun
        metadata:
          name: my-ack-jobrun-ridership-${RANDOM_ID2}
        spec:
          name: my-ack-jobrun-ridership-${RANDOM_ID2}
          virtualClusterRef:
            from:
              name: my-ack-vc
          executionRoleARN: "${ACK_JOB_EXECUTION_ROLE_ARN}"
          releaseLabel: "emr-6.7.0-latest"
          jobDriver:
            sparkSubmitJobDriver:
              entryPoint: "s3://${S3BUCKET}/application/citibike-ridership.py"
              entryPointArguments: [${S3BUCKET}]
              sparkSubmitParameters: "--conf spark.executor.instances=2 --conf spark.executor.memory=1G --conf spark.executor.cores=1 --conf spark.driver.cores=1 --conf spark.sql.shuffle.partitions=60 --conf spark.dynamicAllocation.enabled=false"
          configurationOverrides: |
            ApplicationConfiguration: null
            MonitoringConfiguration:
              CloudWatchMonitoringConfiguration:
                LogGroupName: /emr-on-eks-logs/${EKS_CLUSTER_NAME}
                LogStreamNamePrefix: citibike
              S3MonitoringConfiguration:
                LogUri: s3://${S3BUCKET}/logs

  # This is a child job which runs after csv-parquet jobs is complete
  - name: emr-citibike-popular-stations
    resource:
      action: create
      manifest: |
        apiVersion: emrcontainers.services.k8s.aws/v1alpha1
        kind: JobRun
        metadata:
          name: my-ack-jobrun-popular-stations-${RANDOM_ID2}
        spec:
          name: my-ack-jobrun-popular-stations-${RANDOM_ID2}
          virtualClusterRef:
            from:
              name: my-ack-vc
          executionRoleARN: "${ACK_JOB_EXECUTION_ROLE_ARN}"
          releaseLabel: "emr-6.7.0-latest"
          jobDriver:
            sparkSubmitJobDriver:
              entryPoint: "s3://${S3BUCKET}/application/citibike-popular-stations.py"
              entryPointArguments: [${S3BUCKET}]
              sparkSubmitParameters: "--conf spark.executor.instances=2 --conf spark.executor.memory=1G --conf spark.executor.cores=1 --conf spark.driver.cores=1 --conf spark.sql.shuffle.partitions=60 --conf spark.dynamicAllocation.enabled=false"
          configurationOverrides: |
            ApplicationConfiguration: null
            MonitoringConfiguration:
              CloudWatchMonitoringConfiguration:
                LogGroupName: /emr-on-eks-logs/${EKS_CLUSTER_NAME}
                LogStreamNamePrefix: citibike
              S3MonitoringConfiguration:
                LogUri: s3://${S3BUCKET}/logs

  # This is a child job which runs after csv-parquet jobs is complete
  - name: emr-citibike-trips-by-age
    resource:
      action: create
      manifest: |
        apiVersion: emrcontainers.services.k8s.aws/v1alpha1
        kind: JobRun
        metadata:
          name: my-ack-jobrun-trips-by-age-${RANDOM_ID2}
        spec:
          name: my-ack-jobrun-trips-by-age-${RANDOM_ID2}
          virtualClusterRef:
            from:
              name: my-ack-vc
          executionRoleARN: "${ACK_JOB_EXECUTION_ROLE_ARN}"
          releaseLabel: "emr-6.7.0-latest"
          jobDriver:
            sparkSubmitJobDriver:
              entryPoint: "s3://${S3BUCKET}/application/citibike-trips-by-age.py"
              entryPointArguments: [${S3BUCKET}]
              sparkSubmitParameters: "--conf spark.executor.instances=2 --conf spark.executor.memory=1G --conf spark.executor.cores=1 --conf spark.driver.cores=1 --conf spark.sql.shuffle.partitions=60 --conf spark.dynamicAllocation.enabled=false"
          configurationOverrides: |
            ApplicationConfiguration: null
            MonitoringConfiguration:
              CloudWatchMonitoringConfiguration:
                LogGroupName: /emr-on-eks-logs/${EKS_CLUSTER_NAME}
                LogStreamNamePrefix: citibike
              S3MonitoringConfiguration:
                LogUri: s3://${S3BUCKET}/logs
EOF
Let’s run this job:
argo -n emr-ns submit --watch argo-citibike-steps-jobrun.yaml
The following code is the expected result:
Name:                emr-citibike-tp8dlo6c
Namespace:           emr-ns
ServiceAccount:      unset (will run with the default ServiceAccount)
Status:              Succeeded
Conditions:
 PodRunning          False
 Completed           True
Created:             Mon Nov 07 15:29:34 -0500 (20 seconds ago)
Started:             Mon Nov 07 15:29:34 -0500 (20 seconds ago)
Finished:            Mon Nov 07 15:29:54 -0500 (now)
Duration:            20 seconds
Progress:            4/4
ResourcesDuration:   4s*(1 cpu),4s*(100Mi memory)
STEP                                  TEMPLATE                       PODNAME                                                         DURATION  MESSAGE
 ✔ emr-citibike-if32fvjd              emr-citibike
 ├───✔ emr-citibike-csv-parquet       emr-citibike-csv-parquet       emr-citibike-if32fvjd-emr-citibike-csv-parquet-140307921        2m
 └─┬─✔ emr-citibike-popular-stations  emr-citibike-popular-stations  emr-citibike-if32fvjd-emr-citibike-popular-stations-1670101609  4s
   ├─✔ emr-citibike-ridership         emr-citibike-ridership         emr-citibike-if32fvjd-emr-citibike-ridership-2463339702         4s
   └─✔ emr-citibike-trips-by-age      emr-citibike-trips-by-age      emr-citibike-if32fvjd-emr-citibike-trips-by-age-3778285872      4s
You can open another terminal and run the following command to check on the job status as well:
kubectl -n emr-ns get jobruns -w
You can also check the UI and look at the Argo logs, as shown in the following screenshot.

Clean up
Follow the instructions from the getting started tutorial to clean up the ACK controller for EMR on EKS and its resources. To delete Argo resources, use the following code:
kubectl delete -n argo -f https://github.com/argoproj/argo-workflows/releases/download/v3.4.3/install.yaml
kubectl delete -f argo-emrcontainers-vc-role.yaml
kubectl delete -f argo-emrcontainers-jr-role.yaml
kubectl delete rolebinding argo-emrcontainers-virtualcluster -n emr-ns
kubectl delete rolebinding argo-emrcontainers-jobrun -n emr-ns
kubectl delete ns argo
Conclusion
In this post, we went through how to manage your Spark jobs on EKS clusters using the ACK controller for EMR on EKS. You can define Spark jobs in a declarative fashion and manage these resources using Kubernetes custom resources. We also reviewed how to use Argo Workflows to orchestrate these jobs to get a consistent job submission experience. You can take advantage of the rich features from Argo Workflows such as using DAGs to define multi-step workflows and specify dependencies within job steps, using the UI to visualize and manage the jobs, and defining retries and timeouts at the workflow or task level.
You can get started today by installing the ACK controller for EMR on EKS and start managing your Amazon EMR resources using Kubernetes-native methods.
About the authors
 Peter Dalbhanjan is a Solutions Architect for AWS based in Herndon, VA. Peter is passionate about evangelizing and solving complex business problems using combination of AWS services and open source solutions. At AWS, Peter helps with designing and architecting variety of customer workloads.
 Amine Hilaly is a Software Development Engineer at Amazon Web Services working on the Kubernetes and Open source related projects for about two years. Amine is a Go, open-source, and Kubernetes fanatic.