AWS Big Data Blog
Optimize Amazon EMR costs for legacy and Spark workloads
December 2023: This post was reviewed and updated for accuracy.
Customers migrating from large on-premises Hadoop clusters to Amazon EMR like to reduce their operational costs while running resilient applications. On-premises customers typically use in-elastic, large, fixed-size Hadoop clusters, which incurs high capital expenditure. You can now migrate your mixed workloads to Amazon EMR, which saves costs without compromising performance.
One common use case for Amazon EMR is to run a mixed workload of legacy MapReduce applications and Spark applications. MapReduce applications such as Apache Sqoop jobs need to use Amazon Elastic Compute Cloud (Amazon EC2) On-Demand Instances for resilience. For Spark applications, the application masters are best suited for On-Demand EC2 Instances as well but the executors can be run on EC2 Spot Instances at a significantly reduced cost. This is because Spark tasks have built-in resilience and are resubmitted automatically on task failures without causing a job failure.
To architect solution for this use case, we create an Amazon EMR cluster with the following configuration:
- A fixed size Core node group that uses On-Demand instances and is always running. This node group will be used for MapReduce applications and Spark application masters.
- A fixed size Task node group that uses only Spot instances and uses YARN node labels to place Spark executors on these instances.
- Use YARN node labels to place MapReduce applications and Spark application masters on the Core group.
With this combination of YARN node label based placement of MapReduce applications, Spark application masters and Spark executors, we can now run a mixed workload on this EMR Cluster while maximizing use of Spot instances.
The architecture described above is designed to meet the following requirements:
- Run a mixed workload of legacy MapReduce applications and Spark applications.
- Use On-Demand Instances for MapReduce applications and Spark application masters for resilience.
- Use Spot Instances for Spark executors to reduce cost.
The following are the benefits of this architecture:
- Reduced operational costs: By using Spot Instances for Spark executors, you can save money without compromising performance.
- Improved performance: By placing different types of applications on different types of nodes, you can improve performance and reliability.
Solution overview
For this post, we use the following Apache Sqoop and Apache Spark workloads to demonstrate the scenario and the results:
- Sqoop workload – A simple Sqoop job to extract data from Amazon Redshift and write data to Amazon Simple Storage Service (Amazon S3)
- Spark workload – A Python script that unions Amazon S3 data and writes it back to Amazon S3
The following diagram illustrates the two workloads used for this demonstration.

To build the solution, you must complete the following high-level steps:
- Determine the EMR cluster configuration for the core and task nodes.
- For the workloads to run, identify the capacity scheduler queues required, queue capacity as % of total capacity, and Spot or On-Demand Instances used to meet the queue capacity.
- Assign YARN node labels to the On-Demand and Spot Instances in the capacity scheduler configuration to ensure the appropriate instance types are allocated to the queues.
- Create a bootstrap and step scripts to automate the configuration process during EMR cluster creation.
- Validate the cluster elasticity and application resilience by running the Sqoop and Spark applications.
The solution offers the following benefits:
- Significantly reduces the time to migrate applications to Amazon EMR because you’re no longer struggling to implement cost-optimization techniques as well as application resilience while migrating from on-premises to the AWS Cloud
- Offers cost savings when compared to running similar workloads on in-elastic, large on-premises Hadoop clusters
- Enables you to run a mixed workload on EMR clusters without significantly redesigning your on-premises applications
Prerequisites
You need to complete the following steps before you can configure your EMR cluster and run the workloads.
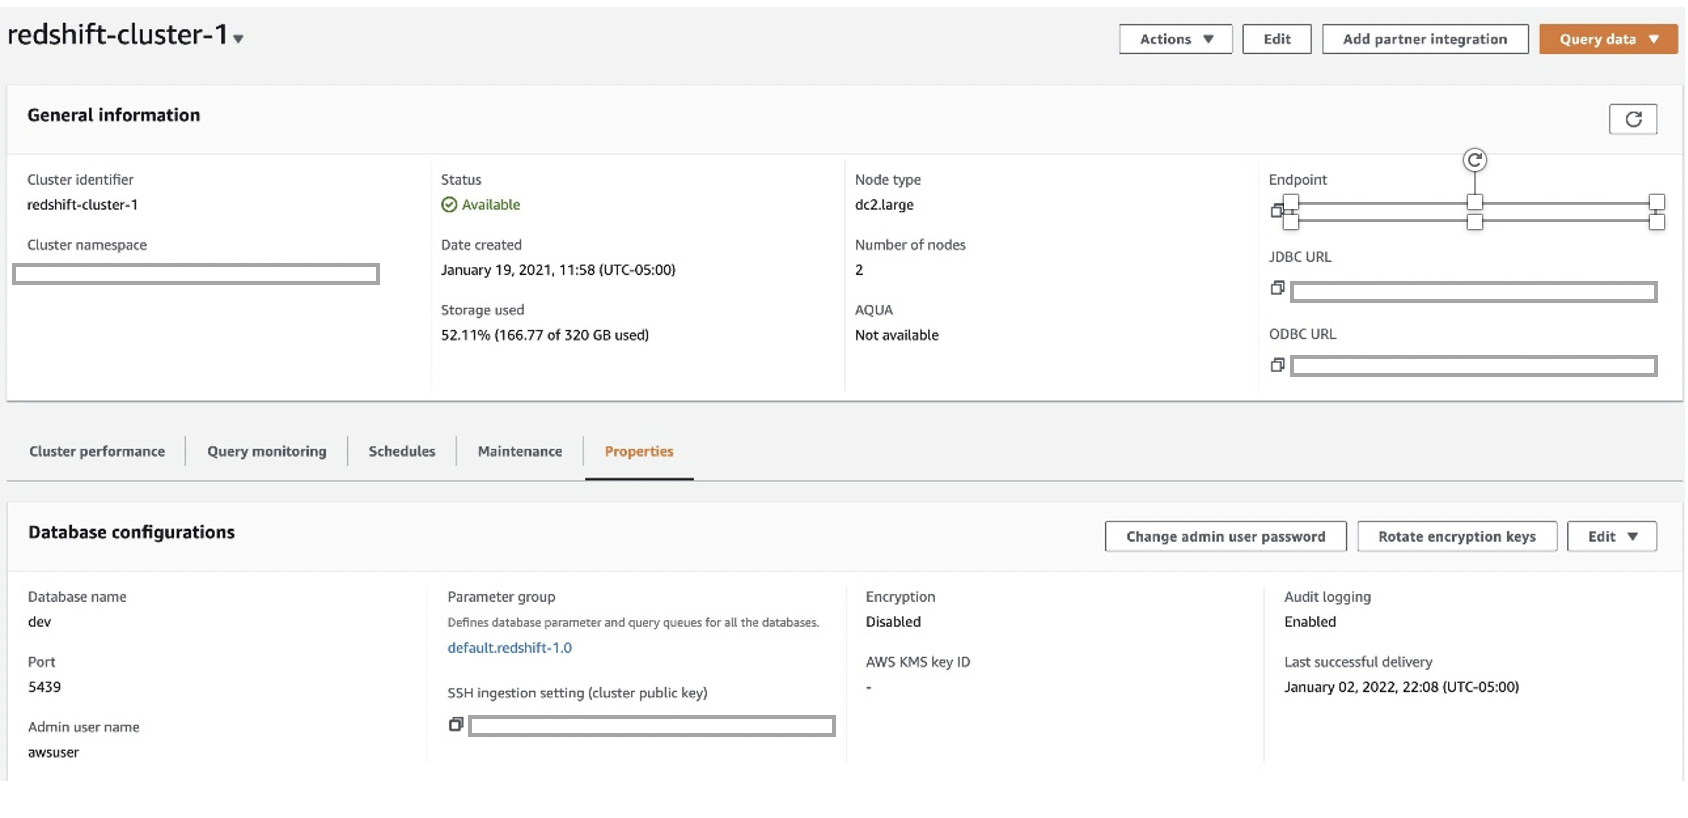
Launch an Amazon Redshift cluster
We first launch an Amazon Redshift cluster. For instructions, refer to Create a sample Amazon Redshift cluster. We use Amazon Redshift as the relational database management service for the Sqoop job.
Create and associate an IAM role for loading the Amazon Redshift cluster
We create an AWS Identity and Access Management (IAM) role that allows the Amazon Redshift cluster to call AWS services on its behalf.
- On the IAM console, choose Roles in the navigation pane.
- Choose Create role.
- For Use case, choose Redshift and Redshift-Customizable.
- Choose Next.
- For Permissions policies, choose the policy
AmazonS3ReadOnlyAccess. - Choose Next.
- For Role name, enter
load_tpch_redshift. - Choose Create role.
Now you attach this role to the Amazon Redshift cluster. - On the Properties tab, choose Manage IAM roles.
- Associate the IAM role.
Load test data into the Amazon Redshift cluster
We create a table called SQOOP_LOAD_TBL and load it with mock data to test the Sqoop job. The following code shows the create table and copy statement. The copy statement should load around 1000000 rows in the SQOOP_LOAD_TBL table, which we use to run a large Sqoop data movement job.
Create an Amazon RDS for PostgreSQL instance
We create an Amazon Relational Database Service (Amazon RDS) for PostgreSQL instance to use as the metastore for Sqoop.
The following configuration uses a small instance. We use Sqoop as master_user and postgres as the database name. Note the database name, user ID, and password—we use these to connect Sqoop running on the EMR cluster to this metastore.

Use the Amazon EMR automation scripts while creating the cluster
We use three automation scripts from the S3 folder s3://aws-blogs-artifacts-public/artifacts/BDB-1737/config/ while creating the EMR cluster.
The first script is a node label script used by YARN to determine if each instance is Spot or On-Demand:
This script runs during cluster creation to assign node labels SPOT or ON_DEMAND based on instance type.
The next is a bootstrap script to copy the node label script to the /home/hadoop directory on all cluster nodes:
This script is used during the bootstrap process to copy getNodeLabels.py from the S3 folder to /home/hadoop on the EMR cluster.
The last is a step script to update the Spot node to be exclusively used by the assigned capacity queue:
There are two kinds of node partitions:
- Exclusive – Containers are allocated to nodes with an exact match node partition. For example, asking partition=“x” will be allocated to the node with partition=“x”, and asking the DEFAULT partition will be allocated to the DEFAULT partition nodes.
- Non-exclusive – If a partition is non-exclusive, it shares idle resources to the container requesting the DEFAULT partition.
We use exclusive labels for SPOT to ensure only Spark workloads can use them and non-exclusive labels for ON_DEMAND so that they can be used both by Spark and Sqoop workloads. For more details on the types of labels, refer to YARN Node Labels.
We’re now ready to run our solution.
Launch an EMR cluster
Complete the following steps to launch an EMR cluster:
- We suggest the following EMR cluster configuration using instance fleets with fixed core and task nodes for this demonstration. The right number and types of nodes need to be chosen based on the workload needs of your use case.
- On the Amazon EMR console, choose Create cluster.
- In the Name and applications section, choose EMR release emr-6.12.0 and select Hadoop, Sqoop, Oozie, and Spark.

- In the Cluster configuration section, choose instance fleets and instance types for Master, Core and Task nodes as shown below.


- In the Cluster scaling and provisioning section, choose fixed size for Core and Task nodes. Use 4 On-Demand units for Core nodes and 4 On-Demand, 32 Spot units for Task nodes. Check Apply allocation strategy button with the recommended option.


- In the Networking section, choose the VPC and multiple subnets to improve availability of Spot and On-Demand nodes.

- Add the the
addNodeLabels.shscript as a step, which is run usingscript-runner.jar.

- For Bootstrap Actions, add the getNodeLabels_bootstrap.sh script from Amazon S3 as a step. This script copies getNodeLabels.py from the Amazon S3 location to the /home/hadoop directory on the primary node.

- In the Software settings section, choose Enter configuration and insert the following JSON in the configuration.
- Update the sqoop metastore URL with the URL of the RDS instance used as sqoop metastore
- Please remember to update the passwords in the sqoop-site classification currently with “*********” as placeholder.

The configuration is created with two queues (Sqoop and default). The Sqoop queue has access only to the On-Demand nodes, and the default queue has access to both On-Demand and Spot nodes.
- In the
spark-defaultssection, the property “spark.yarn.executor.nodeLabelExpression“: “SPOT” enables use of the Spot nodes by the Spark executors - Use an existing EC2 key pair or create a new one if none exists, and download it to be used for logging onto the primary node.
- Choose security groups, one for the Master node and the other for core and task nodes. The Master node security group will need to be updated to allow inbound ssh access to the master node.
- Choose Create cluster and wait for cluster creation to complete.

Configure proxy settings to view websites hosted on the primary node
To configure your proxy settings, follow the instructions in Option 2, part 1: Set up an SSH tunnel to the master node using dynamic port forwarding and Option 2, part 2: Configure proxy settings to view websites hosted on the master node.
After the proxy settings are configured, run the following command on your terminal window (Mac):
Open the Resource Manager UI (found on the Application User Interfaces tab on the Amazon EMR console, similar to http://ec2-xxxxxxxx.compute-1.amazonaws.com:8088/) and choose the scheduler option to monitor the jobs and use of capacity scheduler queues.
Run the Sqoop job
To run the Sqoop job and monitor YARN, complete the following steps:
- Connect to the primary node and run the
Sqoop job -listcommand.
This command creates the Sqoop metadata tables in the metastore.If you can’t connect Sqoop to Amazon RDS, make sure the Amazon RDS security group allows an inbound PostgreSQL TCP connection on port 5432 from both the EMR primary and secondary security groups. Follow the same procedure while connecting to Amazon Redshift to open the Amazon Redshift 5439 port for connections from both the EMR primary and secondary security groups. - Create a test Sqoop job that reads the data from the Amazon Redshift table and writes to Amazon S3.
- Substitute the
<Target S3 folder>,<Temp S3 folder>, Redshift cluster URL, Redshift password in the following command: - List the job to verify if it was created correctly, and run the Sqoop job using the following command:
- Monitor the job and the use of the application queues using the scheduler option on the Resource Manager UI.
You should notice that the Sqoop job is using On-Demand nodes and the Sqoop queue under it. There is no usage of Spot nodes.

Create the Spark job and monitor YARN
The Spark job (emr_union_job.py) reads a mock Parquet dataset from Amazon S3. It uses an argument count to union multiple copies of the dataset, and sorts the result data before writing it to the Amazon S3 output location. Because this job consumes a large amount of memory for performing the union and sort operations, it triggers the Spark executors to scale up Spot nodes. When the job is complete, the EMR cluster should scale down the Spot nodes.
The count value can be varied between 1–8 to achieve varying cluster scaling and runtimes for the job based on the volume of data being unioned.
- Run the Spark job as a step on the EMR cluster using
command-runner.jar, as shown in the following screenshot.
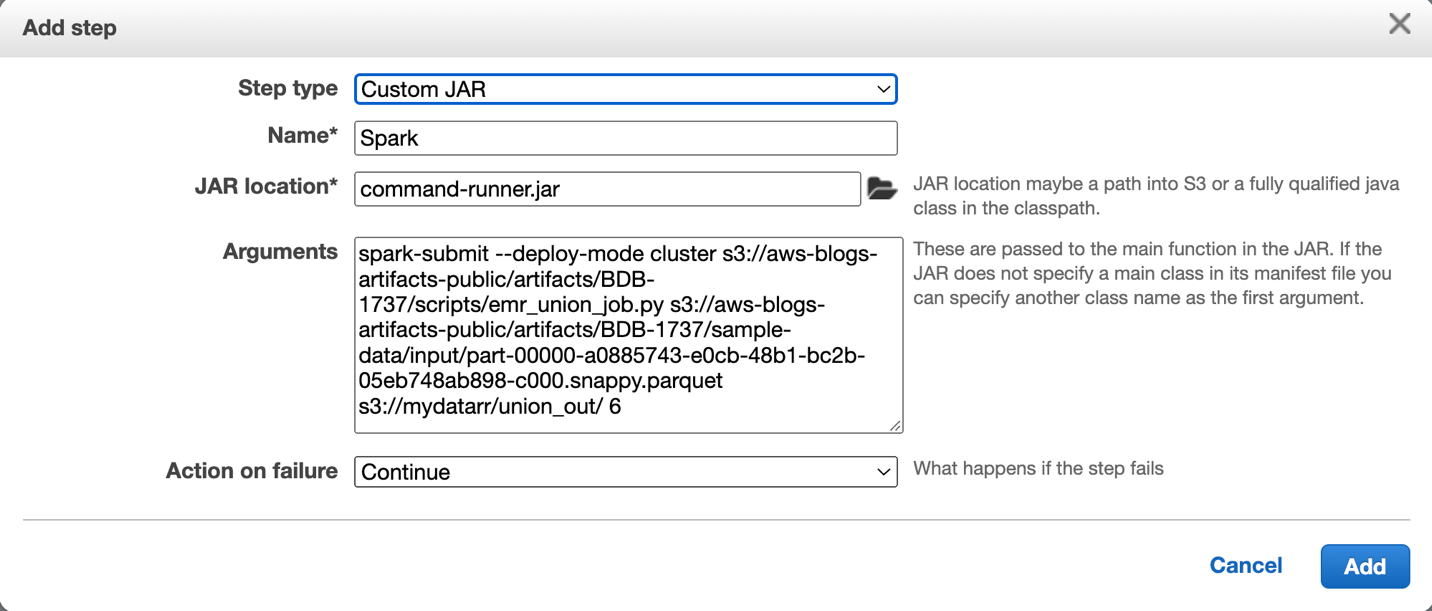
- Use the following sample command to submit the Spark job (
emr_union_job.py).
It takes in three arguments:- <input_full_path> – The Amazon S3 location of the data file that is read in by the Spark job. The path should not be changed. The
input_full_pathiss3://aws-blogs-artifacts-public/artifacts/BDB-1737/sample-data/input/part-00000-a0885743-e0cb-48b1-bc2b-05eb748ab898-c000.snappy.parquet. - <output_path> – The Amazon S3 folder where the results are written to.
- <number of copies to be unioned> – By varying this argument, we can use the Spark job to trigger varying job runtimes and varying scaling of Spot nodes.
- <input_full_path> – The Amazon S3 location of the data file that is read in by the Spark job. The path should not be changed. The
- Submit 4 concurrent jobs using the above spark-submit command to saturate the cluster resources.
- Review the Resource Manager UI and choose the Scheduler tab.
You should see that only the resources under the default queue are being used both inON_DEMANDandSPOTpartitions.

- Now run the Sqoop and Spark jobs together and monitor the resource manager. You should see the Sqoop job using sqoop queue with On-Demand nodes while the Spark jobs are using the default queue with On-Demand and SPOT nodes. The SPOT nodes are used by the Spark executors.
- Review the Resource Manager UI and choose the Scheduler tab.
You should see that the resources under the default and sqoop queues are being used both inON_DEMANDandSPOTpartitions as Sqoop and Spark jobs are running concurrently.

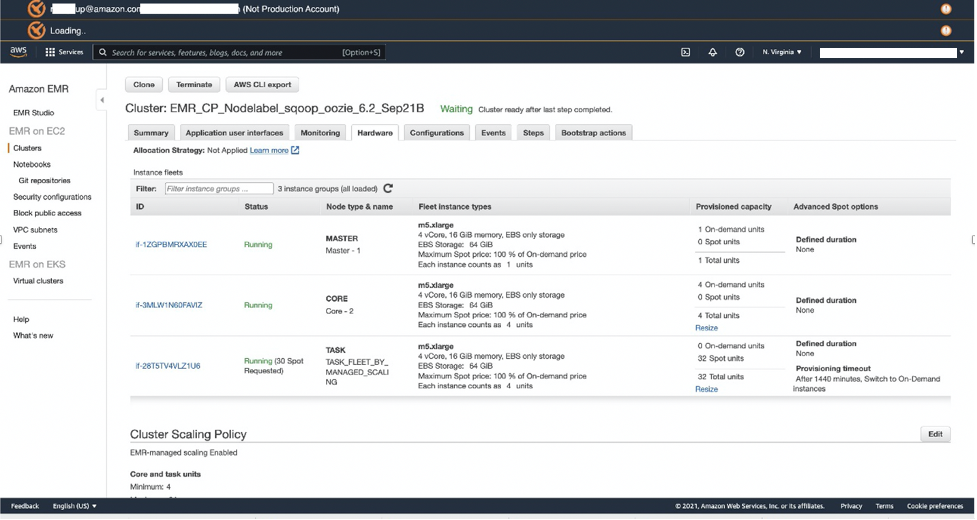
- On the Hardware tab of the EMR cluster, verify if the cluster has scaled up the Spot Instances of the task nodes. Because Spark job executors are configured to use Spot nodes exclusively, the Spot nodes should scale up while the Spark job is running.

Clean up
To help prevent unwanted charges to your AWS account, you can delete the AWS resources that you used for this walkthrough:
- Amazon Redshift cluster
- Amazon RDS database
- EMR cluster
Conclusion
In this post, you learned how to configure an EMR cluster using capacity scheduler and YARN node labels assigned to segment Spark and Legacy workloads to run mixed workload jobs on the EMR cluster . You created an Amazon Redshift cluster for sourcing data, Amazon RDS for Sqoop metadata, a Sqoop job to import data from Amazon Redshift to Amazon EMR, and a Spark job to test use of SPOT instances with yarn node labels and capacity scheduler queues.
You also observed how to run Sqoop jobs on On-Demand nodes to provide resilience, whereas Spark jobs use inexpensive Spot nodes, which scale up and down based on the workload.
We used a sample capacity scheduler queue configuration for this post; you should adjust it for your specific workload requirements. Furthermore, you can create additional scheduler queues to meet more complex requirements.
We also showed how you can apply automation of the configuration for EMR cluster creation.
For more information on Best practices for running Apache Spark applications on Amazon EMR, refer to
Best practices for running Apache Spark applications using Amazon EC2 Spot Instances with Amazon EMR.
Appendix
The following code is the emr_union_job.py script:
About the Authors
 Ramesh Raghupathy is a Senior Data Architect with WWCO ProServe at AWS. He works with AWS customers to architect, deploy, and migrate to data warehouses and data lakes on the AWS Cloud. While not at work, Ramesh enjoys traveling, spending time with family, and yoga.
 Kiran Guduguntla is a WW Go-to-Market Specialist for Amazon EMR at AWS. He works with AWS customers across the globe to strategize, build, develop, and deploy modern data analytics solutions.