AWS Database Blog
Store off-chain data using Amazon Managed Blockchain and Amazon S3: Part 1
Blockchain allows organizations to build applications where multiple parties can securely and transparently run transactions and share data without needing a trusted, central authority. Each member of the network has a copy of this transactional data. This is called on-chain data. Organizations often also want to store additional data along with the transactional data. For example, storing a user picture along with user profile details. Organizations also need an efficient way to change or delete this additional data when required. Storing this additional data using on-chain storage isn’t a scalable and cost-effective approach. Additionally, after the data is recorded on-chain, there is no option to delete this data. For such scenarios, off-chain data storage is the appropriate solution.
This post is the first of a two-part series. In this post, we demonstrate how to use Amazon Simple Storage Service (Amazon S3) as an off-chain storage. You can store transactional data in Amazon Managed Blockchain and related non-transactional data in Amazon S3. In the second post, we show how to read the data from both on-chain storage and off-chain storage in a single request while making sure data in the off-chain storage isn’t tampered with.
You can use off-chain storage to store any non-transactional data that is too large to store in on-chain storage efficiently. This post explains how to create off-chain storage in the AWS Cloud and use that to store non-transactional data along with ledger data on Managed Blockchain with the Hyperledger Fabric framework. This post uses Amazon S3 as the underlying storage for off-chain data. Amazon S3 is an object storage service built to store and retrieve any amount of data from anywhere. It offers industry-leading durability, availability, performance, security, and virtually unlimited scalability at very low costs.
Solution Overview
The following diagram illustrates the high-level architecture of the end-to-end solution:

For this post, let’s consider a use case where off-chain storage is needed. This post references the non-profit blockchain workshop. One of the APIs in this workshop is to create a new donor. This API currently stores the donor’s user name and email. Imagine there is a new requirement from the business to store the picture of the donor along with the profile details. This post explains how to extend the existing API to store the donor picture using off-chain storage.
First, we need to upload the donor image to Amazon S3, which we use as our off-chain storage solution. We use an AWS Lambda function to upload the image to Amazon S3 and return the key and entity tag (ETag) of the object stored in Amazon S3. The ETag is a hash of the object uploaded to the S3 bucket. Amazon S3 calculates this and stores it as metadata. Next, the Blockchain chaincode is invoked, passing the donor profile details along with the S3 object key and ETag details in the request. We use AWS Step Functions to orchestrate the different steps in the solution flow. We use Amazon API Gateway to expose the Step Functions flow to external applications as a REST API.
The walkthrough includes the following steps:
- Create an S3 bucket and set up a gateway VPC endpoint.
- Create a Lambda function to upload the image to Amazon S3.
- Create a workflow using Step Functions.
- Update the API to invoke Step Functions.
- Test the API in API Gateway.
Prerequisites
Before starting the walkthrough, you should complete Part 1, Part 2, and Part 6 of the non-profit blockchain workshop in the GitHub repo. These parts include creating the Managed Blockchain network, enrolling the admin user, deploying the NGO chaincode, and exposing the chaincode as a REST API using Lambda and API Gateway.
Create an S3 bucket and set up a gateway VPC endpoint
To store donor images in Amazon S3, create a bucket in the same Region in which you performed the prerequisite steps. To access the S3 bucket from services within a member VPC (created as part of the prerequisites) using the AWS backbone network, set up a gateway VPC endpoint for Amazon S3. For instructions, see Create a gateway endpoint.
Create a Lambda function to upload the image to Amazon S3
Create a Lambda function to upload the donor image to the S3 bucket. Configure an environment variable (S3_BUCKET) to pass the S3 bucket name to Lambda at runtime. This Lambda function uploads the image to the S3 bucket and returns the key and ETag of the object stored in Amazon S3.
The ETag represents an MD5 digest of the object data. There are certain cases where an ETag doesn’t represent an MD5 digest; in those cases, you have to manually calculate the MD5 hash of the object in this Lambda function and use that as image hash. For more details about ETags, see Common Response Headers.
The following is a sample Node.js code you can use to create this Lambda function:
The following is an example Lambda request:
The following is an example Lambda response:
Create a workflow using Step Functions
You now have two locations to manage data storage. The picture is stored off-chain, while the metadata and other details are stored on-chain. You can update the Lambda function code with additional logic to split the request data and store it in two separate storage systems. But managing this flow logic can become complex in the future if you want to update your flow as per business requirements. Also, it’s a best practice to keep flow logic separate from business logic. With Step Functions, you can separate business logic and flow logic. Step Functions provides a UI to easily define the workflow logic using drag-and-drop features. In this step, you create a workflow using Step Functions that invokes two Lambda functions to store off-chain and on-chain data.
Create a state machine in Step Functions using the following definition. Make sure you replace the required values in the JSON before using it.
At this stage, the state machine should look like the following screenshot:

Next, update the role of the state machine to provide permissions to invoke the Lambda functions to upload the image to Amazon S3 and invoke the chaincode, and delete the object from the S3 bucket.
The first step in the state machine is to invoke a Lambda function that uploads the donor image to an S3 bucket and returns the location and the ETag of the image. This location and ETag information along with the donor’s user name and email are passed to a Lambda function that invokes the chaincode. If the chaincode successfully stores the data in the ledger, this step returns the transaction ID as a final response of the API. If the chaincode has an error (for example, the user name of the donor is already in use), the Lambda function returns an error. In that case, the state machine deletes the donor image stored in the S3 bucket and ends the flow in a failed state.
Update the API to invoke Step Functions
By this point, you have created an API in the API Gateway. The resources in your API should look like the following screenshot:

This API resource methods points to a Lambda function. You now change the integration for the POST method under the /donors resource to point to the Step Functions workflow instead of the Lambda function. After updating, the integration settings should look like the following screenshot:

Expand the Mapping Templates section and update the template JSON using the following code:
The POST method should look like the following screenshot after the update.

Test the API in API Gateway
To test the API before it’s deployed, choose Test on the API Gateway console.
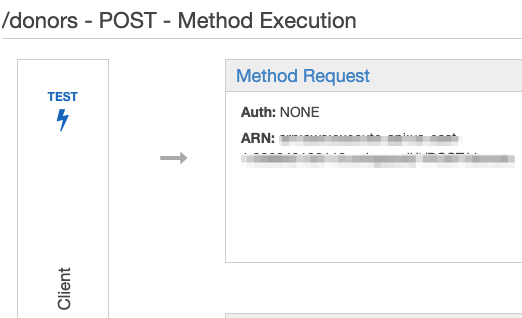
Provide the request JSON in the Request Body field and choose Test. The request JSON should be in the following format:
If the whole flow runs successfully, the chaincode returns a transaction ID.

If an error occurs in the flow, an empty response is returned. You can view the full error details in Amazon CloudWatch Logs.

Summary
In this post, you implemented off-chain storage using Amazon S3 and created a workflow using Step Functions to store off-chain data in Amazon S3 and on-chain data in a Blockchain ledger using a single request. One of the advantages of Blockchain is that you can cryptographically verify the integrity of the data stored on the ledger. However, you also need to make sure that off-chain data isn’t tampered with after it’s stored. Therefore, while reading the data, you need to verify the integrity of the off-chain data.
In the second post, we show you how to fetch both on-chain and off-chain data in a single request while verifying the integrity of the off-chain data. Please let us know in the comments, what you think about this post.
About the Authors
 Surya Jitendra N is a Solutions Architect at AWS. Surya is a SME in blockchain, data analytics, and cloud native development. In his free time, he enjoys spending time with his two daughters and watching web series.
 Bianca Buzea is a Solutions Architect with the ISV team. Bianca enjoys working with customers and teaching them how to create innovative architectures using AWS services. She is passionate about blockchain technology and financial education. Outside of work, you can find her creating content for her personal blog and newsletter on these topics, or playing with sounds in Ableton.
 Meghan Gentry is a Solutions Architect and Blockchain specialist. She joined AWS three years ago as a member of the Military Apprentice Program after serving for seven years in the United States Air Force. Meghan enjoys educating customers about all things cloud and helping them to realize the art of the possible every day. She is excited to evangelize Blockchain technology and distributed systems, especially as it pertains to decentralized finance (DeFi), improving state and federal government operations, and aiding in the progression of Democracy all over the globe. When she isn’t working, Meghan is enjoying time with her husband, two young sons, two dogs, a cat, and several fish outside of Seattle.