AWS DevOps & Developer Productivity Blog
Build ARM-based applications using CodeBuild
AWS CodeBuild has announced support for ARM-based workloads, which will allow you to build and test your software updates natively, without needing to emulate or cross-compile. ARM is a quickly growing platform for application development today and if you rely on emulation and/or cross-compile, the downside is time and reliability. However, a more native approach can be faster and more reliable: Enter ARM-based workload support.
In this post, you will learn how to build a sample Java application with an ARM-based Docker image, you will then upload the artifact to an S3 bucket.
Prerequisite
A new repository in CodeCommit with the code from the sample Java application linked above has already been created. A working knowledge of git and how to fork or clone within your source provider is a pre-requisite.
Configuration Steps
Working with our source code:
- Fork or clone the repo and upload/push the code to your source provider of choice. As of this writing, CodeBuild supports the following Source Providers: S3, CodeCommit, BitBucket, GitHub, and GitHub Enterprise.
- Go to your IDE of choice* and within your repo/source create a new file named buildspec.yml and copy in the following code. *In this post, the AWS Cloud9 IDE will be referenced when discussing edits. (buildspec.yml reference page)
version: 0.2
phases:
    install:
        runtime-versions:
           java: corretto8

    build:
        commands:
            - echo Starting Java build at `date`
            - mvn package

        finally:
            - echo Finished build of Java Sample at `date`

artifacts:
    files:
        - 'target/aws-java-sample-1.0.jar'
For this sample, specify that your container run an Amazon Corretto 8 Java environment. An artifact file will also be output, which we will be sent to an S3 bucket later in the process.
The two phases are:
- Install – Since version 0.2 is being used, the Install phase is required to specify the runtime-version.
- Build – This phase is where the commands used to build the software will be passed.
- Once the buildspec.yml file has been added and saved, you will commit your changes and push your code to your source.

Creating your CodeBuild Project:
Now that you have created your source code, it’s time to create your CodeBuild project. For this post, The AWS Management Console will be used, though other tools such as AWS Cloud Dvelopement Kit (CDK), AWS CloudFormation, or the AWS CLI can also be leveraged.
Creating your artifact destination:
The first thing you are going to do is create where your artifact will be stored. For this blog, you are going to put your artifact into an S3 bucket.
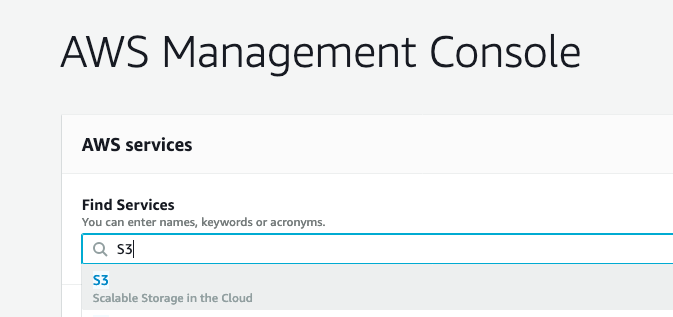
1) In the console search bar type ‘S3.’
2) Select ‘S3’ to go to the S3 Console
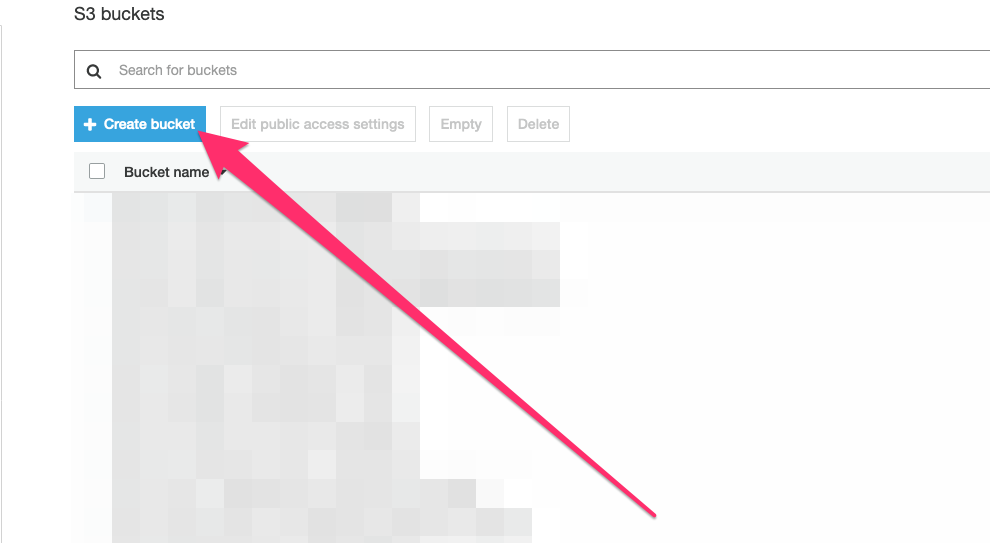
3) Select ‘Create bucket’ from the top left of the console.
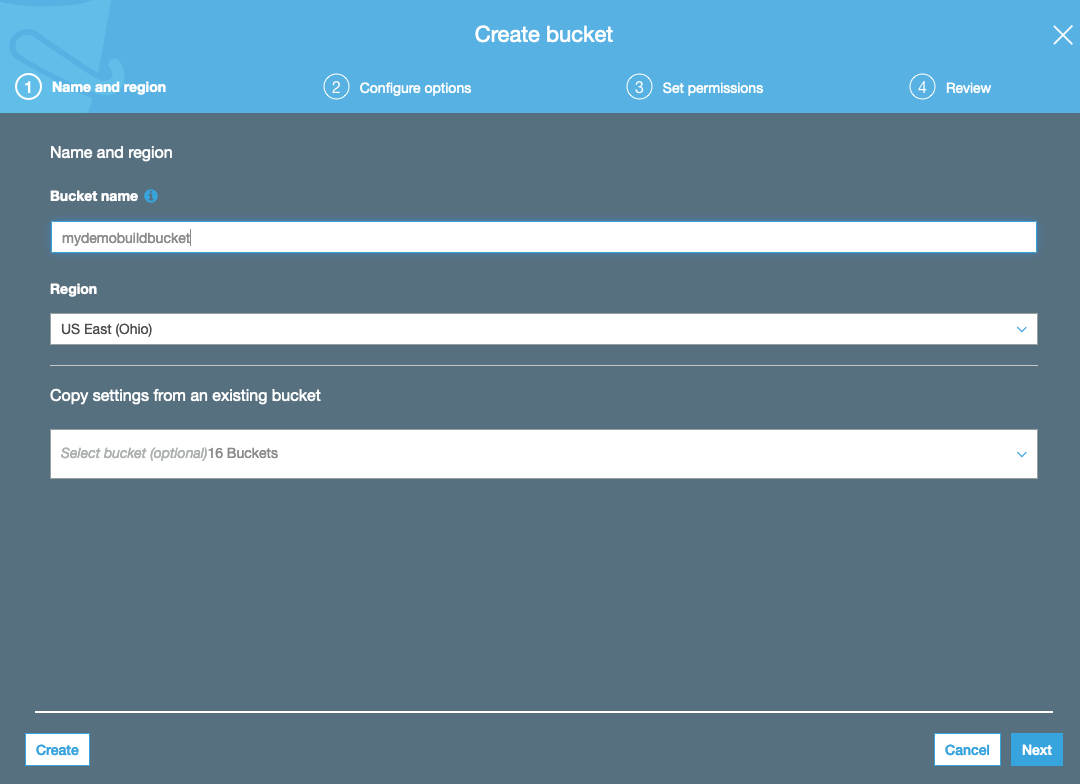
4) Type in your bucket name and Region and click ‘Next.’ For this blog, you are going to use the name “mydemobuildbucket.” It is important to note that it must an be all lowercase and globally unique name.
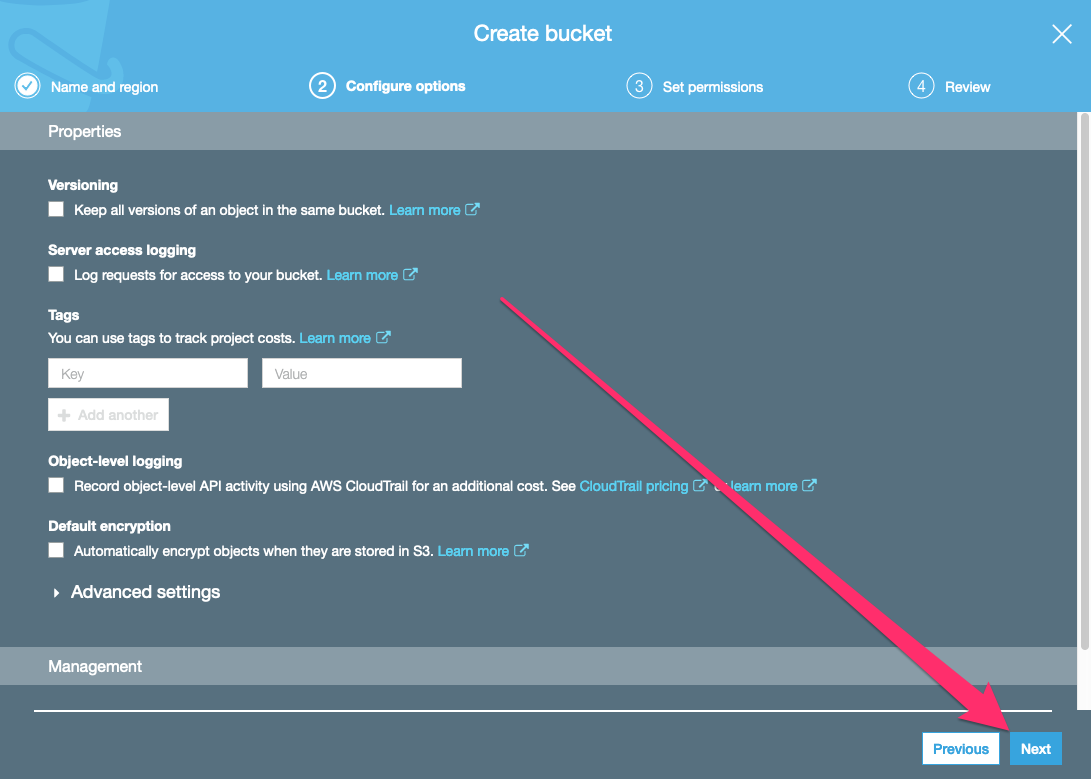
5) Leave the defaults as is for the configuration page and select ‘Next.’
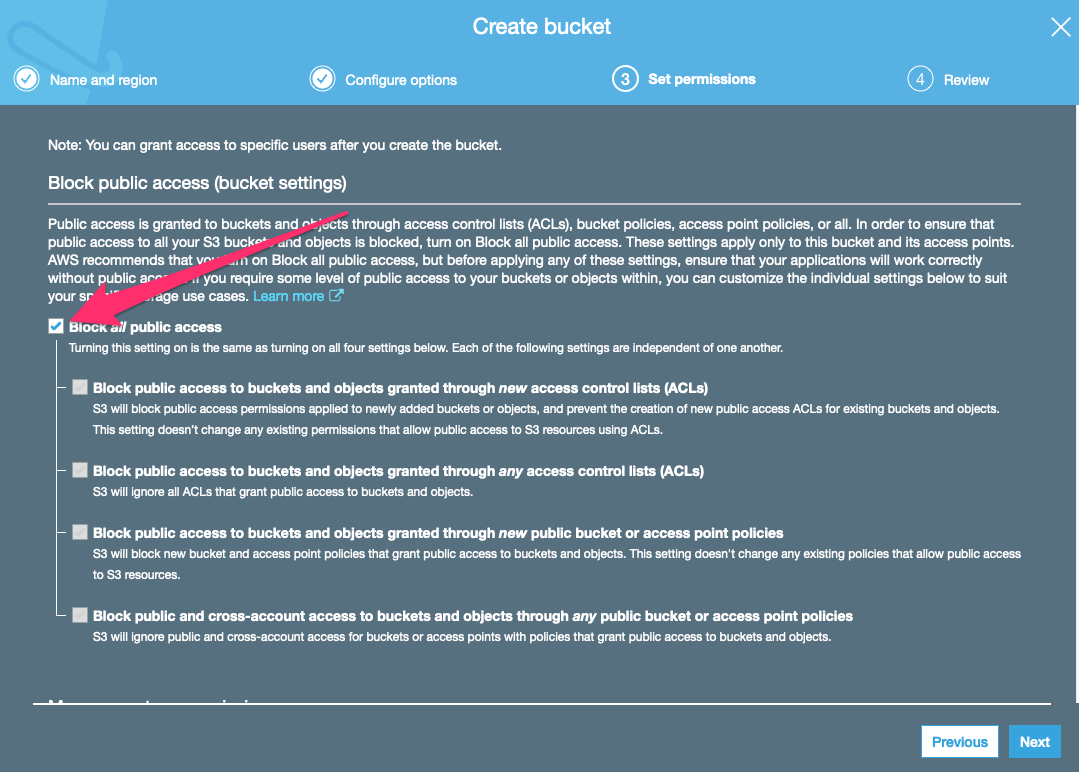
6) Under the permissions tab, choose to ‘Block all public access’ to the bucket, then click ‘Next.’ This well help keep your artifact secure.
7) The Review pane is where you can verify all of your settings. Once you have confirmed that all settings are correct, click ‘Create bucket’ to finish.

You should see your S3 Bucket. With your bucket, you can now create your build project.
Create CodeBuild Project:
If you have worked with CodeBuild in the past, most of this will look familiar, however, as part of the ARM release, a few new options have been added within the Build Environment section that will let you build and test any of your ARM-based applications.
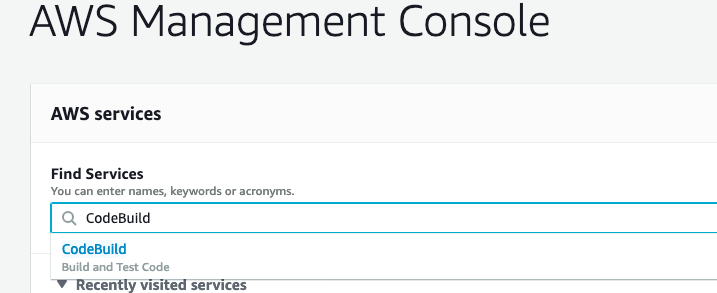
1) Go to the console search and type ‘CodeBuild’ and select the service.
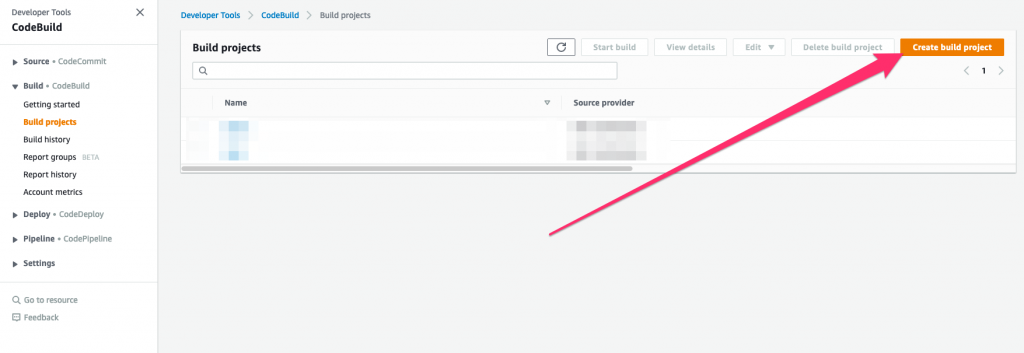
2) In the top right corner click ‘Create build project.’
3) Enter a name for your project. (‘myDemoBuild’ will be used as the default name in this post.) Descriptions are optional but can be useful.

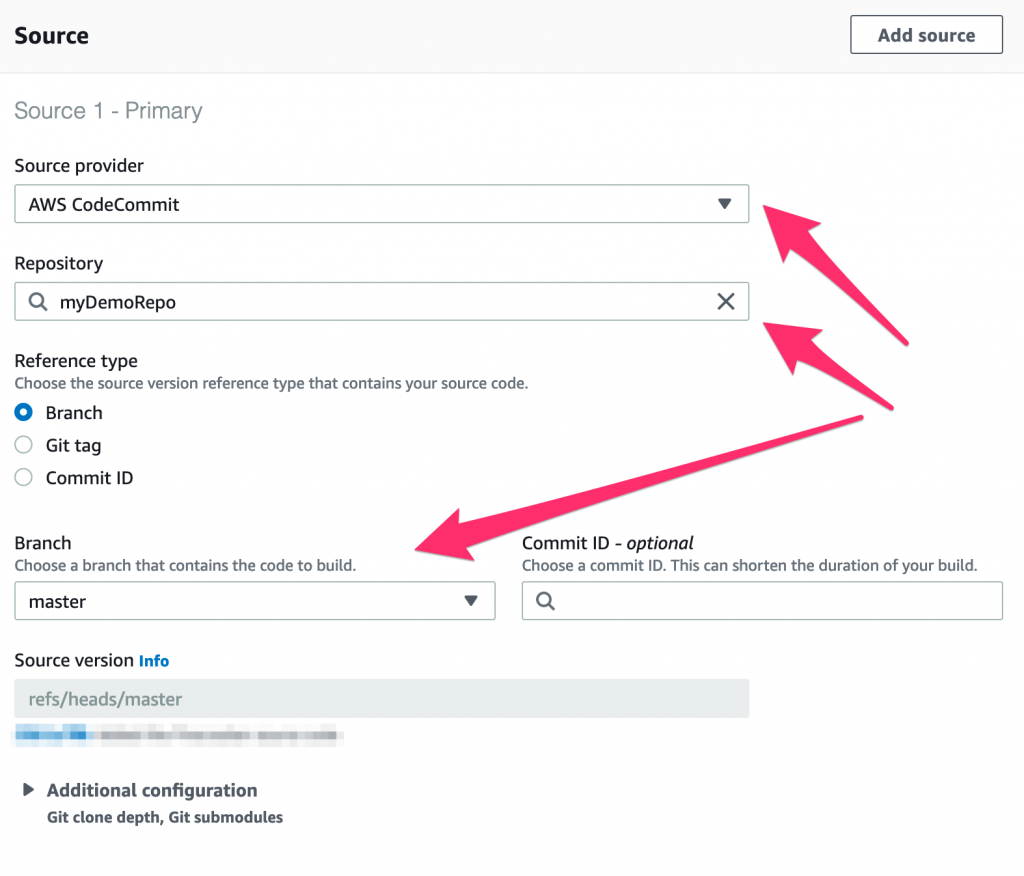
4) Select your source provider. I am going to use CodeCommit and select my repo and the branch where my new code is located.
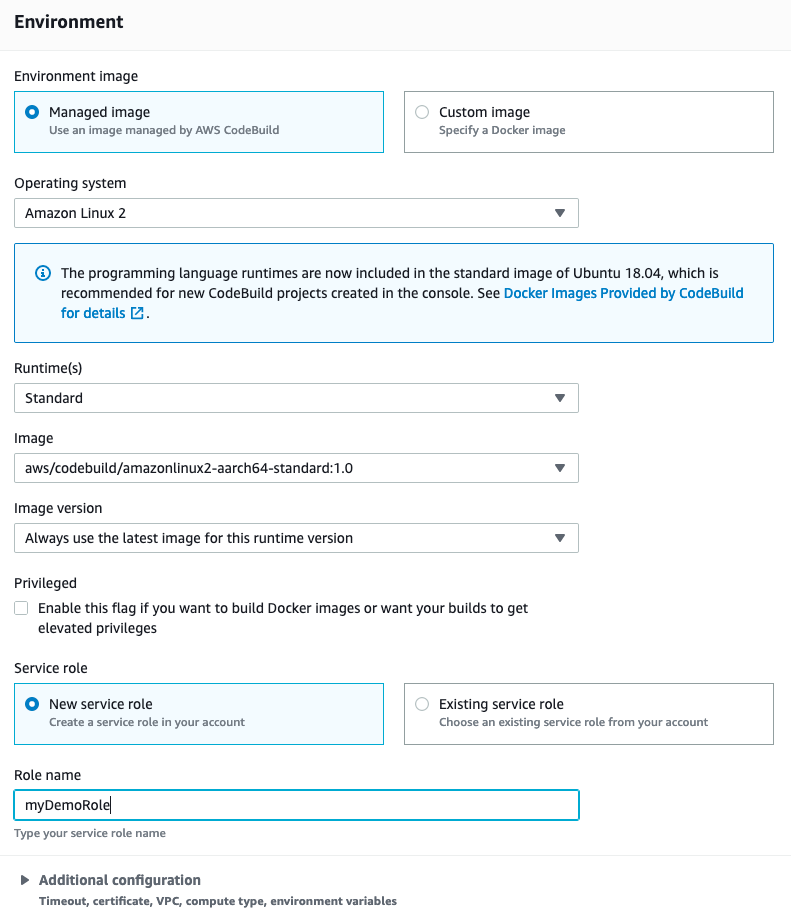
5) This is where the differences are that I mentioned earlier. We are now going to setup our Build Environment. For ARM support we must select the following options:
- Operating System: Amazon Linux 2 (At time of publishing, ARM support only supports using the Amazon Linux 2 operating system.)
- Runtime(s): Standard
- Image: amazonlinux-aarch64-standard
You can either create a new service role or select an existing service role if you have previously created one. I am going to create a new role called myDemoRole. The system will automatically create the required permissions to allow CodeBuild to access the resources based on your input from the Project. In a production environment, I would recommend creating a service role that follows a least access needed principal, instead of creating a holistically new role.
6) Configure buildspec settings. I am going to select ‘Use a buildspec file’ and leave the name blank as it will default to buildspec.yml. However, you can select a specific name if you have multiple buildspec files for use with difference environments. E.g., buildspec-prod.yml, buildspec-staging.yml, buildspec-dev.yml

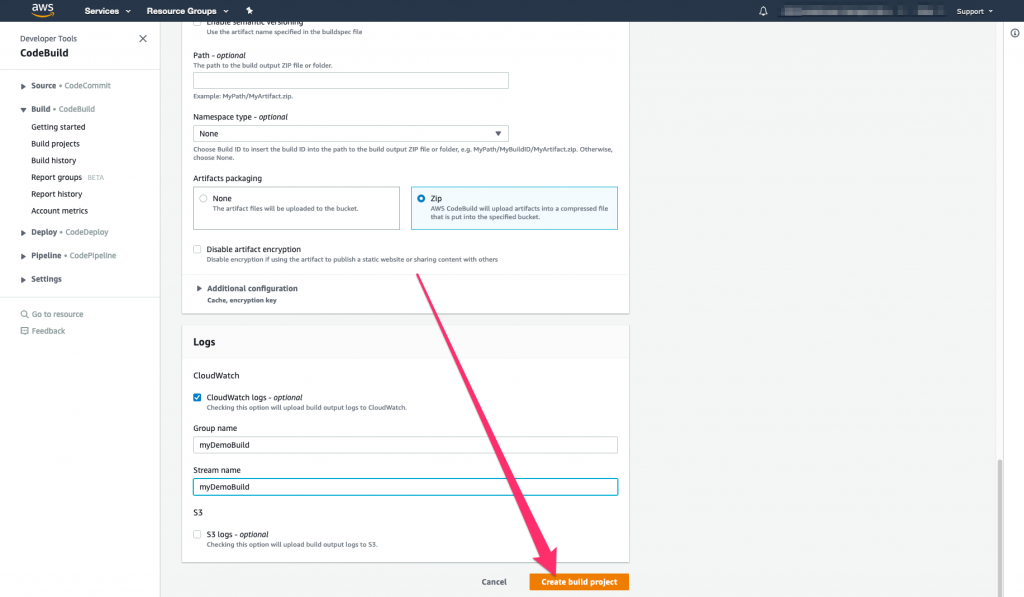
7) Configure your artifact settings. I am going to upload my artifact to the S3 Bucket we created earlier. I have named the file artifact.zip for simplicity, but any name can be used. I have selected to Zip the artifact file, however, that is not required.

8) Configure logging. I am going to enable CloudWatch logging so that the build logs are uploaded to the logging service.

9) Select ‘Create build project.’
Run the build:
Now that your application is created, your S3 bucket has been built, and you’ve created your build project, it is time to run your build. If everything is successful, your artifact file should be stored in your S3 bucket.
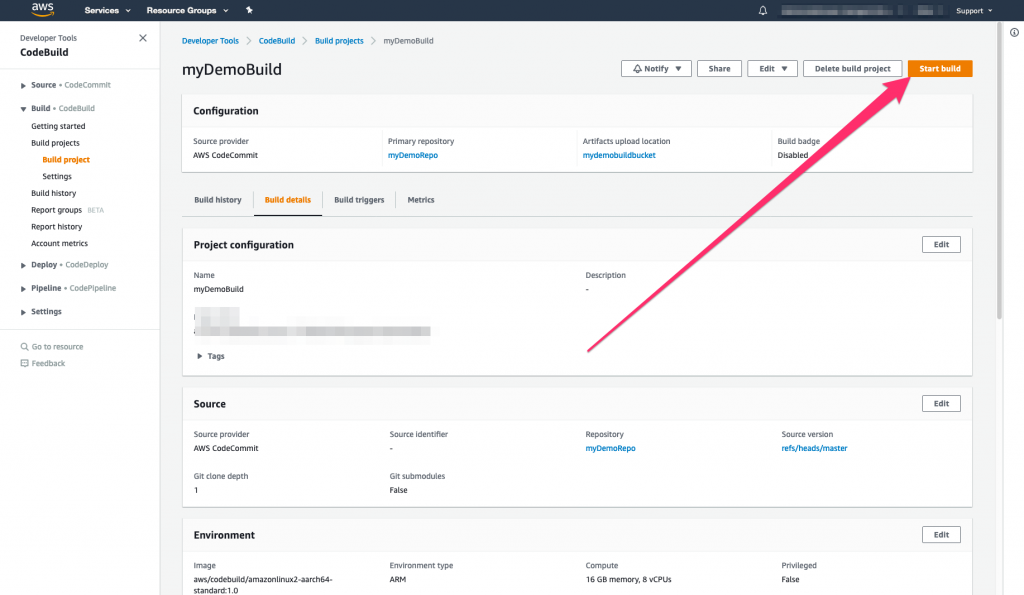
1) After you have created your build project, you should now be in the build page which allows you to run/edit/delete your build project. Select ‘Start build’ in the top right part of the page.
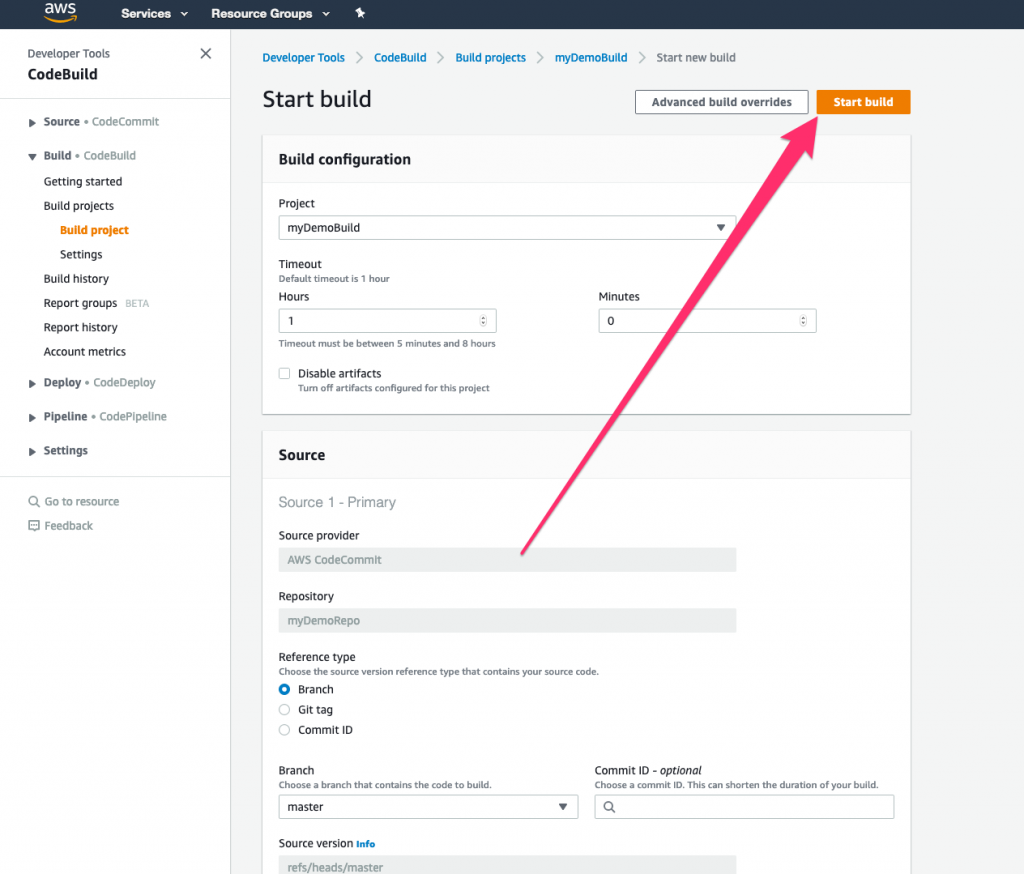
2) You can review or override the build settings that you configured when setting up the project. Once you have verified settings, click ‘Start build’ in the top right.
3) Once your build has been started, it will run through the steps of you buildspec file (this can take a while depending on your application). Once complete, the status should show “Succeeded.”

If for any reason your build did not succeed, look in the phase details to find the error. Validate all of your settings are correct and use the documentation to help you troubleshoot any issues.
4) Now that your build has been successful, verify that your artifact is in the S3 bucket you created.

Clean Up
Reminder, if you created any resources just for testing purposes, you should delete them to keep from incurring additional cost.
Make sure and check the following when cleaning up:
- S3 bucket
- CodeBuild Project
- CodeCommit repository
- Cloud9 Environment
Conclusion
We have walked through the process of using CodeBuild to build a sample Java application in the new ARM environment. Now that you have built your ARM-based artifact, you can download it for any local use or get started developing your own ARM-based applications using AWS Developer Tools.