AWS Cloud Operations Blog
Creating contacts, escalation plans, and response plans in AWS Systems Manager Incident Manager
Many of our customers need an effective incident management and response solution to achieve operational excellence and performance efficiency. Transparency between those who are affected by the incident and those who respond to the incident is key to any incident management process. Finding the right team to mitigate the impact of application or workload incidents can often take hours. On top of that, the incident response process is usually manual and involves lots of uncertainties. This is not desirable, especially when it comes to critical applications that can impact revenue and reputation.
Customers often ask us how we manage incidents internally. To simplify incident response management, we have just released a new AWS Systems Manager capability, Incident Manager, that incorporates the best practices we follow for internal incident management at Amazon. When you use Incident Manager, you engage the right responders at the right time, track incident updates, automate remediation actions, and enable chat-based collaboration.
This is the first in a two-part series. In this post, we discuss prerequisites, onboarding, and setting up incident management components. In the second post, AWS Systems Manager Incident Manager integration with Amazon CloudWatch, we discuss how Incident Manager integrates with Amazon CloudWatch, how Incident Manager components manage an incident, and the importance of post-incident analysis.
What is an incident?
An incident is an issue that occurs in your AWS-hosted applications. Consider an application running on an Amazon Elastic Compute Cloud (Amazon EC2) Linux instance that is using Amazon CloudWatch for monitoring. This application experienced a huge spike in traffic and CPU utilization went above 85%. The application was not prepared to handle the higher loads, so its performance was degraded. During situations like this, you need a response plan that engages the right responders to inspect and mitigate the incident.
To mitigate the incident’s impact, you must be able to identify the right contacts. In scenarios where an immediate response is required and the first contact cannot be reached, you need an escalation plan that allows you to escalate incidents to another set of contacts. After the right contact is engaged to manage the incident, you need a runbook that includes detailed steps to mitigate the incident. Especially during critical incidents, responders are under a lot of stress and prone to making mistakes. A runbook is handy because it instructs responders on how to inspect and manage the incident. The combination of contacts, escalation path, and a runbook of instructions is called a response plan.
Prerequisites
To complete the steps in this walkthrough, you need the following:
- An AWS account and AWS Identity Access and Management (IAM) permissions to access Amazon EC2, AWS Systems Manager, and Amazon CloudWatch. Your IAM user or role should also have iam:CreateServiceLinkedRole permissions. Incident Manager uses this permission to create the AWSServiceRoleforIncidentManager in your account. For more information, see Using service-linked roles for Incident Manager.
- An IAM role that allows Incident Manager to start an AWS Systems Manager automation runbook. For more information, see Setting Up Automation.
- An EC2 Linux instance with detailed monitoring enabled. For this walkthrough, t2.micro is sufficient. This instance should not be currently attached to an Auto Scaling group because later in this post we provide a code snippet that creates a manual runbook that instructs the incident responder to attach the instance to an Auto Scaling group. For information about how to connect to your EC2 instance, see Connect to your Linux instance in the Amazon EC2 User Guide for Linux Instances.
Complete onboarding steps
If this is your first time using Incident Manager, you need to complete the onboarding steps. If you have already completed these steps, skip ahead to the “Add contacts” section of the walkthrough.
- Sign in to the AWS Management Console and search for Incident Manager.
- On the Incident Manager page, choose Prepare.

Figure 1: Incident Manager page
- The onboarding wizard displays the workflow for setting up your incident response plan. Under General settings, choose Set up.
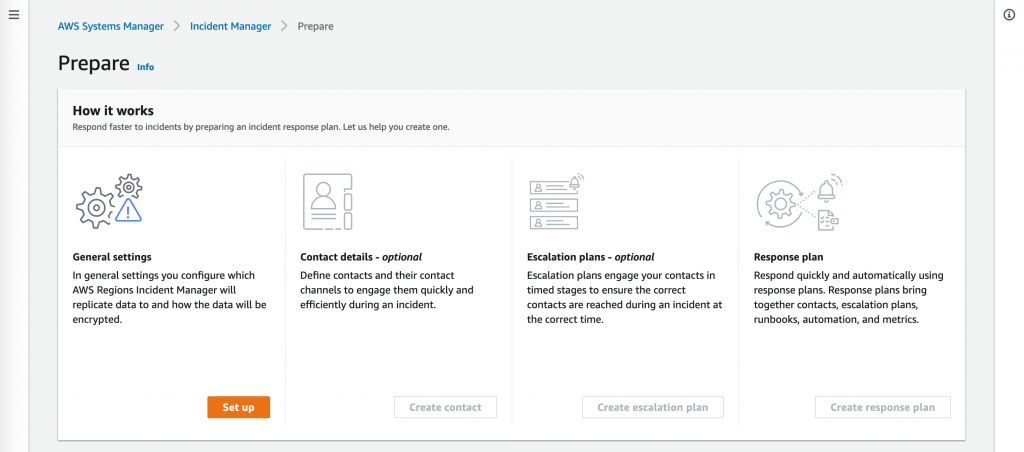
Figure 2: Incident response plan workflow
- On Terms and Conditions, read the text carefully, select the checkbox, and then choose Next.

Figure 3: Terms and Conditions
- The next step is to create a replication set. The replication set uses an AWS Key Management Service (AWS KMS) key to encrypt your data and replicate it across multiple AWS Regions. You can use an AWS-owned key or your own customer-managed key. In this walkthrough, choose one AWS Region for the replication set. You can add more Regions to the replication sets later. For more information, see Using the Incident Manager replication set.

Figure 4: Replication set creation
After you create the replication set, you can start adding contacts.
Add contacts
Your contacts should include everyone who might be involved in the incident. Follow these steps to add a contact.
- In the AWS Systems Manager console, expand Operations Management, and then expand Incident Manager.
- Choose Contacts, and then choose Create contact.

Figure 5: Create contact
- On Contact information, enter names and define contact channels for your contacts. Contact channels are methods you’ll use to engage your contact when an incident occurs.
- Under Contact channel, you can choose from email, SMS, and voice. You can also add multiple contact channels. In an actual scenario, replace the contact name with the incident responder name instead of a general term to reinforce the purpose.
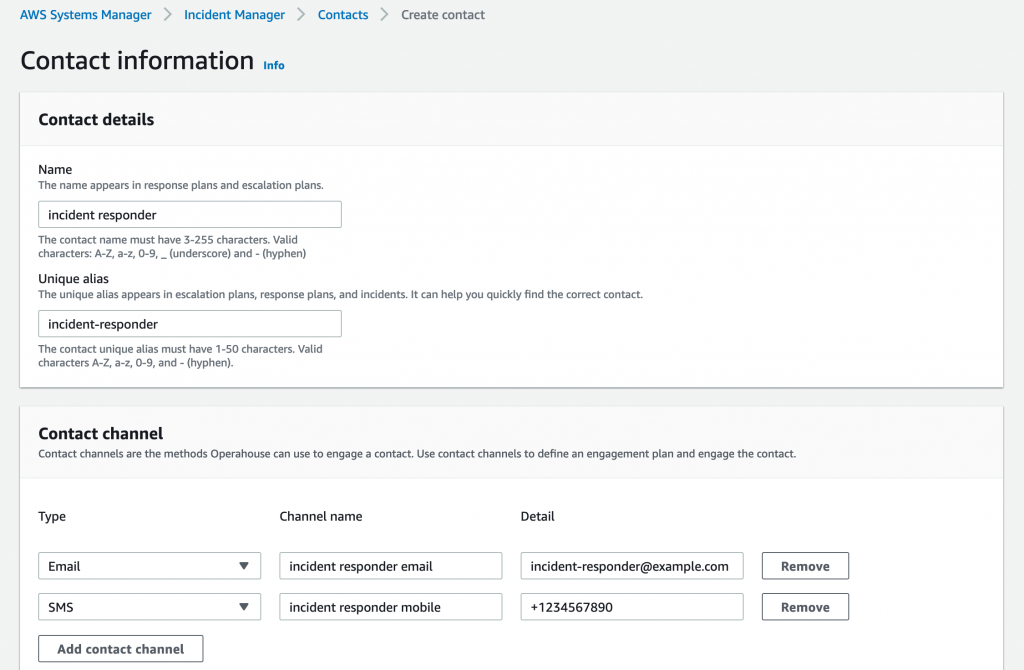
Figure 6: Contact information
- In Engagement plan, you can specify how fast to engage your responders. In Figure 7, the incident responder will be engaged through email 0 minutes into an incident and 10 minutes into an incident through SMS. Complete the fields and then choose Create.

Figure 7: Engagement plan
The contact you added will receive a six-digit activation code to confirm the contact channels. After the contact is activated, the contact can be part of an escalation plan.
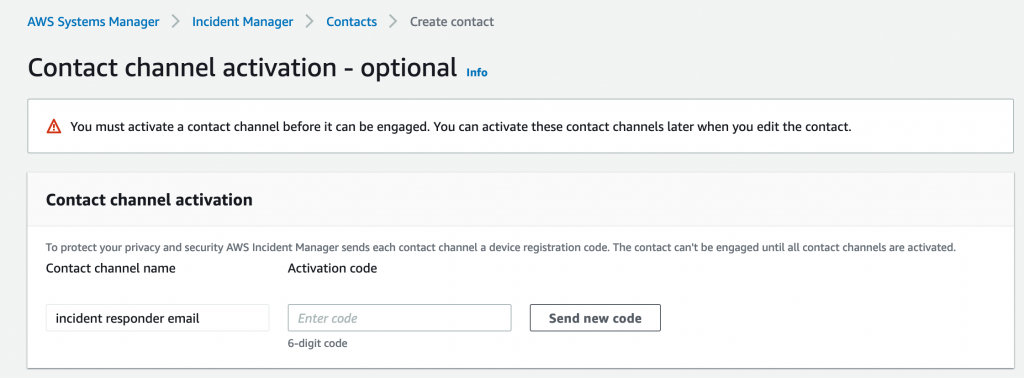
Figure 8: Contact channel activation
- (Optional) Repeat steps 1-5 to create another contact. In this walkthrough, we created another contact with the alias of sr-incident-responder. In a real-world scenario, the contact details should be an actual person or team.
Create an escalation plan
Follow these steps to set up an escalation plan.
- In the AWS Systems Manager console, expand Operations Management, and then expand Incident Manager.
- Choose Escalation plans, and then choose Create escalation plan.
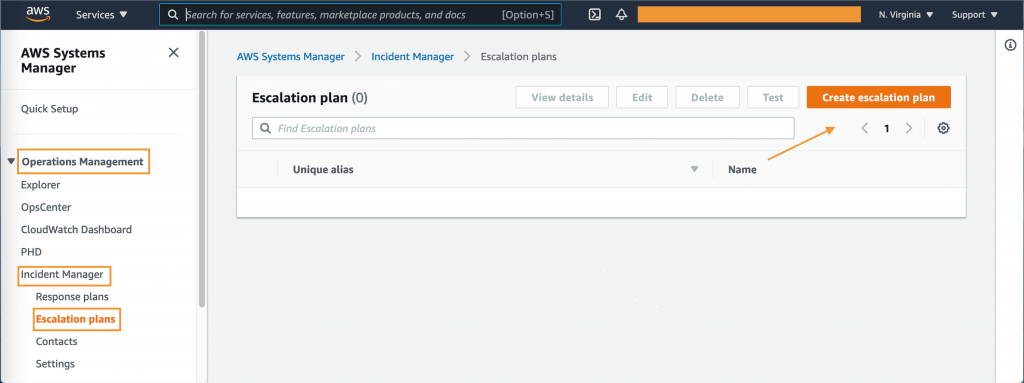
Figure 9: Escalation plan
- On Create escalation plan, you can specify the number of stages you want to include in the escalation plan. Under Stage 1, for Stage duration, enter 5. Choose the first contact you created as the primary contact. Select or clear the checkbox next to Contact name to indicate whether to stop escalation after your contact in Stage 1 has acknowledged the incident.

Figure 10: Contact acknowledgement stops plan progression checkbox
- If you created another contact, you can add that contact in Stage 2. Because you set the Stage duration to 5 in Stage 1, if the responder in Stage 1 does not acknowledge the incident five minutes into the engagement, the next set of contacts,
sr-incident-responder, will be engaged.
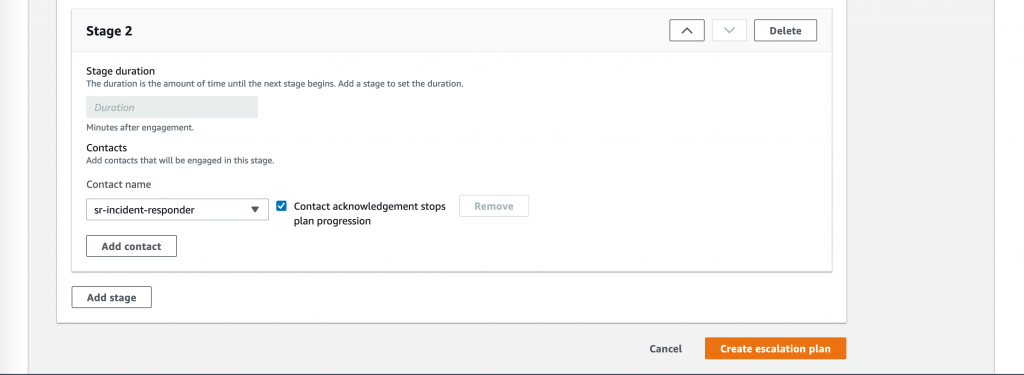
Figure 11: Stage 2
Create a response plan
Now you’re ready to create a response plan for the incident, which ties together the contacts, escalation plan, and runbook. When an incident occurs, a response plan defines who to engage, how to engage, which runbook to initiate, and which metrics to monitor. By creating a well-defined response plan, you can save teams time down the road.
- In the Systems Manager console, expand Operations Management, and then expand Incident Manager.
- Choose Response plans, and then choose Create response plan.

Figure 12: Response plans
- In Create response plan, for Name, enter
EC2HighCPU. For Title, entercpu-incident-1. For Impact, choose Medium.
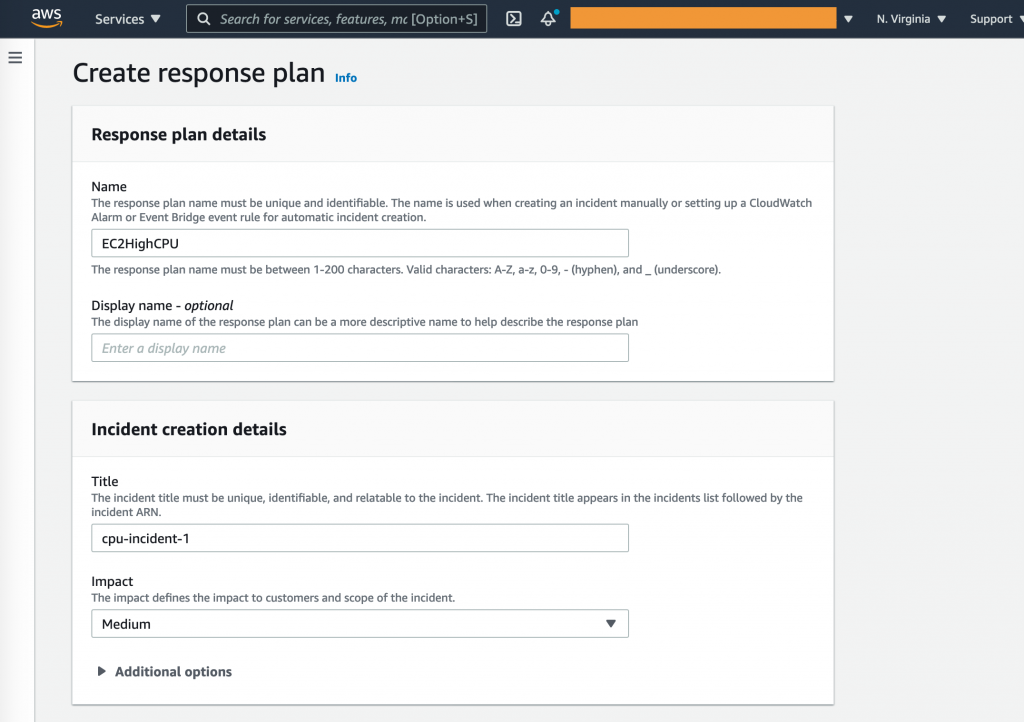
Figure 13: Create response plan
You can optionally configure an AWS Chatbot channel as part of the response plan so that incident responders can communicate over chat. For more information, see Setting up AWS Chatbot in the AWS Chatbot Administrator Guide.

Figure 14: Chat channel
- Under Engagements, choose the escalation plan you created earlier.

Figure 15: Engagements
- In Runbook, choose Clone runbook from template, and enter Runbook name
ec2-cpu-util-runbook. - Under Execution permissions, choose Create an IAM role using a template. Under Role name, select the IAM role you created in Prerequisite that allows Incident Manager to run SSM automation documents, and then choose Create response plan.

Figure 16: Runbook
- You can now view the response plan you created. Under Document, choose the runbook you cloned from the default template (ec2-cpu-util-runbook). You will edit the runbook to make it more applicable to the incident.

Figure 17: ec2-cpu-util-runbook
- In the SSM Automation document cloned from the default runbook, there are generic steps to mitigate an incident. Under Actions, choose Create new version.

Figure 18: Document description
- On Create new version, choose the Editor tab, and then choose Edit. When you see a message that says you can’t return to the Builder tab after you choose the Editor tab, choose OK.
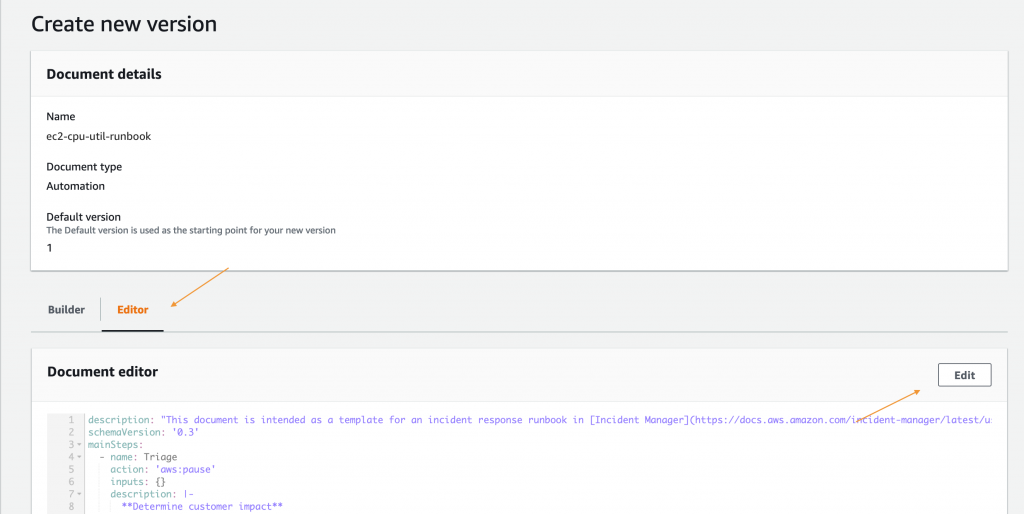
Figure 19: Editor tab
Copy and paste the following code into the Document editor field, and then choose Create automation. This code snippet creates a manual runbook that instructs the incident responder to attach the instance to an Auto Scaling group.
You have now created a response plan that engages your incident responders and provides a predefined runbook to help them mitigate the incident.
In the second blog post of this series, we discuss how the components you created can be used for managing an incident.
Conclusion
In this blog post, we showed how you can use Incident Manager to prepare for and mitigate incidents. Preparation is key to successful incident management. Incident Manager helps you create escalation plans and customized runbooks. It offers more capabilities, too, such as the ability to engage your responders through Slack and the use of automated runbooks. For more information, see Incident Manager in the AWS Systems Manager User Guide.