AWS Cloud Operations Blog
How to easily configure Resource Scheduler across your Organization with Systems Manager Quick Setup
The AWS pay-as-you-go model is ideal for customers looking to optimize their infrastructure costs in the cloud. A simple way to achieve significant savings is to stop Amazon Elastic Compute Cloud (Amazon EC2) instances when they aren’t being used, for example, outside of business hours.
This approach can reduce EC2 instances utilization and reduce the overall costs based on a configured schedule. For example, by using the default scheduler, which is business hours 9.00 AM to 5.00 PM on Monday to Friday, the expected cost reduction is approximately 70% of running instances 24/7.
AWS Solutions already provides a way to configure the Instance Scheduler for your multi-account and multi-region environment using AWS CloudFormation stacks. AWS Systems Manager Quick Setup is launching a new Resource Scheduler Quick Setup Type. It makes configuring the Resource Scheduler across accounts and regions in your AWS Organizations from a centralized location easier and quicker. This capability provides a User Experience (UX) that enables Customers to configure Resource Scheduler with just a few clicks. The key benefit is that Customers don’t have to deal with AWS CloudFormation templates or any code. This post walks you through the steps to use this new feature.
Solution overview
Quick Setup is an AWS Systems Manager feature that lets you quickly configure and deploy AWS services with the recommended best practices. By utilizing Quick Setup, you can instantly configure services within an individual or across multiple AWS accounts and regions within your Organization with just a few clicks.
You can use Quick Setup to enable Resource Scheduler across your accounts within organizational units (OUs) and Regions following the AWS best practices without manually logging in to individual accounts.
The following diagram shows a typical Organization setup, with multiple OUs containing different AWS accounts. It illustrates an administrator account where you enable Resource Scheduler from Systems Manager Quick Setup.
Resource Scheduler Quick Setup targets accounts and regions using CloudFormation Stack to deploy a Change Calendar, a State Manager Association, and an Automation Document for Start and Stop instances.
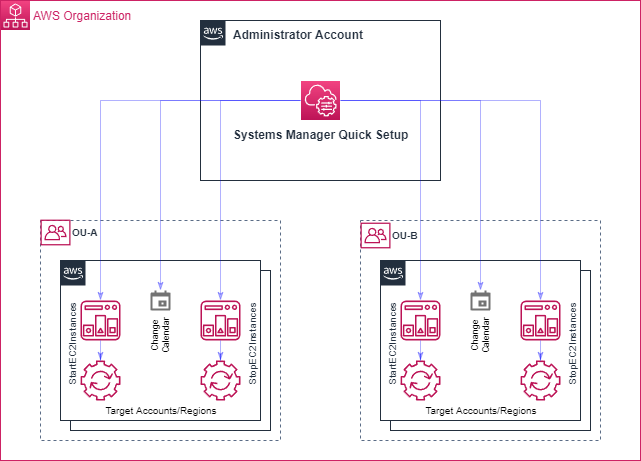
Figure 1. Target Architecture diagram
Enabling Resource Scheduler with Systems Manager Quick Setup
By following the instructions below you will be guided on how to create your first Resource Scheduler configuration using System Manager Quick Setup, including an overview of the prerequisites and the one-time configuration of the home region for AWS Quick Setup, if you have never used AWS Quick Setup before.
Prerequisites
You have options for selecting the target configurations, as shown in the following figure:

Figure 2. Possible Targets
- For the Current account, you need admin privileges to deploy the configuration.
- For Custom, before you get started, ensure that you have the following prerequisites:
- One or more OUs within your Organization. If you aren’t familiar with AWS Organizations terminology, then refer to AWS Organizations terminology and concepts.
- One or more target AWS accounts.
- One central (or administrator) account with privileges to manage the target accounts.
Steps to enable Quick Setup Resource Scheduler
Follow these steps to enable Instance Schedule by using Quick Setup:
- Choose a home region. If you haven’t enabled AWS Quick Setup, choose a home Region. This choice specifies the Region where Quick Setup deploys your configuration and provisions the required AWS resources. Note that you can’t change the home region after you choose it.
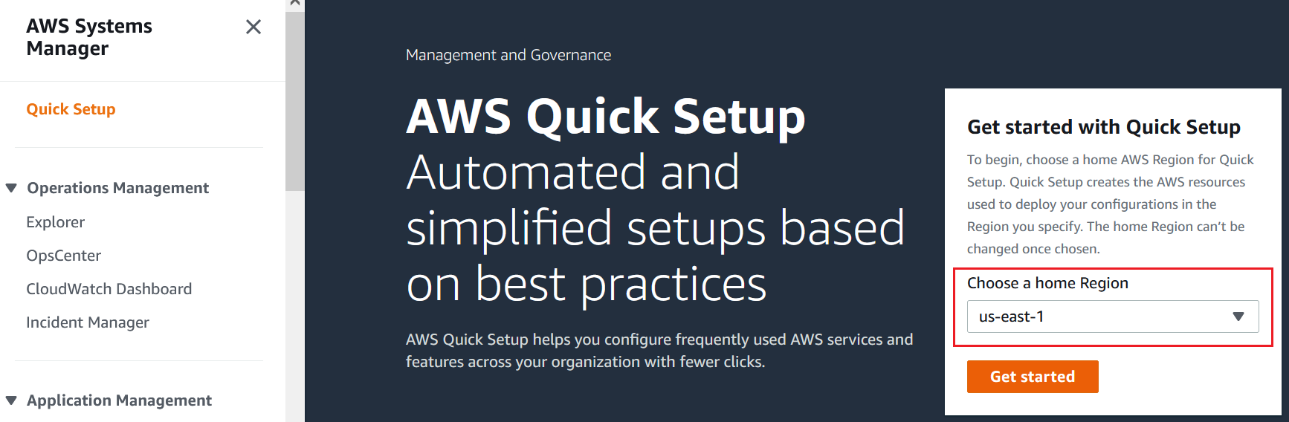
Figure 3. Get Started with Quick Setup
- Choose a configuration type – To get started with Quick Setup for Resource Scheduler, choose the Resource Scheduler from the available configuration types. These pre-defined configuration types help you set up the service or feature to use the recommended best practices in a multi-account and multi-region environment.
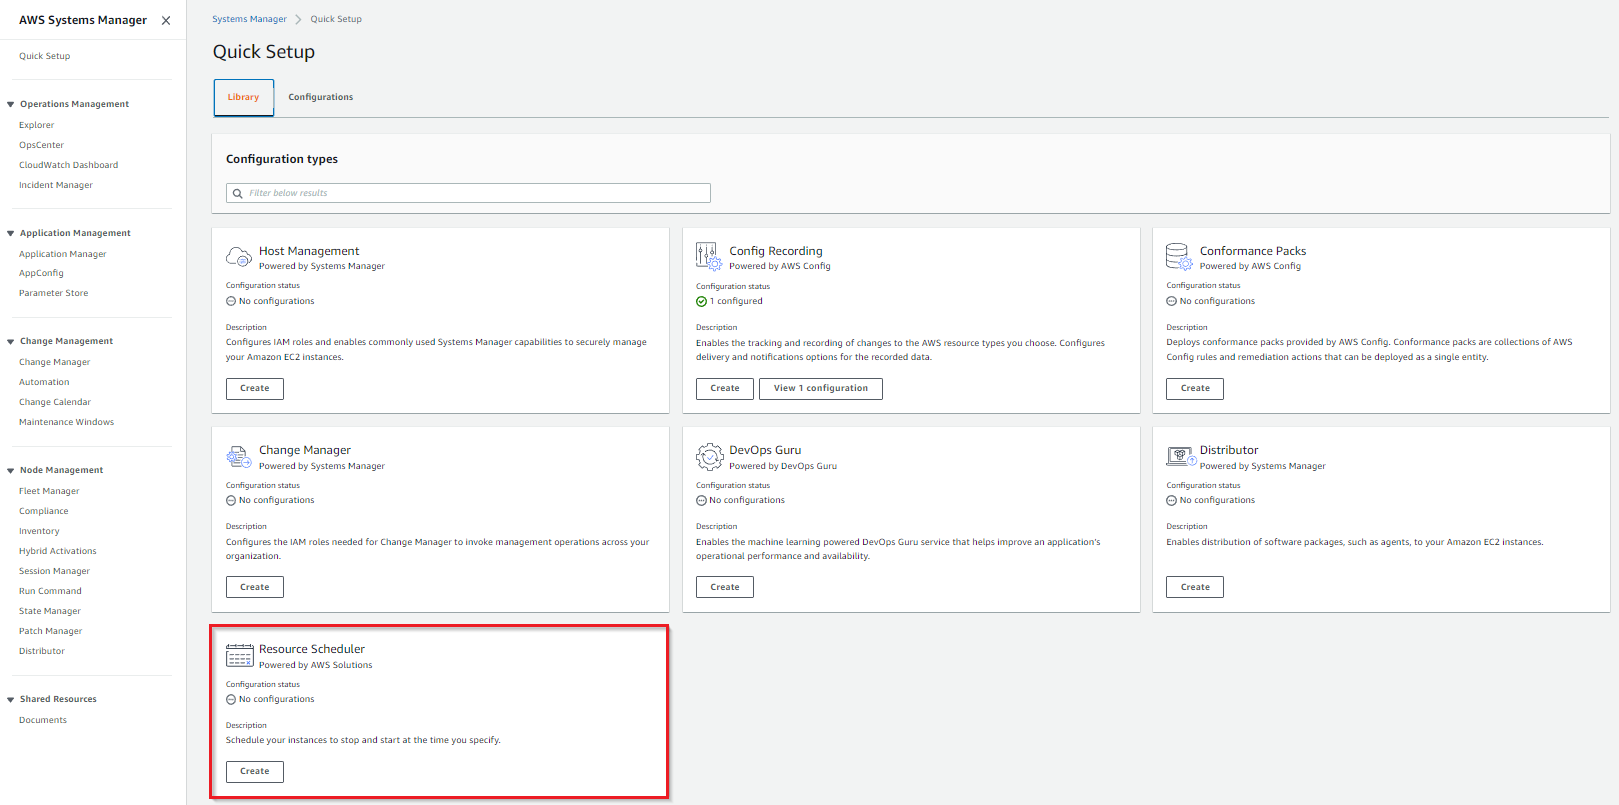
Figure 4. Quick Setup Configuration Type
- Customize Schedule options – Once you’ve selected the Resource Scheduler configuration type, you can see the Schedule options. By default, the pre-defined schedule will stop instances weekly during weekends and non-business hours (5.00 PM to 9.00 AM).
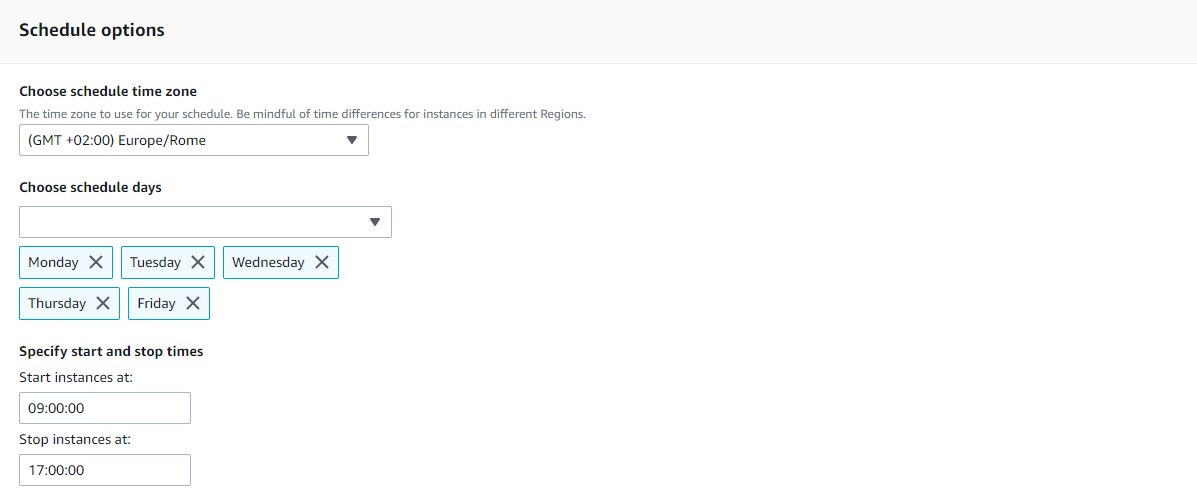
Figure 5. Schedule Options
To customize the schedule, configure your start and stop dates and times and define the desired recurrence, as shown in the following.
Suppose you have different use cases requiring multiple schedulers. In that case, you may want to create as many Resource Scheduler configurations as you can to cover all of your use cases. By applying different tags, your EC2 instances will be stopped and started according to the respective Scheduler.
Remember to select the correct time zone in the dedicated drop-down menu.
- Customize Target options – Select the target accounts and regions to deploy the Resource Scheduler.
Define the Key and Value of the Tag that the Resource Scheduler will utilize to identify the selected instances for scheduled start and stop.

Figure 6. Instance Tag
Select if you will use Custom (to select OUs and Regions) or just the Current account.

Figure 7. Possible Targets
Finally, select the OUs and Regions where you want to deploy the Resource Scheduler.
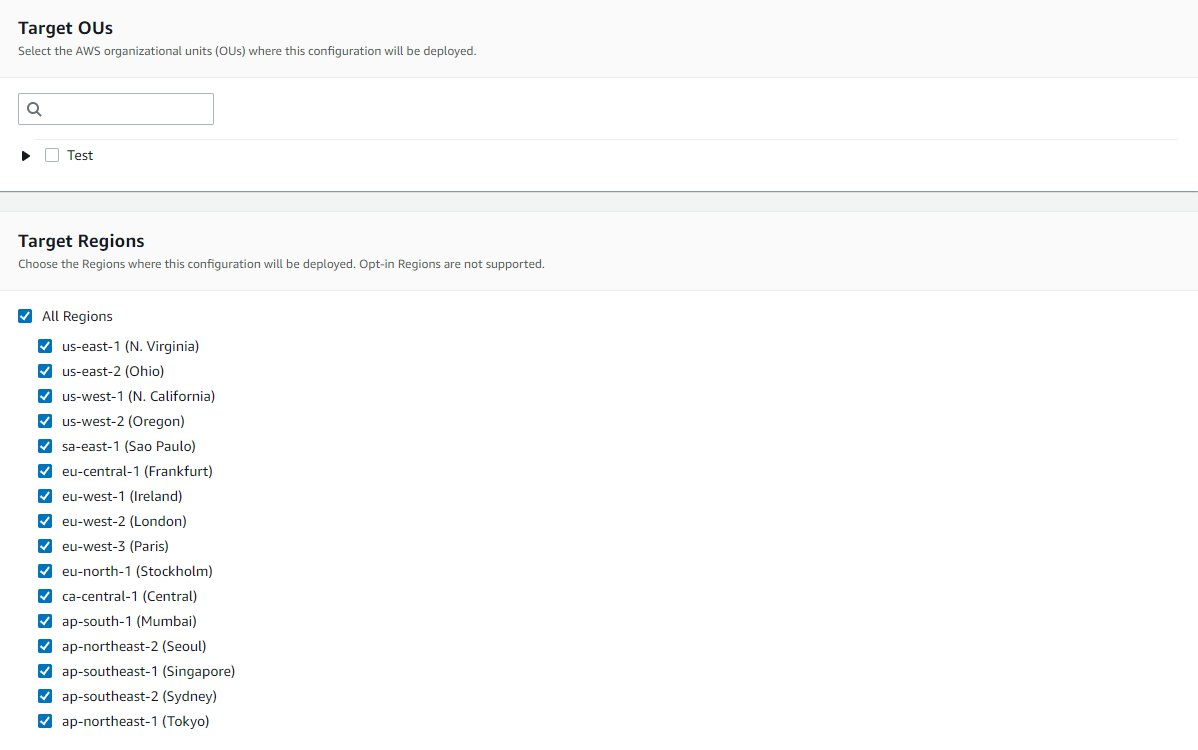
Figure 8. Target OUs and Regions
- Create configuration – At the end, you receive a summary based on your configuration selections. Select the Create button to provision the resources.
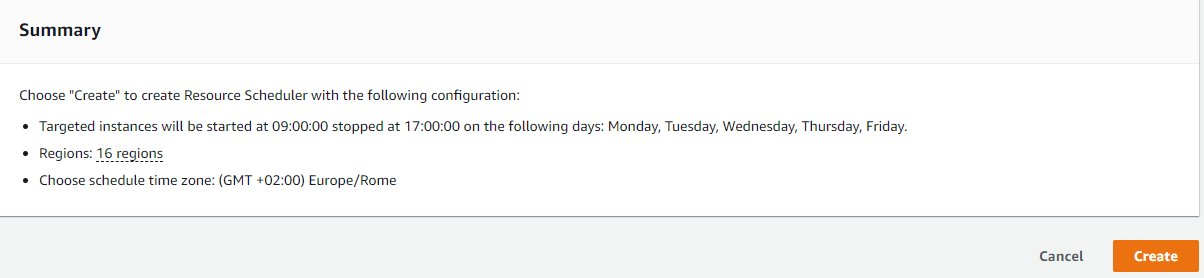
Figure 9. Summary before Resource Scheduler creation
Verifying Quick Setup Resource Scheduler Configuration status
After creating your Quick Setup Configuration, you can verify if the deployment was completed successfully in each account/region using the “View details” button.
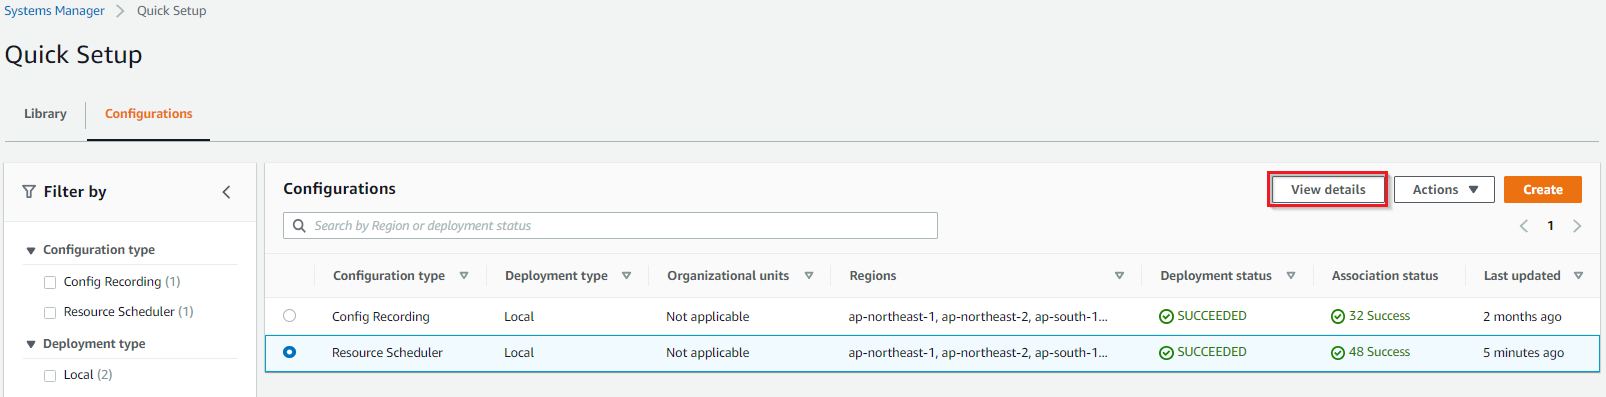
Figure 10. Resource Scheduler Configuration review
Looking at the Configuration details in the following image, you can observe the deployment status for each account/region.
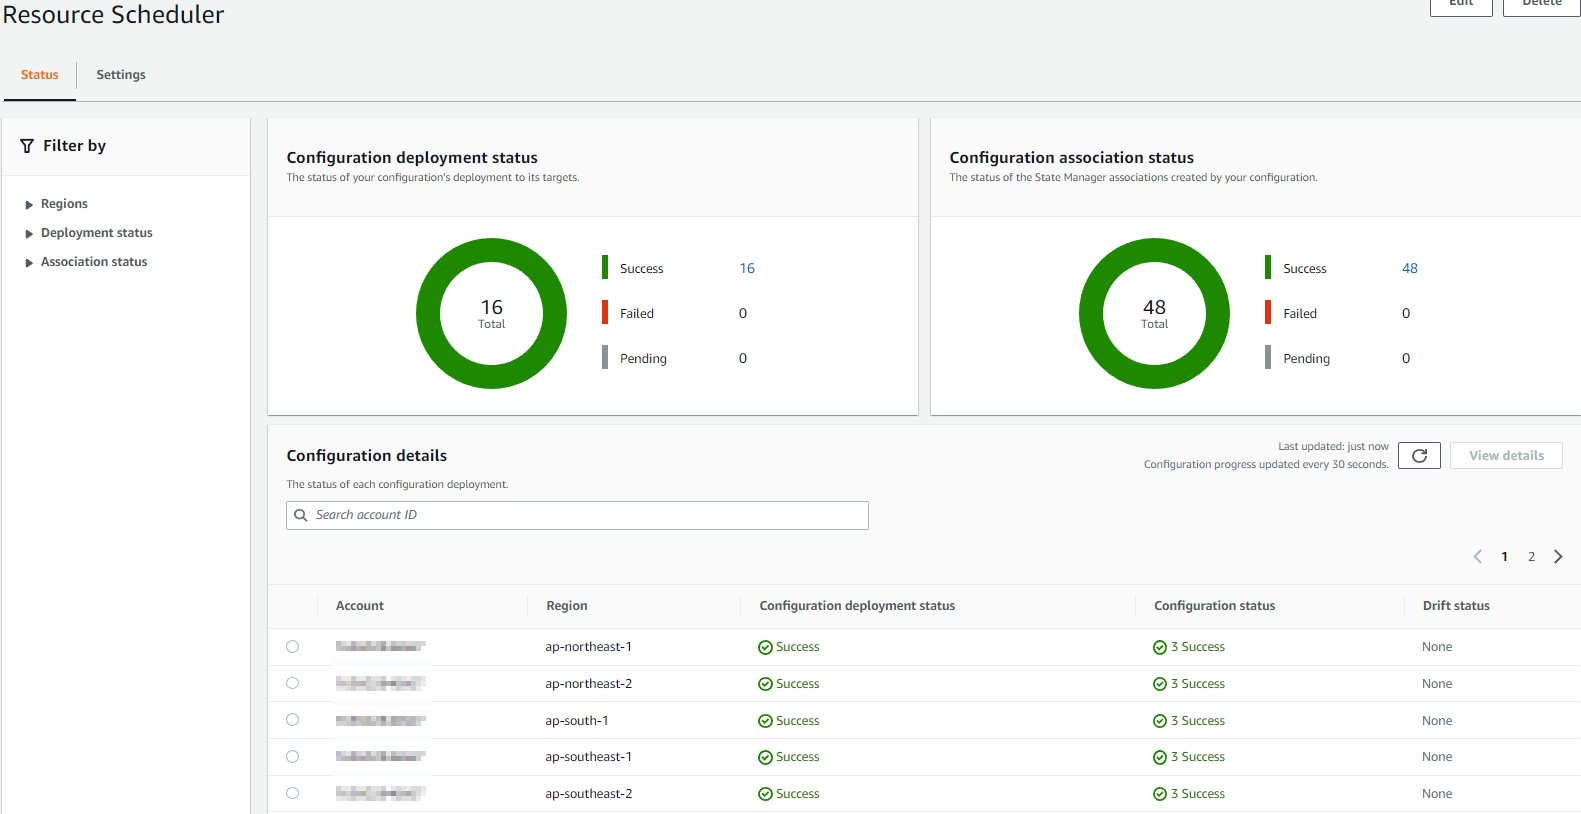
Figure 11. Resource Scheduler Configuration review – Details
Quick Setup has drift detection capabilities in case of problems with the Configuration status. You can investigate the root cause from the console. Refer to the Quick Setup Troubleshooting for more information.
Tagging instances
After creating the Resource Scheduler Quick Setup Configuration, you must apply the Tag specified during the creation to start and stop your instances. You can apply the Tags one-by-one or in a batch, as AWS offers multiple ways to manage Tags for numerous resources. Review the Tag Editor documentation and Resource Groups Tagging post for more information.
Conclusion
When customers move to the cloud, they pay only for what they use. So, they always seek opportunities to optimize and save cloud infrastructure costs. This post demonstrated how to quickly enable, configure and utilize the Quick Setup Resource Scheduler within your Organization. Resource Scheduler stops and starts your AWS instances in specific OUs and Regions using multiple schedulers for different use cases through better UX.
Discover other configurations that you can easily implement with AWS Quick Setup:
- Manage instances using AWS Systems Manager Quick Setup across AWS Organization
- How to easily configure DevOps Guru across your organization with Systems Manager Quick Setup
- Managing configuration compliance across your organization with AWS Systems Manager Quick Setup
About the authors: