Networking & Content Delivery
AWS Verified Access introduces policy assistant to quickly see the impact of new access policies
Amazon Web Services (AWS) Verified Access (AVA) is a secure remote access service that eliminates the need for VPNs. AVA reduces management complexity and improves security with real-time evaluations of requests based on factors such as identity and device posture. With Verified Access, you can define access policies written in Cedar using end user context, such as user groups and device risk scores, received from your existing third-party identity and device security services.
This blog post introduces policy assistant, which provides new capabilities to write, troubleshoot, and simulate policies on the Verified Access console, allowing you to see how a new or modified policy impacts your users’ ability to access applications. In this blog post, we show you how to use the Verified Access policy assistant to develop and fine-tune access policies faster. And we provide two examples demonstrating troubleshooting and fine-tuning.
Prerequisites
Before we begin, you need to deploy an existing Verified Access instance and endpoint. The steps required to deploy Verified Access can be found in this tutorial. Additionally, make sure Include trust context and Deliver to Amazon Cloudwatch Logs are enabled on the Verified Access instance. These settings are not enabled by default, and are required for the policy assistant to work properly. Not enabling the two functions will result in a “No logs found” error by the policy assistant. Policy assistant retrieves the latest log for a given user sign-in. As a result, the user that is being used for troubleshooting needs to have attempted to sign in to the Verified Access application recently.
The following images and their accompanying text explain how to verify and enable Include trust context and Deliver to Amazon Cloudwatch Logs.
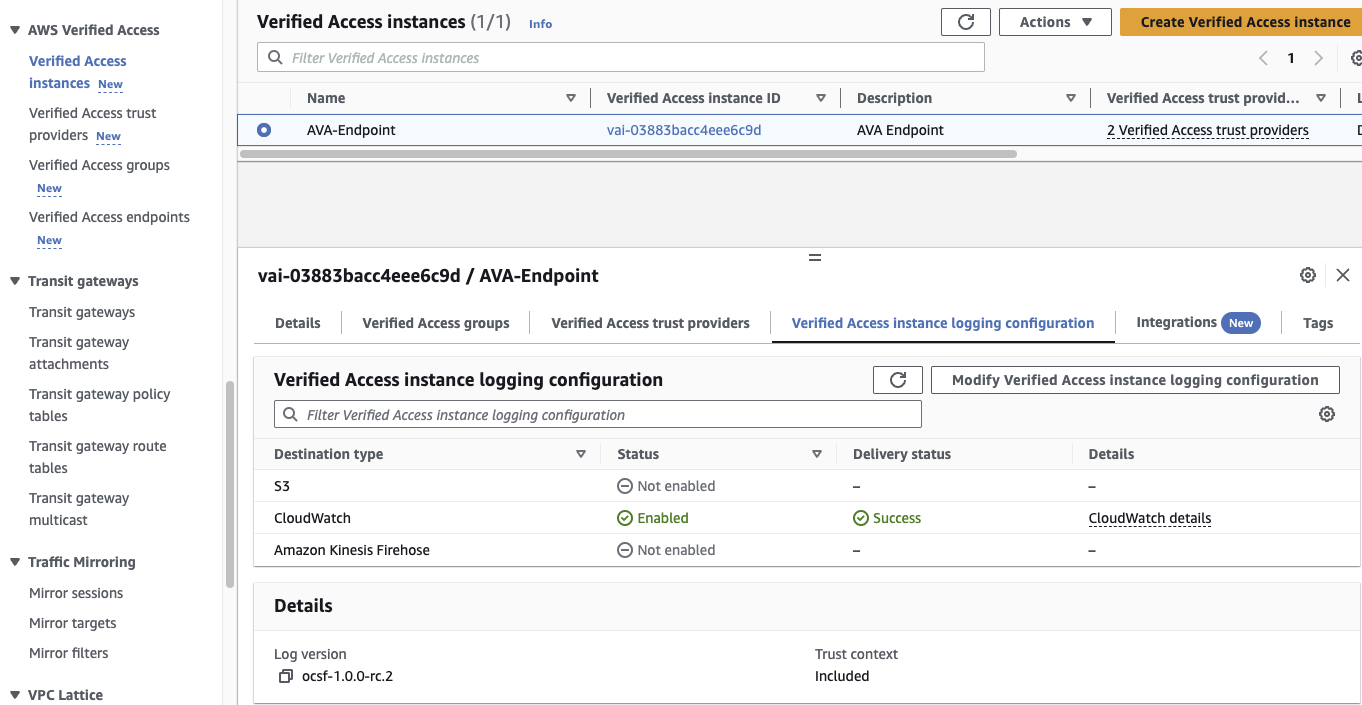
Figure 1 – Verified Access instances – Instance logging configuration
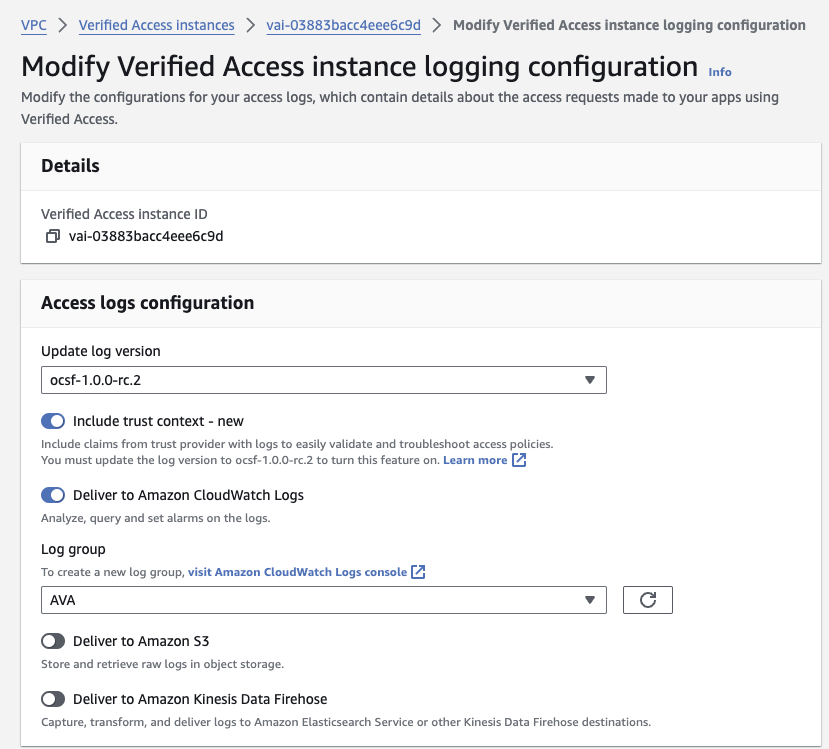
Figure 2 – Verified Access instances – Deliver to CloudWatch Logs and Include Trust Context
Solution overview
Building on top of improved logging functionality, the policy assistant can write, validate, troubleshoot, and simulate policies in the AVA console, allowing you to see how a new or modified policy impacts your users’ application access. You can observe the outcome of your existing policy and then modify and test these policies iteratively as needed through these simulations. Once you are able to validate the policy successfully, it can be deployed in production.
Here is an outline of steps that Verified Access administrators need to undertake to troubleshoot a policy with the policy assistant:
- Select the Verified Access instance ID link in the Verified Access instance associated with the endpoint.
- Provide the user details for which the policy assistant will retrieve the latest access log.
- Review the latest access log context and Verified Access policies as presented by the policy assistant.
- Iterate the policy as needed and simulate the effects of changes in real time until the target policy status results in allow.
- [Optionally] Deploy the new version of the policy to production.
Solution walkthrough: Using Verified Access policy assistant for troubleshooting and fine-tuning
In this walkthrough example, we go step by step on the following examples:
- Troubleshoot an access policy where a user has reported not being able to access an application.
- Fine-tune the existing policy to add additional conditions based on a newly introduced device trust provider.
Troubleshooting
In this scenario, we use a fictional scenario with the domain example.com and the user john_stiles Please adjust to your own domain and users as required.
We have received reports of user john_stiles being unable to access the finance application example.com. The end user john_stiles has informed us that until a few days ago, they had been able to access the application successfully. We will walk through retrieving the Verified Access access logs, access group or endpoint access policies for john_stiles using the policy assistant. Once retrieved, the policy assistant provides a playground where the access policies can be modified and validated to have the expected result. This is all done in the playground without making any changes to the policy in place.
- On the AWS Management Console, navigate to the VPC
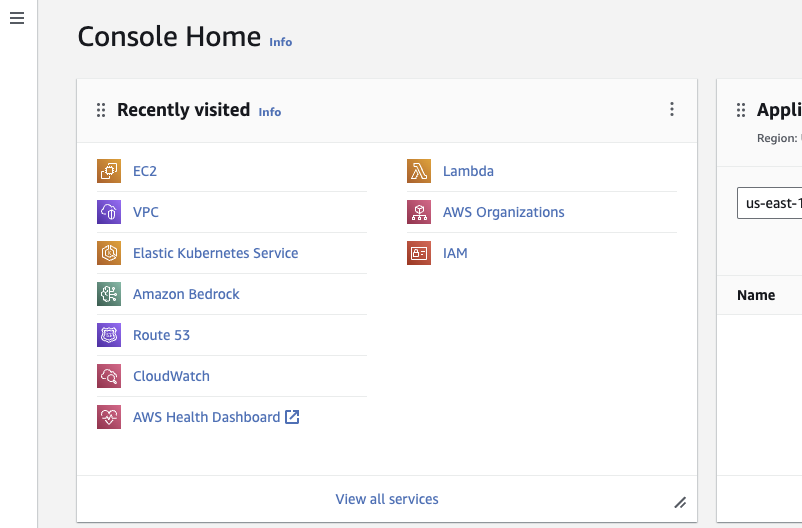
Figure 3 – AWS console
- On the left pane, under AWS Verified Access, select on Verified Access Instances.
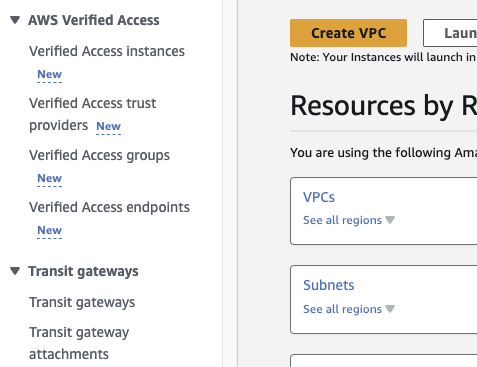
Figure 4 – AWS Verified Access
- Choose the Verified Access instance ID hyperlink for the Verified Access instance.

Figure 5 – Verified Access instances
- On the top right corner, choose Launch policy assistant.
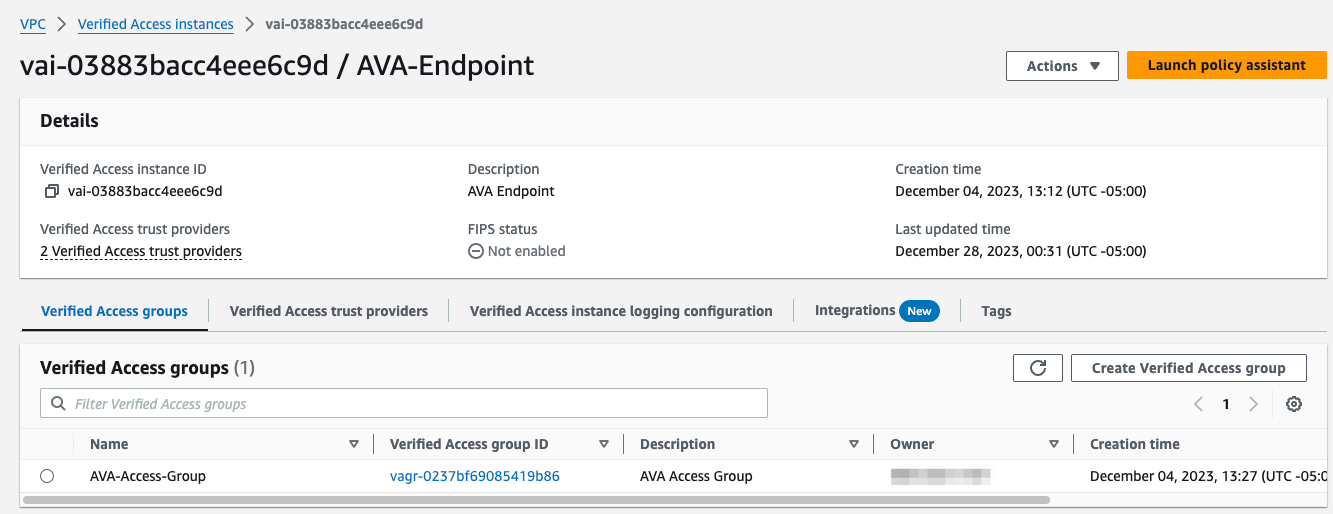
Figure 6 – Launch policy assistant
- Here we enter the john_stiles email address, which is used to authenticate when accessing the application via Verified Access. Next, select the Verified Access endpoint associated with the application the user is trying to access. Lastly, select Latest deny result under Authorization result and press Next.
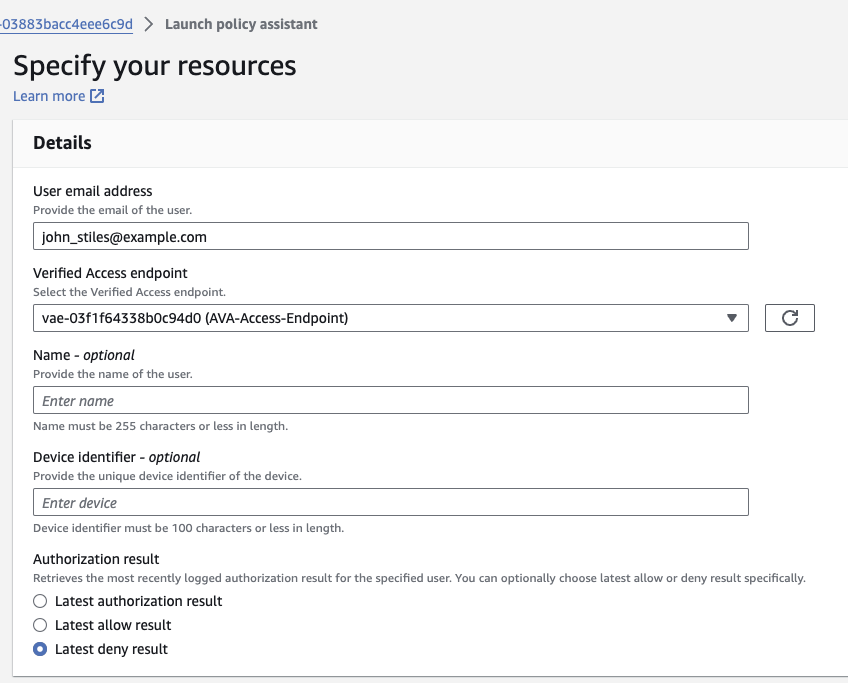
Figure 7 – Policy assistant – Specify resources
- The policy assistant was able to retrieve the context data for the latest deny entry from the logs. The policy assistant is also able to automatically retrieve the group and endpoint policy. With this on screen, we can now begin to review the context relative to the existing policies and assess why the user was denied access. In the following image, based on the identity provider’s context metadata, we can see john_stiles is part of the HR-Managers group. We have identified the reason for user john_stiles’s access failure. The group policy permits only members of the HR-Frontdesk group. It turns out that john_stiles was recently promoted, and the change in his role resulted in a change in his group membership.
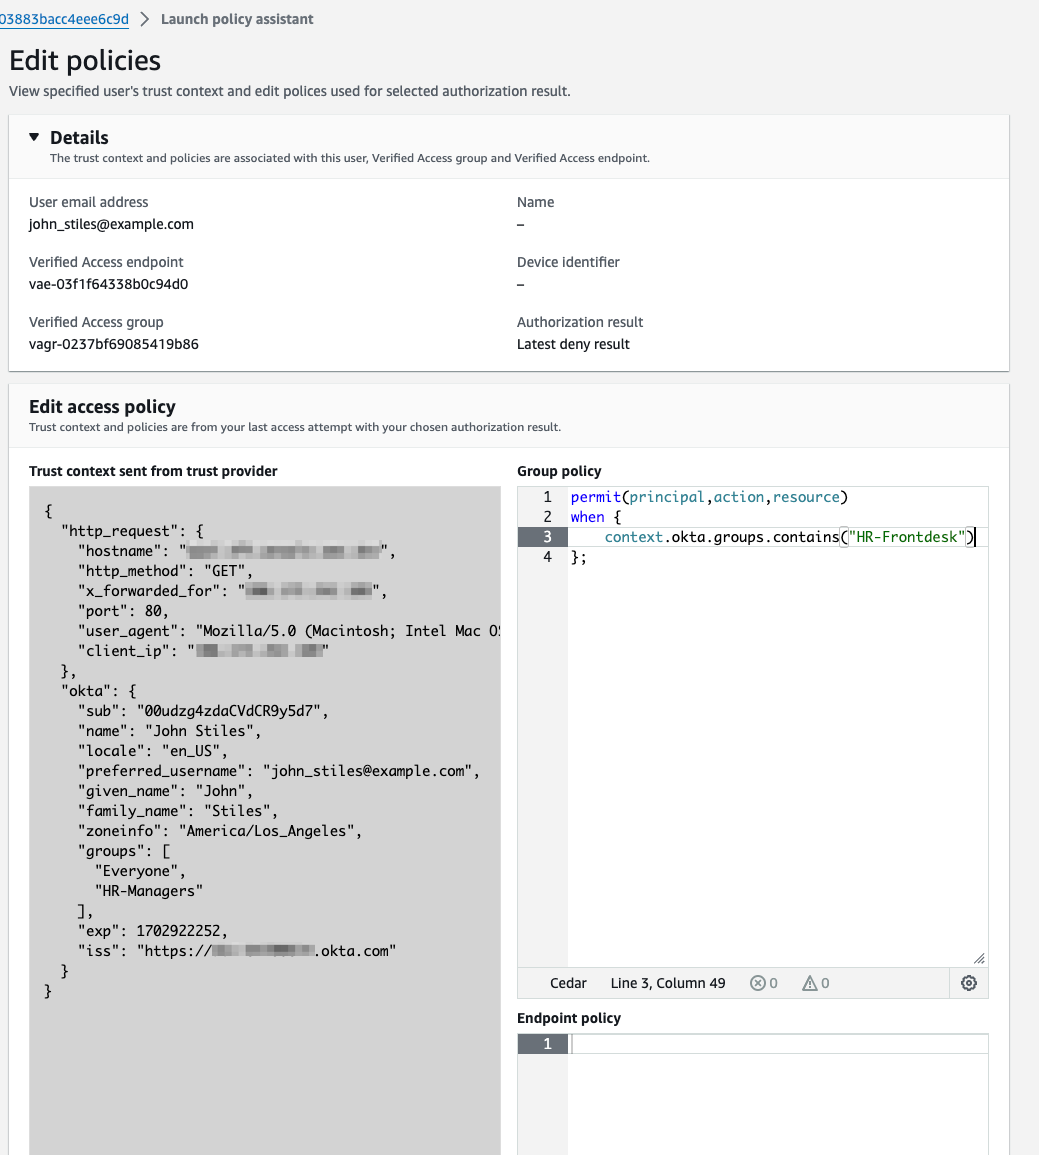
Figure 8 – Policy assistant – Review policies
Fine-tuning
In this second fictional scenario, we continue using the domain example.com, and our user is now nikki_wolf. Please adjust to your own domain and users as required.
IT has rolled out a client endpoint agent as part of the organization’s mandate to move to a Zero Trust architecture. The launch of the new architecture has been a great success, with 100 percent deployment to all corporate workstations. In the following steps, we walk through how to test additional policy conditions on the existing production policy prior to pushing the update to production.
In this example, the device trust provider has already been set up. Device trust provider integration is covered in depth in Integrating AWS Verified Access with device trust providers.
- We return to the Verified Access Policy Assistant view on the AWS console. This time, we enter the email address of our test account, nikki_wolf. Optionally, the authorization results findings can be further filtered by providing the user’s Name or Device identifier from the device context.
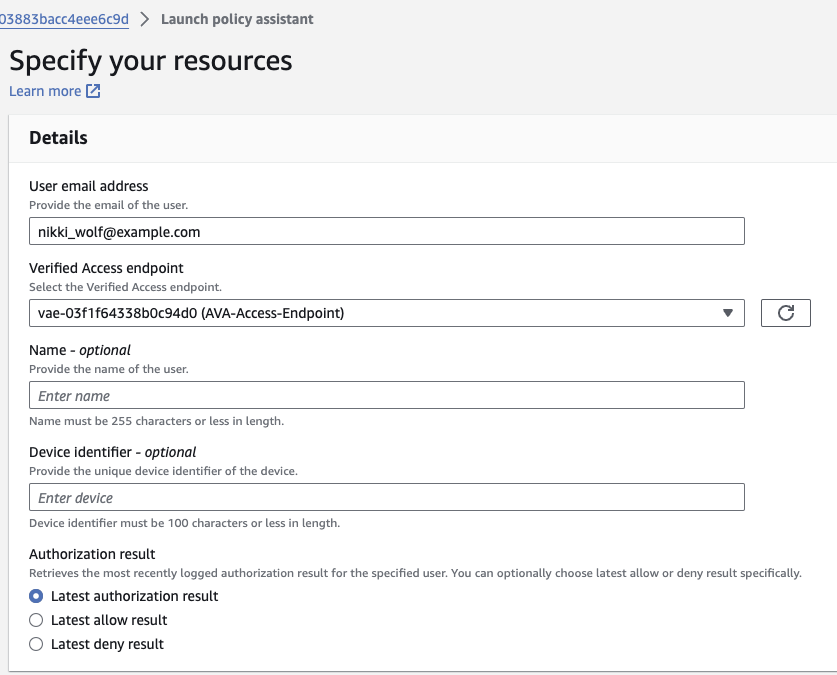
Figure 9 – Policy assistant – Specify resources
- The policy assistant was able to retrieve the context data for the latest Verified Access logs along with the respective access policies. In the logs, we can see the device trust provider metadata in the context key. We will now proceed to develop and validate the new target policy.
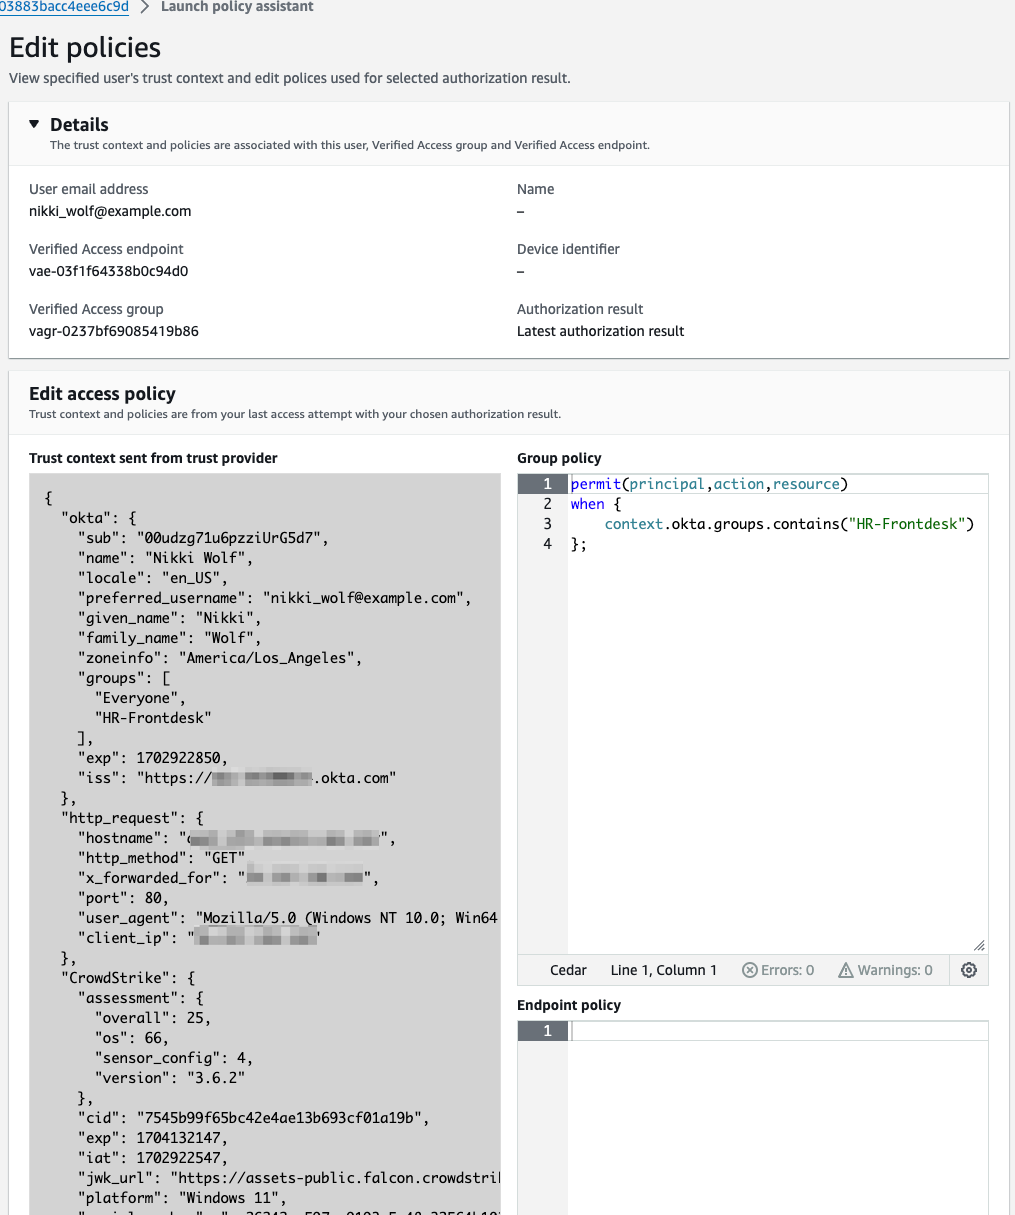
Figure 10 – Policy assistant – Edit policies
- After many iterations to the group policy (omitted for brevity), as shown in the following image, the new policy results in an allow. We can now confidently push the target policy to production. We can either take a copy of the new policy and apply it at a later date or choose Next and push the updated policy now.

Figure 11 – Policy assistant – Test policies
- We have decided to push the update now. In this screen, we can validate differences between the existing and new policies before applying the changes.
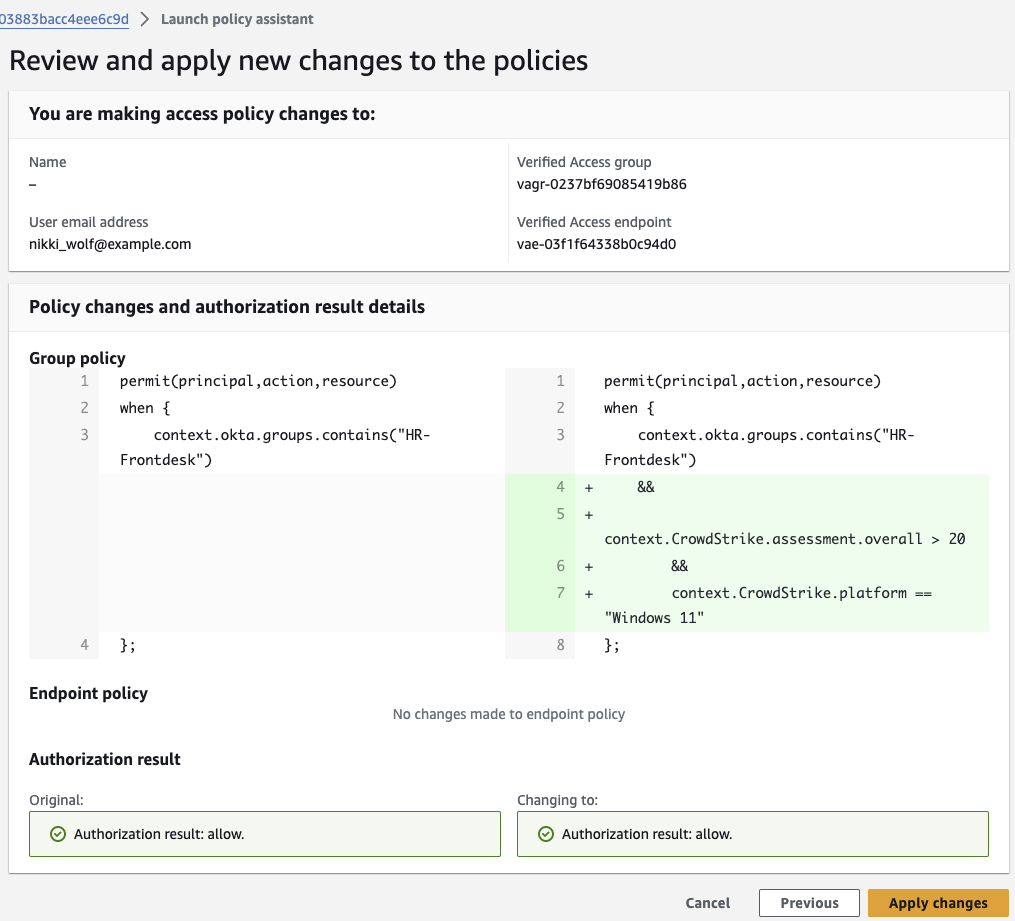
Figure 12 – Policy assistant – Push policy changes
Conclusion
In this post, we showed you how to use the Verified Access policy assistant where policies need to be validated in troubleshooting and fine-tuning scenarios. The policy assistant makes it possible to validate and test changes to production polices using real access logs. This eliminates trial and error validation in production systems and allows for faster policy development.
To learn more, refer to the AWS Verified Access documentation.

Diego Hernandez
Diego Hernandez is a Technical Account Manager based in Canada. Diego passion is all things networking. In his spare time, Diego enjoys spending time with his family and snowboarding.

Kunj Thacker
Kunj is a Technical Account Manager at AWS and is based out of California. He has an extensive background in Network and Infrastructure engineering prior to this role. He is passionate about new technologies and enjoys helping customers build, implement, and optimize their cloud infrastructure on AWS.