AWS Open Source Blog
Integrating Amazon EFS with Podman running on Red Hat Enterprise Linux
This post was written by Mayur Shetty and Vani Eswarappa.
Podman is a daemonless open source, Linux-native tool designed for finding, running, building, sharing, and deploying applications using Open Containers Initiative (OCI) containers and container images on a Red Hat Enterprise Linux (RHEL) system. Similar to other container engines, such as Docker, Podman depends on an OCI-compliant container runtime to interact with the operating system and create the running containers. Podman manages the container ecosystem, which includes pods, containers, container images, and container volumes using the libpod library.
Containers that are controlled by Podman can be run either by root or by a non-privileged user. This setup is an alternative to Docker containers when you need increased security, unique identifier (UID) separation using namespaces, and integration with systemd. If you are using container-based application using Podman, you may have requirements to scale your compute and storage layers .
In this post, we exlain how to scale a Podman-based container application at the compute layer and storage layer using Amazon Elastic Compute Cloud (Amazon EC2) and Amazon Elastic File System (Amazon EFS).
Amazon EFS provides a scalable, fully managed, elastic NFS file system that lets you share file data without provisioning or managing storage infrastructure. It can be used with Amazon Web Services (AWS) cloud services and on-premises resources, and it is built to scale on demand to petabytes without disrupting applications. With Amazon EFS, you can grow and shrink your file systems automatically as you add and remove files, reducing the need to provision and manage capacity to accommodate growth.
Let’s walk through instructions for deploying a sample web application—a photo gallery application—using Podman on a RHEL Amazon EC2 instance, where the images displayed by the website are stored on the Amazon EFS mounted on Amazon EC2 instances across multiple Availability Zones, providing scalability and high availability (HA) to the application.
Prerequisites
For this tutorial, you’ll need the following prerequisites:
- Amazon Virtual Private Cloud (Amazon VPC) with public subnet created.
- RHEL EC2 instance launched within your Amazon VPC.
- Podman already installed on Amazon EC2 instance.
- Amazon EFS created within the Amazon VPC, and Amazon EC2 security group is added in the access EFS.
- For the photo gallery, we will use the Linuxserver.io photoshow container image.
Solution overview
We will walk through the following steps.
- The Podman container will run in a RHEL EC2 instance and use the local filesystem on the Amazon EC2 instance to store the images (no HA).
- We will do what we did in the previous step, but this time we store the images on an Amazon EFS (storage-level HA).
- We will make the solution HA by adding a second Amazon EC2 instance on another Availability Zone and adding an Application Load Balancer in front of it (compute-level HA added).
- We will take care of scaling the solution by adding an Auto Scaling Group (scaling added).
Step 1: Run Podman container on RHEL EC2 instance with local file system on Amazon EC2 instance (no HA for compute or storage)
To start, you must connect to the Amazon EC2 instance through the SSH client using an SSH key pair.
Next, download the photoshow container image. Select the registry from the list of options that works for you:
Here we are making sure that there are no containers running on the Amazon EC2 instance:
Next, we’ll create a directory on the host machine and create a file in that directory.
Now we run the container with the podman -v command to point the source and where we want it mounted into the container.
The preceding :Z confirms that the proper SELinux context is set:
Next, we download a few images into the /photo/pictures directory of the host EC2 instance using wget:
The next step shows that no volumes were created:
Now, let’s check the container with the inspect command to see what was mounted. Under the "Mounts" element, you should see /Thumbs mounted to EC2 host’s "/home/ec2-user/photo/thumb" folder, /Pictures mounted to "/home/ec2-user/photo/pictures" folder, and /config mounted to "/home/ec2-user/photo/config" folder.
At this point, we can log into the container and check the directories that we created:
And, we can check the images that we downloaded into /Pictures folder:
Next, we can go to http://<EC2 Public IP>:8080 to check the photo gallery, as shown in the following image:

This result is cool, but is the data highly available? In other words: If the Amazon EC2 goes down, can we still access our images? In Step 2, we’ll look at how to address this.
Step 2: Run Podman container on RHEL EC2 instance with Amazon EFS file system (HA for storage)
In the previous scenario, our application was using the local filesystem. To make the data highly available, now we’ll use Amazon EFS to store our images. You will see how to set up Amazon EFS and use it with our application container running in Podman.
Create an Amazon EFS filesystem, called demo in this example.

Next, update the /etc/fstab with the Amazon EFS entry as shown in the following code example, and then mount the Amazon EFS filesystem on the Amazon EC2 host.
Mount the /mnt/efs_drive:
Verify the mount point with this command:
Run the container using Podman:
At this point, you can inspect the container:
This setup looks fine, but what if the Amazon EC2 instance goes down? We have data in an Amazon EFS filesystem, but how are the clients going to access it? This situation will be addressed in the next step.
Step 3: Add EC2 instance in second Availability Zone and an Application Load Balancer to distribute traffic (HA for compute)
For this step, we want to add high availability to both our compute and storage. Our storage is already highly available because of Amazon EFS, but now we’ll make the Amazon EC2 instance highly available, too.
To do this, we first create an Amazon Machine Image (AMI) of our running Amazon EC2 instance (as shown in the following figures) and bring a new Amazon EC2 instance in a different Availability Zone. Both of our instances will now access the same data that is stored on Amazon EFS.


Next, we’ll add an Application Load Balancer to distribute the client requests to the two Amazon EC2 instances in the two Availability Zones.


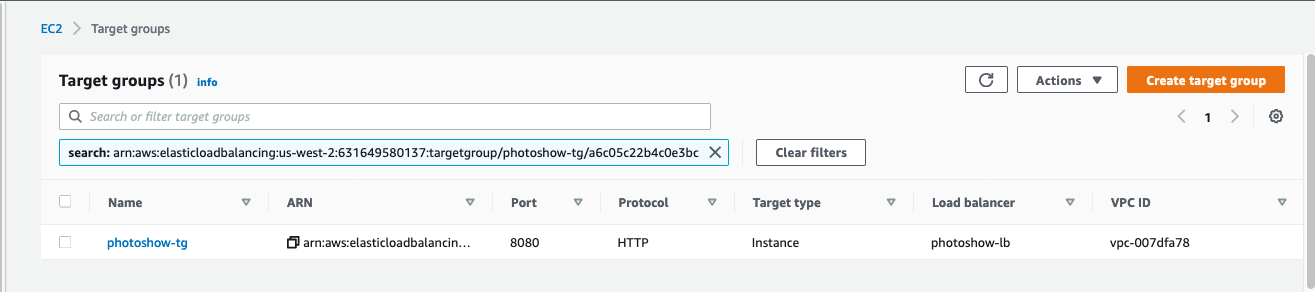
The Application Load Balancer forwards the requests to the target group that includes the two EC2 instances hosting the application containers.

Next, enter the DNS name of the load balancer with port 8080 in the web browser (photoshow-lb-207083175.us-west-2.elb.amazonaws.com:8080) to connect to the application.

So far so good, but in the next step, we’ll look at what happens when our requests increase and we need additional resources to handle the client requests.
Step 4: Scale the solution using the Auto Scaling group (auto scaling added)
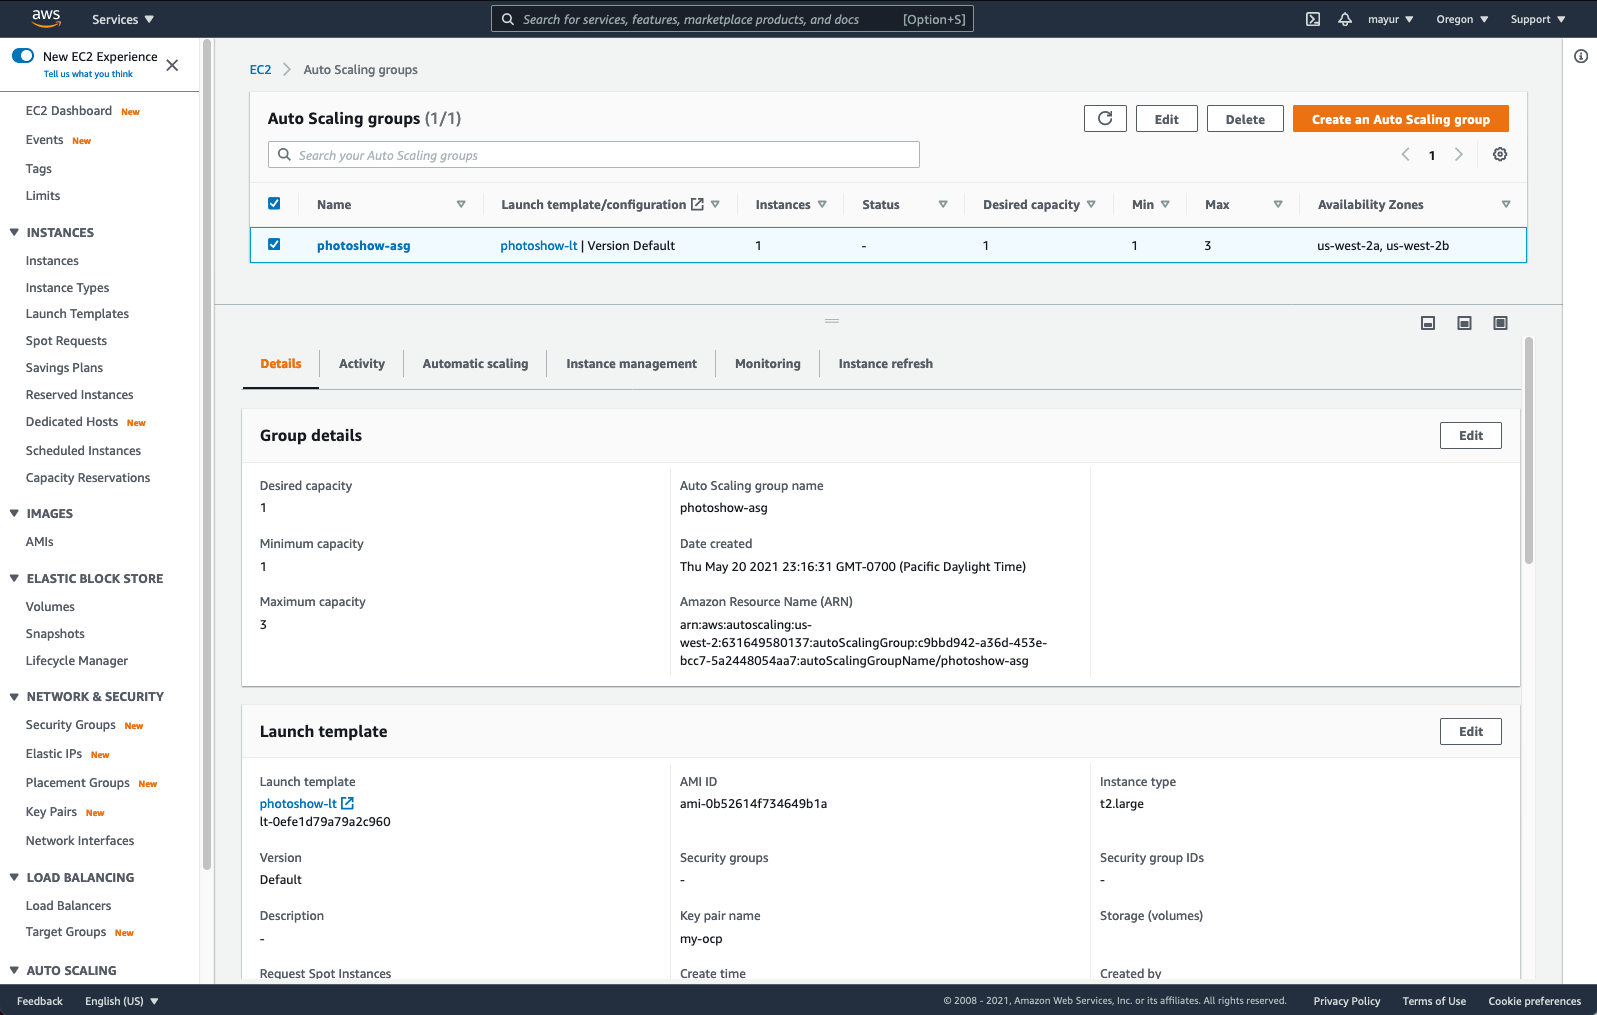
This is where automatic scaling comes into the picture. We added an Auto Scaling group called photoshow-asg with desired capacity of 1, minimum capacity of 1, and maximum capacity of 3 to handle any increase in the user requests.
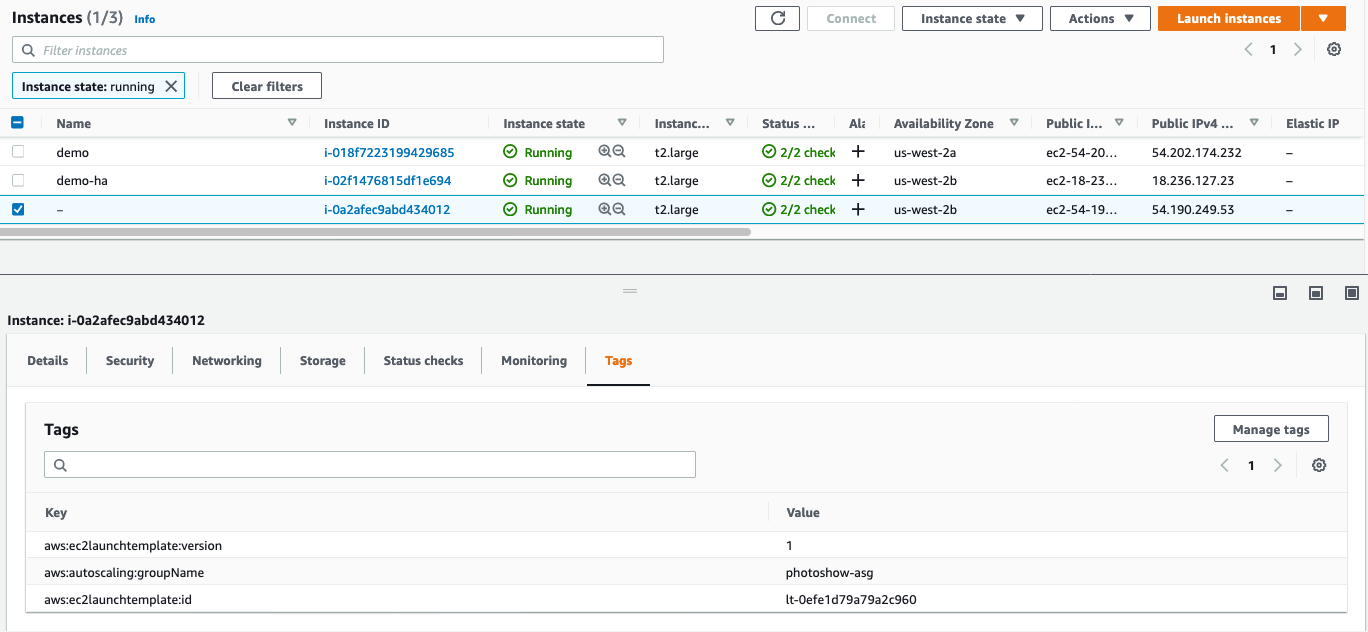
We tested to confirm that the photo gallery could still be accessed from the URL and tested the scaling of the Amazon EC2 instances based on the load:
This approach is ok, but we don’t want to give the DNS name of a load balancer to family and friends to check out photos. This is where Route 53 helps. We have a domain register with Route 53, and we’re going to use it to access the photo gallery.
To set this up, go to Route 53, Hosted Zone, <your registered domain>, and create a CNAME record type pointing to the load balancer DNS name:
![]()

Conclusion
In this post, we have described a highly available and scalable solution using Podman and Amazon EFS on Red Hat Enterprise Linux 8. This is a supported configuration as both RHEL 7 and 8 are supported with Amazon EFS. So, if there is an issue with RHEL/Podman, Red Hat would support it. If there is an issue with Amazon EFS, then AWS would be supporting the customer.
If you also want to simplify agile development with embedded continuous integration and nearly continuous deployment (CI/CD), add container catalog and image streams, or integrate your existing pipeline, then look into Red Hat OpenShift on AWS. You can choose between self-hosted Red Hat OpenShift Container Platform, the managed offering of Red Hat OpenShift Dedicated, Red Hat OpenShift Service on AWS (ROSA), or a mixture of these services that suit your organization’s needs to manage your Kubernetes clusters with one solution.

Mayur Shetty
Mayur Shetty is a Principal Solution Architect with Red Hat’s Global Partners and Alliances Organization (GPA) working with AWS as a partner. He has been with Red Hat for more than five years, where he was also part of the OpenStack Tiger Team. Prior to Red Hat, he worked as a Senior Solution Architect driving solutions with the OpenStack Swift, Ceph, and other object storage software.