AWS Robotics Blog
Running an SSH server on AWS RoboMaker
Overview
AWS RoboMaker is a fully managed service that enables Robotics developers to build, run, scale, and automate simulations without managing any infrastructure. During the development cycle, roboticists frequently need to perform a deeper inspection of what is going on within the running container. Though CloudWatch offers important metrics and logs related to simulation jobs, you still need to rely on traditional methods to login to the running container and inspect the real-time status of running processes (ROS nodes), messages and application logs. In this tutorial, you will learn the steps needed to configure SSH login to a running container on a AWS RoboMaker simulation job. SSH will provide remote shell access into a running container, which can be beneficial to inspect and troubleshoot logs and configurations. This tutorial will go over how to install and run OpenSSH on AWS RoboMaker. You will configure the required security groups and network parameter settings to enable SSH login to the container.
Prerequisites
A basic understanding of Docker is required, as this tutorial involves building a Docker image in an Ubuntu 20.04 environment. You need an AWS account with the necessary AWS IAM permissions to create an AWS Cloud9 development environment, create and push a container to an Amazon Elastic Container Registry, create an AWS RoboMaker simulation application, and run an AWS RoboMaker simulation job. Finally, this tutorial can incur costs, so follow the clean step at the end of the tutorial to avoid any surcharges.
Solution Overview
In this tutorial, you will create resources in your AWS account using a command line API. You can set up a development environment with the AWS CLI installed or create an AWS Cloud9 environment. We will use the following process to demonstrate this solution:
- Generate an SSH Key Pair on Cloud9.
- Build a Docker image with OpenSSH.
- Push the Docker image to the Elastic Container Registry (ECR).
- Configure and run a simulation job in AWS RoboMaker.
- SSH into the Docker container.
Generate an SSH Key Pair on Cloud9
- Use these steps to setup the Cloud9 environment.
- Connect to the Cloud9 environment. Run the following command to create a new folder
robomaker-sshdemo.mkdir robomaker-sshdemo - Run the following command in the Cloud9 terminal to generate an SSH key.
ssh-keygen -t rsa -b 4096 - Follow the instructions on the command prompt and enter the complete location of the key file. For this tutorial, we will enter the directory location of
robomaker-sshdemocreated earlier./home/ec2-user/environment/robomaker-sshdemo/id_rsa
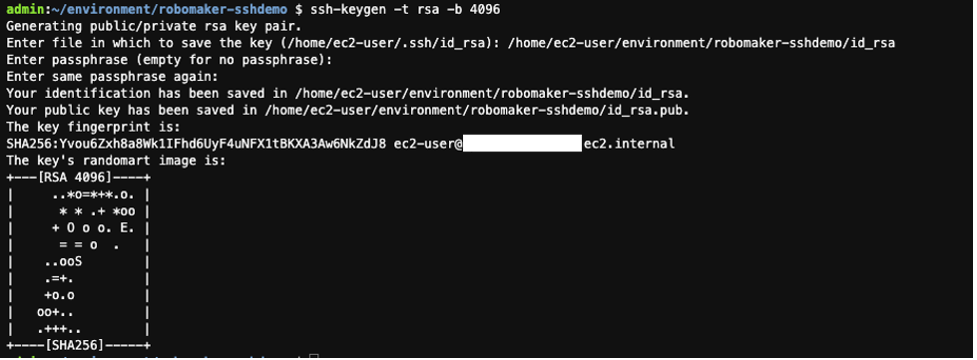
Figure 1: Create SSH public and private key
Once the public and private keys are generated, we will use the public key during OpenSSH deployment in the container. The private key must be kept securely on your machine and used to provide SSH access.
Build docker image with OpenSSH
- Create a Dockerfile inside the
robomaker-sshdemodirectory and add the following content.#SSH access to the running container on AWS RoboMaker FROM osrf/ros:humble-desktop-full RUN apt update && apt install -y openssh-server xterm vim sudo RUN groupadd sshgroup && useradd -ms /bin/bash -g sshgroup sshuser && usermod -aG sudo sshuser RUN mkdir -p /home/sshuser/.ssh COPY id_rsa.pub /home/sshuser/.ssh/authorized_keys RUN chown sshuser:sshgroup /home/sshuser/.ssh/authorized_keys && chmod 600 /home/sshuser/.ssh/authorized_keys RUN sed -i 's/#Port 22/Port 1122/' /etc/ssh/sshd_config ENTRYPOINT ["/bin/bash", "-c"]
Figure 2: Create Dockerfile
- Run the Docker build command to build the image.
sudo docker build -t sshdemo:latest .
Once the Docker image is created, proceed with the next step.
Push Docker image to Elastic Container Registry (ECR)
In this step, we create an ECR repository to store Docker image.
- Run the following command to create an ECR repository on your AWS account.
aws ecr create-repository --repository-name sshdemo - Go to the ECR console inside your AWS account and search for the
sshdemorepository. Choose View push command.
Figure 3: Create and access the ECR repository
- Copy and run the first command to retrieve an authentication token and authenticate your Docker client to your registry.

Figure 4: Commands to push Docker image to the ECR repository
- Copy and run the third command to tag the Docker image so you can push the image to this repository.
- Copy and run the fourth command to push this image to your newly created AWS repository.

Figure 5: Push Docker image to the ECR repository
This will take less than 5 minutes to push the Docker image to your ECR repository. You can review the most recent image in the sshdemo repository. Once completed, proceed to the next step.
Configure and run simulation job on AWS Robomaker
In this step, you will create a AWS RoboMaker simulation job with the sshdemo Docker image.
- Navigate to the AWS RoboMaker service. On the left navigation, select Simulation applications under the Development menu. Choose Create simulation application.
- Enter
sshdemoin the Name field. - Choose Browse ECR. For Amazon ECR repository, choose
sshdemo. - Choose Create.

Figure 6: Create simulation application using Docker image
- From the left navigation menu, select Simulation jobs and choose Create simulation job.
- For the IAM role, choose Create new role and enter the new IAM role name as
sshdemo. - For VPC under Networking, choose the default VPC.
- For Security groups, choose the default security group. The Dockerfile uses 1122 to run an SSH server. Ensure port 1122 is open for inbound communication for the default security group. For more details on how to add rules to a security group, follow the link.
- For Subnets, choose any two subnets.
- Set Assigned public IP to Yes and choose Next.
- Under Specify robot application, choose None under Choose method and choose Next.
- Under Specify simulation application, select existing applications under Choose method. For Simulation application, choose
sshdemo. - Under Launch command enter the following command.
source /opt/ros/humble/setup.bash && ros2 run demo_nodes_cpp talker - Expand the Simulation application tools section and choose Customize tools. Choose Add tool and input the indicated information for the following fields:
- Tool name:
Exploratory-xterm - Command:
/usr/bin/xterm -geometry 120x40 - Choose
Restartfrom the Exit behavior drop-down - Choose
Enable UI Streamingfor Output settings - Make sure the Send output to Amazon CloudWatch checkbox is chosen
- Choose Add tool
- Tool name:
- Under Simulation application connectivity enter the following details.
- Simulation job port:
1122 - Application port:
1122 - Port type:
Public
- Simulation job port:
- Choose Next and choose Create to create the simulation job.
This will take around 5 minutes to create the simulation job. Please move forward to the next step once the job is in the RUNNING state.
SSH into the docker container
In this step, you will SSH to the container running on the AWS Robomaker.
- Go to the Simulation application tools, choose Connect under the
Exploratory-xtermtool, and execute the following command to start the SSH server.source /opt/ros/humble/setup.bash ros2 topic list service ssh restart - Reset the password for sshuser.
passwd sshuser - Go to the running simulation job and copy Public IP address under the Networking section.
- Open the local terminal and navigate to the private key location.
- Run the following command to ssh into the container.
ssh -i id_rsa sshuser@<<Public IP>> -p 1122 - Elevate the privilege and run the following commands in the SSH terminal to return a list of all the topics.
sudo -i source /opt/ros/humble/setup.bash ros2 topic list - Run the following command to see the data being published on a topic.
ros2 topic echo /chatter
Congratulations! You can SSH into the container running on AWS Robomaker. You can run the top command to see running processes and navigate the directories to explore logs and configuration as well as perform many other useful diagnostics and actions.
Cleanup
When you’ve completed the tutorial, remove any resources you created to avoid incurring additional charges.
- To cancel simulation jobs, choose the simulation job ID and choose Cancel from the Action drop down.
- Delete the robot and simulation applications.
- Delete the IAM role created in step 1 of this tutorial.
- Delete the container image and ECR repository.
- Delete the Cloud9 Environment.
Conclusion
In this tutorial, you learned how to run an SSH server using AWS RoboMaker. This solution can help Robotics developers troubleshoot running applications in real-time and decrease the cycle time for model development. You can learn more about AWS RoboMaker in this developer guide. To find out more about how AWS (or our partners) can help you, please contact your representative.